5、ROS+OpenCV application
5、ROS+OpenCV application5.1、Overview5.2、Usage5.2.1、Start up5.2.2、显示方法5.2.3、Effect show5.3、Node5.3.1、Edge detection algorithm5.3.2、Contour moment5.3.3、Face recognition
5.1、Overview
wiki:http://wiki.ros.org/opencv_apps
Source code:https://github.com/ros-perception/opencv_apps.git
Function package path:~/software/transbot_library/src/opencv_apps
Code reference: https://github.com/Itseez/opencv/tree/master/samples/cpp
opencv_apps provides various nodes that run internally OpenCV's functionalities and publish the result as ROS topics. With opencv_apps, you can skip writing OpenCV application codes for a lot of its functionalities by simply running a launch file that corresponds to OpenCV's functionality you want.
5.2、Usage
5.2.1、Start up
Step 1: Start the camera
roslaunch transbot_visual opencv_apps.launch camDevice:=USBCam【camDevice】:ORBBEC camera is【Astra】,High frame rate camera【USBCam】;The default is【USBCam】
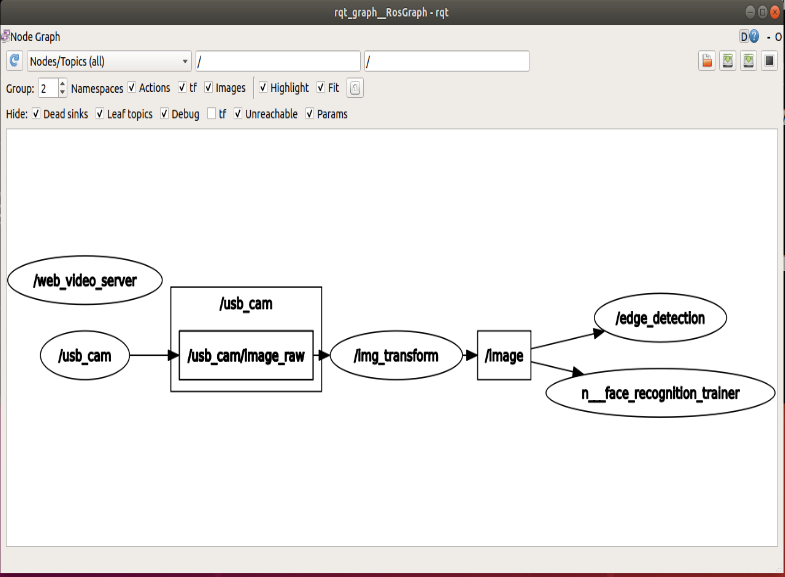
If the webpage cannot be viewed, check if there is no [web_video_server] node, if not, you need to run the following command.
xxxxxxxxxxrosrun web_video_server web_video_serverStep 2: Start the function of Opencv_apps
xxxxxxxxxxroslaunch opencv_apps face_recognition.launch # Face recognitionroslaunch opencv_apps corner_harris.launch # harris corner detectionroslaunch opencv_apps camshift.launch # Target tracking algorithmroslaunch opencv_apps contour_moments.launch # Contour momentroslaunch opencv_apps convex_hull.launch # Polygon outlineroslaunch opencv_apps discrete_fourier_transform.launch # Discrete Fourier Transform Algorithmroslaunch opencv_apps edge_detection.launch # Edge detection algorithmroslaunch opencv_apps face_detection.launch # Face detection algorithmroslaunch opencv_apps fback_flow.launch # Optical flow detection algorithmroslaunch opencv_apps find_contours.launch # Contour detectionroslaunch opencv_apps general_contours.launch # General contour detectionroslaunch opencv_apps goodfeature_track.launch # Feature point trackingroslaunch opencv_apps hls_color_filter.launch # HLS color filterroslaunch opencv_apps hough_circles.launch # Hough circle detectionroslaunch opencv_apps hough_lines.launch # Hough line detectionroslaunch opencv_apps hsv_color_filter.launch # HSV color filterroslaunch opencv_apps lk_flow.launch # LK optical flow algorithmroslaunch opencv_apps people_detect.launch # Human detection algorithmroslaunch opencv_apps phase_corr.launch # Phase correlation displacement detectionroslaunch opencv_apps pyramids.launch # Image pyramid sampling algorithmroslaunch opencv_apps rgb_color_filter.launch # RGB color filteringroslaunch opencv_apps segment_objects.launch # Clear background detection algorithmroslaunch opencv_apps simple_flow.launch # Simplified optical flow algorithmroslaunch opencv_apps smoothing.launch # Simple filterroslaunch opencv_apps threshold.launch # Threshold image processingroslaunch opencv_apps watershed_segmentation.launch # Watershed segmentation algorithmAlmost every function case will have a parameter [debug_view], boolean type, whether to use Opencv to display the picture, it is displayed by default.
If you don’t need to display it, set it to [False], for example
xxxxxxxxxxroslaunch opencv_apps contour_moments.launch debug_view:=False
5.2.2、显示方法
- rqt_image_view
Enter the following command to select the corresponding topic
xxxxxxxxxxrqt_image_view
- opencv
The system displays it by default.
- Web view
(At the same LAN) Enter IP+port in the browser, for example:
xxxxxxxxxx192.168.2.102:8080
5.2.3、Effect show
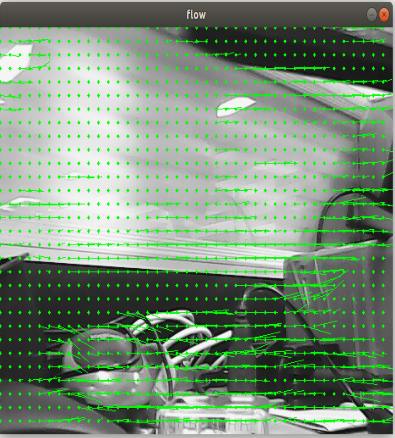
- Optical flow detection algorithm
Move the screen and observe the phenomenon.
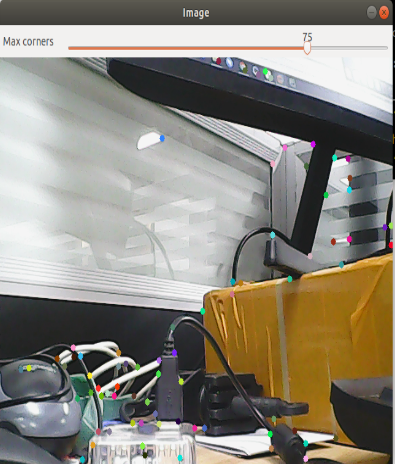
- Feature point tracking
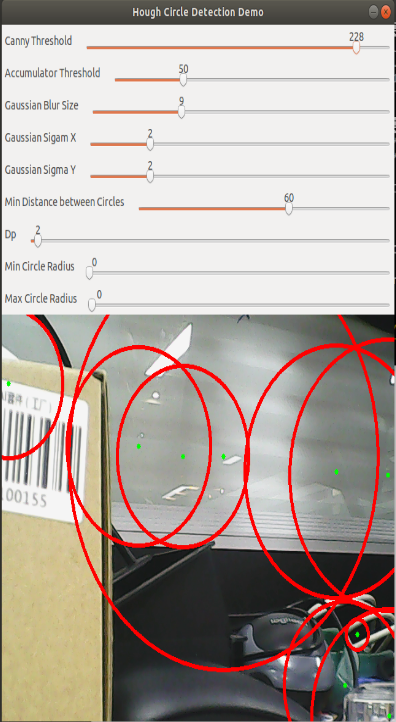
- Hough circle detection
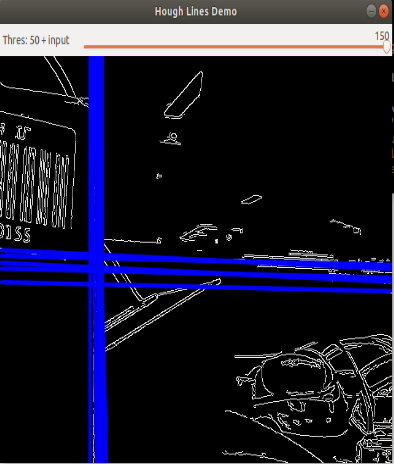
- Hough line detection
The lower the threshold, the more lines there are, and the more easily the picture gets stuck.
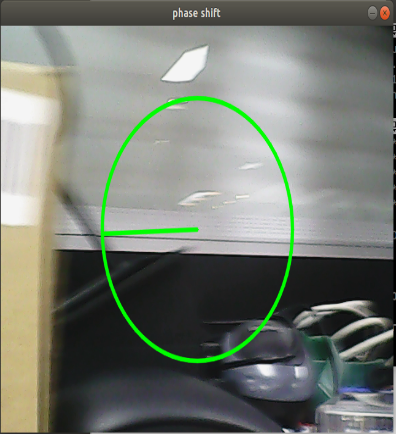
- Phase correlation displacement detection
The faster the camera moves, the larger the radius of the circle.
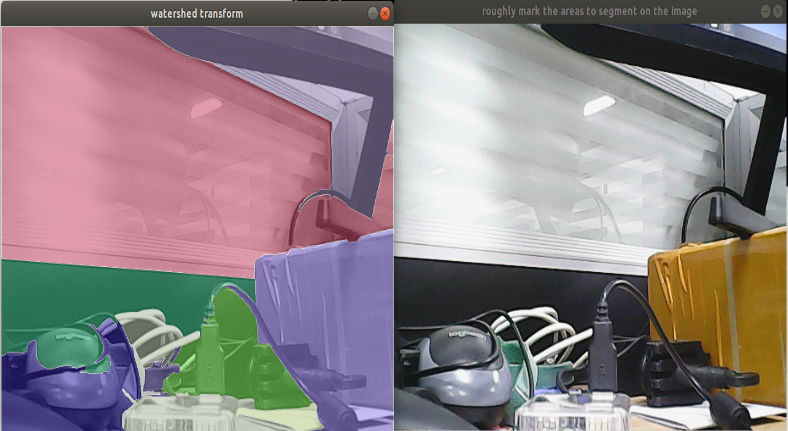
- Watershed segmentation algorithm
Use the mouse to select different objects, the system automatically distinguishes them.
5.3、Node
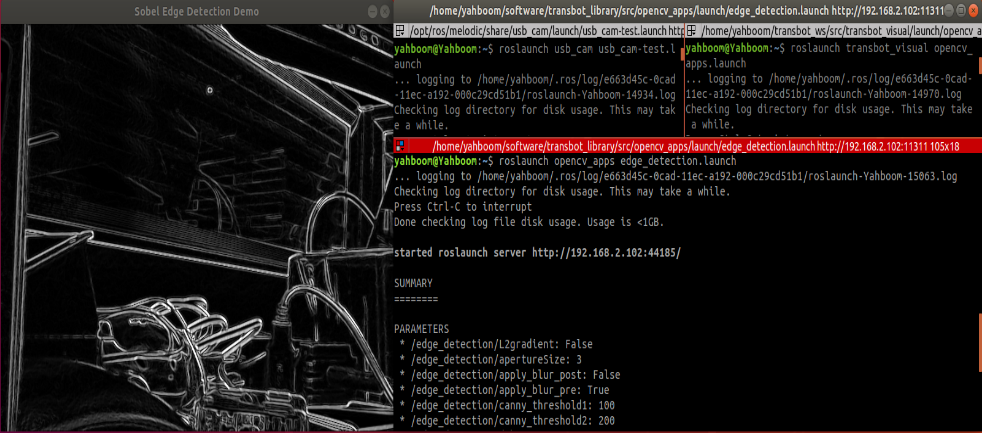
5.3.1、Edge detection algorithm
| Parameter | Type | Default | Analyze |
|---|---|---|---|
| ~use_camera_info | bool | true | Subscribe to the topic [camera_info] to get the default coordinate system ID, otherwise use the image information directly. |
| ~debug_view | bool | false | Whether to create a window to display the node image |
| ~edge_type | int | 0 | Specify the edge detection method: 0: Sobel operator, 1: Laplacian operator, 2: Canny edge detection |
| ~canny_threshold1 | int | 100 | Specify the second canny threshold |
| ~canny_threshold2 | int | 200 | Specify the first canny threshold |
| ~apertureSize | int | 3 | The aperture size of the Sobel operator. |
| ~apply_blur_pre | bool | True | Whether to apply blur() to the input image |
| ~postBlurSize | double | 3.2 | Input image aperture size |
| ~apply_blur_post | bool | False | Whether to apply GaussianBlur() to the input image |
| ~L2gradient | bool | False | Parameters of canny |
| ~queue_size | int | 3 | Queue size |
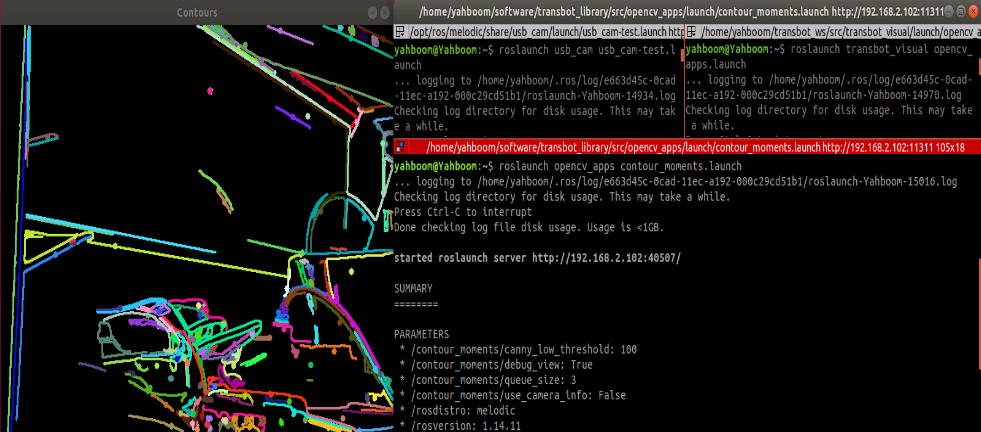
5.3.2、Contour moment
| Parameter | Type | Default | Analyze |
|---|---|---|---|
| ~use_camera_info | bool | true | Subscribe to the topic [camera_info] to get the default coordinate system ID, otherwise use the image information directly. |
| ~debug_view | bool | false | Whether to create a window to display the node image |
| ~canny_low_threshold | int | 0 | Canny edge detection low threshold |
| ~queue_size | int | 3 | Queue size |
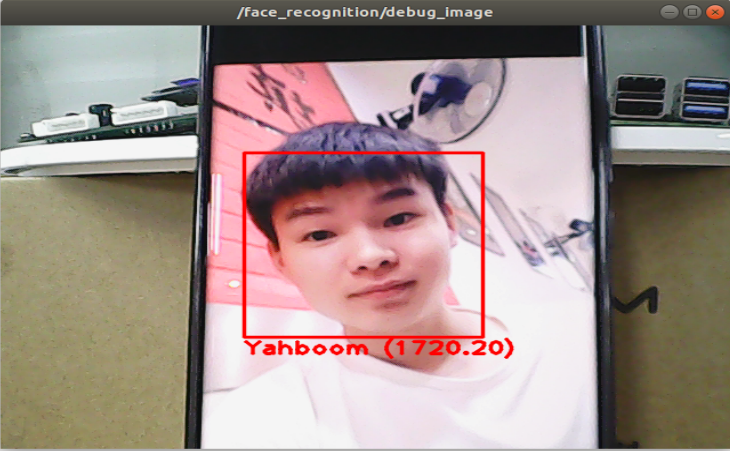
5.3.3、Face recognition
| Parameter | Type | Default | Analyze |
|---|---|---|---|
| ~approximate_sync | bool | false | Subscribe to the topic [camera_info] to get the default coordinate system ID, otherwise use the image information directly. |
| ~queue_size | int | 100 | Queue size for subscribed topics |
| ~model_method | string | "eigen" | Face recognition method: "eigen", "fisher" or "LBPH" |
| ~use_saved_data | bool | true | Load training data from the ~data_dir path |
| ~save_train_data | bool | true | Save the training data to the ~data_dir path for retraining |
| ~data_dir | string | "~/opencv_apps/face_data" | 保存训练数据路径 |
| ~face_model_width | int | 190 | Train the width of the face image |
| ~face_model_height | int | 90 | Training the height of the face image |
| ~face_padding | double | 0.1 | Fill ratio of each face |
| ~model_num_components | int | 0 | The number of components of the face recognizer model (0 is considered unlimited) |
| ~model_threshold | double | 8000.0 | Face recognition model threshold |
| ~lbph_radius | int | 1 | Radius parameter (only applicable to LBPH method) |
| ~lbph_neighbors | int | 8 | Neighborhood parameters (only applicable to LBPH method) |
| ~lbph_grid_x | int | 8 | Grid x parameters (only applicable to LBPH method) |
| ~lbph_grid_y | int | 8 | Grid y parameter (only applicable to LBPH method) |
| ~queue_size | int | 100 | Image subscriber queue size |
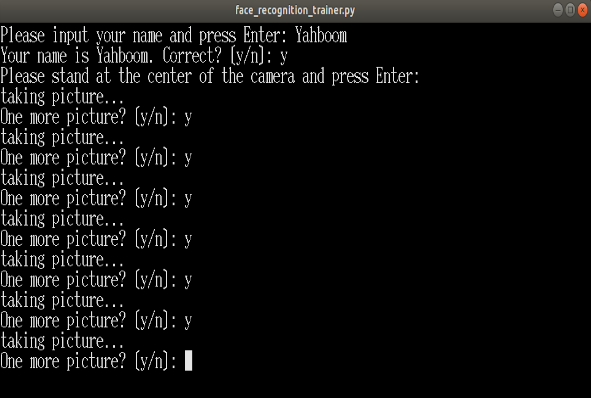
Steps:
- First, after the colon in the figure below, enter the character's name: Yahboom
- Confirm name: y
- Then place the face in the center of the image and click OK.
- Cycle to add a photo: y, click to confirm.
- To end the picture collection, enter: n and click to confirm.
- Close the launch file and restart.
If you need to enter the recognition, cycle 1~5 in turn until all the recognition personnel are entered, and then perform step 6.
Step 3: Ensure that the face can be recognized

Recognition effect