Control buzzer and button
Control buzzer and button1、Control buzzer1.1、Experiment goal1.2、Experiment preparation1.3、Experimental operation and phenomenon1.4、Code2、Control button2.1、K1 function2.2、K2 function2.3、RESET key function
1、Control buzzer
1.1、Experiment goal
Control the buzzer switch on the Transbot expansion board, the buzzer time is 100ms, 300ms, 1s, etc.
1.2、Experiment preparation
Buzzer and button as shown below.
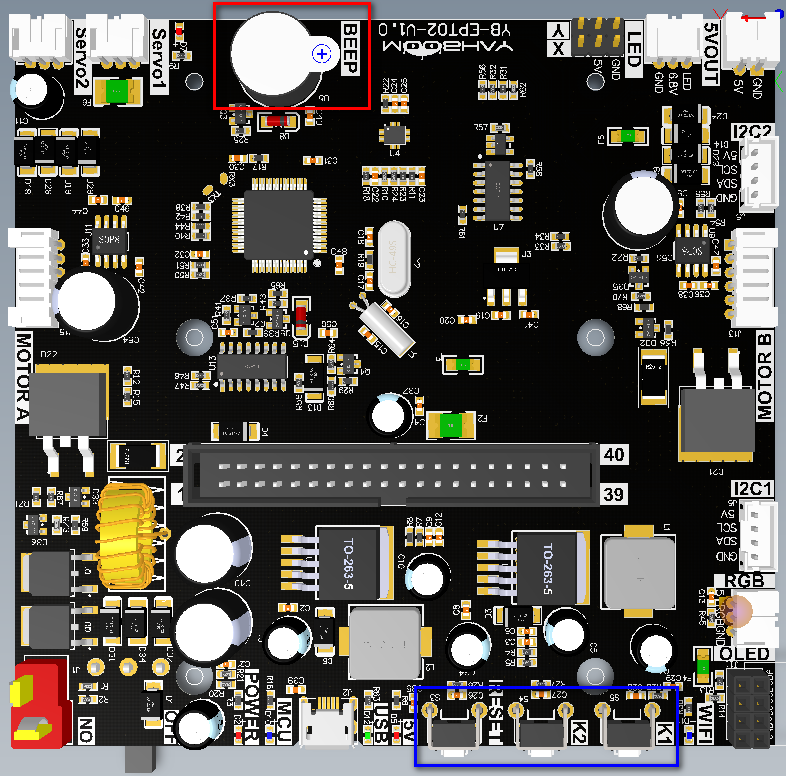
The buzzer on the Transbot expansion board is an active buzzer,
Transbot_Lib library functions needed to control the buzzer, as shown below.
set_beep(on_time)Parameter : on_time=0: turn off, on_time=1: keep beeping, on_time>=10: turn off automatically after beeping for xx ms (on_time is a multiple of 10).
Return value: None.
1.3、Experimental operation and phenomenon
Please the video.
1.4、Code
Code path: Transbot/Samples/3.beep_key.ipynb
2、Control button
Buzzer and button as shown below.

2.1、K1 function
The button K1 is connected to the Jetson Nano board and is directly controlled by Jetson Nano, so there is no corresponding function on the expansion board.
If you use the image file provided by us, after the Transbot code is launched, long press the K1 key to enter the network configuration mode.
When the APP control process is closed, the function of button K1 can be customized on Jetson Nano. Button K1 is connected to the physical pin 11 of Jetson Nano, and the BCM code is 17.
2.2、K2 function
When you press Button K2 function every time the buzzer will sound once, and switch the special effects of the RGB colorful light bar.
After pressing the button K2 for about 10 seconds, the whistle will be sounded for one second, which means that the MCU is restored to the factory settings, that is, the data area in the Flash is restored to the default.
Button K2 is connected to the MCU in the expansion board. The function of this button has been fixed and cannot be customized.
2.3、RESET key function
The reset button can restart the MCU on the expansion board.