4.2 Sound Sensor
Note: If the recognition effect is not good, we can modify the detection reference value appropriately in the code. In addition to making sounds, we can also trigger sound sensors by blowing air.
1. Learning Objectives
In this course, we will learn how to use the sound sensor and OLED of the Raspberry Pi Pico robot.
2. About Hardware
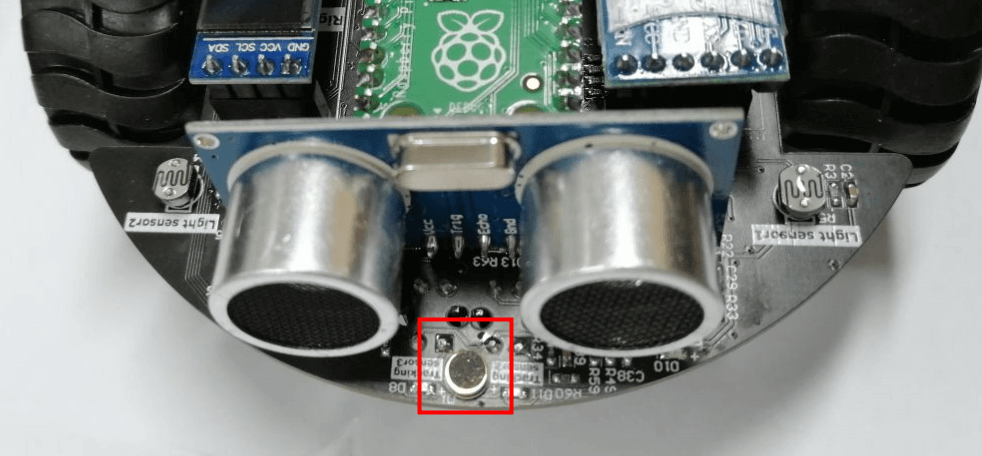
We need use sound sensor and OLED on Pico robot expansion board.
Please connect the jumper cap to the Voice pin before using. As shown below.
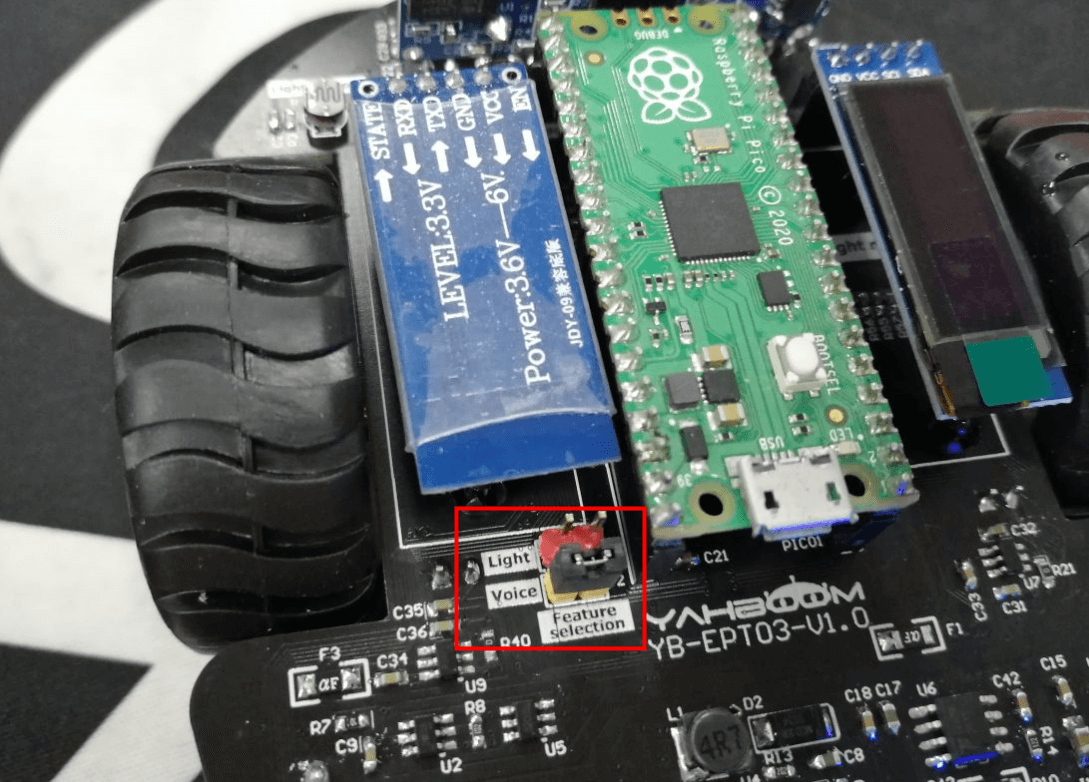
Sound sensor has a built-in condenser electret microphone that is sensitive to sound. The sound wave makes the electret film in the microphone vibrate, resulting in a change in capacitance and a small voltage corresponding to the change. This voltage is converted into a suitable The voltage is sent to the PICO development board. Because there is no ability to detect noise, try to use it in a quieter environment.
3. About code
Code path: Code -> 2.Sensor advanced course -> 2. Sound sensor.py
xfrom pico_car import SSD1306_I2Cfrom machine import Pin, I2C, ADCimport time#initialization oledi2c=I2C(1, scl=Pin(15),sda=Pin(14), freq=100000)oled = SSD1306_I2C(128, 32, i2c)#initialization ADCSound = machine.ADC(27)
while True: #get value sounds = Sound.read_u16() print(sounds) oled.text('Sound:', 0, 0) oled.text(str(sounds), 50, 0) #Display sound on OLED for i in range(10): oled.pixel(i, 30, 1) oled.pixel(i, 29, 1) if sounds > 5000: for i in range(10): for j in range(4): oled.pixel(i+10, 27+j, 1) if sounds > 10000: for i in range(10): for j in range(10): oled.pixel(i+20, 21+j, 1) if sounds > 20000: for i in range(10): for j in range(20): oled.pixel(i+30, 11+j, 1) oled.show() oled.fill(0) time.sleep(0.1)
from pico_car import SSD1306_I2C
Use SSD1306_I2C of pico_car.
import time
The "time" library. This library handles everything time related, from measuring it to inserting delays into programs. The unit is seconds.
from machine import Pin, I2C, ADC
The machine library contains all the instructions that MicroPython needs to communicate with Pico and other MicroPython compatible devices, extending the language of physical computing, using the Pin, ADC and I2C libraries here.
i2c=I2C(1, scl=Pin(15),sda=Pin(14), freq=100000)
Set the IIC 1 pin to SCL 15, SDA 14, and the frequency to 100000.
oled = SSD1306_I2C (128, 32, i2c)
Initialize the size of the OLED to 128*32, and pass in the IIC parameters set earlier.
Sound = machine.ADC(27)
Initialize ADC port 27.
oled.text (str (sounds), 50, 0)
Convert the value of the sound into a string and display it at the 50,0 position of the OLED.
oled.pixel (i, 30, 1)
Display a point at the position of i, 30, and display it on the OLED through the for loop drawing.
oled.show ()
Display the set OLED content.
oled.fill (0)
Clear the settings and prepare for the next display.
sounds = Sound.read_u16()
The Sound.read_u16() function is used to detect the value of the sound sensor and assign it to the variable sounds.
4. Experimental phenomenon
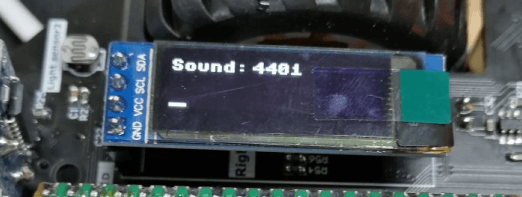
After the code is downloaded, we can see that the first line of the OLED displays the value of Sound, and the second line displays the volume of the sound.
At the same time, the print shell will also print the value of the sound sensor.
If you block the photosensitive sensor with your hand, the value will change and the volume will fluctuate.
The performance of the sound sensor will be affected by the battery level. We recommend adjusting comparison values in code after user testing. When testing the sensor, it is recommended to turn off high-power loads such as the motor and RGB lights of the car.