2.3 Download code Startup automatically
1. Download routine
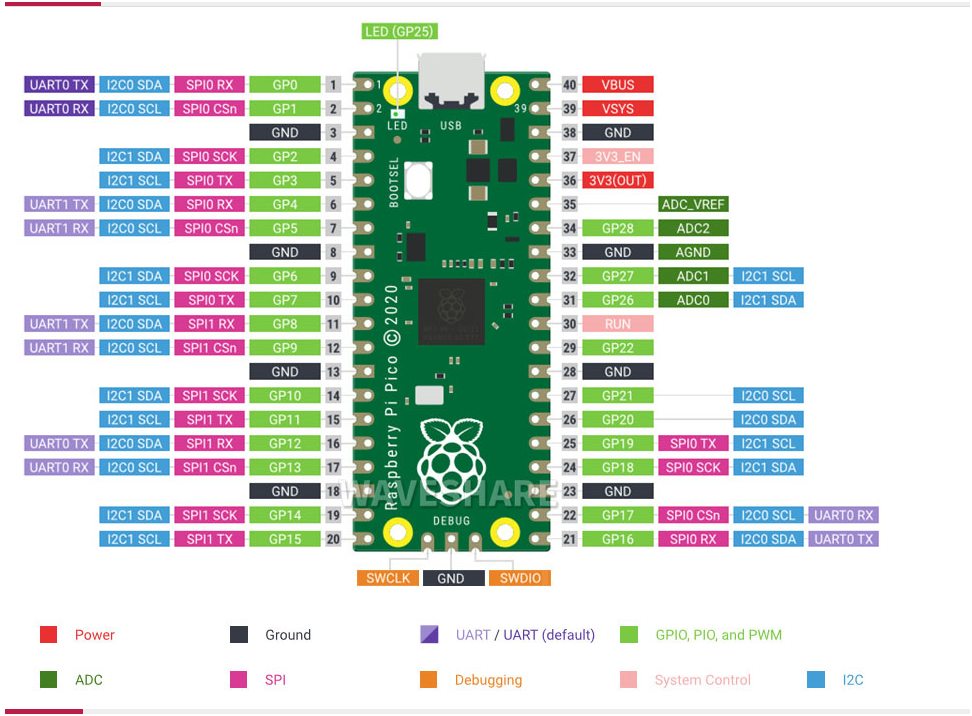
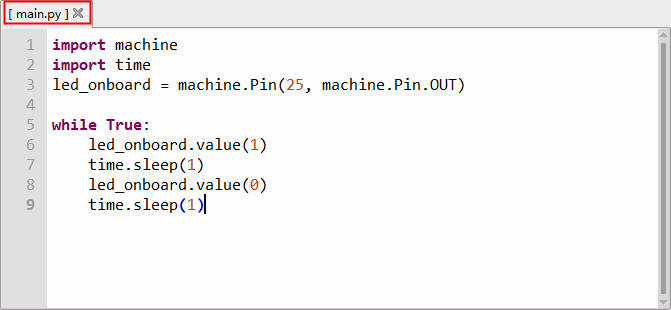
Looking at the pin diagram of Pico, we know that the control pin of Pico's on-board LED is GPIO25, here we try to control the on-board LED.
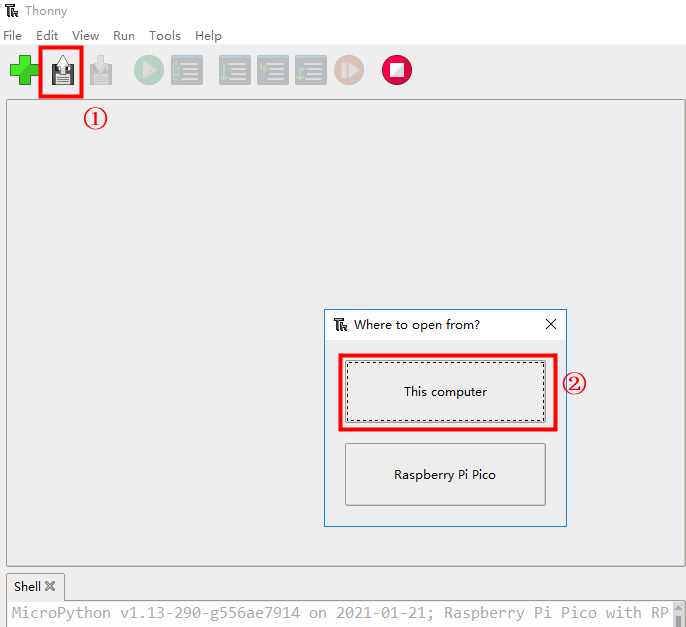
After we successfully connected to PICO in the previous section, select Open -- This Computer.
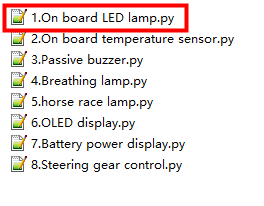
Open the Pico Robot supporting materials -> Appendix -> Course code -> 1. basic course -> 1.On board LED lamp.py.
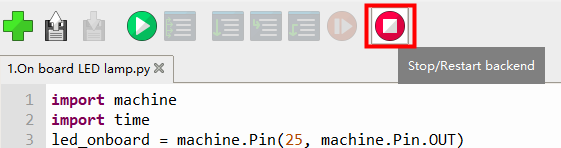
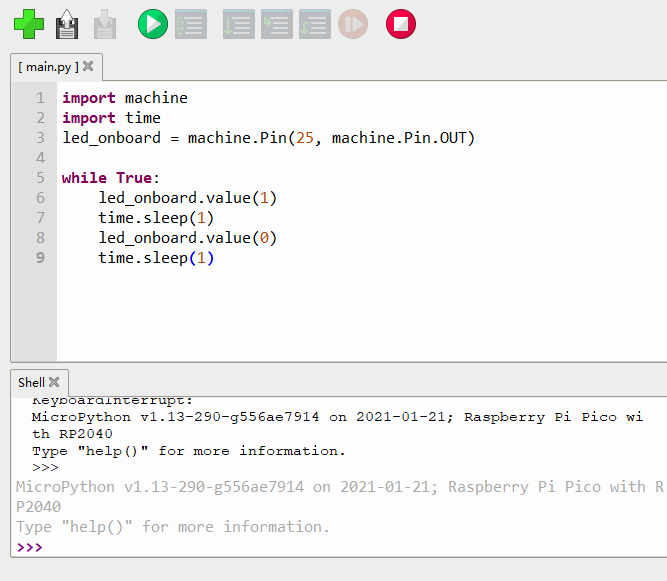
Click the green Run button, the program starts running, and the Shell window will display %Run -c $EDITOR_CONTENT
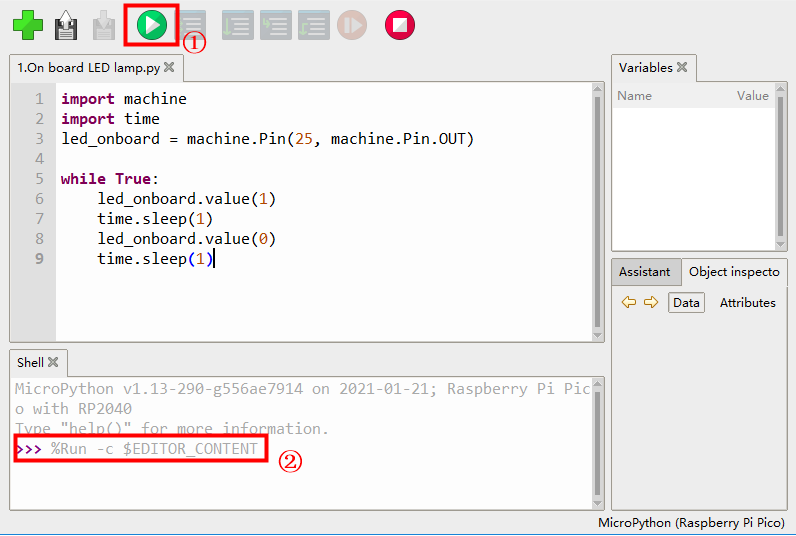
At this point, the LED on the PICO board will cycle on and off for one second. If you click the stop button on the menu, or unplug the data cable connected to the computer, the LED will stop blinking.
2. Boot up
The above program can only be run when it is connected to the computer. If you want to unplug the data cable to run, you must write the program file into the PICO.
The provided routines can be set to start at boot by the following methods.
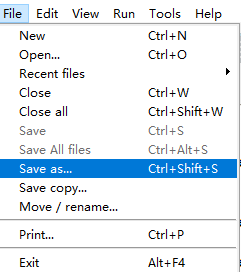
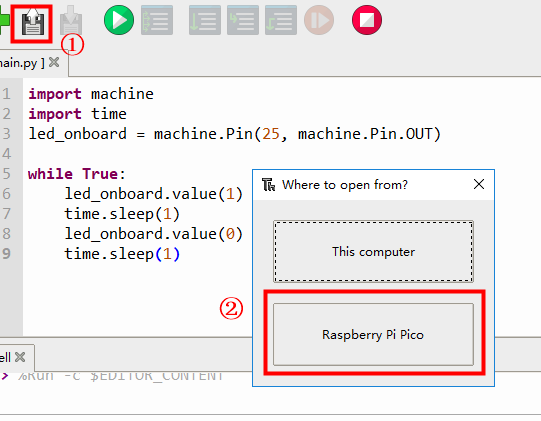
1. Continue to the previous step, in the opened 1.On board LED lamp.py file, select File - Save As.
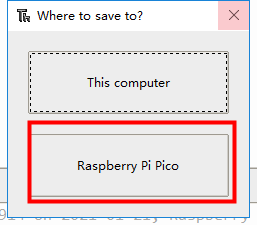
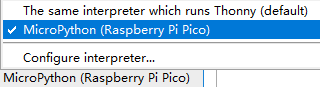
2. Select Raspberry Pi Pico.
3. Enter main.py in File name, note that the file name of main.py must be used to start, and then click OK.
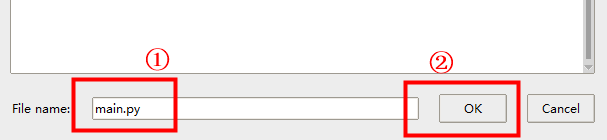
4. At this point, 1. The onboard LED light.py file becomes [main.py], where [ ] means that the file exists inside the PICO.
5. Press the reset button at this time, or restart the PICO development version, the LED on the board will flash by itself, and there is no need to run the program through the computer.
- Note that if PICO executes the boot-up self-starting program, using the computer to connect to run the program will prompt that the development version is running, and you need to perform the following steps:
1. After connecting the data cable, select Raspberry Pi Pico
2. At this time, it shows that the development version is busy. According to the prompt, press Ctrl+C
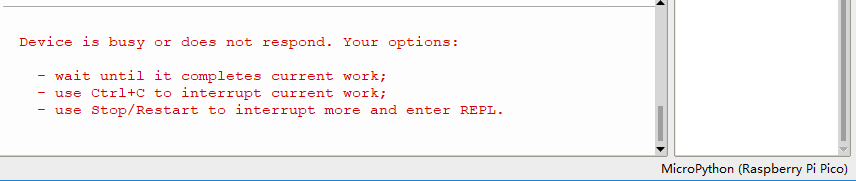
3. At this time, the main.py file is no longer executed, and the program can be run through thonny
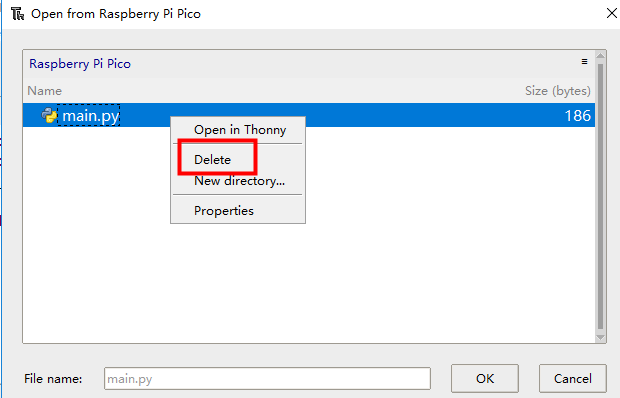
- If you want to remove the boot-up program, after pressing Ctrl+C, click Open--Raspberry Pi Pico--Right-click on the main.py file--Delete.
Note, please try a few more times if you cannot set it, or re-brush the library file according to Section 2.1 to solve it.