7 Robot calibration
7 Robot calibration 7.1 imu school associate 7.1.1 Calibration steps 7.1.2 Use the calibrated imu data 7.2 Linear speed calibration 7.2.1 Preparation 7.2.2 Start 7.3. Angular velocity calibration 7.3.1. Preparation 7.3.2 Start
Note: The parameters have been calibrated before the product leaves the factory, and generally do not need to be calibrated. If you feel that the control robot has a large deviation, you need to calibrate [imu], [linear velocity], and [angular velocity]; when calibrating, place the robot in advance and do not move the robot.
It should be noted that this lesson is applicable to the ROSMASTER X3 and X3Plus for the Mecanum wheel models. X1 is an ordinary four-wheel drive model, and R2 is an Ackerman model. Due to the difference in the principle of motion direction control, this lesson is not applicable.
7.1 imu school associate
ROSMASTER has already calibrated the imu before leaving the factory, and the user does not need to calibrate. The following tutorial refers to the procedure that should be started if the imu needs to be calibrated.
7.1.1 Calibration steps
Note: When calibrating, make sure the robot is still.
- start
roslaunch yahboomcar_bringup calibrate_imu.launch
As shown in the figure below, press Enter to calibrate the data in the X+, X-, Y+, Y-, Z+, Z- directions in turn. After the calibration, it will be automatically saved to the specified folder.
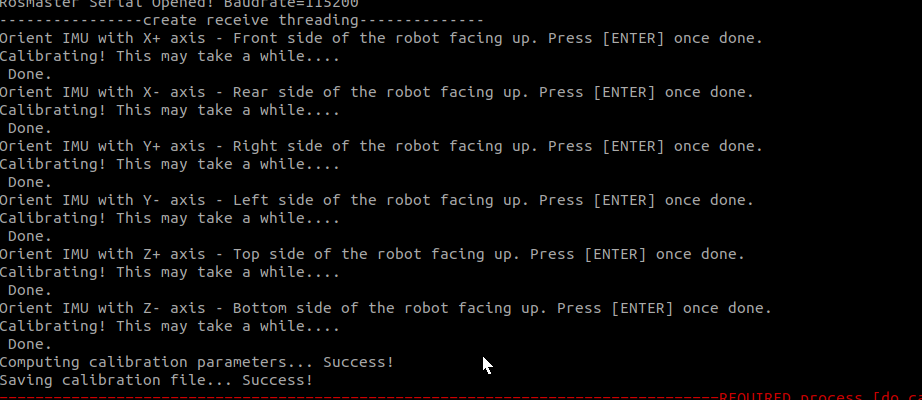
When shipped from the factory, the calibration data is stored in,
xxxxxxxxxx~/yahboomcar_ws/src/yahboomcar_bringup/param/imu_calib.yaml
7.1.2 Use the calibrated imu data
xxxxxxxxxxroslaunch yahboomcar_bringup bringup_calib.launch
The above command is to use the self-calibrated imu data when starting the chassis drive.
7.2 Linear speed calibration
7.2.1 Preparation
- Measure the distance of 1 meter with a meter ruler and make a mark.
- put the trolley at the starting point.
- Modify the parameters linear_scale_x and linear_scale_y to 1.0.
7.2.2 Start
- terminal input
xroslaunch yahboomcar_bringup bringup.launch # chassis controlroslaunch yahboomcar_bringup calibrate_linear.launch # linear speed calibrationrosrun rqt_reconfigure rqt_reconfigure # Enable dynamic parameter adjustment
- Click the square on the right of [start_test] to start moving the distance of [test_distance]. At this time, observe whether the car really moves [test_distance]. If not adjust the parameter [odom_linear_scale_correction], put the car back to the starting point to continue the test.
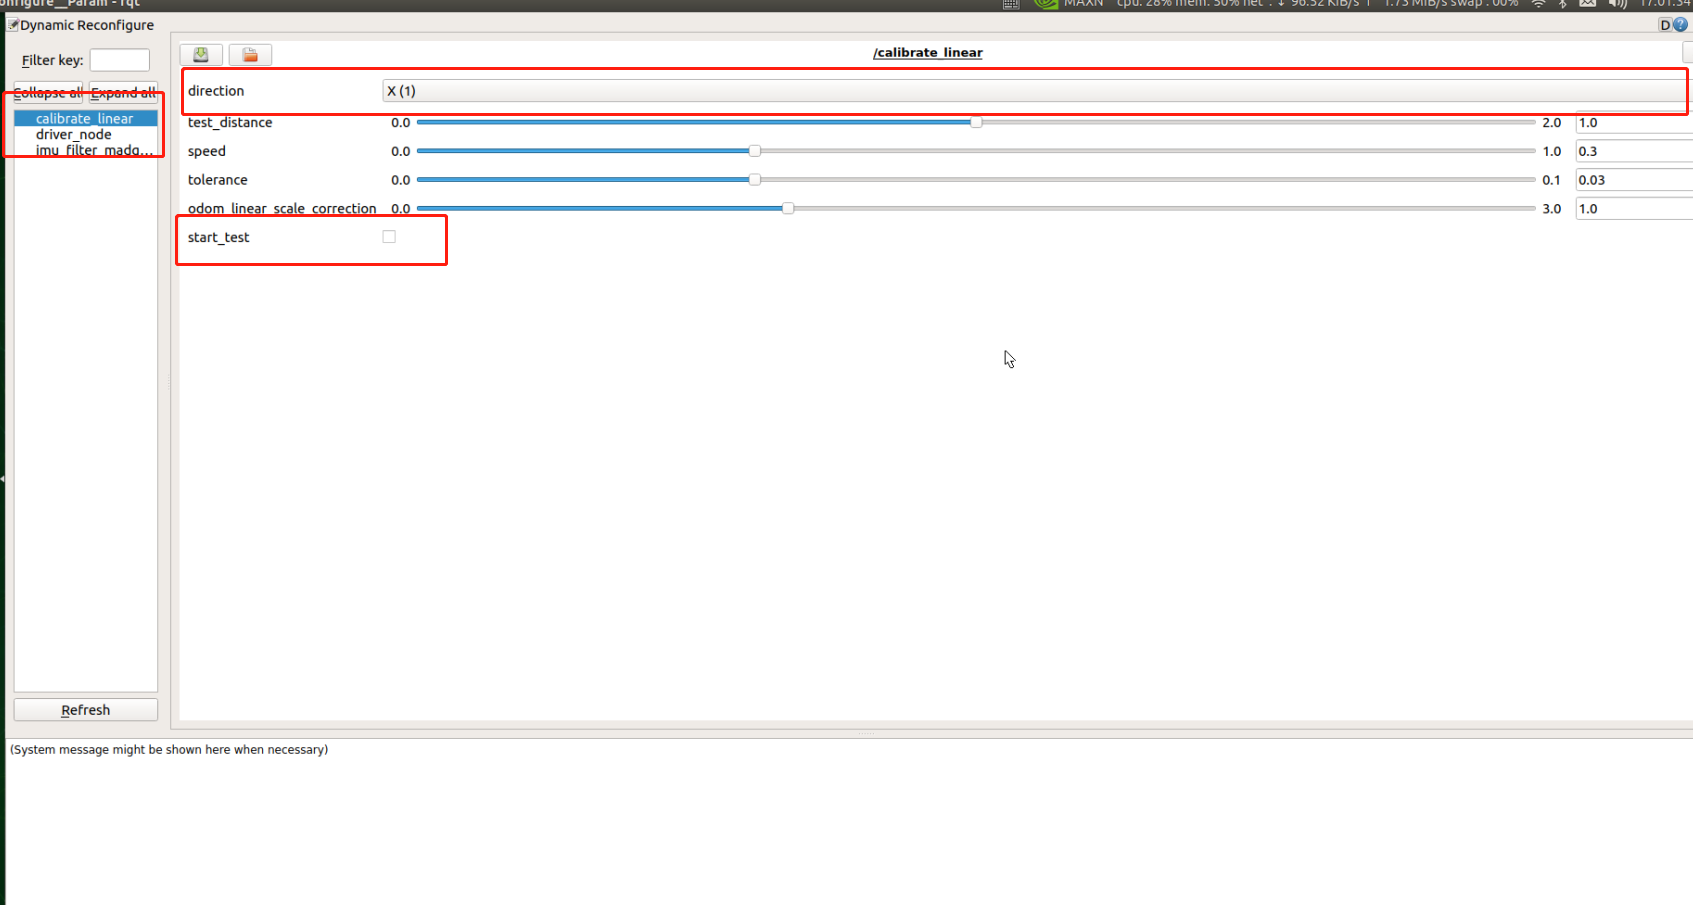
Note: The car defaults to calibrate the linear speed of the X-axis direction at the beginning. If you want to calibrate the Y-axis, click [direction] to switch the direction and then click [start_test] to start calibrating the linear speed of the Y-axis.
- test_distance: test distance. It should not be too large, the default is one meter.
- speed: Test line speed. The higher the speed, the greater the inertia.
- tolerance: The error in reaching the target. If the error is too small, it will shake at the target position, otherwise, the error of reaching the target point will be very large.
- odom_linear_scale_correction: odometer scaling.
- start_test: start the test.
- direction: the direction of the linear velocity, the default is the X axis.
After the test, remember the value of [odom_linear_scale_correction] and modify it to the values of the parameters linear_scale_x and linear_scale_y in bringup.launch.
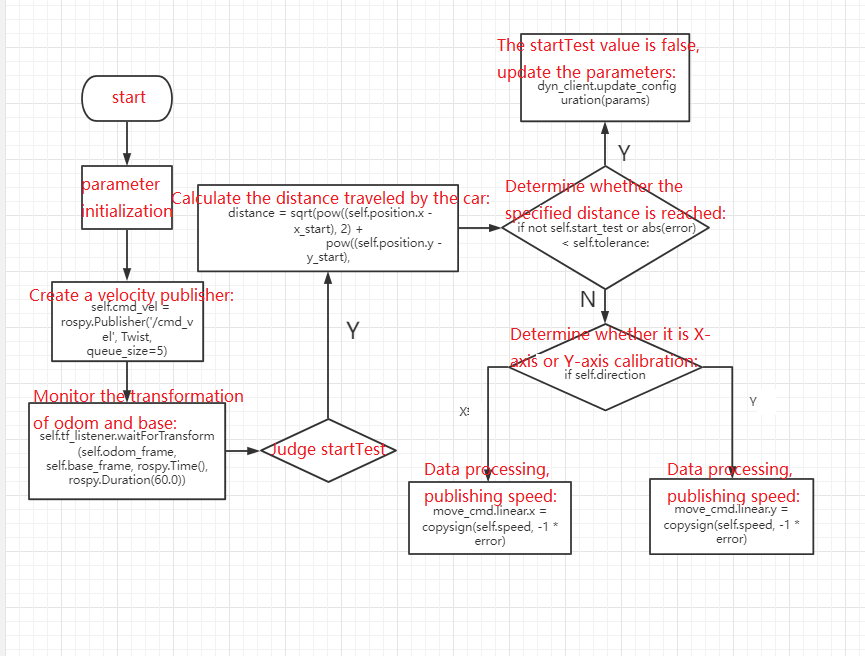
- calibrate_linear.py program flow chart
7.3. Angular velocity calibration
7.3.1. Preparation
- Put the trolley in a position where it is easy to rotate the angle.
- Modify the parameter angular_scale to 1.0.
7.3.2 Start
- terminal input
xroslaunch yahboomcar_bringup bringup.launch # chassis controlroslaunch yahboomcar_bringup calibrate_angular.launch # angular velocity calibrationrosrun rqt_reconfigure rqt_reconfigure # Enable dynamic parameter adjustment

- Click the square on the right side of [start_test] to start moving the distance of [test_angle]. At this time, observe whether the car really turns [test_angle]. If not adjust the parameter [odom_angule_scale_correction], put the car back to the starting point to continue the test.
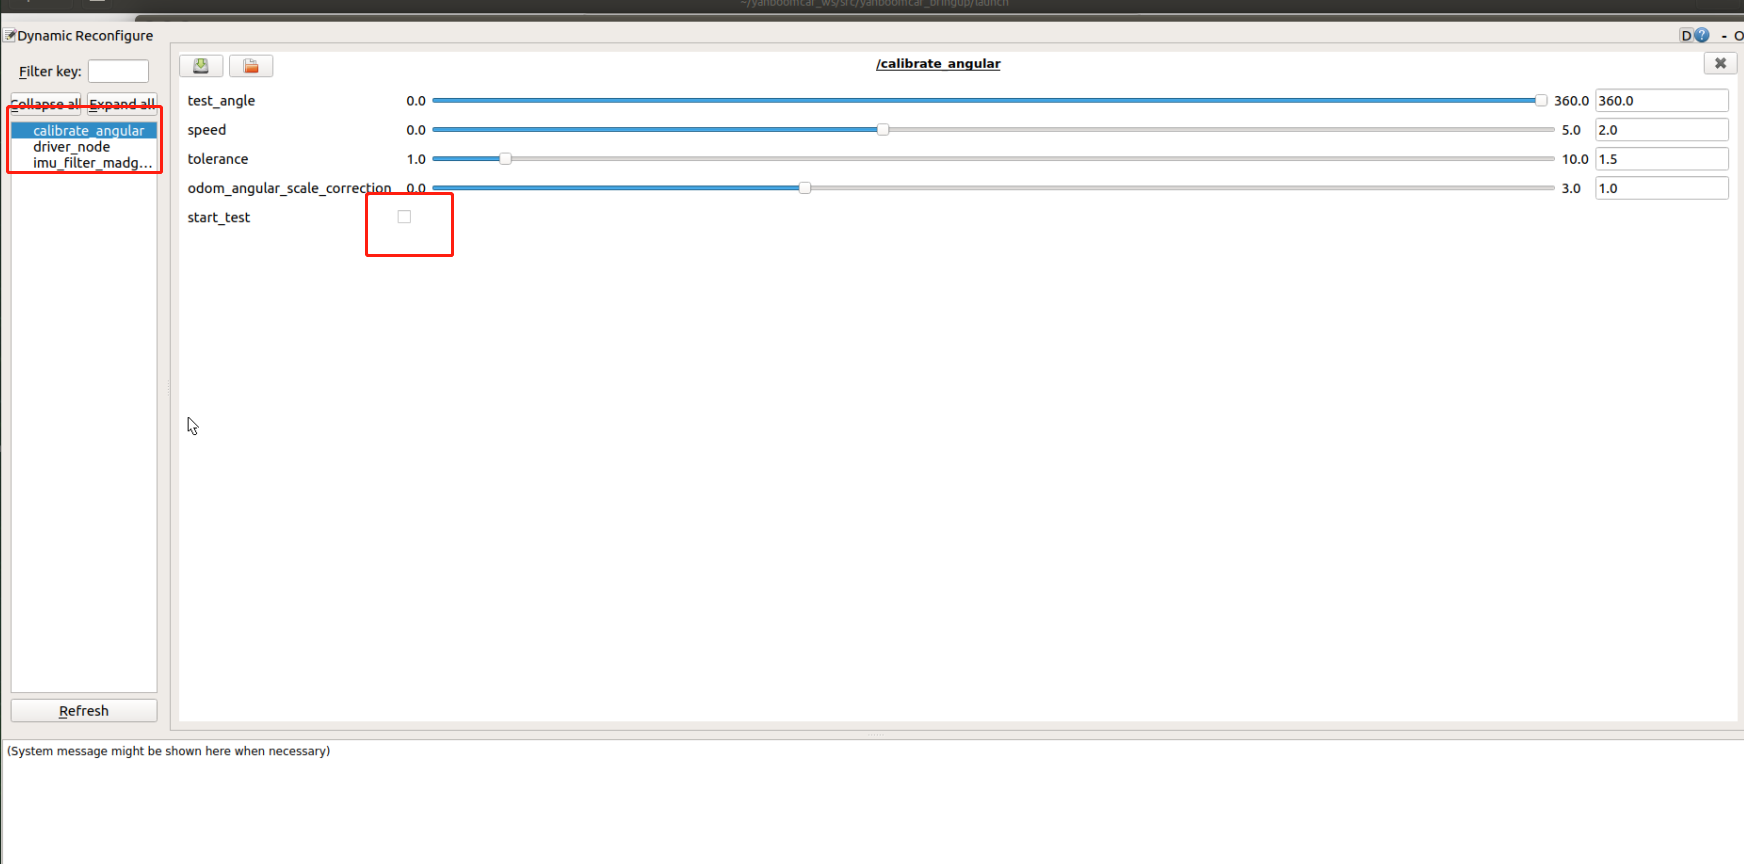
- test_angle: test distance. It should not be too large, the default is 360°.
- speed: Test angular velocity. The higher the speed, the greater the inertia.
- tolerance: The error in reaching the target. If the error is too small, it will shake at the target position, otherwise, the error of reaching the target point will be very large.
- odom_angule_scale_correction: odometer scaling.
- start_test: start the test.
After the test, remember the value of [odom_angule_scale_correction] and modify it to the value of the parameter [angular_scale] in bringup.launch.
- calibrate_angular.py program flow chart
