YOLO5+TENSORRT acceleration
1.Precautions before use
If you are using the YAHBOOM version of the image, there is no need to build the environment. If you are building the environment yourself, you need to download the Tensorrt package The version of yoloV5 should correspond to the package of Tensorrt This tutorial uses the YOLO5 V5.0 version, so the Tensorrt acceleration package also needs to use V5.0 This is the Tensorrt download link:https://github.com/wang-xinyu/tensorrtx/tree/master/yolov5
2.start using
- Gen under tensorrt/yolov5 Copy gen_wts.py to the folder of yolov5
- Execute gen_wts.py build .wts file。
python3 gen_wts.py yolov5s.pt
- Go to the yolov5 folder under the directory tensorrtx as usual, create a build file, and enter
xxxxxxxxxxmkdir buildcd buildcmake ..
- Classify in yololayer. h_ Modify NUM to yours. The official dataset is Coco, so the default is 80. (This step can be ignored if it is official)
- 执行makeFile。(Make once every time it is modified to ClassNUM)
xxxxxxxxxxmake -j4
- Copy the wts file from the file path of yoloV5 to tensorrtx/yolov5.
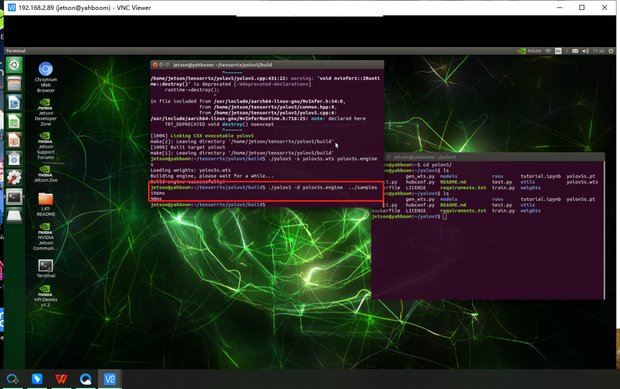
- build .engine file
xxxxxxxxxx sudo ./yolov5 -s ../yolov5s.wts yolov5s.engine s3.Can testing achieve acceleration
way1:Enter the folder tensorrtx/yolo5/build and run the command
xxxxxxxxxxsudo ./yolov5 -d yolov5s.engine ../samples
Can be run in the YOLOv5 folder
xxxxxxxxxxpython3 detect.py
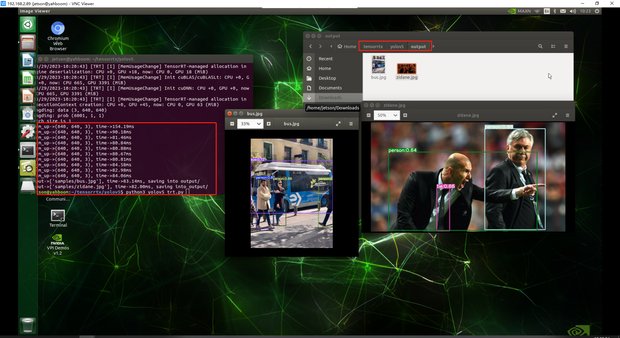
By comparison, it can be clearly seen that the addition of Tensorrtx greatly reduces the recognition time of images
way2:running
xxxxxxxxxxcd tensorrtx/yolo5python3 yolov5_trt.py
It can also be run in the YOLOv5 folder
xxxxxxxxxxpython3 detect.py
By comparison, it can be clearly seen that the addition of Tensorrtx greatly reduces the recognition time of images