4. ROS+Opencv application
4. ROS+Opencv application4.2. Use4.2.1. Startup4.2.2. Display methods4.2.3. Effect display4.3 Nodes4.3.1 Edge detection algorithm4.3.2. Contour moment4.3.3. Face recognition
4.1, Overview
wiki:http://wiki.ros.org/opencv_apps
Source code: https://github.com/ros-perception/opencv_apps.git
Function package: ~/orbbec_ws/src/opencv_apps
Most of the code was originally taken from https://github.com/Itseez/opencv/tree/master/samples/cpp
The opencv_apps program provides various nodes that run opencv functionality internally and publish the results to the ROS topic. When using the opencv_apps program, you only need to run a launch file according to your business requirements, so you don't have to write program code for these functions.
ROS Wiki has the relevant node analysis, the corresponding node topic subscription and topic publication, related parameters introduction, etc. See the ROS WiKi for details.
4.2. Use
4.2.1. Startup
Step 1: Start the camera
roslaunch astra_visual opencv_apps.launch If the page cannot be viewed, check whether there is no [web_video_server] node, if not, run the following command
xxxxxxxxxxrosrun web_video_server web_video_serverStep 2: Start the Opencv_apps function
xxxxxxxxxxroslaunch opencv_apps face_recognition.launch # 人脸识别# Face recognitionroslaunch opencv_apps corner_harris.launch # harris角点检测# harris corner detectionroslaunch opencv_apps camshift.launch # 目标追踪算法# Target tracking algorithmroslaunch opencv_apps contour_moments.launch # 轮廓矩 # Contour momentroslaunch opencv_apps convex_hull.launch # 多边形轮廓# Polygon outlineroslaunch opencv_apps discrete_fourier_transform.launch # 离散傅里叶变换算法# Discrete Fourier transform algorithmroslaunch opencv_apps edge_detection.launch # 边缘检测算法 # Edge detection algorithmroslaunch opencv_apps face_detection.launch # 人脸检测算法# Face detection algorithmroslaunch opencv_apps fback_flow.launch # 光流检测算法 # Optical flow detection algorithmroslaunch opencv_apps find_contours.launch # 轮廓检测# Contour detectionroslaunch opencv_apps general_contours.launch # 一般轮廓检测# General contour detectionroslaunch opencv_apps goodfeature_track.launch # 特征点追踪# Feature point trackingroslaunch opencv_apps hls_color_filter.launch # HLS颜色过滤# HLS Color filteringroslaunch opencv_apps hough_circles.launch # 霍夫圆检测# Hough circle detectionroslaunch opencv_apps hough_lines.launch # 霍夫直线检测# Hough line detectionroslaunch opencv_apps hsv_color_filter.launch # HSV颜色过滤# HSV color filteringroslaunch opencv_apps lk_flow.launch # LK光流算法# LK Optical flow algorithmroslaunch opencv_apps people_detect.launch # 人体检测算法# Human detection algorithmroslaunch opencv_apps phase_corr.launch # 相位相关位移检测 # Phase dependent displacement detectionroslaunch opencv_apps pyramids.launch # 图像金字塔采样算法# Image pyramid sampling algorithmroslaunch opencv_apps rgb_color_filter.launch # RGB颜色过滤# RGB color filteringroslaunch opencv_apps segment_objects.launch # 清除背景检测算法# Clear background detection algorithmroslaunch opencv_apps simple_flow.launch # 精简光流算法# Streamlined optical flow algorithmroslaunch opencv_apps smoothing.launch # 简单过滤器# Simple filterroslaunch opencv_apps threshold.launch # 阈值图像处理# Threshold image processingroslaunch opencv_apps watershed_segmentation.launch # 分水岭分割算法# Watershed segmentation algorithmAlmost every function case will have a parameter [debug_view], Boolean type, whether to use Opencv display image, the default display.
If it does not need to be displayed, set it to [False], for example
xxxxxxxxxxroslaunch opencv_apps contour_moments.launch debug_view:=False
However, after starting this way, some cases can not be displayed in other ways, because in the source code, some [debug_view] set to [False], will turn off the image processing.
4.2.2. Display methods
- rqt_image_view
Enter the following command to select a topic
xxxxxxxxxxrqt_image_view
- opencv
It is displayed by default. No action is required.
- Web viewing
(In the same LAN) Enter IP+port in the browser, for example:
xxxxxxxxxx192.168.2.102:8080
4.2.3. Effect display
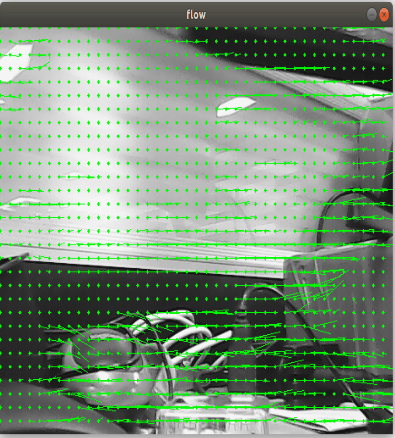
- Optical flow detection algorithm
Move the screen and observe the phenomenon.
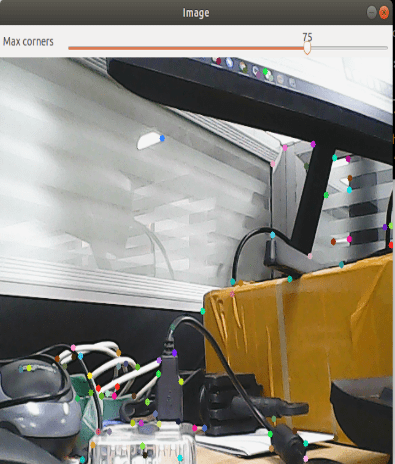
- Feature point tracking
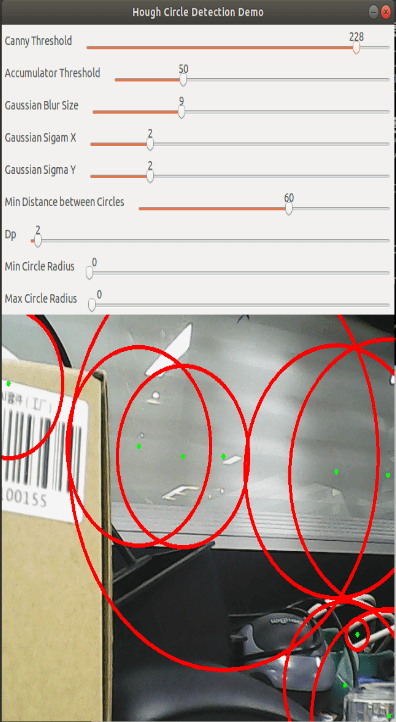
- Hough circle detection
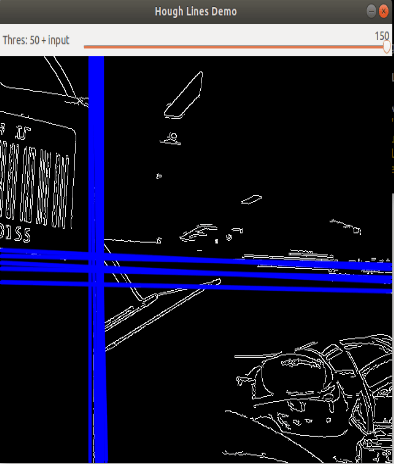
- Hough linear detection
The lower the threshold, the more lines, and the easier it is to get stuck.
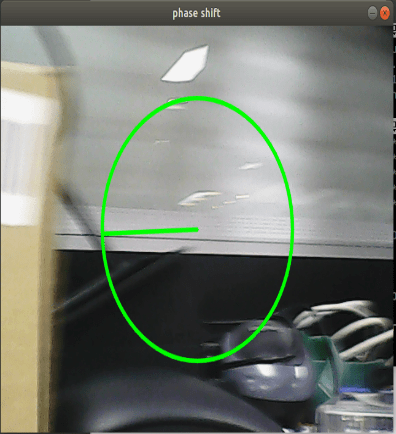
- Phase dependent displacement detection
The faster the camera moves, the larger the radius of the circle.
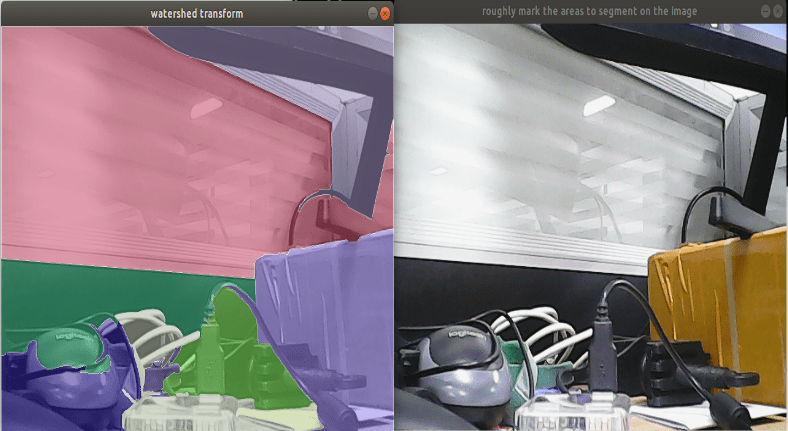
- Watershed segmentation algorithm
Use the mouse to select different objects, the system will automatically distinguish.
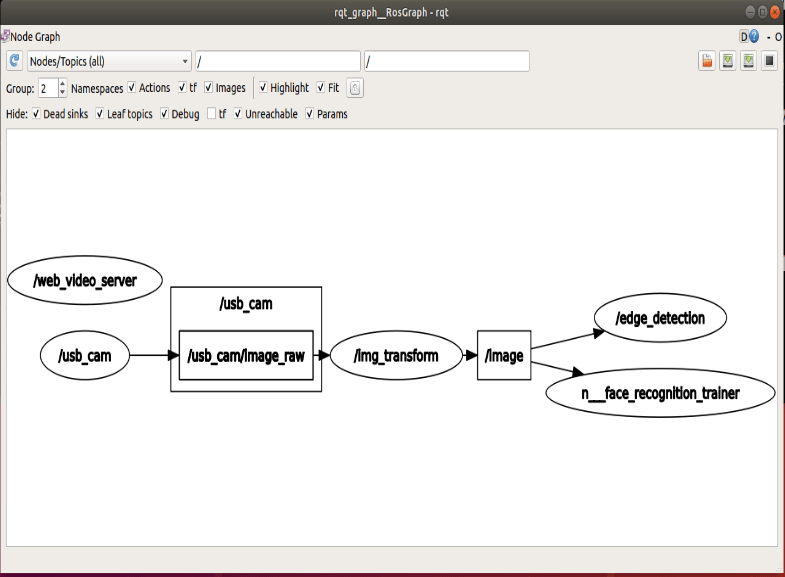
4.3 Nodes
Each case in this section will have a topic for subscribing images and publishing images.
4.3.1 Edge detection algorithm
| Parameters | Types | Default | Parsing |
|---|---|---|---|
| ~use_camera_info | bool | true | Subscribe to [camera_info] to get the default coordinate ID, otherwise use the image information directly. |
| ~debug_view | bool | false | Whether to create a window to display the node image |
| ~edge_type | int | 0 | Specify edge detection methods: 0: Sobel operator, 1: Laplacian operator, 2: Canny edge detection |
| ~canny_threshold1 | int | 100 | Specifies the second canny threshold |
| ~canny_threshold2 | int | 200 | Specifies the first canny threshold |
| ~apertureSize | int | 3 | The aperture size of a Sobel operator. |
| ~apply_blur_pre | bool | True | Whether blur() is applied to the input image |
| ~postBlurSize | double | 3.2 | Enter the image aperture size |
| ~apply_blur_post | bool | False | Whether to apply GaussianBlur() to the input image |
| ~L2gradient | bool | False | canny parameters |
| ~queue_size | int | 3 | Queue size |

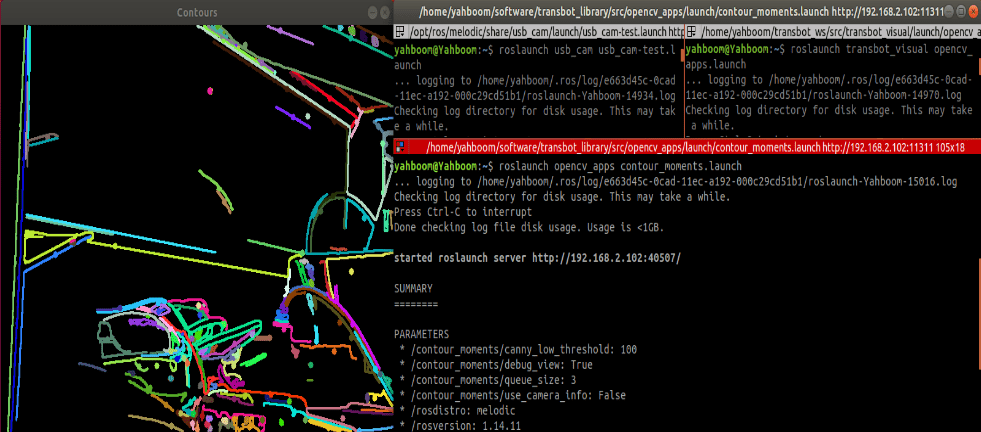
4.3.2. Contour moment
| Parameters | Types | Default | Parsing |
|---|---|---|---|
| ~use_camera_info | bool | true | Subscribe to [camera_info] to get the default coordinate ID, otherwise use the image information directly. |
| ~debug_view | bool | false | Whether to create a window to display the node image |
| ~canny_low_threshold | int | 0 | Canny edge detects a low threshold |
| ~queue_size | int | 3 | Queue size |
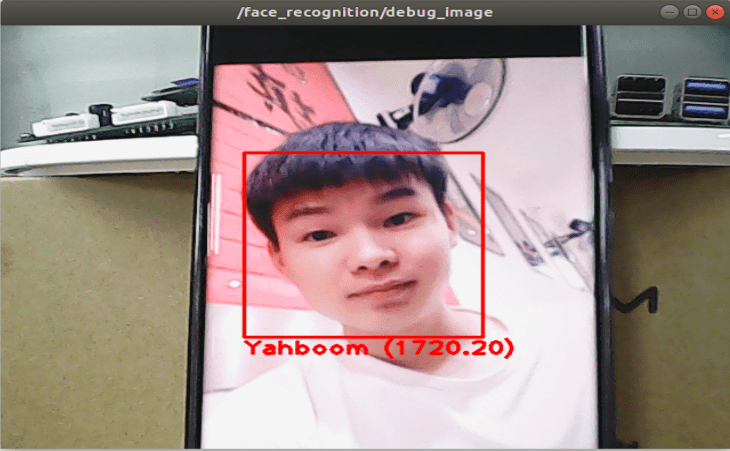
4.3.3. Face recognition
This case is through the real-time collection of people's images of autonomous training, real-time recognition, the steps are slightly complicated.
| Parameters | Types | Default | Parsing |
|---|---|---|---|
| ~approximate_sync | bool | false | Subscribe to [camera_info] to get the default coordinate ID, otherwise use the image information directly. |
| ~queue_size | int | 100 | The queue size for subscribing to a topic |
| ~model_method | string | "eigen" | Face recognition method: "eigen", "fisher" or "LBPH" |
| ~use_saved_data | bool | true | Load the training data from the ~data_dir path |
| ~save_train_data | bool | true | Save the training data to the ~data_dir path for retraining |
| ~data_dir | string | "~/opencv_apps/face_data" | Save the training data path |
| ~face_model_width | int | 190 | Train the width of the face image |
| ~face_model_height | int | 90 | Train the height of the face image |
| ~face_padding | double | 0.1 | The fill ratio for each face |
| ~model_num_components | int | 0 | Number of components in the face recognizer model (0 is considered unlimited) |
| ~model_threshold | double | 8000.0 | Face recognition model threshold |
| ~lbph_radius | int | 1 | Radius parameters (for LBPH method only) |
| ~lbph_neighbors | int | 8 | Neighborhood parameters (for LBPH method only) |
| ~lbph_grid_x | int | 8 | Grid x parameter (for LBPH method only) |
| ~lbph_grid_y | int | 8 | Grid y parameter (for LBPH method only) |
| ~queue_size | int | 100 | Image subscriber queue size |
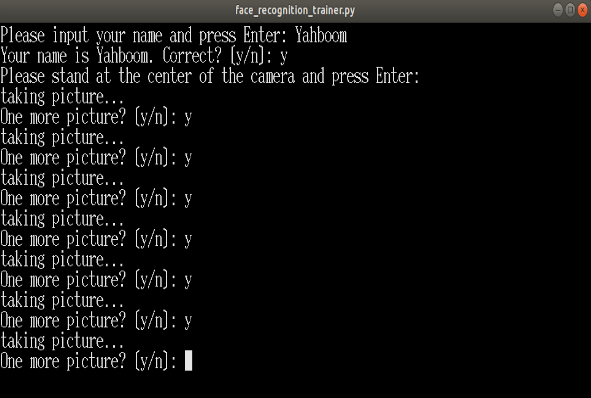
Operation steps:
- First, after the colon in the picture below, enter the name of the person: Yahboom
- Confirm name: y
- Then place the face in the center of the image and click OK.
- Add a photo in the loop: y, click confirm.
- To finish collecting pictures, enter n and click OK.
- Close the launch file and restart.
If it is necessary to enter the knowledge, cycle 1 to 5 in turn until all the identification personnel are entered, and then perform the sixth step.
Step 3: Make sure you can recognize faces
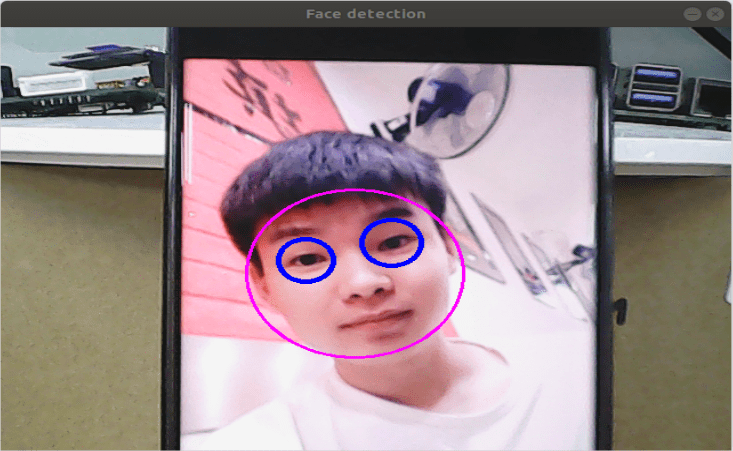
Final recognition effect