2. Voice control module port binding
2. Voice control module port binding 2.1. Bind the port number of the HUB board 2.2. Bind the port number of the HUB board 2.3. Test
Since both the HUB board and the voice module use CH340 serial ports, when they are used at the same time, the main control board will not be able to identify which device is the HUB board and which device is the voice module due to port conflict. So we need to bind the port of the voice module. Once the port is bound, the wiring of the voice module cannot be replaced, otherwise the binding will be invalid. In this course, we take the Raspberry Pi as an example to demonstrate, the Jetson version is the same operation steps.
2.1. Bind the port number of the HUB board
ll /dev/ttyUSB* ll /dev/myserial ll /dev/rplidar - First, Do not connect to the voice board to the robot, you can find the lidar and the HUB board are ttyUSB0 and ttyUSB1, as shown below.
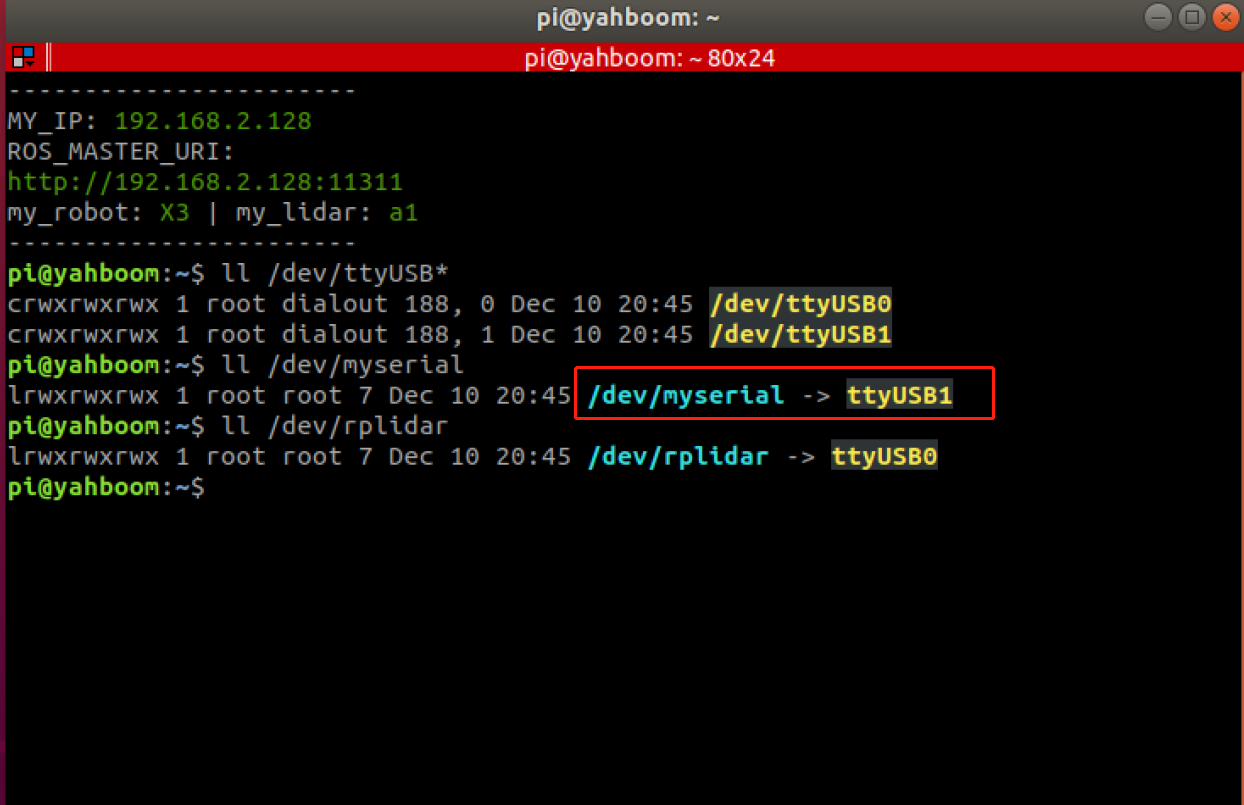
Then, we check the port information of the HUB board, mainly to check the device path information.
Input following command:
xxxxxxxxxxudevadm info --attribute-walk --name=/dev/ttyUSB1 |grep devpath
As shown below. The content in the red wireframe represents the device path.

Next, we modify the /etc/udev/rules.d/rplidar.rules file, bind the port number of the HUB board.
Input following command:
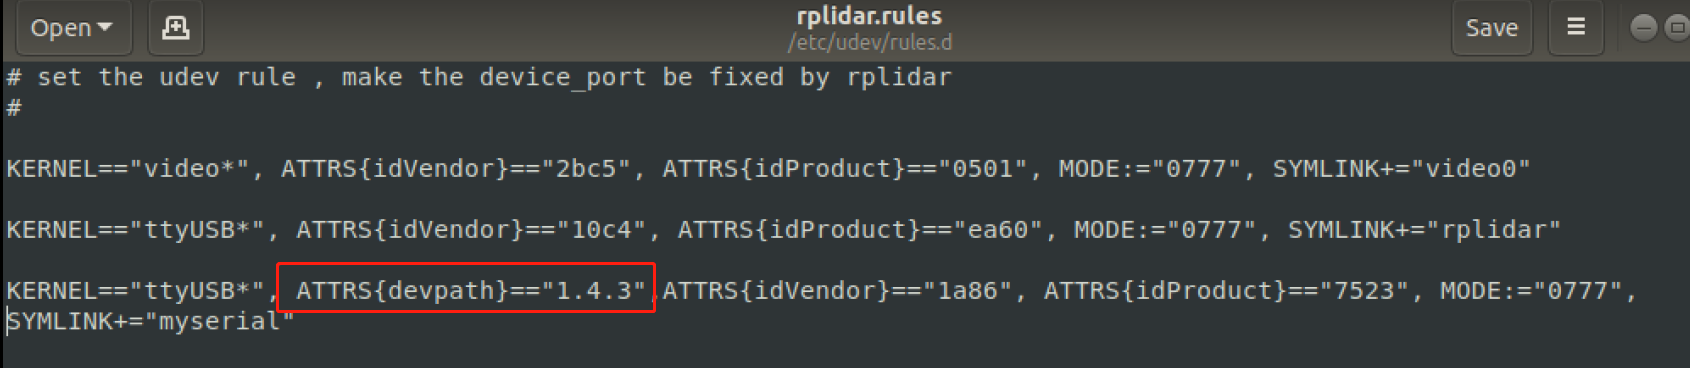
xxxxxxxxxxsudo gedit /etc/udev/rules.d/rplidar.rulesFind the myseial column in the file, as shown below, add the content.
Save and exit, input the following three commands in the terminal to reload the device.
xxxxxxxxxxsudo udevadm triggerxxxxxxxxxxsudo service udev reloadxxxxxxxxxxsudo service udev restart
2.2. Bind the port number of the HUB board
Input following command in the terminal to view the device number.
xxxxxxxxxxll /dev/ttyUSB*
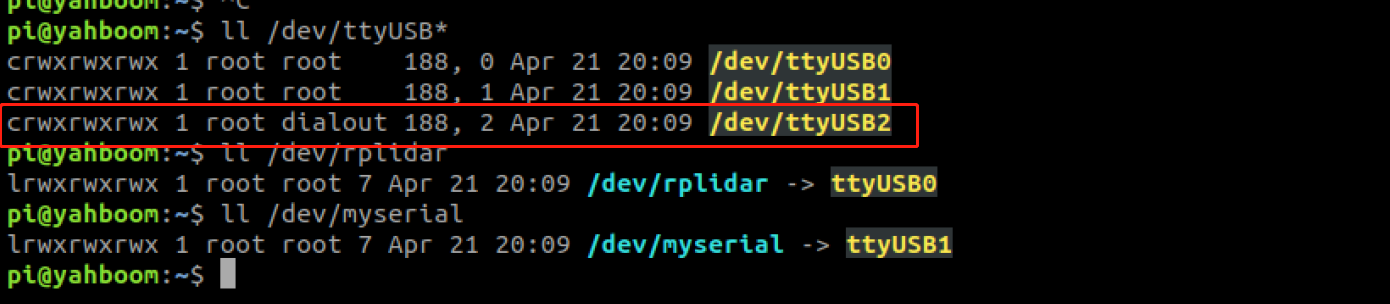
We find that the system recognizes the voice board as /dev/ttyUSB2 by the system, then, we input the following command to view the device path information.
xxxxxxxxxxudevadm info --attribute-walk --name=/dev/ttyUSB2 |grep devpath As shown below. The content in the red wireframe represents the device path.

Then, we modify the /etc/udev/rules.d/rplidar.rules file, bind the port number of the voice board.
Input following command:
xxxxxxxxxxsudo gedit /etc/udev/rules.d/rplidar.rules
Add the content as shown in the image below,

- Save and exit, input the following three commands in the terminal to reload the device.
xxxxxxxxxxsudo udevadm trigger sudo service udev reload sudo service udev restart 2.3. Test
Finally, the physical connection diagram of the port after binding, as shown in the following figure,
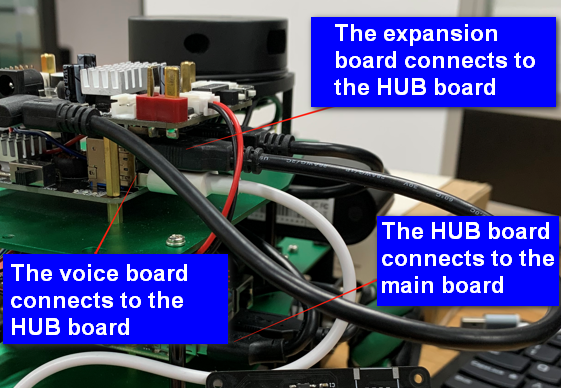
Note: Don't change the wiring, Otherwise, the port will not recognize the device.
Input following command to test voice board.
xxxxxxxxxxpython3 voice_ctrl_test.py - After successfully connecting the voice module. "Speech Serial Opened! Baudrate=115200" will be displayed in the terminal.
- After saying "Hi, Yahboom" to the module, it will answers "Hi, i am here".
- After unplugging the voice board, the program will report an error and exit.
If the actual result is consistent with the above three points, it means that the device is successfully bind.
Note: The HUB and voice board cannot be plugged into other ports, otherwise the device number will not be recognized.