Tip:
PC software remote control and APP remote control use the same program.
The image provided by us has enabled the process by default.
Username: jetson Password: yahboom
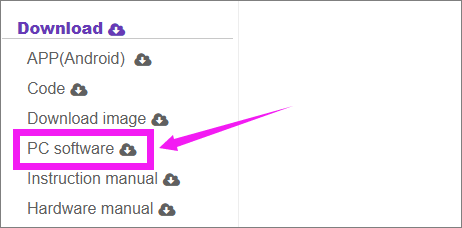
1.Install PC software
1.1 Download PC software from our website.
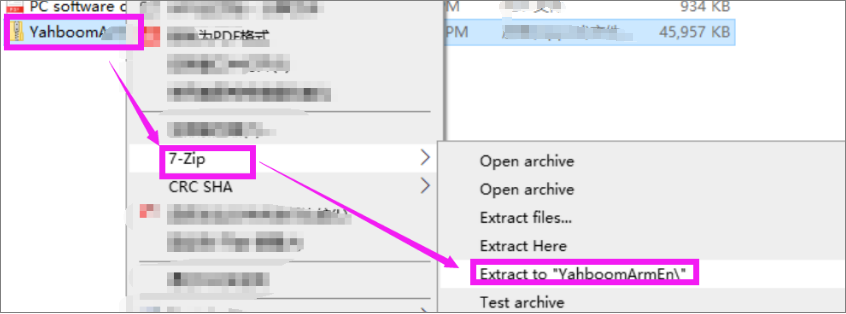
1.2 Extract ZIP file by 7z software or you can use others software.
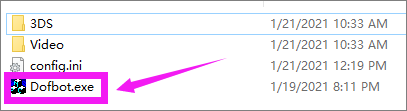
1.3 You will get a folder as shown below.

2.Start up DOFBOT and connect PC software
2.1 After turning on the power switch, wait patiently. When the robotic arm buzzes three times, it means that the system has been started.
2.2 Ensure your computer and robotic arm are under the same LAN.
2.3 Double-click the exe file to open the software.
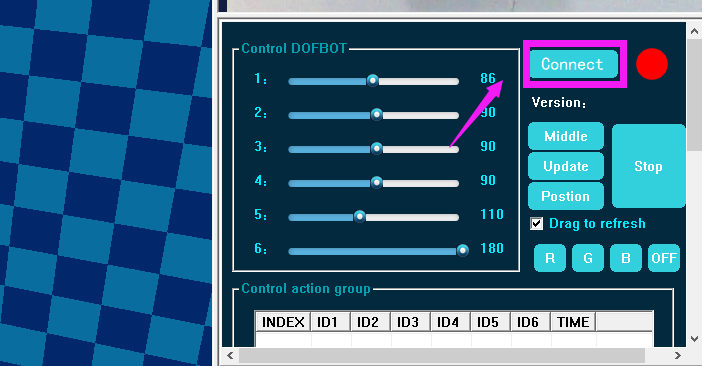
3.Control DOFBOT by PC software
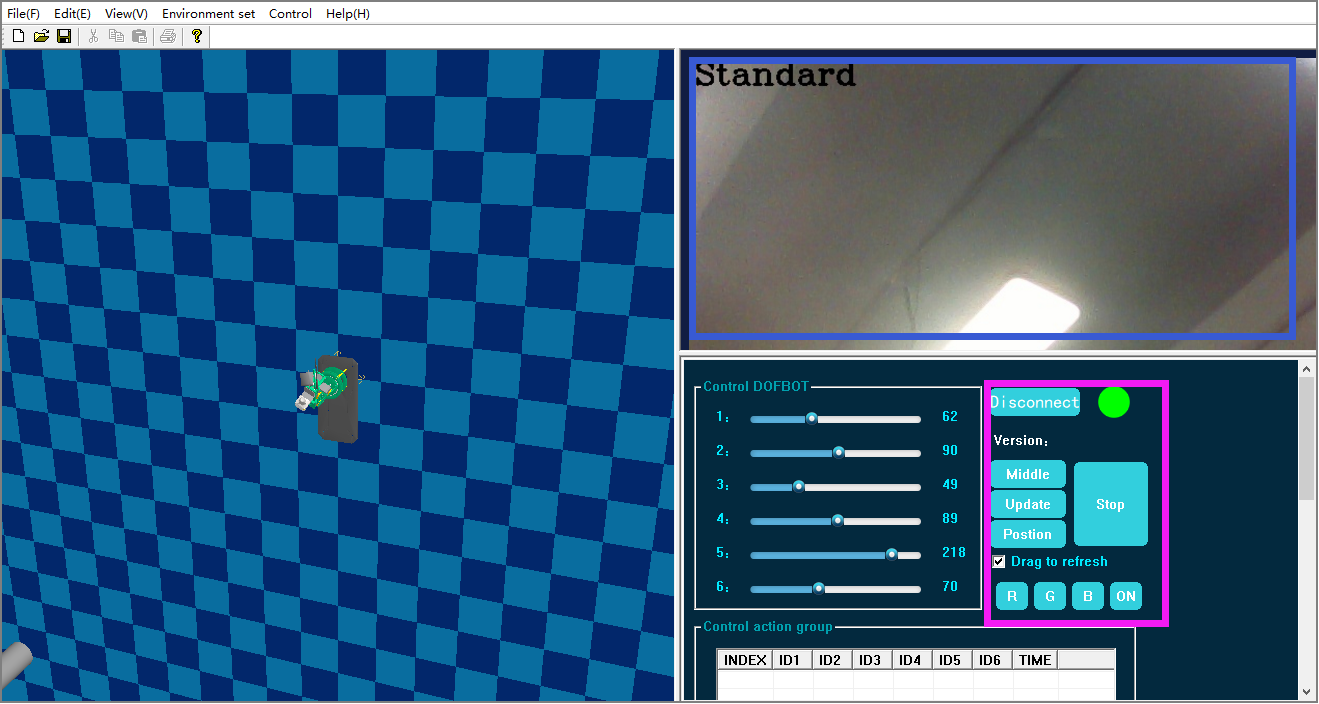
3.1 Click [Connect] to connect robotic arm.
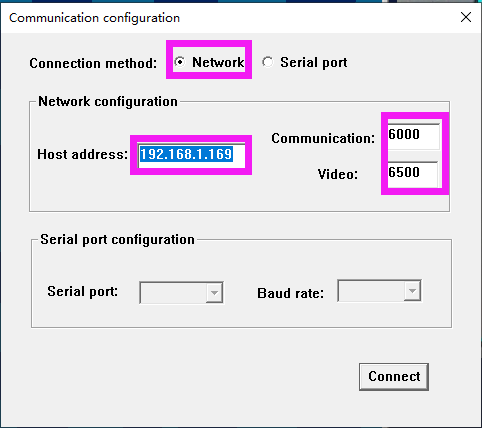
3.2 Select the network connection method.
Input the IP address, communication port, and video port of the robotic arm. Then click *[**Connect****]***.
3.3 If the connection is successful, the status indicator on the interface will become green, as shown below. The video screen will also be loaded.
4.PC Function
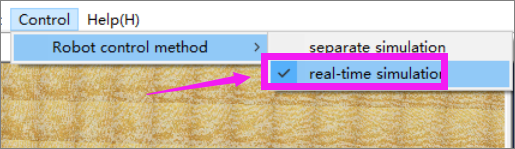
Real-time simulation
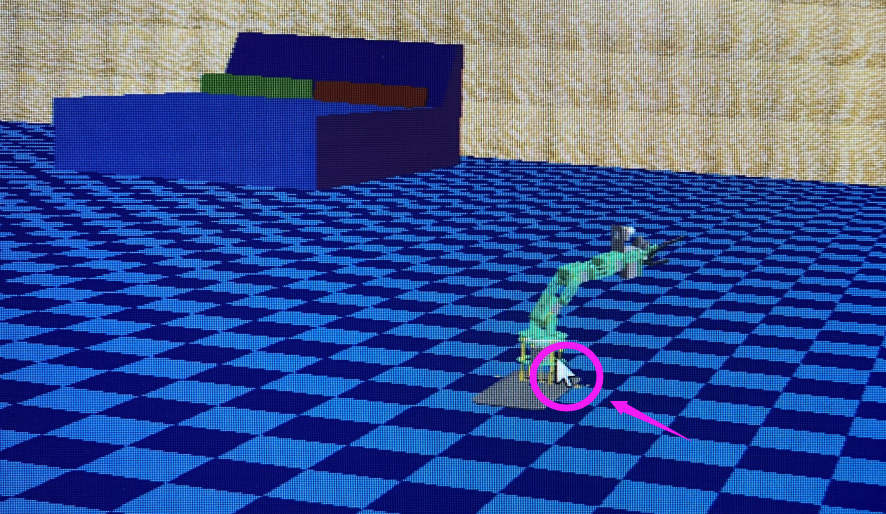
- Click the 3D simulation of the robotic arm on the left side on PC software.
- Choose [Control]--[Robot control method]--[real-time simulation].
- You can control robotic arm by button on key board. As shown below.
Note: During control, the mouse needs to be kept on the 3D simulation.
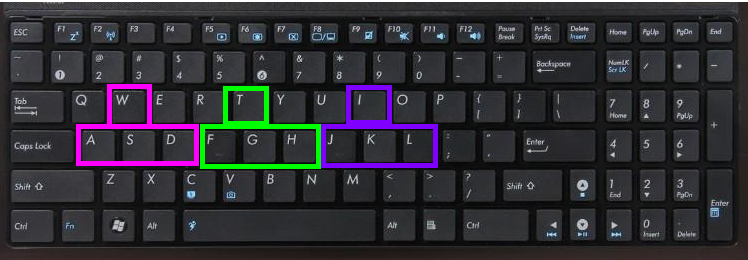
Press W,A,S,D key on keyboard at the same time.
Press T,F,G,H key on keyboard at the same time.
Press I,J,K,L key on keyboard at the same time.
Can control robotic arm.
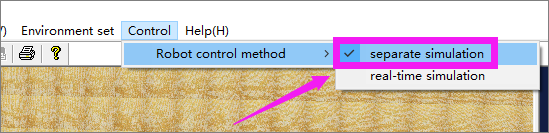
Separate simulation
- Choose [Control]--[Robot control method]--[separate simulation simulation].
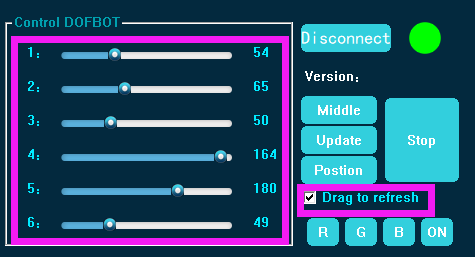
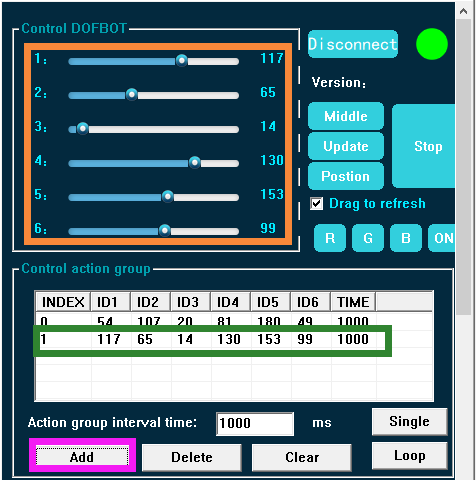
- Control DOFBOT
You can control 6 servo of robot arm by drag slider.
- Control cation group
Step:
①Drag slider on Control DOFBOT area.
②Click [Add] on Control action group, which means add a set of actions to robot arm. And you can see a set of action group data on the table. As shown below.
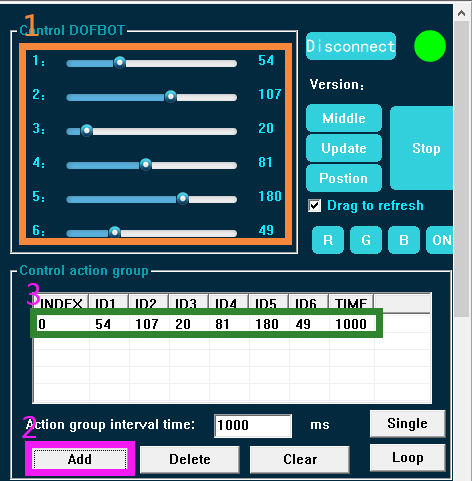
We can add more action groups in the same way.
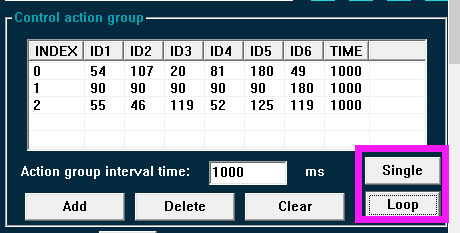
③Click [Single] or [Loop] to run this action.
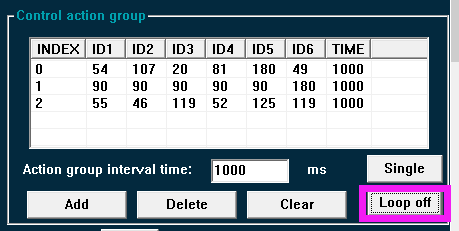
④Click Loop off] to stop action is running, and robotic arm will back to center position.
⑤[Delete] and [Clear] be used to delete or clear actions.
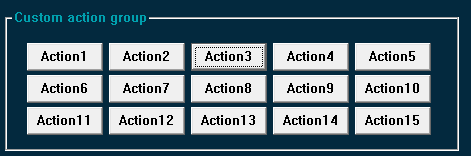
- Custom action group
Choose ActionX, robot arm will automatically completed this action, and the robot arm will automatically stop after the action is completed.
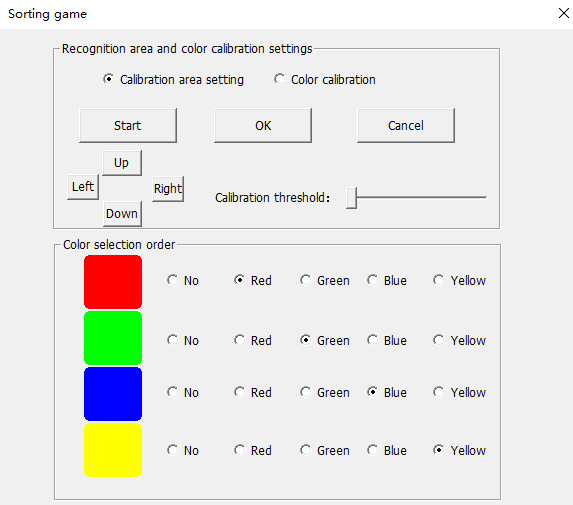
- Sorting game

①Place map and click a game, for example-Color sorting.
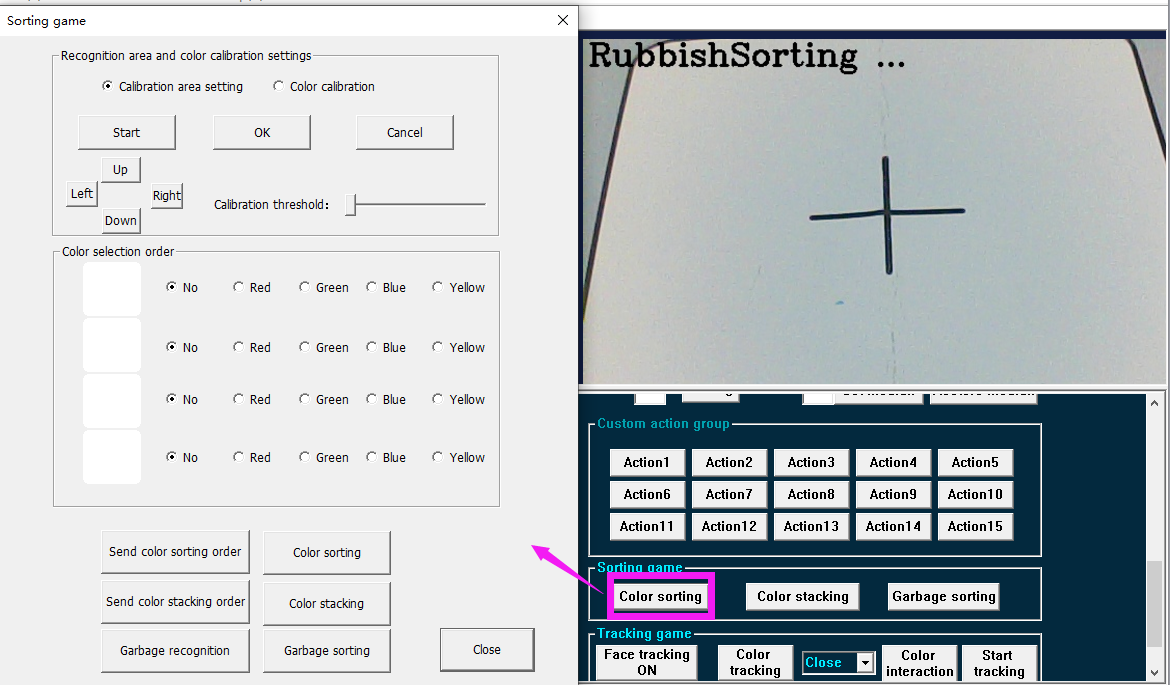
②We need to set the calibration area, enter the calibration area. Click to up, down, left and right button to ensure camera can fully see the identification frame.
We can slide the calibration threshold setting so that the cyan box can circle the identification frame in the map, and click *[OK]* to complete the calibration.

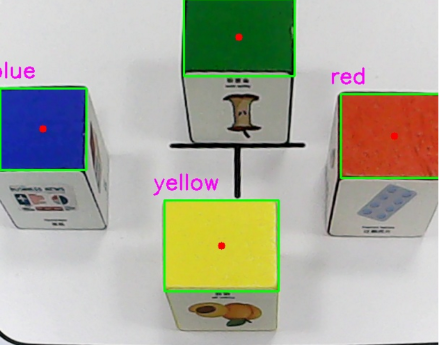
③Select the color block, then send the sorting or stacking order, wait for the camera to recognize it, and then click sorting or stacking.
- Tracking game
Face tracking: Click [Face tracking ON], when the robotic arm detects the face in the video screen, the robotic arm will move slowly with the face.
Color tracking: Select the color to be tracked. Then, click [Color tracking], place the corresponding color block in front of the robotic arm camera. When we move the color block, the robotic arm will move with the color block.
Color interaction: Click to [Color interaction], place the block in the green recognition box on the screen, wait for the value in the green box to stabilize. Then, click [Start tracking], the robotic arm will move with the color block.
