RTAB 3D mapping and navigation
This chapter needs to be used with a car chassis and other sensors to operate. This is just an explanation of the implementation method. In fact, it cannot be run. It needs to be used with the company's rosmaster-X3 car to achieve this function.
If you need to transplant it to your own motherboard, you need to install other dependency files.
1. Function description
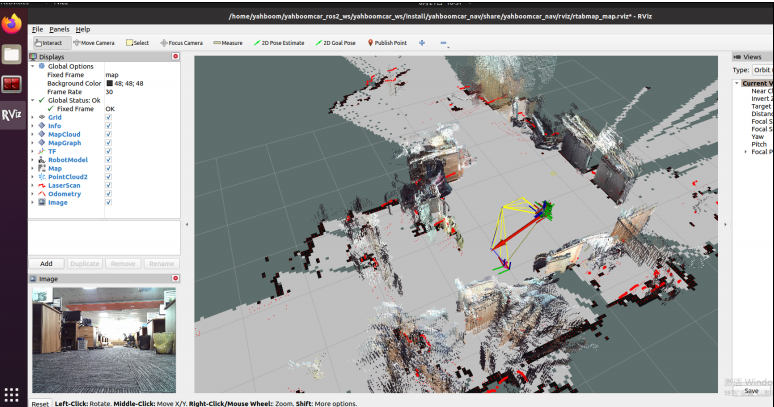
After the program is started, control the car through the handle or keyboard The car will use the radar scanning data and the depth data of the depth camera to build a map using the RTAB-MAP algorithm during the movement, and save the map after the construction is completed.
After the navigation program is started, you can give the car a target point in rviz and let it navigate and run.
2. Install RTAB-MAP
Taking ros2-foxy as an example.
Input the following command to install.
xxxxxxxxxxsudo apt install ros-foxy-rtabmap* -y3. Mapping
Input the following command:
x
#Satrt Astra cameraros2 launch astra_camera astro_pro_plus.launch.xml#Start chassis cameraros2 launch yahboomcar_nav map_rtabmap_launch.py#Start rviz to display the mapros2 launch yahboomcar_nav display_rtabmap_map_launch.pyNote: This mapping algorithm has relatively high hardware performance requirements, and some development boards may get stuck.
It is recommended to configure a virtual machine and run the RTAB-MAP algorithm on the virtual machine.
4. Save map
When the map construction is completed, directly [ctrl+c] exit the map construction node, and the system will automatically save the map. The default saving path of the map is [~/.ros/rtabmap.db].
5. Navigation
Input the following command:
x
#Satrt Astra cameraros2 launch astra_camera astro_pro_plus.launch.xml#Start rviz displayros2 launch yahboomcar_nav display_rtabmap_nav_launch.py#Satrt Navigationros2 launch yahboomcar_nav navigation_rtabmap_launch.pyNavigation is divided into single-point navigation and multi-point navigation.
Click [2D Pose Estimate] on rviz, then compare the pose of the car and mark an initial pose for the car on the map.
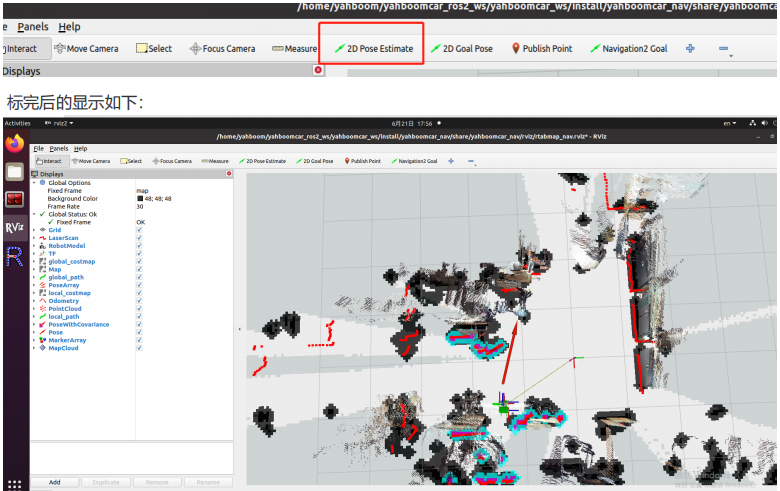
Comparing the overlap between the radar scanning point and the obstacle, you can set the initial pose of the car multiple times until the radar scanning point and the obstacle roughly coincide.
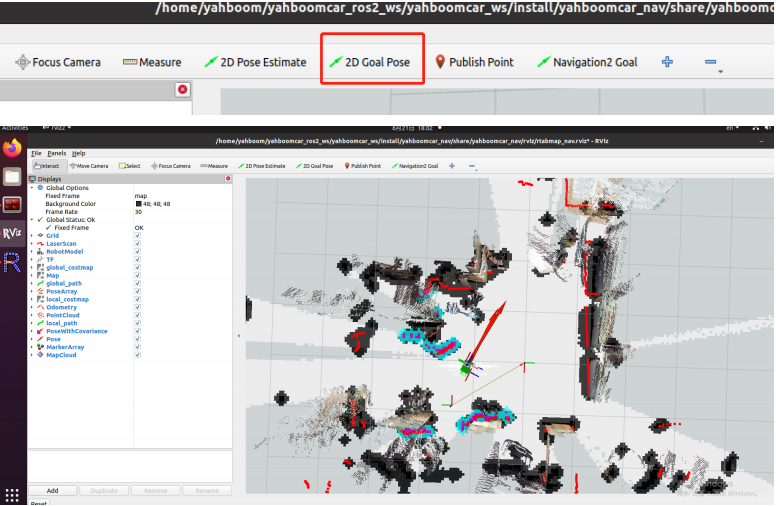
After the initial pose is set, you can click [2D Goal Pose] to set a navigation target point, and the car will start single-point navigation.
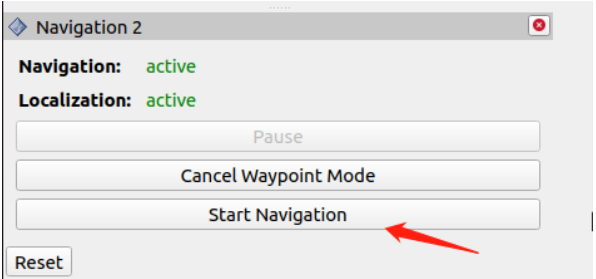
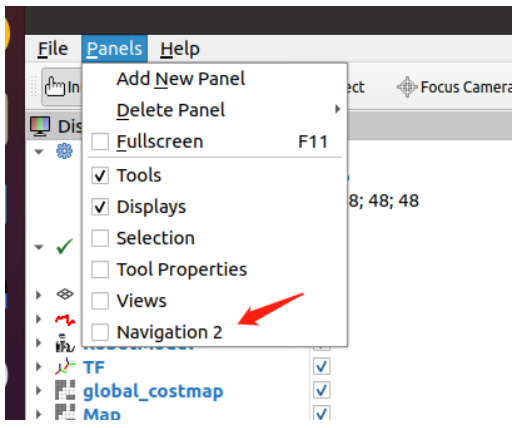
After the initial pose is set, you can click [Panels] in the upper left corner of rviz, select [Navigation 2], and the [Navigation 2] will be displayed.
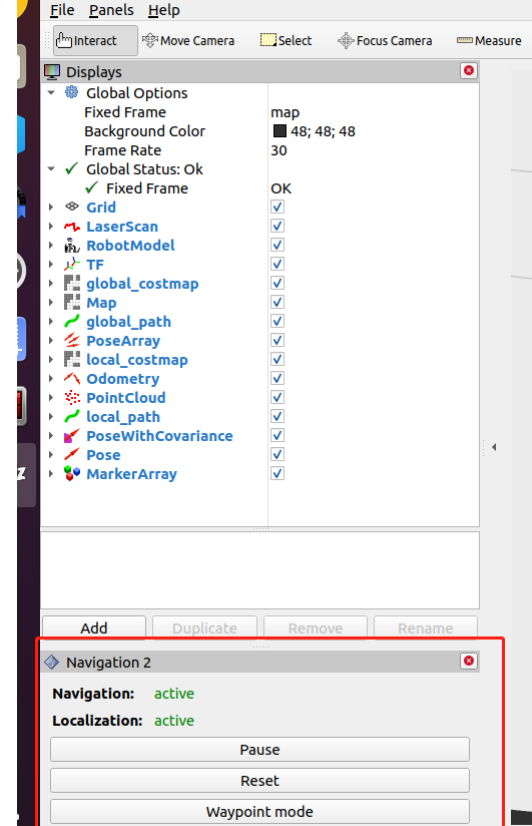
Click [Waypoint mode] in the picture above, and then click [Navigation2 Goal] on rviz to mark a target point on the map.
Click [Navigation2 Goal] again to mark the second target point on the map.
If you continue the cycle, you can mark multiple target points at once.

After marking multiple target points, click [Start Navigation] to start multi-point navigation.
After the multi-point navigation is completed, the car will stay at the position of the last target point.