Lio-SAM mapping
1、Radar configuration
Enter the command in the terminal and press the Enter key:
sudo nano ~/aloam/src/vanjee_lidar_v2.4/src/config/config.yaml
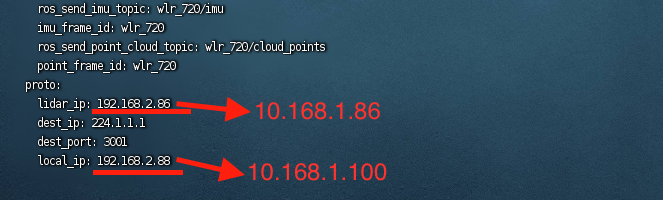
Taking my car as an example, the Jetson nano's IP is 10.168.1.100 and the radar IP is 10.168.1.68, so modify it as shown in the picture below.
2、Run mapping
There are two ways to run mapping, one is online mapping and the other is offline mapping. Online mapping uses lidar scanning and mapping in real time. Offline mapping uses a bag with radar data for mapping, which can be done without radar.
Before mapping, we need to calibrate the 16-line lidar and imu. Before calibration, you need to start the imu and radar, and perform imu and radar calibration through the bag that records imu data and radar data.
Enter the aloam workspace through the terminal, and enter the command in the terminal to start imu and radar data. The imu I use here is Vette's 10-axis imu. It should be noted that the transmission frequency of imu needs to be 200hz:
source devel/setup.bashroslaunch vanjee_to_velodyne vanjee_to_velodyne.launch
This launch starts the radar package, as well as the data conversion package and imu package.
Then open a new terminal, enter the workspace of lio_sam, and enter the command in the terminal:
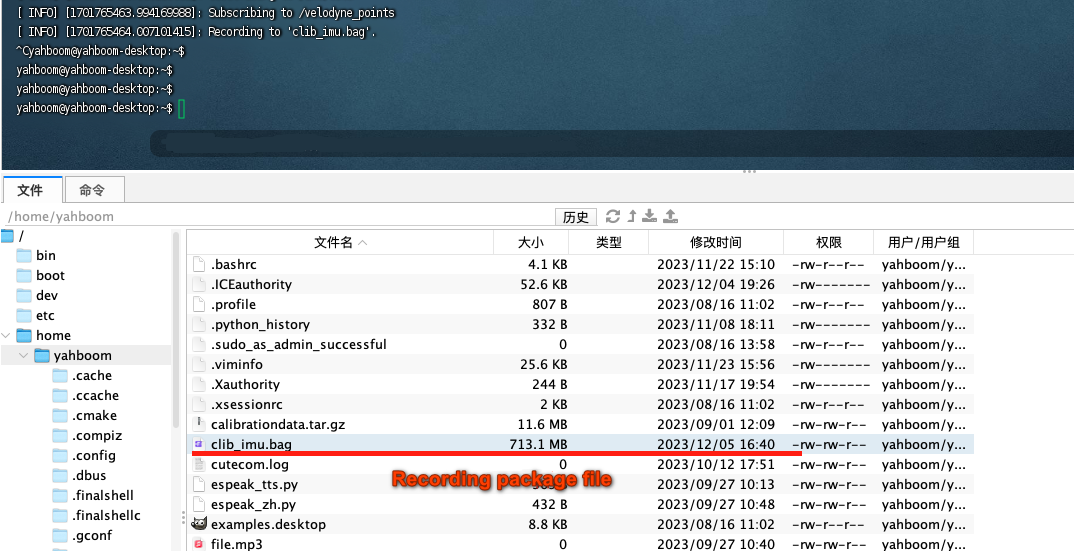
source devel/setup.bashrosbag record -O clib_imu.bag /imu/data /velodyne_points
At this time, rotate the car on the x-axis, y-axis, and z-axis. After recording the data for about 1 minute, press ctrl + c in the packet recording terminal to save. The picture below shows saving the calibration data package.
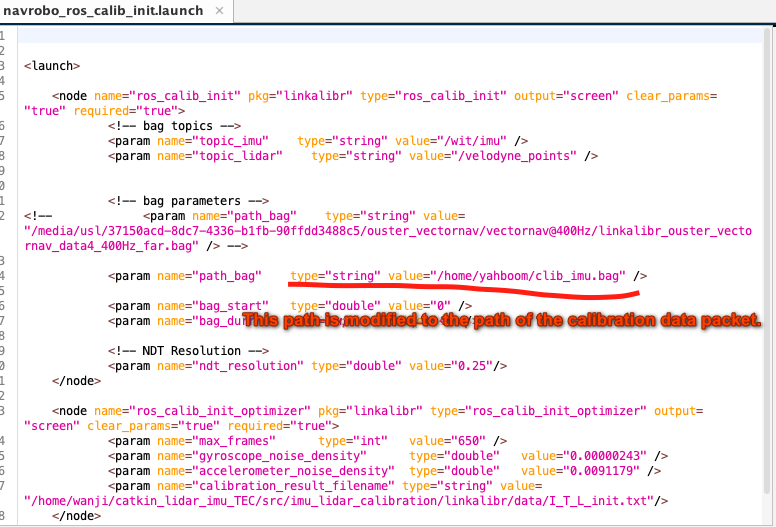
Open the file (note that src is preceded by your own workspace path)
src/imuCalibEx/src/imu_lidar_calibration/linkalibr/launch/ros_calib_init.launch
Modify the bag path you just saved as shown in the figure below
Close the vanjee_to_velodyne node and enter the command in the terminal
source devel/setup.bashroslaunch linkalibr ros_calib_init.launch
Wait for calibration to complete
The picture below shows the result of successful calibration.

You can see the saved calibration files in the working directory:
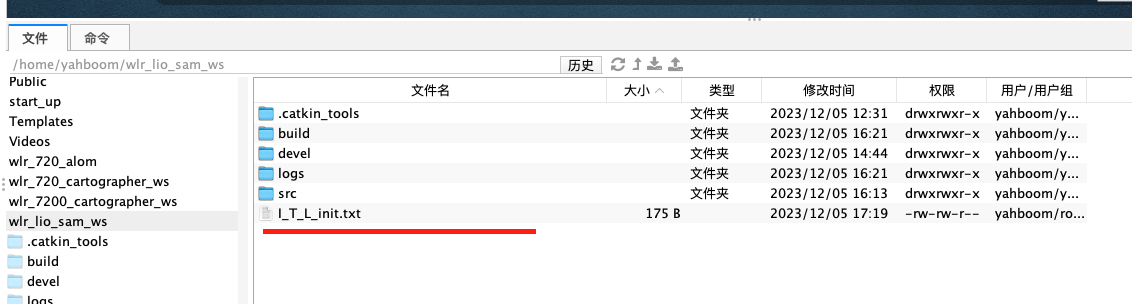
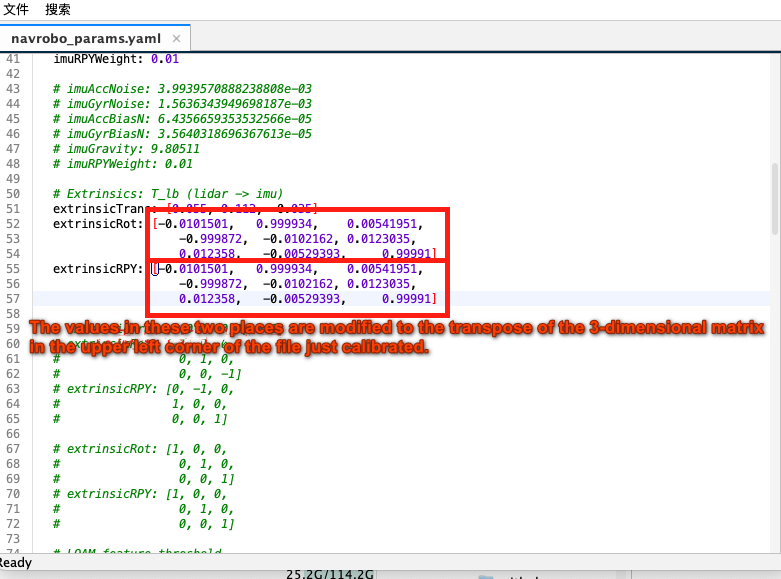
We open the file and take the transpose of the three-dimensional matrix in the upper left corner as the result of our calibration
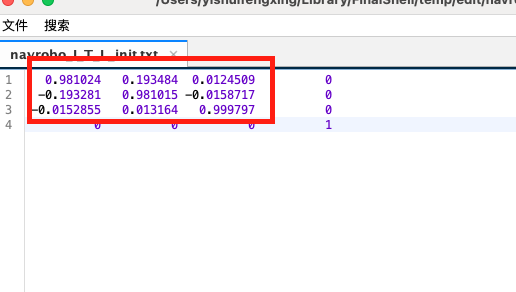
Modify the values of extrinsicRot and extrinsicRPY in the lio-sam configuration file by transposing the above result.
The configuration file path of Lio-sam is (note that src is preceded by the path of the workspace):
xxxxxxxxxxsrc/Lio_Sam/src/LIO-SAM/config/params.yaml
Online mapping
Enter Lio-Sam's workspace through the terminal and enter the command in the terminal:
xxxxxxxxxxsource devel/setup.bashroslaunch lio_sam run.launchOpen a new terminal, enter Lio-Sam's workspace, and enter the command in the terminal:
xxxxxxxxxxsource devel/setup.bashroslaunch vanjee_to_velodyne vanjee_to_velodyne.launchAs shown in the figure below, the operation status
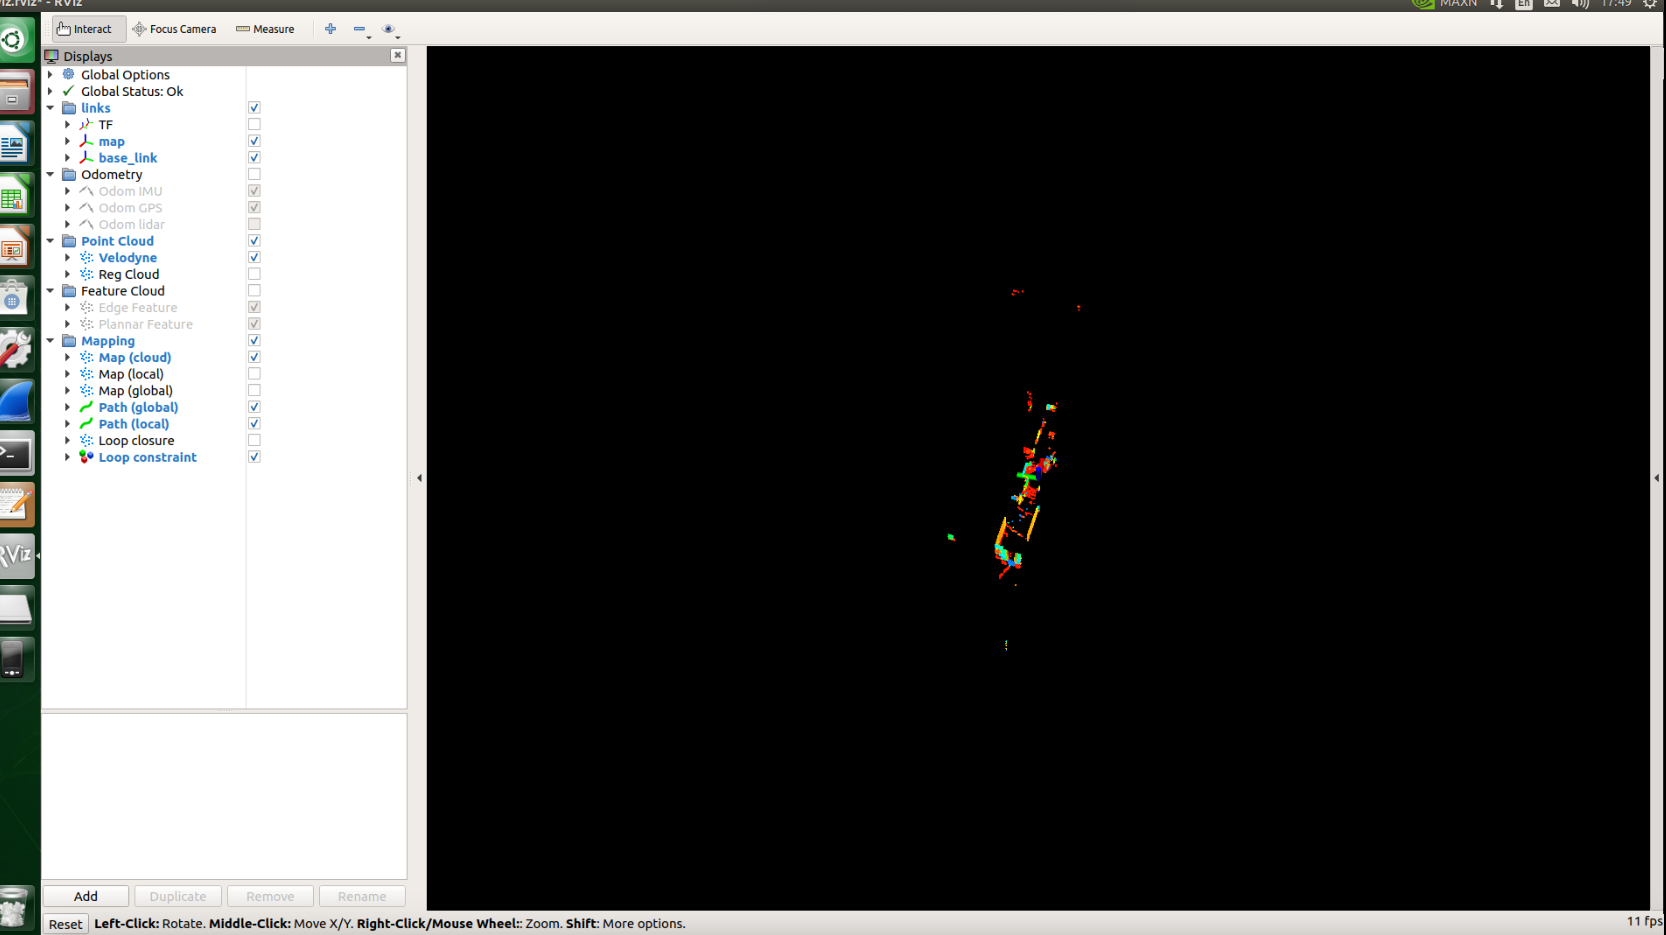
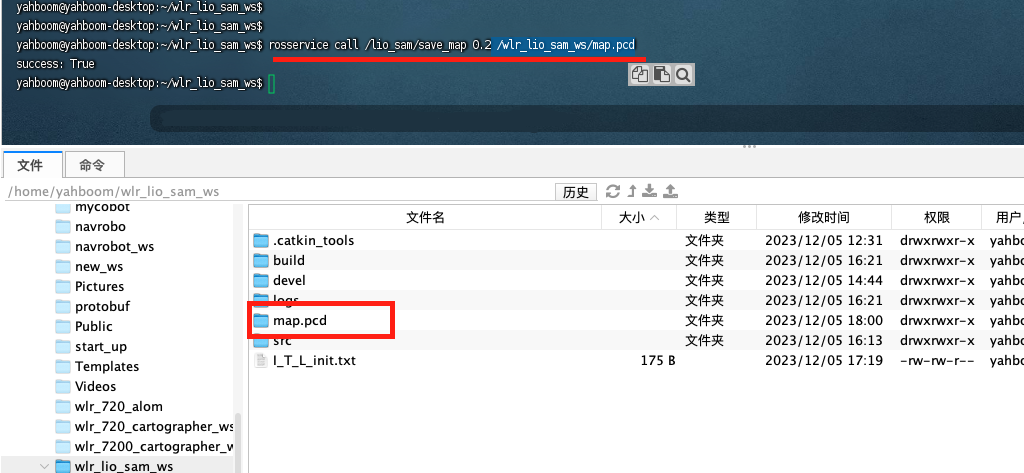
Then drive around to build the map. After the map is completed, reopen a terminal and enter the following command
xxxxxxxxxxrosservice call /lio_sam/sava_map 0.2 /wlr_lio_sam_ws/map.pcdThe picture below shows the saved map file
Offline mapping
The difference between offline mapping and online mapping is that offline mapping uses recorded bags for mapping. We have already mentioned the method of recording the bag when calibrating it above, so we won’t go into it here. Now by default we already have the collected data bag.
Open a new terminal, enter Lio-Sam's workspace, and enter the command in the terminal:
xxxxxxxxxxrosbag play test.bagNote: test.bag is a recorded bag with lidar and imu data.
Open a new terminal, enter Lio-Sam's workspace, and enter the command in the terminal
source devel/setup.bashroslaunch lio_sam run.launch
After waiting for the bag to run, you can save the map. For the method of saving the map, see the save map command of the online mapping tutorial.