MicroROS-VM:First Trial
MicroROS-VM:First Trial1、Burn MicroROS control board firmware1.1、Serial device identificationDevice connectionInstall serial device driverView device1.2、Write factory firmwareFactory firmwareFlash download tool1.3、Burn factory firmwareOpen the Flash download toolSoftware download modeDownload factory firmwareVerify factory firmware2、VMware installation and use2.1、VMware installationVMware Workstation PlayerVMware Workstation Pro2.2、VMware uses3、Configure MicroROS control board3.1、Parameter introduction2、Configuration parameters3. Start/connect the agentStart agentconnection broker4、testView ROS nodesKeyboard control car
This tutorial is just a simplified version, mainly paired with quick-start videos!
xFor detailed tutorial steps, please see the [Preparation before development] tutorial!Software locations involved in getting started quickly:Factory firmware: program source code summaryVirtual machine: virtual machine system
1、Burn MicroROS control board firmware
Note: For users who have just received the product, the MicroROS control board does not need to burn the factory firmware.
Please check directly below for the tutorial on configuring the MicroROS control board
xOur products will have firmware burned before leaving the factory. This video is mainly provided to users who need to burn firmware!
1.1、Serial device identification
Device connection
Use Type-C data cable to connect the computer and MicroROS control board.
Note: Burning firmware requires turning on the power switch of the MicroROS control board for power supply!
xWhen connecting to the MicroROS control board for the first time, the system may not be able to correctly identify the serial device. We need to install the driver of the CP210X series.
Install serial device driver
Open system device manager
If the device manager does not correctly identify the serial device, we need to install the CP210x series driver:
xxxxxxxxxxhttps://www.silabs.com/developers/usb-to-uart-bridge-vcp-drivers
View device
Check the corresponding serial device in the device manager port option.
1.2、Write factory firmware
Factory firmware
The firmware we demonstrate here:microROS_Robot_V0.0.4
xThe firmware may be upgraded later and the name may be slightly different, but the steps are the same.
Flash download tool
We need to prepare the Flash download tool in advance:
xxxxxxxxxxhttps://www.espressif.com.cn/zh-hans/support/download/other-tools
1.3、Burn factory firmware
Open the Flash download tool
Software download mode
Check the corresponding download tool mode option

The terminal can see the corresponding download information!
Download factory firmware

Verify factory firmware
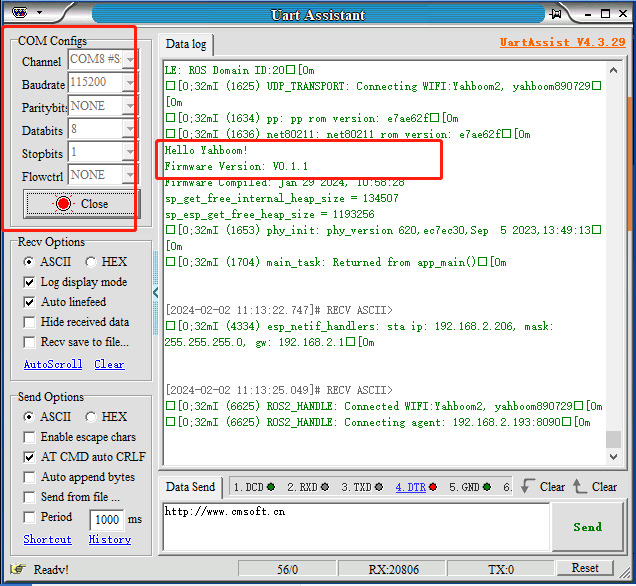
Check the information printed by the MicroROS control board through the UartAssist software: After connecting the serial port, press the Reset button of the development board!
The serial port will print firmware version information!
2、VMware installation and use
2.1、VMware installation
VMware Workstation Player
This version is free for non-commercial use.
xxxxxxxxxxhttps://www.vmware.com/cn/products/workstation-player.html
VMware Workstation Pro
Commercial use requires payment, and you can experience the 30-day trial version.
https://www.vmware.com/cn/products/workstation-pro/workstation-pro-evaluation.html
2.2、VMware uses
You need to download and decompress the virtual machine image provided in our information in advance
3、Configure MicroROS control board
3.1、Parameter introduction
Edit the config_robot.py file according to your own configuration
xif __name__ == '__main__':robot = MicroROS_Robot(port='/dev/ttyUSB0', debug=False)robot.set_wifi_config("Yahboom2", "yahboom890729")robot.set_udp_config([192, 168, 2, 238], 8090)robot.set_car_type(robot.CAR_TYPE_COMPUTER)# robot.set_car_type(robot.CAR_TYPE_RPI5)robot.set_ros_domain_id(20)# robot.set_ros_serial_baudrate(921600)robot.set_ros_namespace("")
set_wifi_config:Configure the network information connected to the MicroROS control board
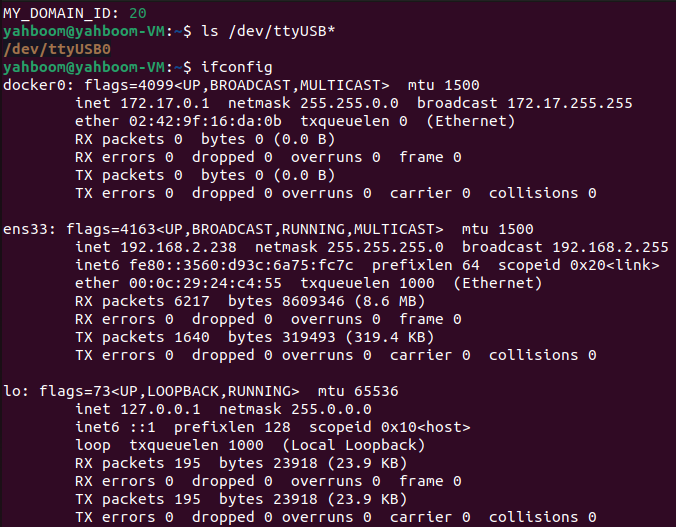
set_udp_config:Virtual machine IP address
set_car_type:Set the car type (currently there are virtual machine version and Raspberry Pi version)
set_ros_domain_id:Set the environment variable of ROS2 communication domain ID
set_ros_serial_baudrate:Set the baud rate for ROS serial communication
set_ros_namespace:Set the name of the multi-machine communication car
2、Configuration parameters
Shortly press the reset button of the MicroROS control board (it is in the configuration state within 5 seconds of reset), and enter the following command to configure the robot. If the data returned by the terminal is consistent with what you set, it means that the configuration parameters are successful!
xxxxxxxxxxsudo python3 config_robot.py
After the configuration is successful, you can unplug the data cable connecting the virtual machine and the MicroROS control board!

3. Start/connect the agent
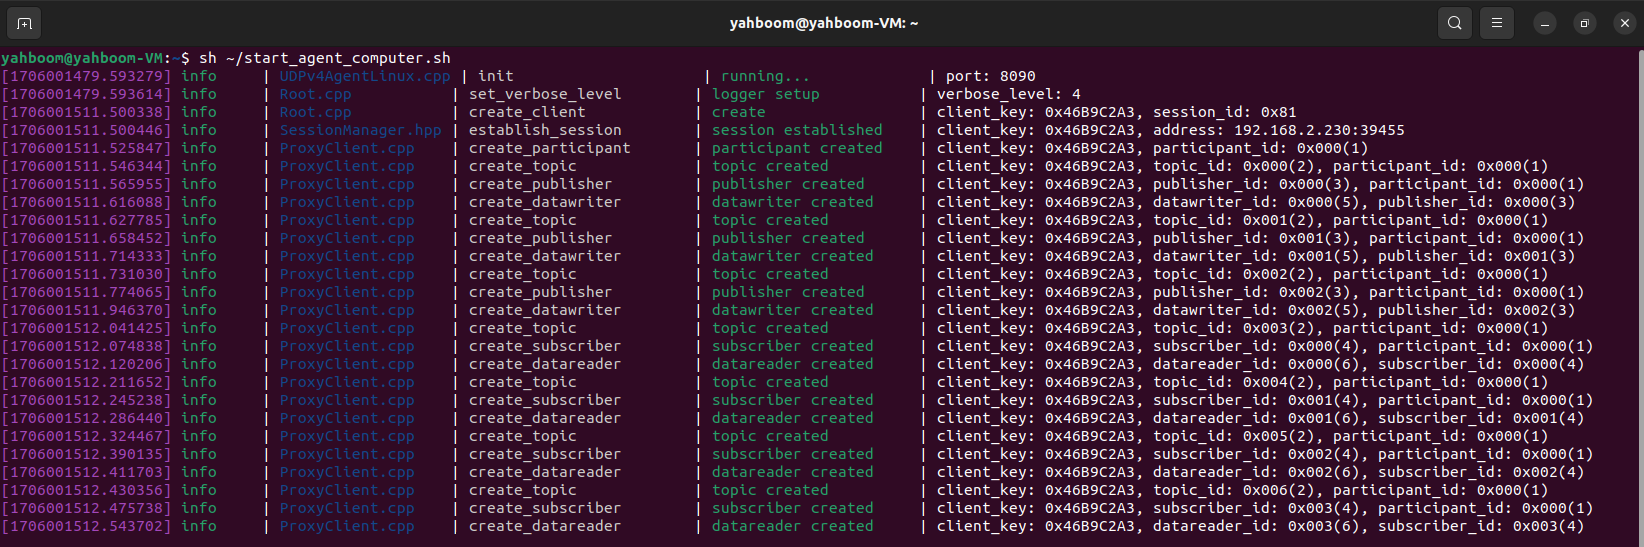
Start agent
Using the virtual machine provided in our materials, run the following command:
xxxxxxxxxxsh ~/start_agent_computer.sh

connection broker
Turn on the power switch and the car will automatically connect to the agent.
4、test
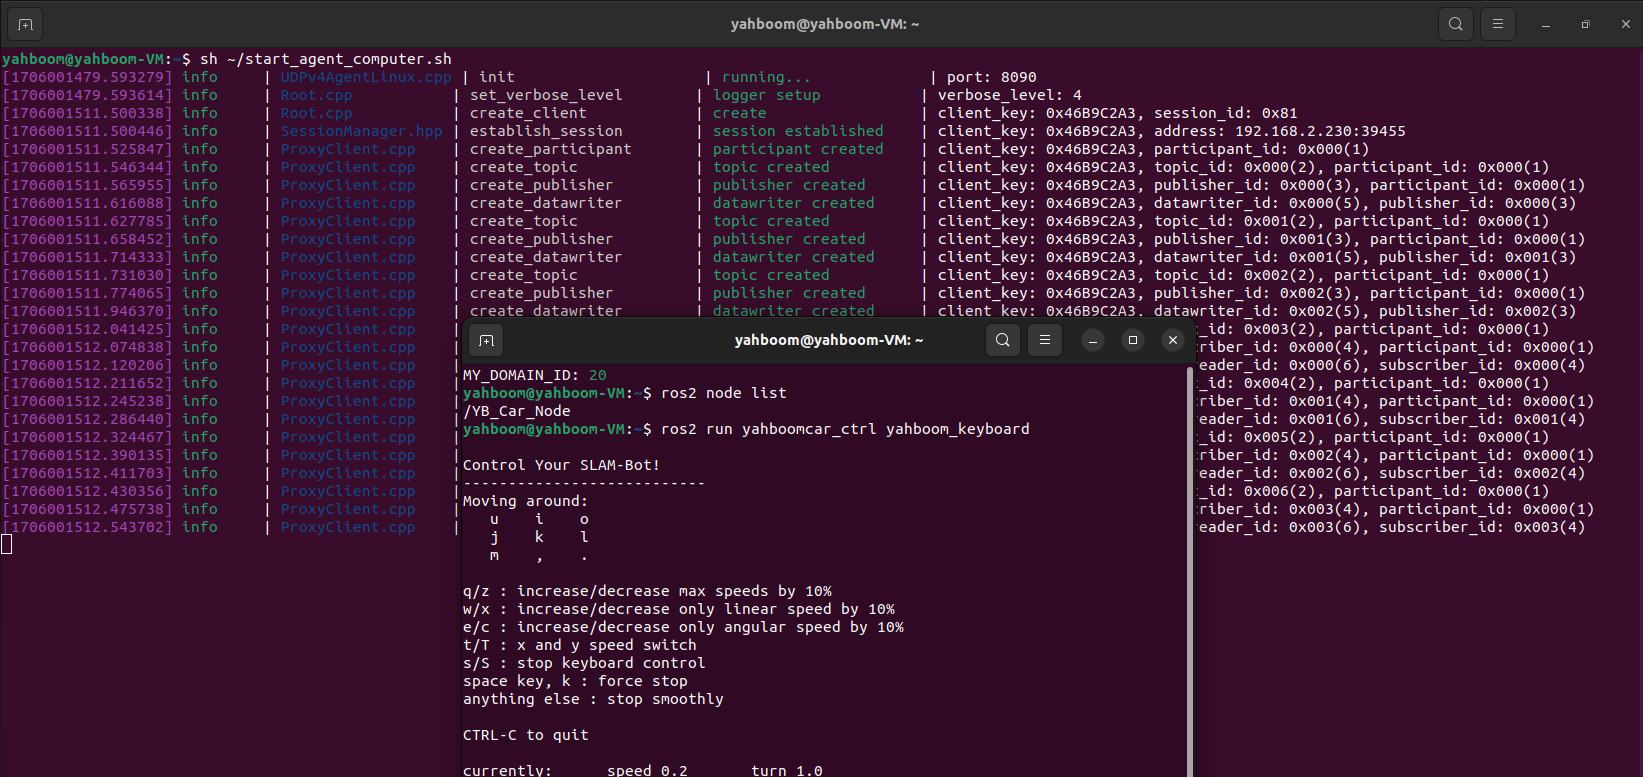
View ROS nodes
Reopen a terminal and enter the following command:
xxxxxxxxxxros2 node list
Keyboard control car
Enter the following command in the terminal and keep the mouse on the terminal: Control the car according to the terminal key prompts!
xxxxxxxxxxros2 run yahboomcar_ctrl yahboom_keyboard