stm32 configure camera
stm32 configure camera1. Experiment preparation2. Wiring diagram3. Experimental steps and experimental resultsIntroduction to the main program source code of wifi configuration
1. Experiment preparation
- STM32F103 series microcontroller
- wifi camera
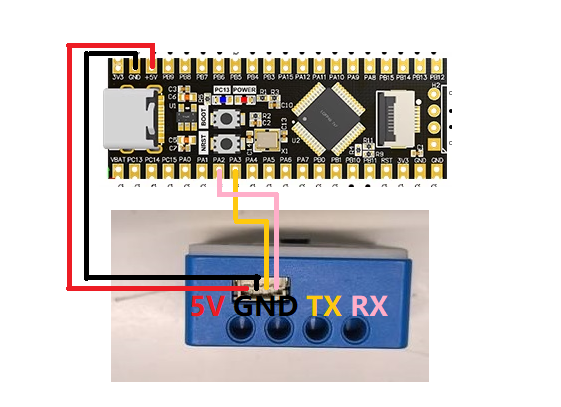
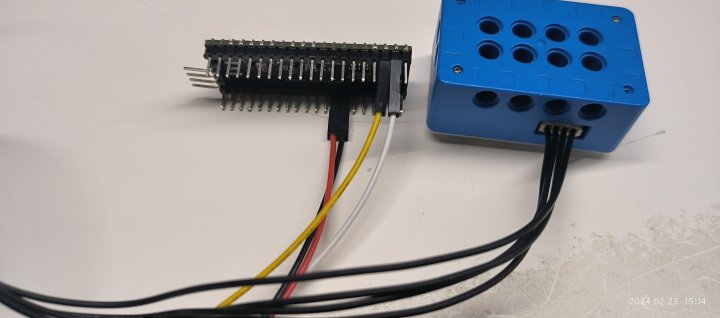
2. Wiring diagram
| STM32F103 | wifi camera |
|---|---|
| PA2 | RX |
| PA3 | TX |
| GND | GND |
| 5V | 5V |
stm32 can also be connected to the computer, and you can use the ttl module. The stm32 used in this tutorial directly encapsulates the ttl module, and you can connect it to the computer through the USB interface Connection between STM32 and ttl module
| STM32F103 | ttl module |
|---|---|
| PA9 | RX |
| PA10 | TX |
| GND | GND |
| 5V | 5V |
3. Experimental steps and experimental results
- Check whether the program is running normally
- Download the program of this project to the stm32 board
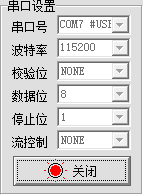
- Open the serial port assistant on the computer, open the computer and detect the stm32 serial port, as shown below
- After pressing the reset button of stm32, the serial port assistant will print out the corresponding information.
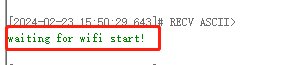
- Wait for about 30 seconds and the corresponding wifi information will be printed.
If the AP+STA mode is turned on, then the IP addresses of the AP+STA will have the correct IP address (this source code is in this mode)
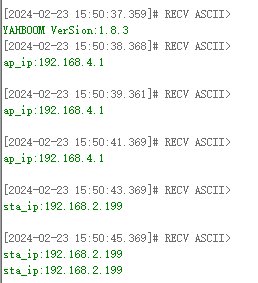
If only one mode is enabled, then sta_ip:null or ap_ip:null When sta_ip:null occurs, you need to check whether the connected wifi name and password are correct. If correct, whether only the AP mode is turned on and the STA mode is not turned on.
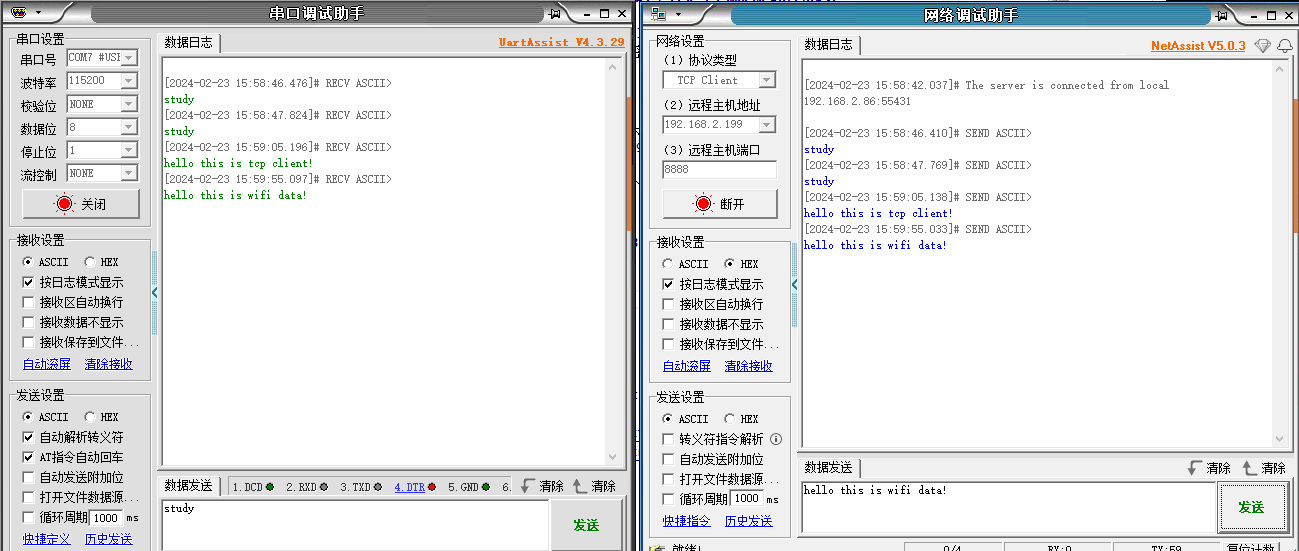
- Transparent transmission of data based on IP connection
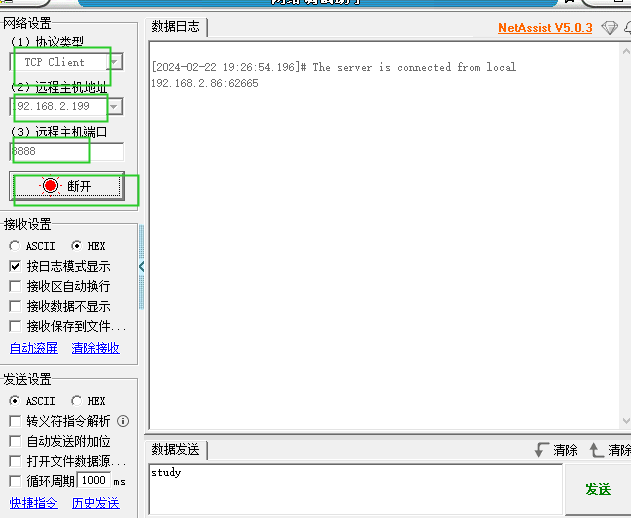
First open the NetAssist.exe software on your computer and make sure the computer and camera are on the same network segment.
Then connect according to the obtained IP address. For example, the obtained sta_ip is: "192.168.2.199"/ap_ip is: "192.168.4.1"
Then there are 2 ways
- Connect the computer to the camera's spontaneous wifi, and then connect through the ip 192.168.4.1. The port number is 8888 and cannot be changed.
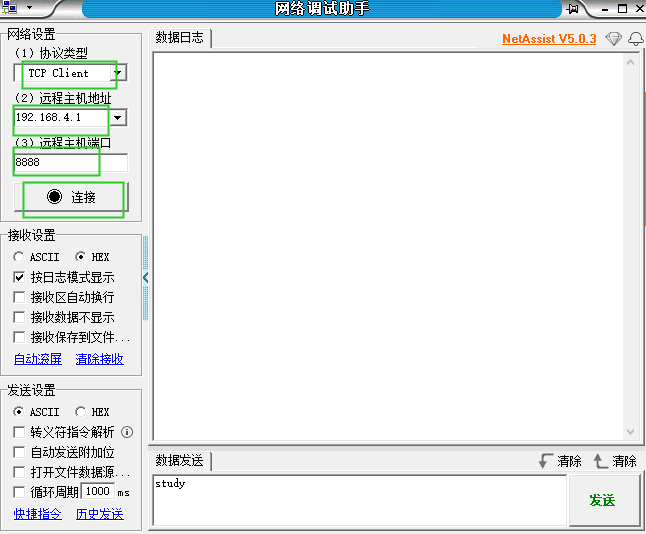
- The computer is connected directly through the IP address 192.168.2.199. The port number is 8888 and cannot be changed. The following figure is a diagram of a successful connection.
- Connect the computer to the camera's spontaneous wifi, and then connect through the ip 192.168.4.1. The port number is 8888 and cannot be changed.
Then by sending information, the terminal of the serial port assistant will also print relevant information
- Watch the camera picture
Open the browser on your computer or mobile phone
Then watch the video through the obtained IP address. For example, the obtained sta_ip is: "192.168.2.199"/ap_ip is: "192.168.4.1"
Then you can watch the live camera footage in 2 ways
- Connect the computer to the camera's spontaneous wifi, and then enter http://192.168.4.1:81/stream through the browser to access the camera screen
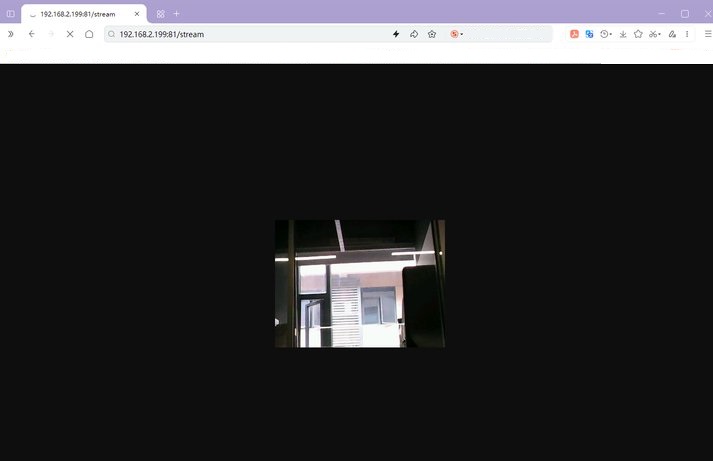
- Directly enter http://192.168.2.199:81/stream on your computer to access the camera screen.
Introduction to the main program source code of wifi configuration
xxxxxxxxxxThe above constants are defined in the esp32_wifi.c source code of this project
- STA_WIFI_SSID: The name of the wifi to be connected, change it according to your own situation
- STA_WIFI_PD: The wifi password to be connected, change it according to your own situation
- AP_WIFI_SSID: The wifi name of the wifi camera's spontaneous hotspot, change it according to your own situation
- AP_WIFI_PD: The wifi password of the wifi camera's spontaneous hotspot, change it according to your own situation
If you want to change the wifi mode, this tutorial defaults to dual mode coexistence, that is, STA+AP mode Select the mode under the file esp32_wifi.h
xxxxxxxxxx#define MODE_AP 0#define MODE_STA 0#define MODE_AP_STA 1
0: represents canceling this mode 1: represents selecting this mode You can only choose one mode, not at the same time, otherwise the IP address will not be queried