APP control
APP control1、Download and install APP2、APP connect Transbot2.1、Connect device2.2、Search and connect device2.4、IP connect device3、APP function3.1、Remote Control3.2、Colorful lights Trasnbot SE APP control does not include this function3.3、Image beautify3.4、Laser radar Trasnbot SE APP control does not include this function3.5、AR WORLD3.6、SMART TRACK3.7、Patrol3.8、Autopilot3.9、USE GUIDE
1、Download and install APP
Android users search"YahboomRobot" in Play Store or enter tutorial link on the homepage to download APP.
iOS users search"YahboomRobot" in App Store to download APP.
2、APP connect Transbot
Yahboom Transbot image system comes with WiFi (Name: Transbot, password: 12345678), users can connect their phone to Transbot WiFi to form a local area network to realize APP remote control of the robot car.
2.1、Connect device
Open YahboomRobot APP, choose [ROS Robot]--[TRANSBOT].
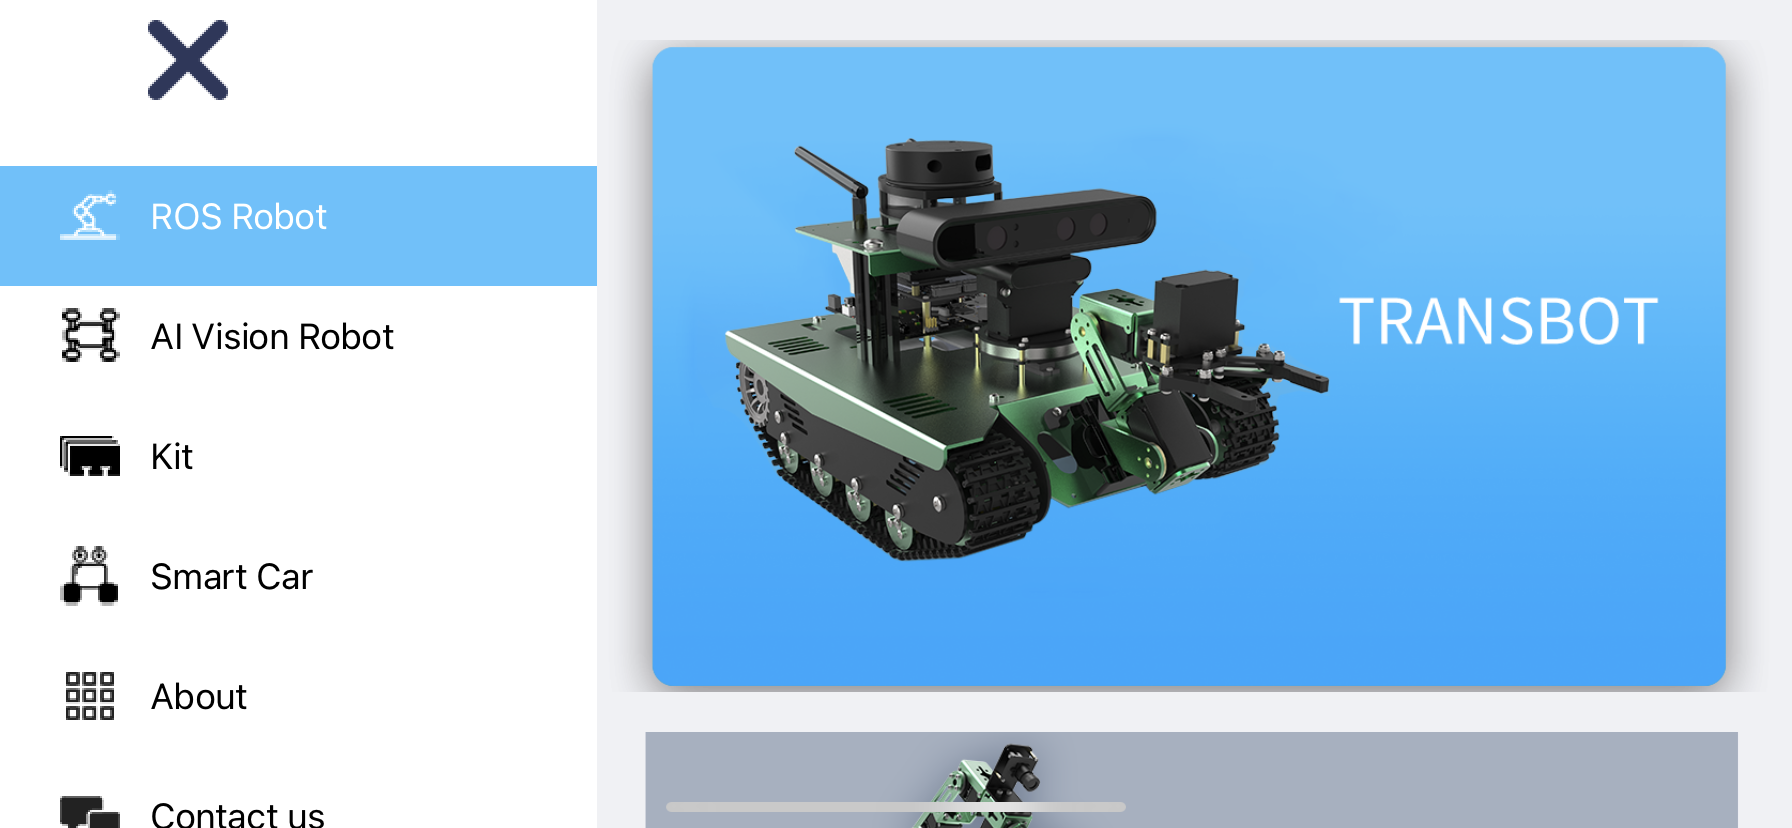
After selecting the product, the following interface will appear. This product does not support WiFi distribution mode, please click [Skip].

2.2、Search and connect device
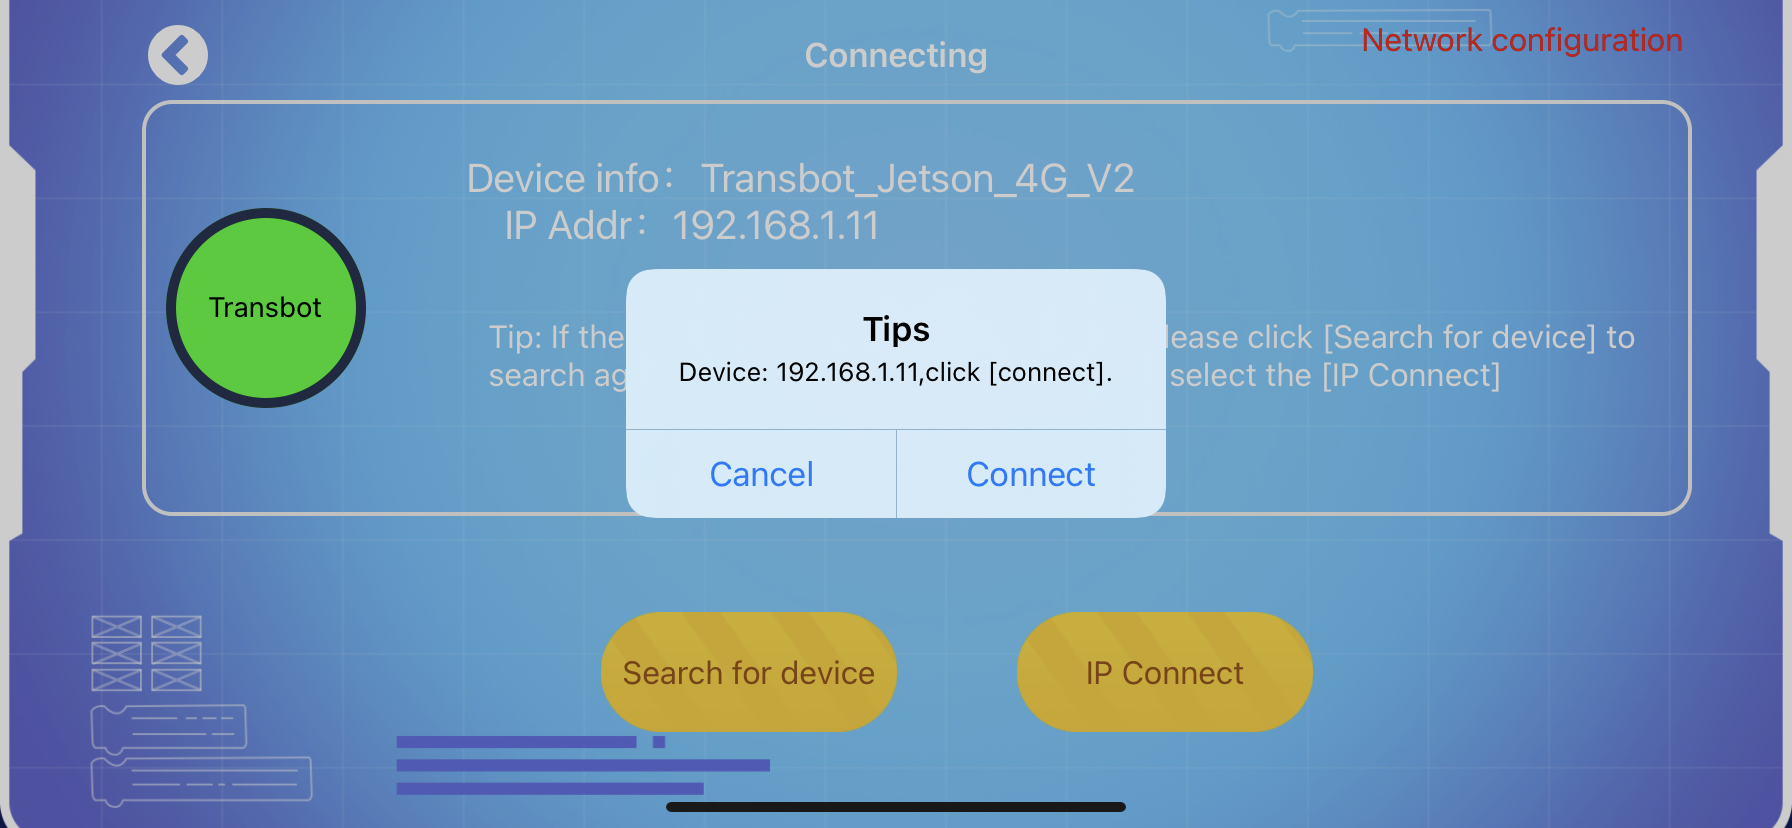
The phone will automatically search for the device, and a prompt info will appear after a few seconds, click [Connect]. If the device is not found for a long time, please click [Search for device] to search again.
Note: Before searching for the device, please make sure that the network of Transbot and the mobile phone are in the same local area network.

The phone will automatically search for the device, and a prompt info will appear after a few seconds, click [Connect].
2.4、IP connect device
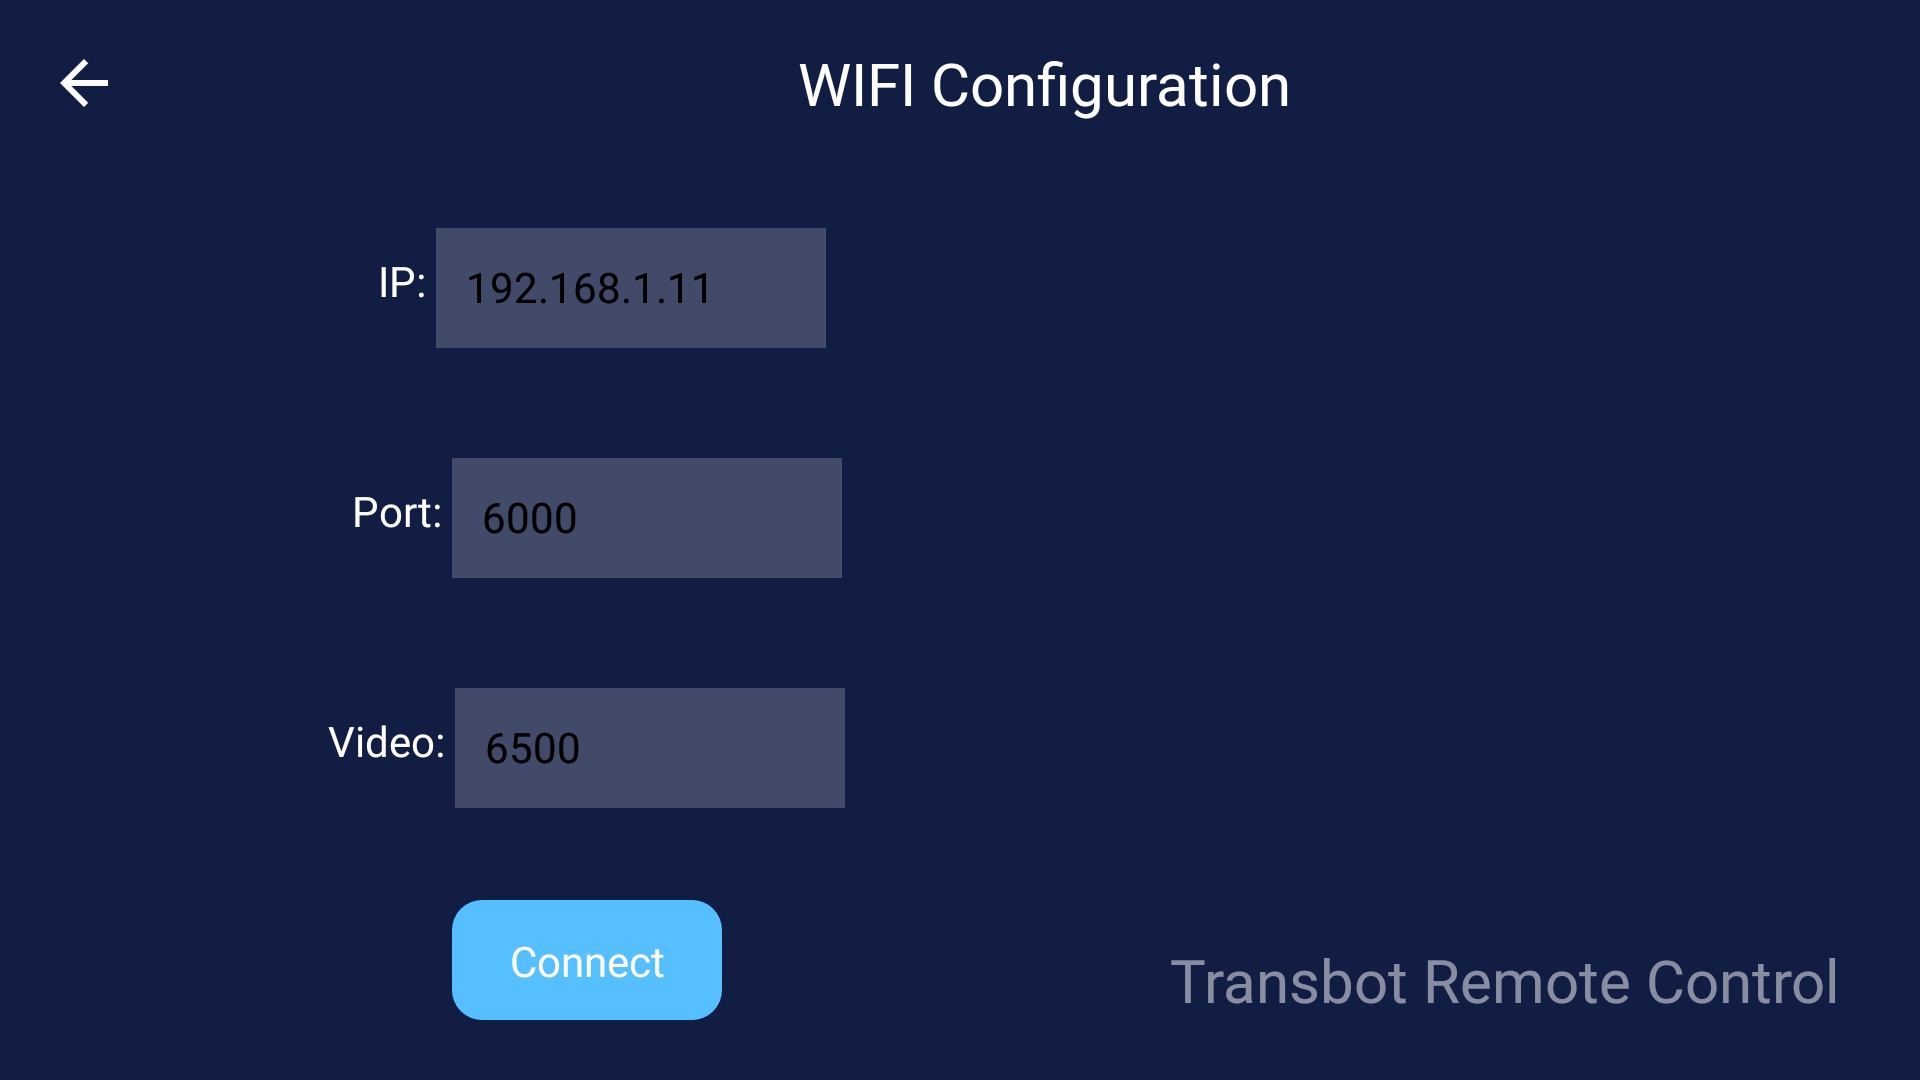
We can also click the [IP Connect]to connect to the network manually. As shown below, input DOFBOT IP address on APP, "Port":6000 , "video": 6500.
3、APP function
3.1、Remote Control

Click the [Remote Control] icon, the following interface will appear on APP.
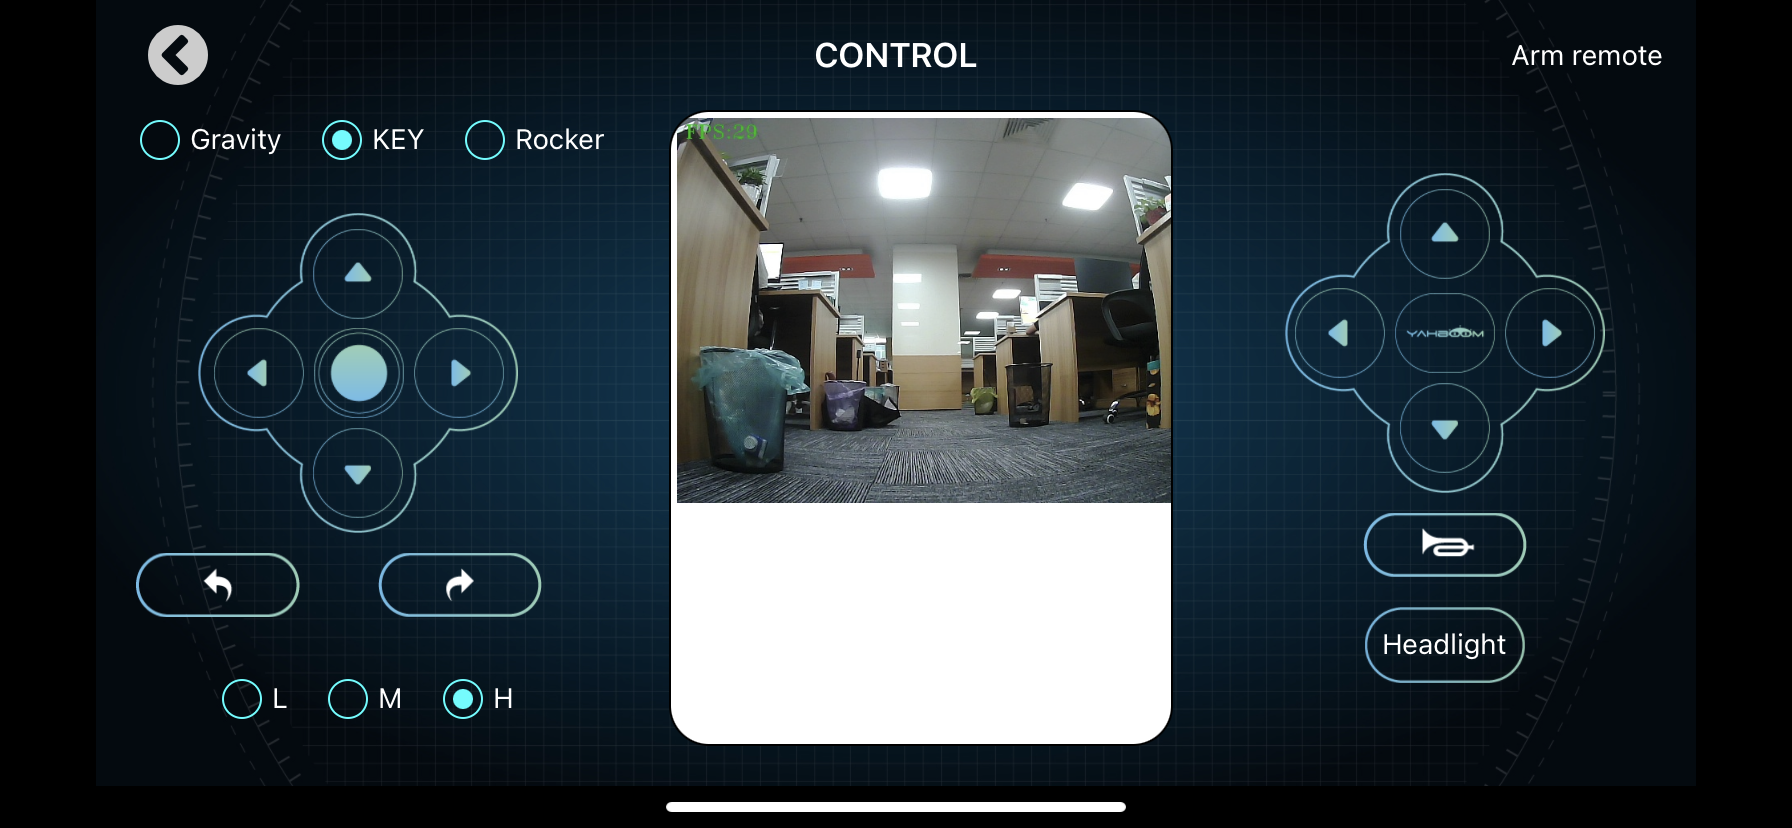
The remote control interface is divided into four parts.
Part 1. Left area. There are three ways to control Transbot: gravity, button, joystick, which can control robot car forward, backward, turn left and right, rotate left and right. The buttons at the bottom can also adjust the speed of the robot car.
Part 2. Middle area. View video captured by the camera, and the images support zooming in and out. The upper left corner of the screen shows the frame rate, and the suffix -X represents the function number currently running.
Part 3. Right area. Control the camera servo platform, buzzer and searchlight.
When the servo platform button is pressed, the servo will automatically rotate in one direction, when we release the button, it will stop. Press the middle button once to restore the servo platform to the middle position.
When the buzzer button is pressed, the buzzer will sound, when we release this button, the buzzer will turn off.
The searchlight button is a switch, click once to turn on the light, click again to turn off the light.
Part 4. The robotic arm control button in the upper right corner.
After clicking, we will enter the interface for controlling the robotic arm. As shown below. We can view the current video screen in full screen. The joystick on the left of the video screen can control the car, and the button on the right can control the robotic arm. There is a full-screen display switch in the upper right corner.
3.2、Colorful lights Trasnbot SE APP control does not include this function
3.3、Image beautify
Click the [Image beautify] icon, the following interface will appear on APP.
We can choose two special effects [Sketch-Edge Detection] and [Motion-Contour Detection]. The following figure shows the effect of the two special effects.
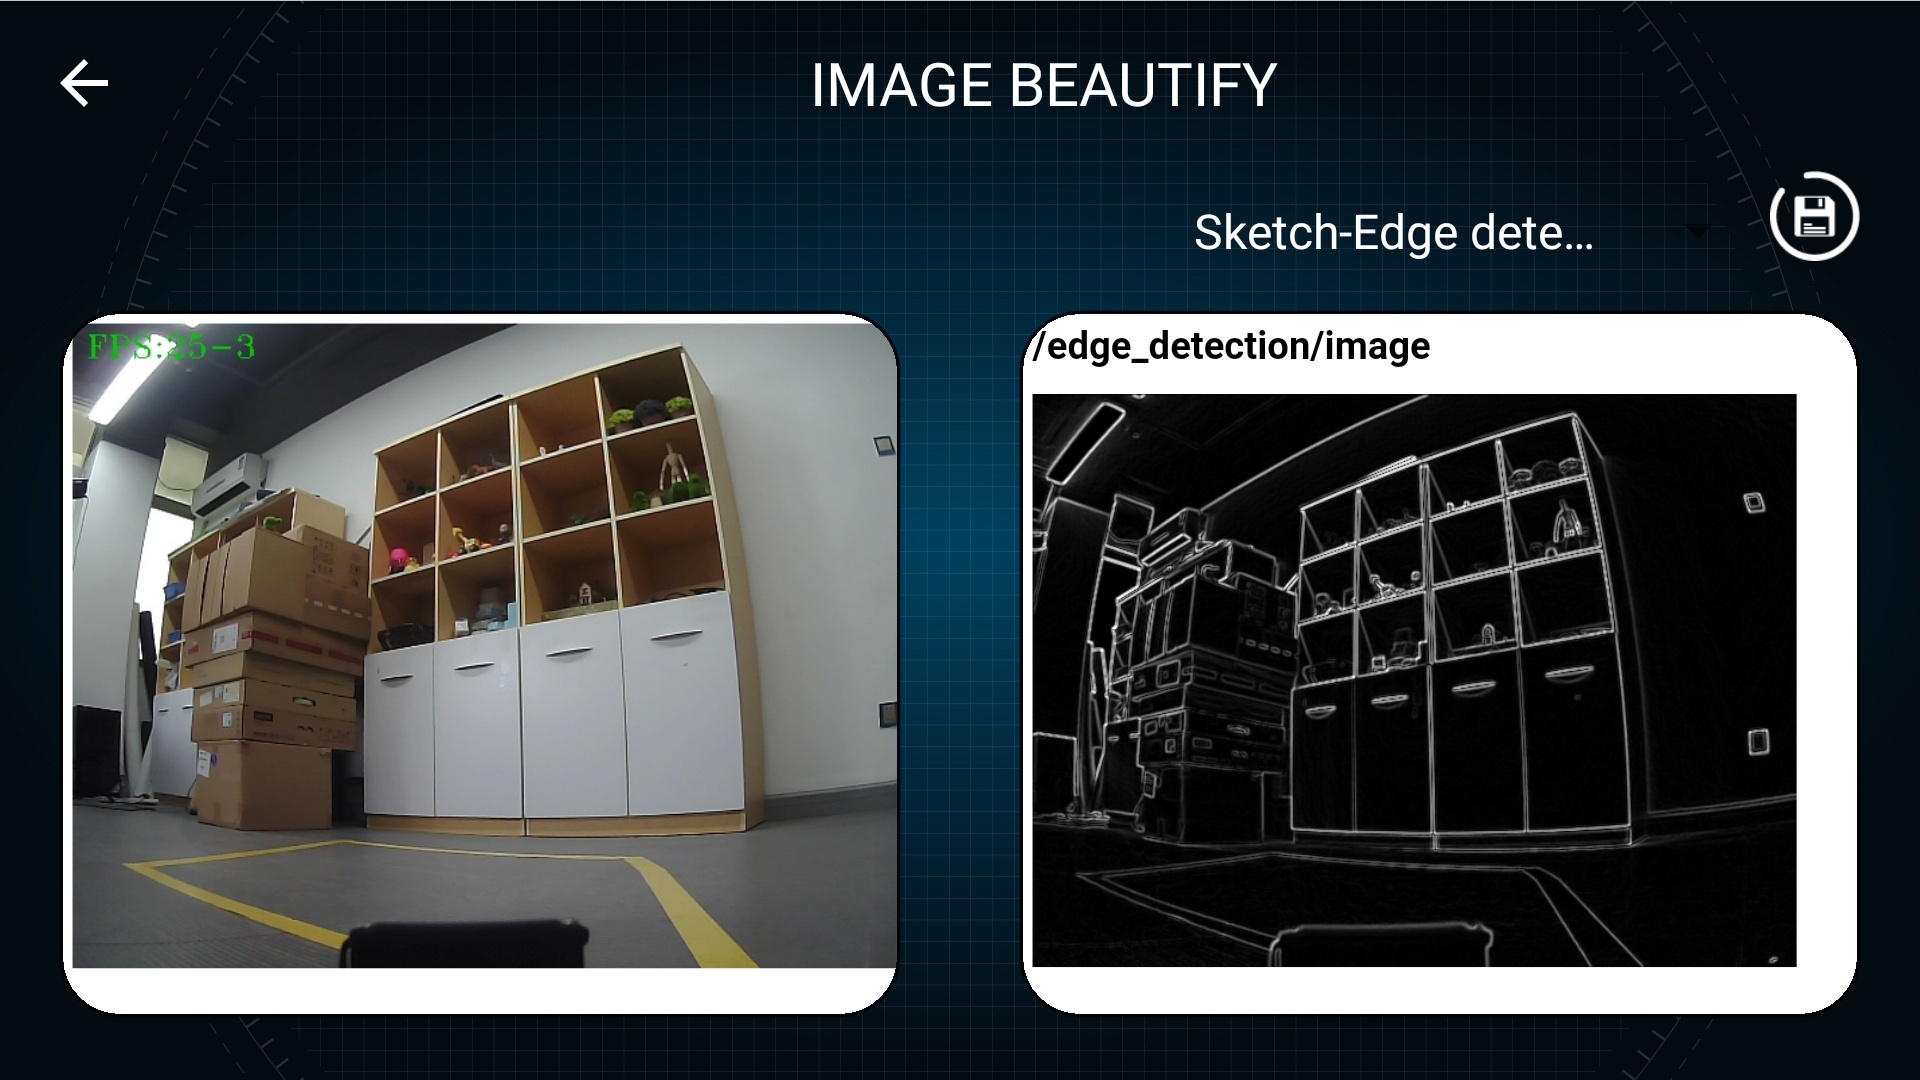
We can choose two special effects [Sketch-Edge Detection] and [Motion-Contour Detection]. The following figure shows the effect of the two special effects.
Click the picture save button in the upper right corner to save the current beautified picture to the phone album, the album name is [YahboomAlbum].
(This function requires the APP to open the storage data permission.)

3.4、Laser radar Trasnbot SE APP control does not include this function
3.5、AR WORLD
Click the [AR WORLD] icon, the following interface will appear on APP.
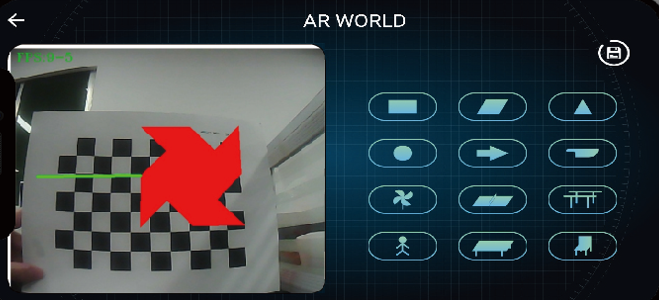
The AR game requires checkerboard paper. Click the button on the right, select one of the shapes to be displayed, and put the checkerboard paper in front of the camera. For example, as shown above, the small windmill graphic is selected. Click the button again to close this function.
3.6、SMART TRACK
Click the [SMART TRACK] icon, the following interface will appear on APP.
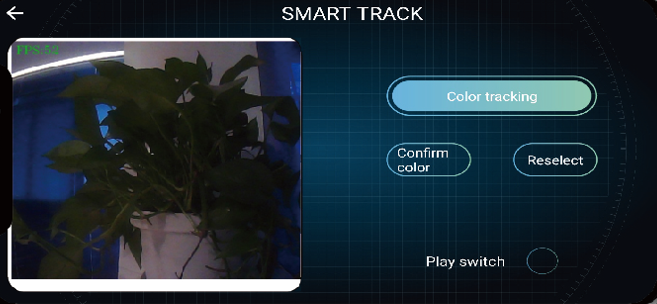
Principle of smart track: First identify the HSV value of a color, and then process it with an algorithm to detect whether there is an object similar to the color in the screen. If there is, mark the object with a circle, and the camera tracks the object.
Before starting this function, we click the [Color Tracking] button. If it is the first time to use, a small box will automatically appear on the video interface. We need to fill the entire small box with the color to be recognized, and then press [Confirm color] button.
After confirming the color, the system will save it to the Transbot/transbot/TransbotTrackerHSV.text file in the system user directory. Next time you turn on the [Color Tracking] function, you do not need to recognize it again, and will automatically read the value of the file.
If you need identify the color, click [Re-select] button a small box will displayed. After filling in the color to be identified, click [Confirm Color].
[Play switch] Turn on the smart track function.
3.7、Patrol
Click the [Patrol] icon, the following interface will appear on APP.
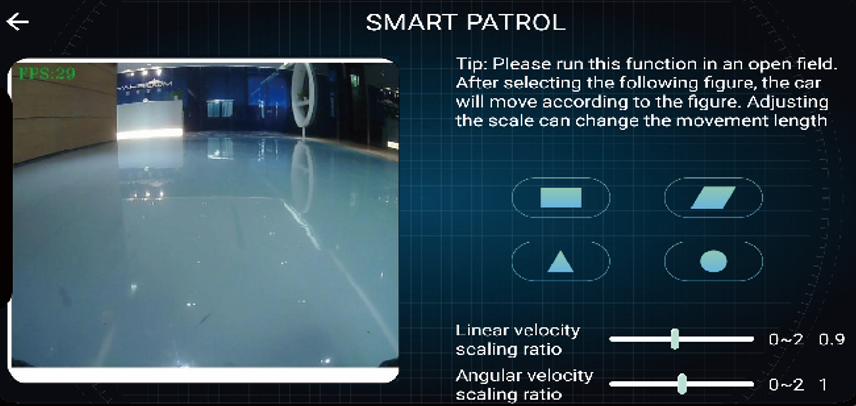
There are four paths for the patrol function. Click the button, the car will automatically move a similar path according to the graphic on the button, click again to close the function.
The [Linear Speed Scaling Ratio] and [Angular Speed Scaling Ratio] below can adjust the movement of the trolley more accurately according to different venues.
3.8、Autopilot
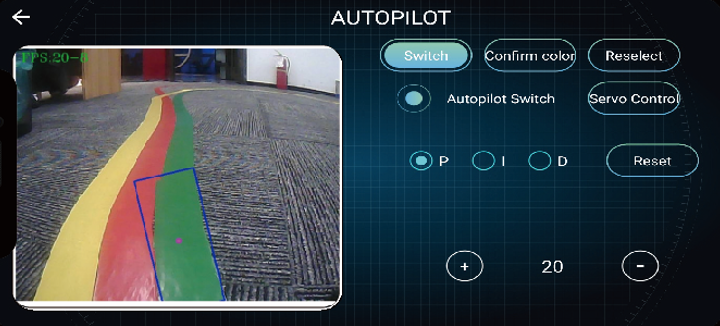
Click the [Autopilot] icon, the following interface will appear on APP.
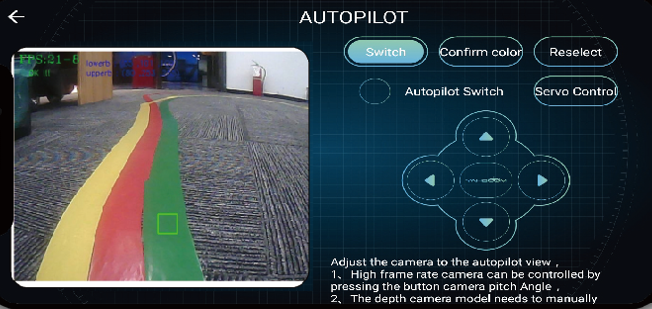
The Autopilot function interface is divided into two parts, the left side displays the camera screen, and the right side is responsible for the control functions.
[Display Switch]: Switch the original image and the binary image screen, the binary image screen will display the recognized color as white, and display other colors as black.
[Confirm color]: Save the HSV value of the color to be recognized in the small box to the Transbot/transbot/TransbotFollowHSV.text file in the system user directory. Next time you enter [Autopilot], you do not need to recognize it again, and it will automatically read the value on file.
[Re-select]: Re-identify the color and display a small box. After filling in the color to be identified, click [Confirm Color].
[Autopilot switch]: Transbot will process the algorithm according to the color recognized by the camera screen to realize the Autopilot function.
[Servo /car control]: Click button to adjust servo pan/tilt or the motor movement.
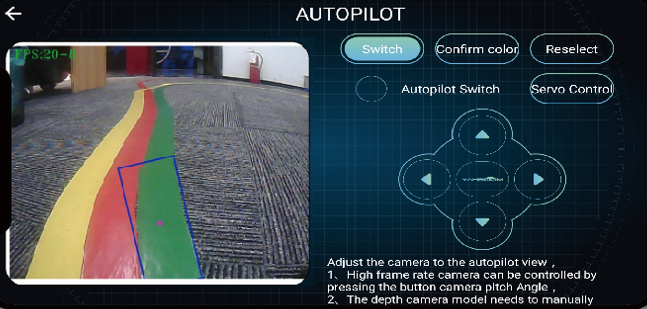
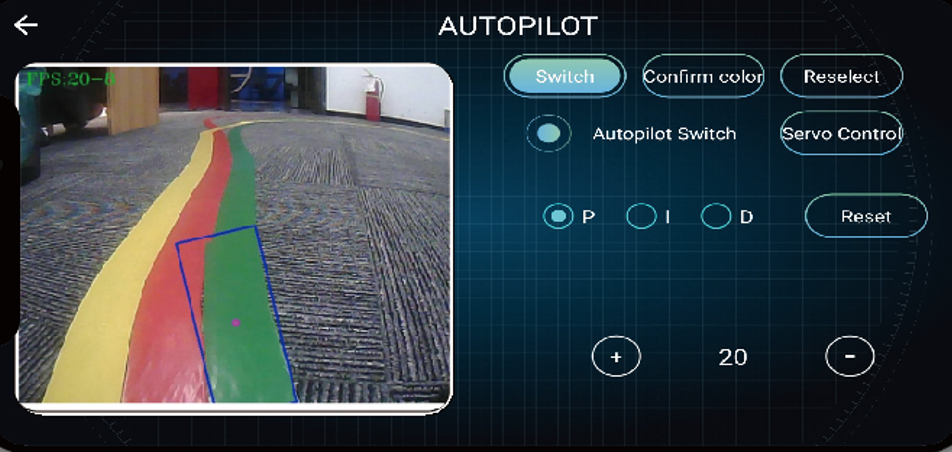
When the [Automatic driving switch] is turned on, the arrow keys that control the car will be replaced with the PID parameter adjuster. Only one parameter can be adjusted at a time. Touch the circle on the left of the corresponding PID text to select the modified parameter.
For example, if P is selected, it will display the current P value, and then click the [+] sign on the left to increase the value, and click the [-] sign on the right to decrease the value.
If the debugged PID parameters are not effective, you can click the [Reset] button on the right, and select [OK] in the pop-up dialog box to restore the PID parameters to the default configuration.
3.9、USE GUIDE
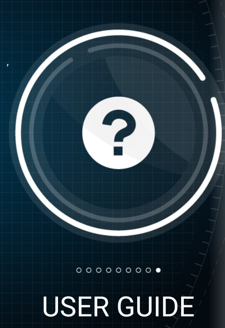
Click the [User Guide] icon on the main interface, and the following interface will appear. Please read the color calibration instructions carefully and click [Next].
In this interface, we can adjust the HSV value of the color recognition of the automatic driving and smart tracking functions. On the upper right side, you can choose [Autopilot color calibration] or [Smart track color calibration], and only one of the two functions can be selected at the same time.
[Display switch] : Switch the original image and the binary image screen, the binary image screen will display the recognized color as white, and display other colors as black.
[Color Calibration] : Save the color calibration data to the TransbotFollowHSV.text or TransbotTrackerHSV.text file for the [Autopilot] or [Smart track] function.
Color calibration instructions: Please select Autopilot color calibration or smart track color calibration, and then point the Transbot camera at the color to be recognized, and then click the [Display Switch] switch to fine-tune through the HSV slider. The effect is that the recognized color area is white. Others are black, indicating successful debugging, click [Color Calibration] to save the data, and finally click [Return].