Serial Print
Serial PrintDevice connectionHardware connectionSoftware connectionSerial port printingCode analysisExperimental results
Use the serial port to print the message Hello, Yahboom!.
Device connection
Hardware connection
Use the Type-B data cable to connect the Arduino Uno and the computer.
Software connection
Open the "Arduino IDE" software and select the model and serial port number corresponding to the development board.
Serial port printing
Use the serial port to print some variables to monitor program variables and debug the program in real time!
Code analysis
Here we only briefly introduce the code content. For detailed code, please refer to the corresponding code file, which is provided in the download area!
Initialization code
Our code uniformly uses the serial port baud rate of 115200, which is also consistent with the WiFi camera communication baud rate.
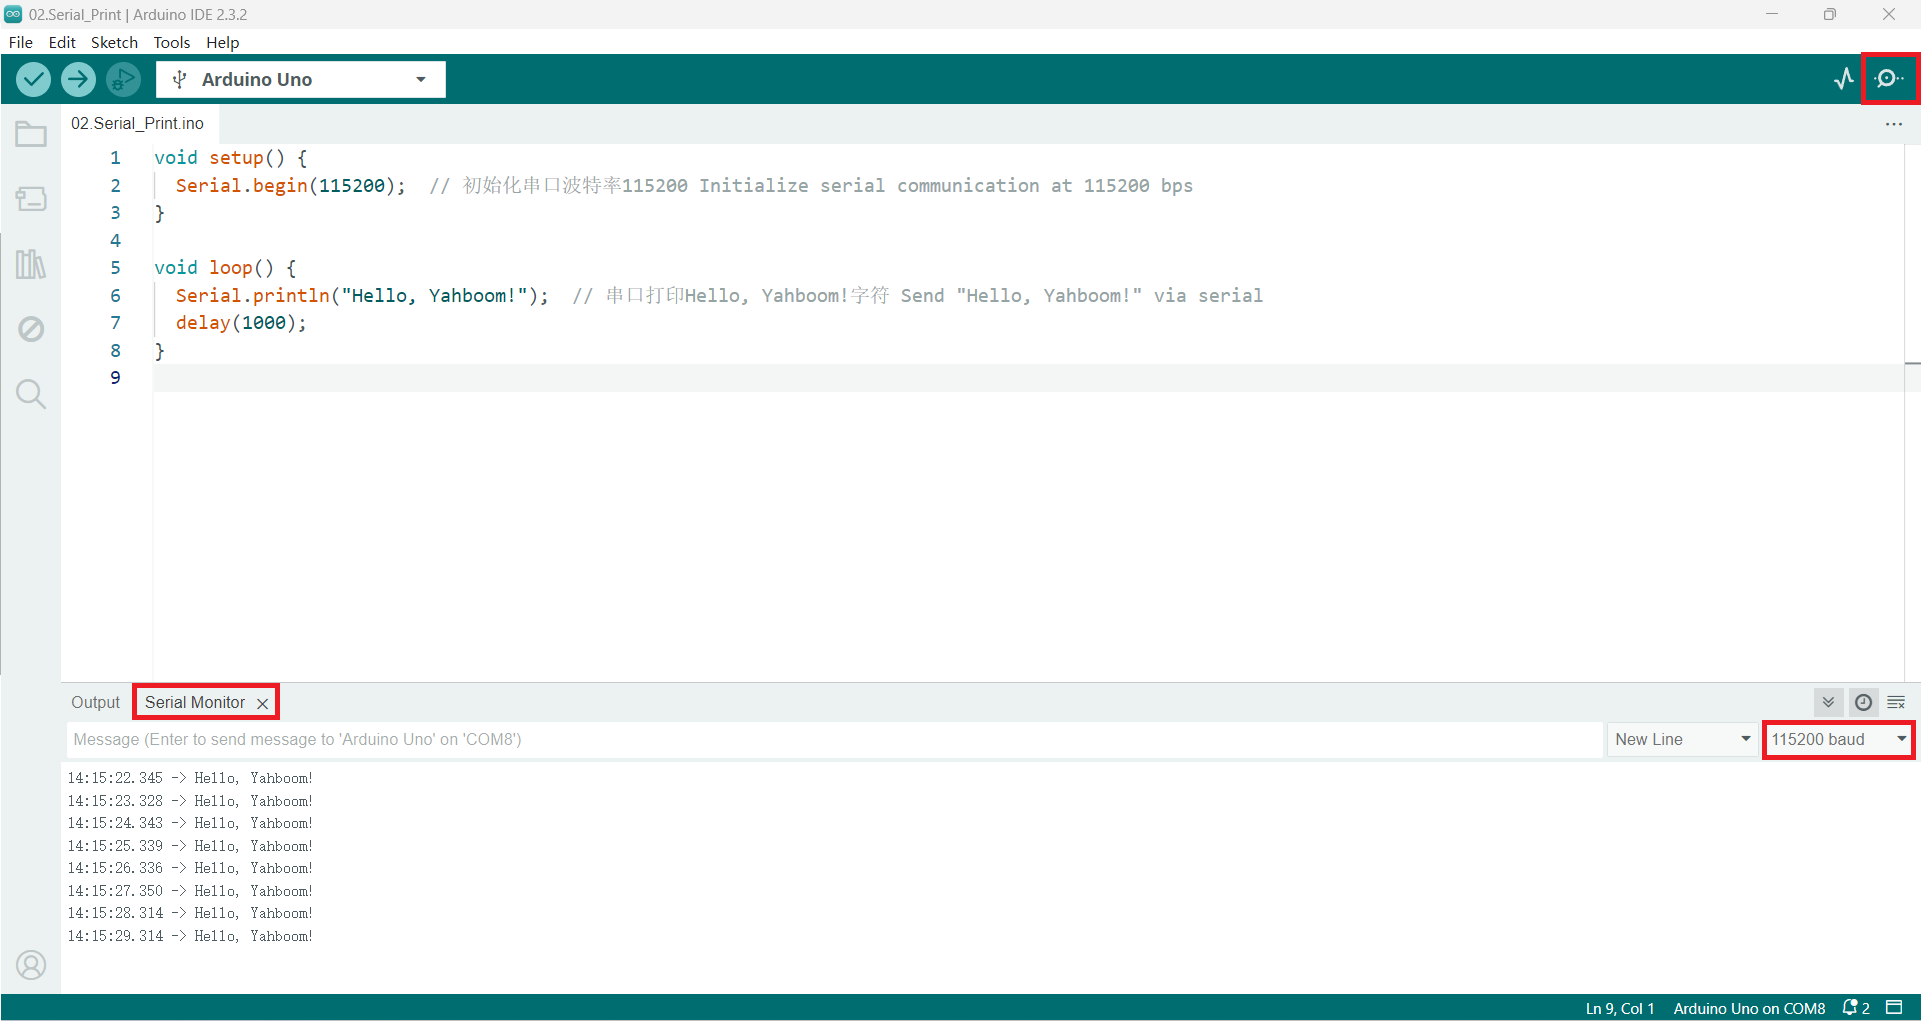
void setup() {Serial.begin(115200); // 初始化串口波特率115200 Initialize serial communication at 115200 bps}
Run code in a loop
xxxxxxxxxxvoid loop() {Serial.println("Hello, Yahboom!"); // 串口打印Hello, Yahboom!字符 Send "Hello, Yahboom!" via serialdelay(1000);}
Notes
Using the Serial.println() function will automatically wrap lines;
Using the Serial.print() function will not automatically wrap lines.
Experimental results
After compiling the program successfully, upload the code to the Arduino Uno development board.
After the program starts, open the serial monitor that comes with the Arduino IDE, and you can see that the serial port keeps printing Hello, Yahboom! content.
If there is no display content, you can check whether the serial port baud rate is consistent with the code setting, and then press the RESET button on the development board.
xxxxxxxxxxThe burning program cannot use other programs to occupy the serial port or an external serial port communication module (for example: WiFi camera module), otherwise the program cannot be burned or an error message will be prompted!