Burning system image
Burning system imageBurning system image for Jetson NanoJetson Orin NX/Orin Nano Burning System Image
Burning system image for Jetson Nano
- Please download the factory image file of Jetson Nano version from the factory image in the data, and then decompress it to get the .img image file locally.
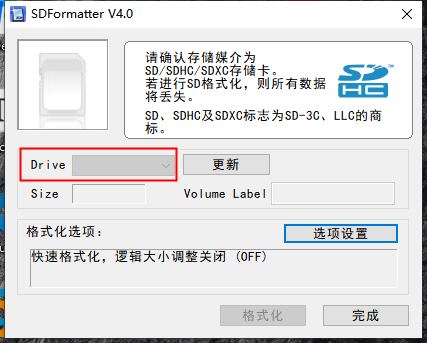
- Insert the USB drive into the USB port of the computer and use the software SDFormatter to format it. You need to check the drive letter of the formatted drive and make sure you don’t choose the wrong one.
Note: After formatting, the data in the original USB drive will be cleared. If there is important data, please back up the file before formatting.
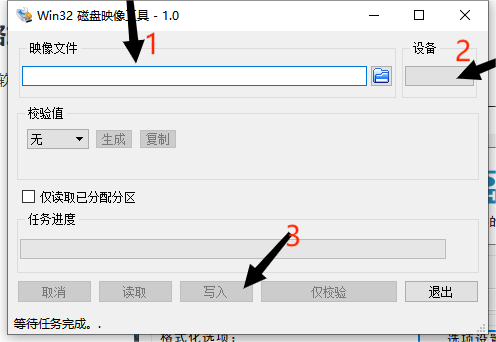
- Open the Win32DiskImager software and select the .img image just decompressed.
- Select the drive letter of the USB drive. Note that you must check carefully here to confirm that it is the drive letter of the USB drive.
- Click [Write].
Note: After burning is completed, the system may prompt to format the partition because it cannot recognize the partition. Do not format it at this time! Do not format it! Do not format it! Click Cancel, then unplug the USB drive and insert it into the JETSON NANO to boot.
- After the burning is completed, insert the USB drive into the JETSON NANO and power it on. If the system enters the desktop normally after booting, it means that the system burning is complete.
Jetson Orin NX/Orin Nano Burning System Image
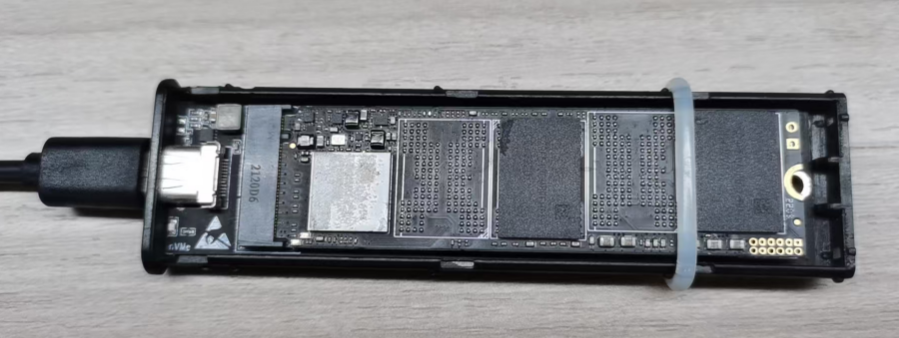
You need to prepare an NVME SSD box and install the SSD into the SSD box before you can connect it to the computer.
Note: The SSD box is not included in the package and needs to be prepared by yourself.
- According to the motherboard model, please download the factory image file of Jetson Orin NX or Jetson Orin Nano version from the factory image in the data, and then decompress it to get the .img image file locally.
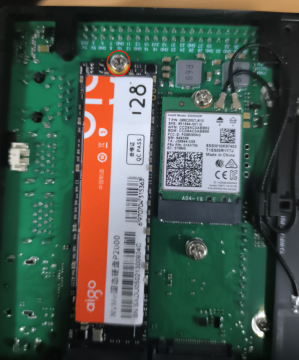
- Find the nvme SSD on the back of Jetson Orin NX/Orin Nano, unscrew the screws, remove the SSD, and put it into the SSD box.
- Connect the SSD box to the computer via USB and use the software SDFormatter to format it. Here you need to check the formatted drive letter and don't make a mistake.
Note: After formatting, the original data in the USB drive will be cleared. If there is important data, please back up the file before formatting.
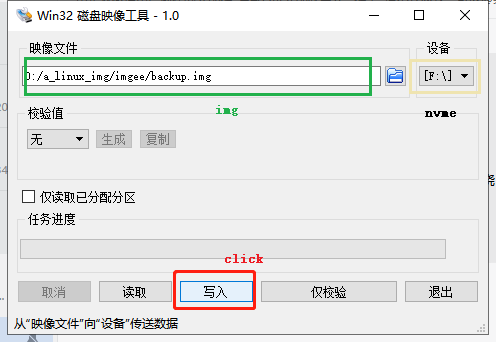
Open Win32DiskImager burning tool

Select the image, select the drive letter, and click [Write] to write, as shown in the figure
Wait for the image burning to complete, install the nvme solid-state drive back to the motherboard, and you can successfully boot after powering on for a while.