Open and close the virtual desktop
Note: This tutorial is based on the factory image environment. It is only applicable to Jetson Orin NX and Jetson Orin Nano motherboards. Jetson Nano users can skip it.
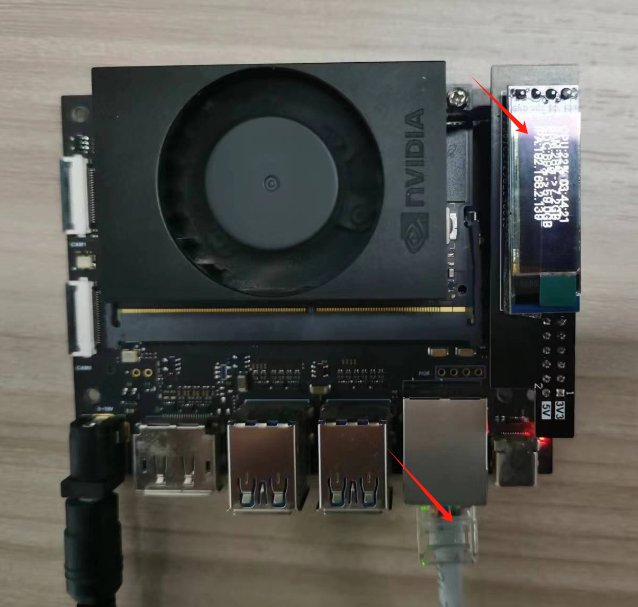
1. Connecting devices
This connection tutorial is suitable for connecting to a wired network without a display screen to achieve remote VNC login.
First, you need to connect the Jetson Orin NX and Jetson Orin Nano motherboards to the network cable, and then check the current motherboard IP address from the OLED.
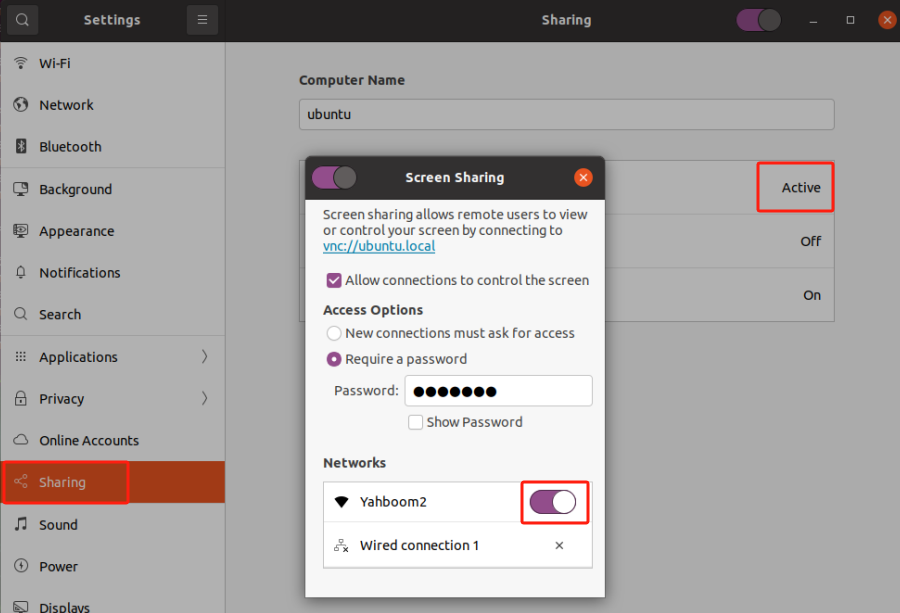
Note: If you are connected to WiFi, after connecting to WiFi, you need to use a DP cable to connect to the physical screen and manually activate the screen sharing function of this WiFi.
Open [Settings] in the application, find [Sharing], click [Screen Sharing], then find the corresponding WiFi name in [Networks] and turn on the setting.
2. Turn on the virtual desktop
The virtual desktop switch is only applicable to Jetson Orin NX and Jetson Orin Nano motherboards, in order to solve the problem that VNC remote login cannot be used without a connected monitor.
By default, the DP line is used to display the desktop, and the virtual desktop is turned off (DP mode).
Open the terminal and enter the following command to turn on the virtual desktop and switch to VNC mode.
xxxxxxxxxxsudo cp /etc/X11/xorg.conf.backup_vnc /etc/X11/xorg.conf
Note: After switching to VNC mode, the DP connection cable will become invalid. You need to modify the configuration back to use the DP interface to connect to the display normally.
Since the factory system has enabled the function of connecting to the shared desktop via network cable, you can use VNC to remotely log in to the desktop after restarting the system.
xxxxxxxxxxsudo reboot
3. Turn off the virtual desktop
If you need to connect to the DP display, open the terminal and enter the following command to switch to the DP interface connection display mode.
xxxxxxxxxxsudo cp /etc/X11/xorg.conf.backup_dp /etc/X11/xorg.conf
Restart the system and you can use the DP cable to connect to the display.
xxxxxxxxxxsudo reboot