Object Detection
This example demonstrates object detection. It uses the YOLOv6n model by default. It also supports the yolov8s and yolox_s_leaky models. It uses Hailo's NMS (non-maximum suppression) layer as part of the HEF file, so all detection networks compiled with NMS can use the same code.
1. Detect the video
Terminal input,
xxxxxxxxxxcd hailo-rpi5-examples/
Then enter the command to enter the virtual environment
xxxxxxxxxxsource setup_env.sh
Enter the command. Run the video for detection
xxxxxxxxxxpython basic_pipelines/detection.py --input resources/detection0.mp4
Where the .mp4 suffix indicates the path to the video
To close the appearance, you can press ctrl+c.
Contents in this example:
Custom callback class:
This is an example of a custom callback class. It can be used to send user-defined data to the callback function. It inherits from app_callback_class and can be extended with user-defined variables and functions. In this example, we added a variable and a function to the class. These are used in the callback function when under the flag. These values are then displayed on the user frame. --use-frame
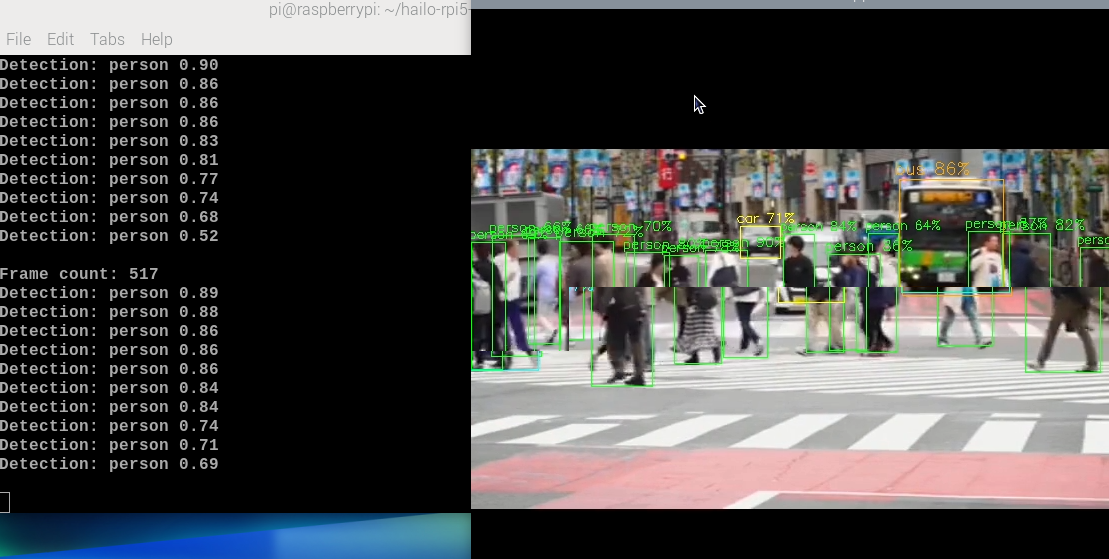
Application callback function:
In this function, we see an example of how to parse metadata. Each Gstreamer buffer contains objects. This object is the root of all Hailo metadata objects attached to this buffer. All detections are read and their labels, bounding boxes, and confidences are read. In this example, we assume that there is a "person" near you. All detection results are parsed and the number of detected people is calculated. Information about each detected person is printed to the terminal. If this flag is used, frames are extracted from the buffer and displayed. The number of detected people is displayed on the frame. In addition, user-defined data is displayed on the frame. HAILO_DETECTION``HAILO_ROI``--use-frame
2. Real-time detection of camera images
In the virtual environment terminal, enter the following command. By default, these examples run with a USB camera (/dev/video0). You use the --input flag to change the input source according to the real-time situation.
xxxxxxxxxxpython basic_pipelines/detection.py --input /dev/video0 #usb camerapython basic_pipelines/detection.py --input rpi #csi camera
If the camera does not display properly, you can check which video devices are available by running the following command:
xxxxxxxxxxls /dev/video*You can test whether the camera is working properly by running the following command:
xxxxxxxxxxffplay -f v4l2 /dev/video0If you encounter an error, try another device, such as /dev/video2.
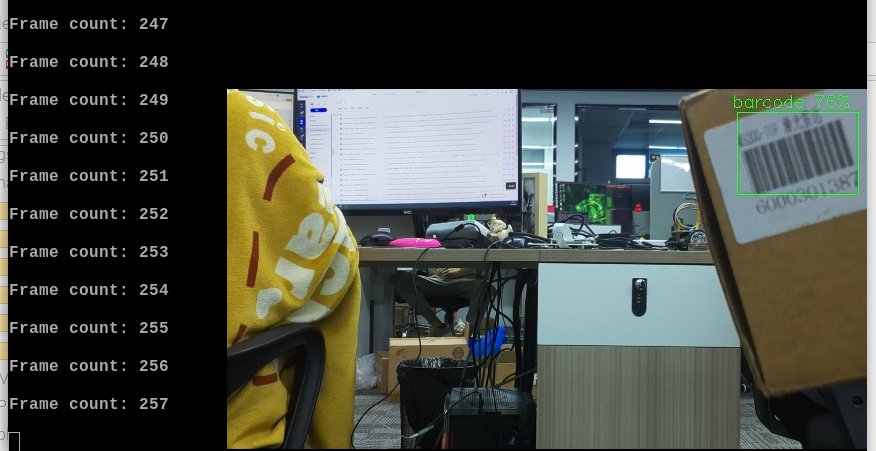
3. Use the retrained model (taking QR code recognition as an example)
Note: (If you need to use your own trained model for acceleration, please follow the tutorial below and convert it to the hef format required by the hailo board)Retraining example
This application includes support for using a retrained detection model. The model should be compiled with HailoRT NMS post-processing (HailortPP). To use a custom model, you can load its HEF using the flag. The default labels used by our model are COCO labels (80 classes). If you are using a custom model with different labels, you can use this flag to load the label file. For example, (using RPi camera input):
xxxxxxxxxxpython basic_pipelines/detection.py --labels-json resources/barcode-labels.json --hef resources/yolov8s-hailo8l-barcode.hef -i rpi
Yolov8s-hailo8l-barcode.hef is the hef format converted after retraining, output:
Troubleshooting and known issues
If the camera case suddenly fails to run in the middle, you can refer to the solution steps below. If it still doesn't work, you need to restart the Raspberry Pi.
- RPi camera input is still in Beta stage. It may be unstable and may cause the application to crash.
- The frame buffer is not optimized and may slow down the application. It is shown as a simple example.
- DEVICE_IN_USE() error. This error usually means that the Hailo device (usually ) is currently being accessed or locked by another process. This can happen during concurrent access attempts or if the previous process was not cleanly terminated, leaving the device in a locked state.
Resolution steps:
1.Identify the device: Typically, the Hailo device is located at . Make sure this is the correct device file for your setup. /dev/hailo0
2.Find processes using the device: Run the following command to list any processes currently using the Hailo device:
xxxxxxxxxxsudo lsof /dev/hailo0
3.Kill the process: Kill the process using the PID (Process ID) from the previous command output. Replace with the actual PID. <PID>
xxxxxxxxxxsudo kill -9 <PID>