Getting Started
This section will teach you how to set up a Raspberry Pi 5 with the Hailo-8L AI accelerator.
What you need
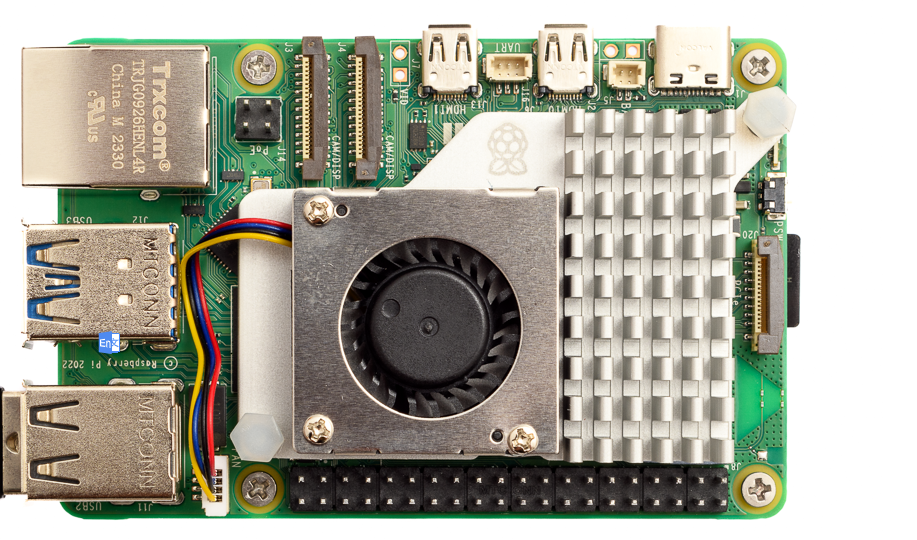
- Raspberry Pi 5
- Raspberry M.2 M-Key HAT
- Hailo8 M.2 module (also supports Hailo-8L)
- Thermal pad (included in the kit)
- Optional: Heatsink
- Optional: Official Raspberry Pi camera (e.g., Camera Module 3 or High Quality Camera)
- Optional: USB camera
Hardware:
We used a Raspberry Pi 5 model with the official active cooler (optional: Cool Pi heatsink) and a 27W USB-C power supply. We recommend using the official USB-C power supply to ensure that the motherboard can provide sufficient power to the M.2 HAT.
Raspberry Pi M.2 M-Key HAT can be used with Hailo-8L M.2 key M or B+M (also supports Hailo-8), wiring diagram with Raspberry Pi 5.
The pcle end of the connection cable is connected to the m.2HAT.
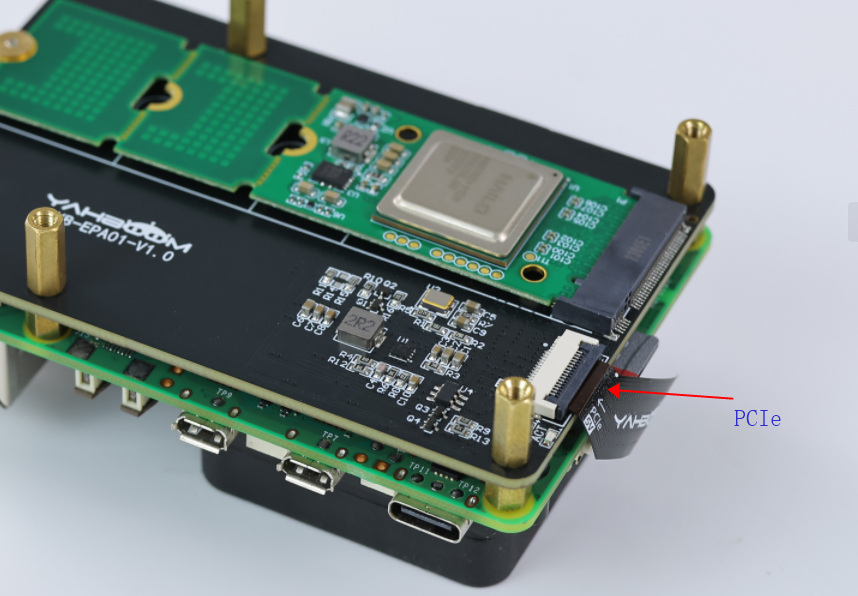
The rpi5 end of the connection cable is connected to the interface of the Raspberry Pi 5.
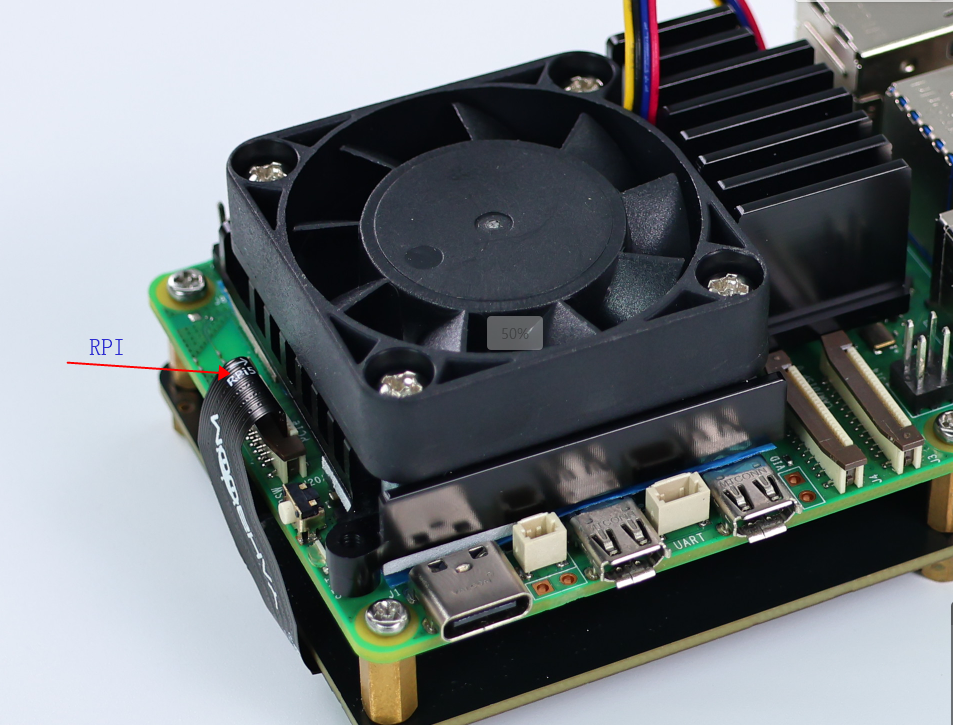
For CSI camera connection, please refer to the Raspberry Pi 5 camera case.
Software:
Note: The SD card of the Raspberry Pi 5 needs to contain a bootable image. You can refer to the image burning in the Raspberry Pi 5 tutorial we provided
The interface that appears after the boot is successful

Update the system
Note: (The following steps are only required for DIY in your own environment. If you use the image we provide directly, you do not need to rebuild it)
xxxxxxxxxxsudo apt updatesudo apt full-upgrade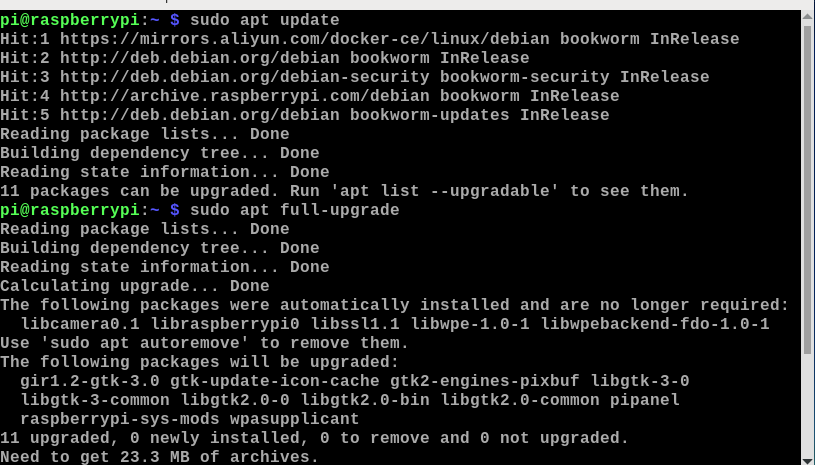
This will update your system to the latest Raspberry Pi kernel, which includes Hailo driver support.
Set PCIe to Gen3
To achieve optimal performance of the Hailo device, it is necessary to set PCIe to Gen3. While using Gen2 is an option, it will result in reduced performance.
Open the Raspberry Pi Configuration Tool:
xxxxxxxxxxsudo raspi-config

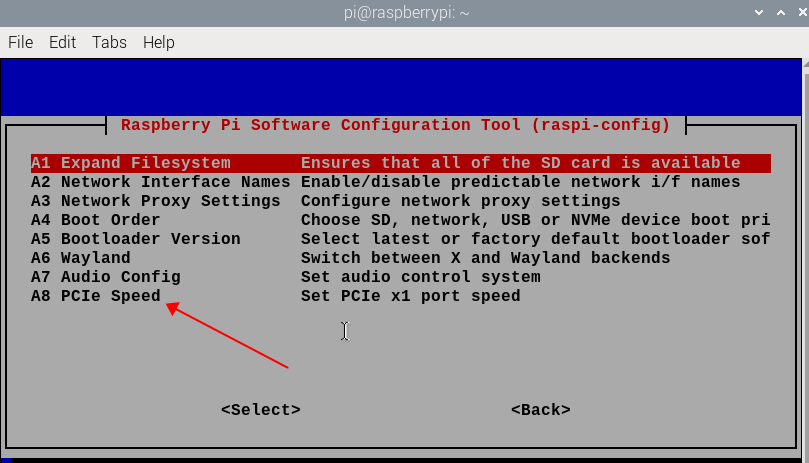
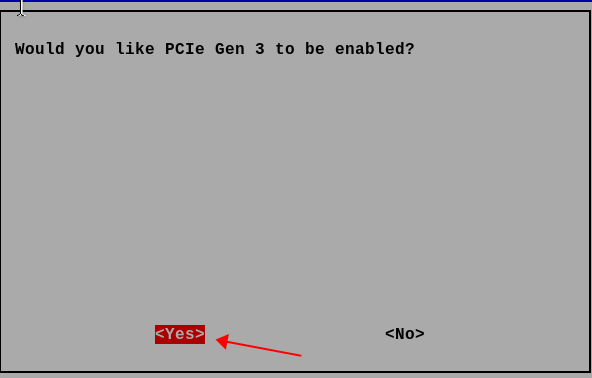
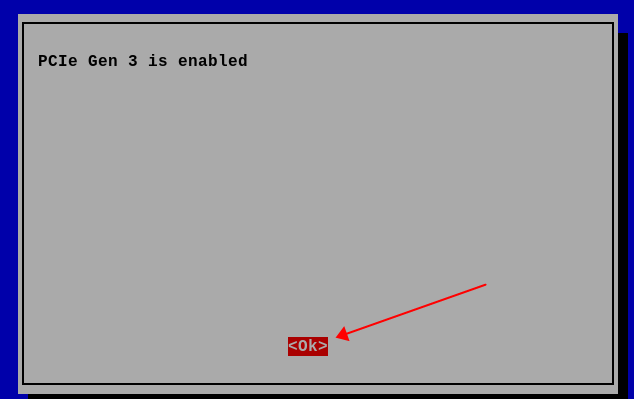
Select option 6 Advanced options and then select option A8 PCIe speed. Select "Yes" to enable PCIe Gen 3 mode. Click "Finish" to exit.
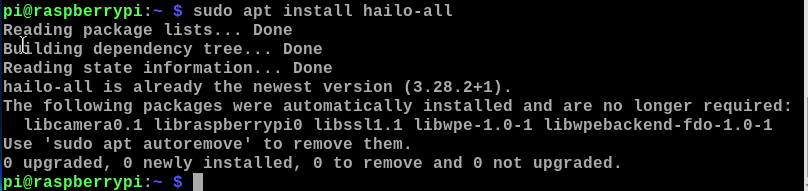
Install hailo software
Install all necessary software to make the Raspberry Pi AI Kit work properly. To do this, run the following command from a terminal window:
xxxxxxxxxxsudo apt install hailo-all
The following picture shows that the installation has been successful
This will install the following software components:
- Hailo firmware
- HailoRT runtime software. For more information.
- Hailo post-processing software demonstration stage.
Restart your Raspberry Pi.
xxxxxxxxxxsudo reboot
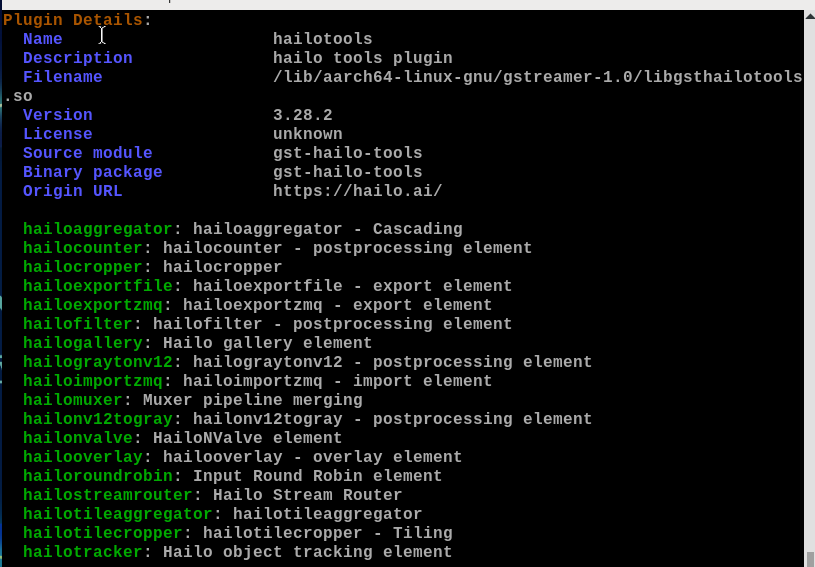
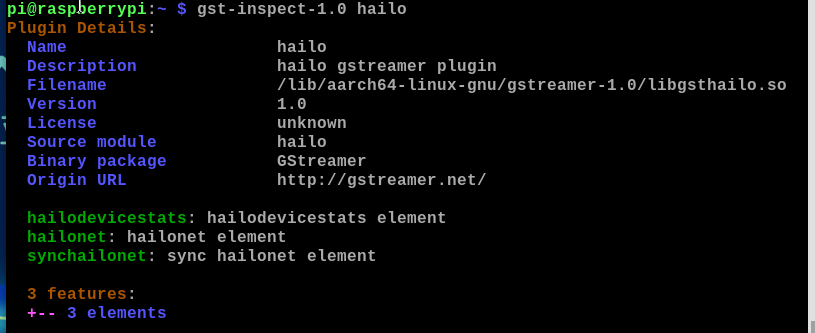
Test TAPPAS Core installation by running the following command:
Hailotools:
xxxxxxxxxxgst-inspect-1.0 hailotoolsExpected Result:
Hailonet:
xxxxxxxxxxgst-inspect-1.0 hailo
Expected Result:
If found or not, try to delete GStreamer registry:hailo``hailotools
xxxxxxxxxxrm ~/.cache/gstreamer-1.0/registry.aarch64.bin
Known Issues
The following issues should be handled by the TAPPAS Core installation deb, but if you encounter them you can fix them manually.
PCIe Page Size Issues
Some hosts do not support certain PCIe descriptor page sizes. If you receive an error like this:
xxxxxxxxxx[HailoRT] [error] CHECK_AS_EXPECTED failed - max_desc_page_size given 16384 is bigger than hw max desc page size 4096Make sure that /etc/modprobe.d/hailo_pci.conf exists and contains the following line:
xxxxxxxxxxoptions hailo_pci force_desc_page_size=4096Check the configuration:
xxxxxxxxxxcat /etc/modprobe.d/hailo_pci.conf# expected result:options hailo_pci force_desc_page_size=4096Unable to allocate memory in static TLS block
In some cases (especially aarch64), you may encounter the following error, which prevents some GStreamer plugins from loading correctly. The error message is:
xxxxxxxxxxbash(gst-plugin-scanner:67): GStreamer-WARNING **: 12:20:39.178: Failed to load plugin '/usr/lib/aarch64-linux-gnu/gstreamer-1.0/libgstlibav.so': /lib/aarch64-linux-gnu/libgomp.so.1: cannot allocate memory in static TLS block
This should be fixed by adding the following to your file: .bashrc
xxxxxxxxxxecho 'export LD_PRELOAD=/usr/lib/aarch64-linux-gnu/libgomp.so.1' >> ~/.bashrc
If you have already encountered this error, you can fix it by running the following command:
export LD_PRELOAD=/usr/lib/aarch64-linux-gnu/libgomp.so.1rm ~/.cache/gstreamer-1.0/registry.aarch64.bin