Use USB Camera
Use USB CameraInstall FSWebcamView USB camera devicesTake a photoTime-lapse photographyUse Cron (scheduled tasks)Web preview cameraInstall MotionModify the configuration fileStart the serviceWeb preview screen
Use a standard USB camera to take photos and videos on the Raspberry Pi.
Install FSWebcam
FSWebcam is a simple and straightforward webcam application. The software installation command is as follows:
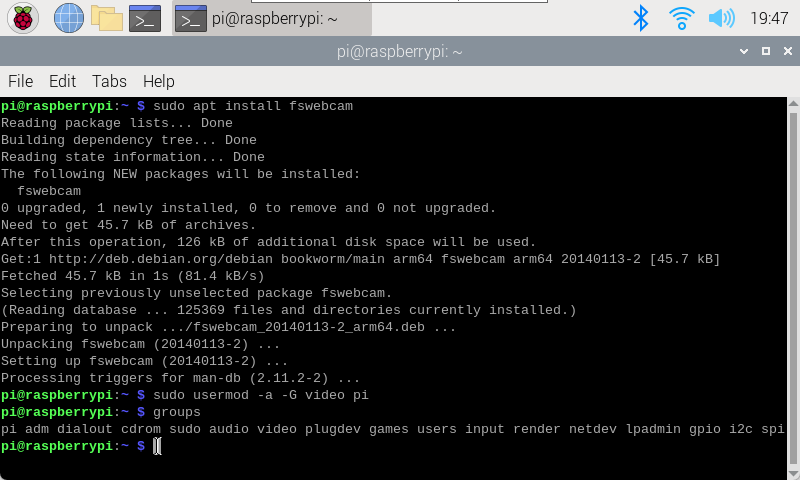
sudo apt install fswebcam
- Add user permissions: sudo usermod -a -G video
Example: Add pi user permissions to the group
xxxxxxxxxxsudo usermod -a -G video pi
- Check if the user has been correctly added to the group
Command: groups
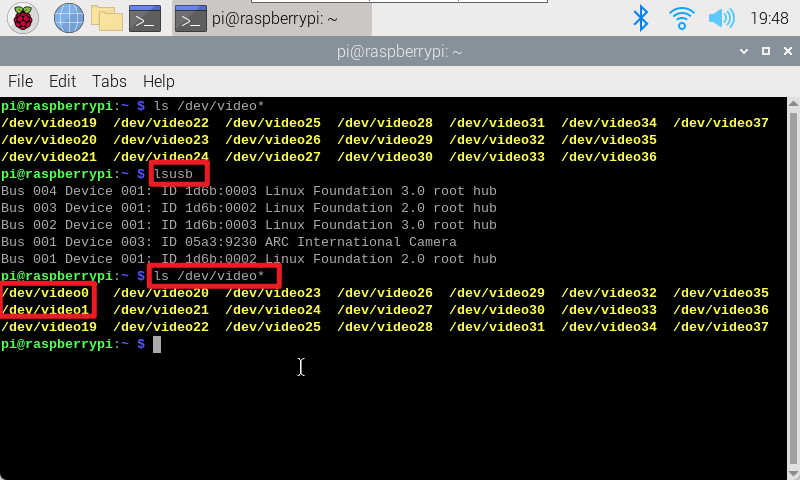
View USB camera devices
Use the lsusb command to view all USB devices recognized by the system;
Use the ls /dev/video* command to list all video devices recognized by the system.
xxxxxxxxxxThe following two commands are to detect the information displayed by the camera. You can compare the differences by yourself:One is image/video acquisition, and the other is metadata acquisition.
Take a photo
- fswebcam <image_name>
Example: Take a photo and save it as image.jpg (the default path for saving the file is in the user directory)
xxxxxxxxxxfswebcam image.jpg
- fswebcam -r resolution
<image_name>
Example: Take an image file with a resolution of 1280x720 and save it as image2.jpg
xxxxxxxxxxfswebcam -r 1280x720 image2.jpg
- fswebcam -r resolution
--no-banner <image_name>
Example: Take an image file with a resolution of 1280x720, do not display time and other information on the image, and save it as image3.jpg
xxxxxxxxxxfswebcam -r 1280x720 --no-banner image3.jpg
Time-lapse photography
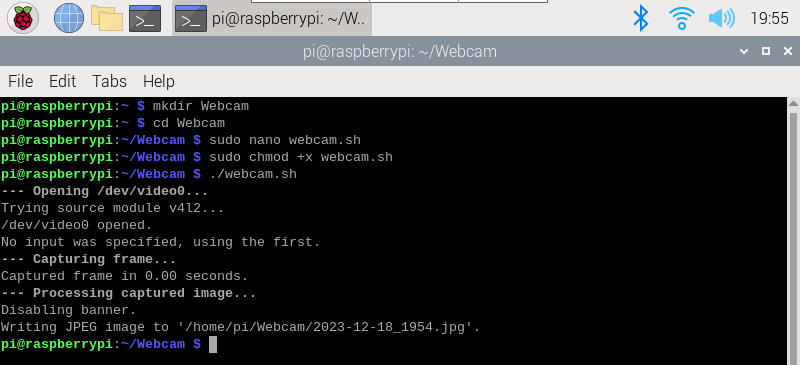
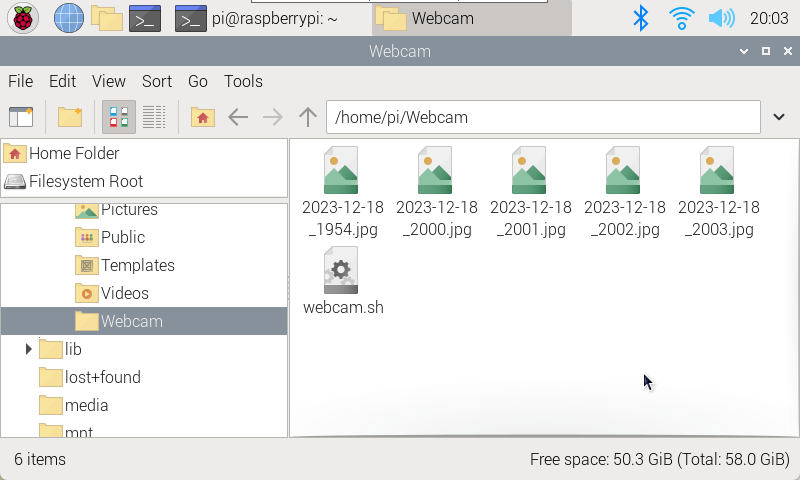
Create a new Webcam folder and enter the file
xxxxxxxxxxmkdir Webcam
xxxxxxxxxxcd Webcam
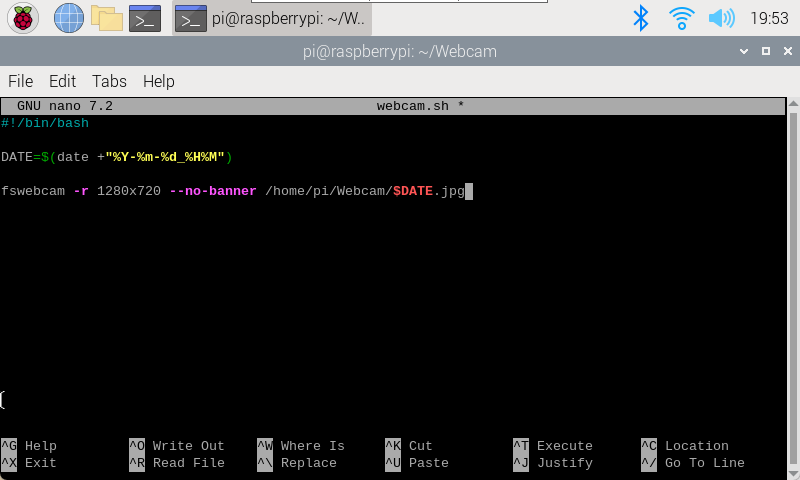
Create a new webcam.sh script file and edit the content
xxxxxxxxxxsudo nano webcam.sh
File content: The file save path needs to be modified by yourself. My system user name directory is yahboom
x#!/bin/bashDATE=$(date +"%Y-%m-%d_%H%M")fswebcam -r 1280x720 --no-banner /home/pi/Webcam/$DATE.jpg
Press Ctrl+X, enter Y, and press Enter.
Add executable permissions
xxxxxxxxxxsudo chmod +x webcam.sh
Run the script
xxxxxxxxxx./webcam.sh
Use Cron (scheduled tasks)
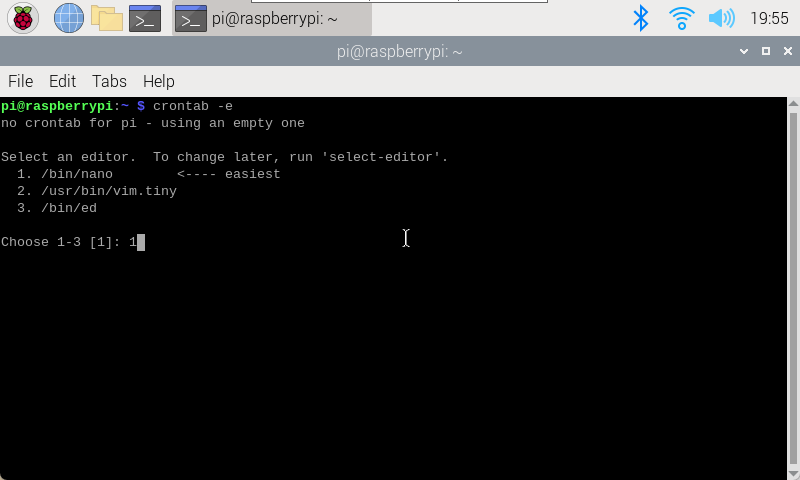
Open the cron table for editing. You will be prompted to select an editor for the first use. It is recommended to use the nano editor
xxxxxxxxxxcrontab -e
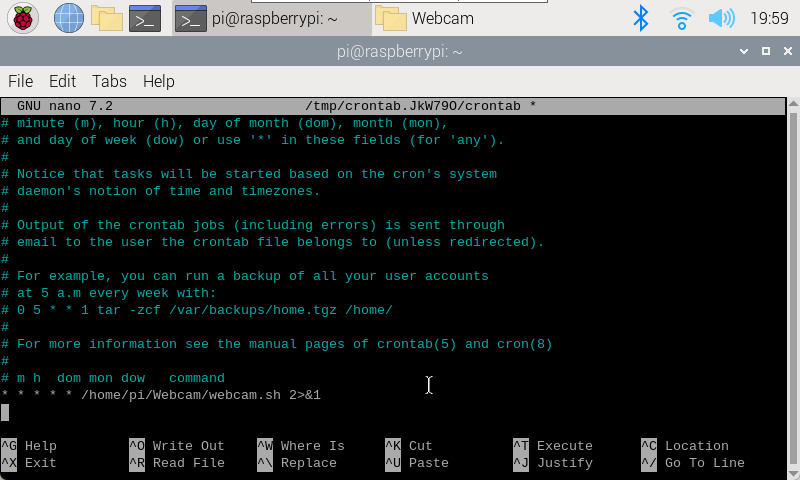
Add the following code to the edited document: The first 5 * signs represent a timer of 1 minute, and 2>&1 is to input the error output to the standard output
xxxxxxxxxx* * * * * /home/pi/Webcam/webcam.sh 2>&1
After saving the file and exiting, the terminal will output the following:
xxxxxxxxxxcrontab: installing new crontab
For Cron jobs, you can learn about the format and syntax by yourself!
xxxxxxxxxxIf the image is not generated after one minute, you can restart the service and check whether the path is correct!Start cron service: sudo service cron startStop cron service: sudo service cron stop
xxxxxxxxxxIf the cron service stop command cannot turn off the camera's automatic shooting, it is recommended to use the crontab -e command directly to delete the previously edited content!
Web preview camera
Use Motion to realize real-time viewing of the video shot by the USB camera on the web page.
xxxxxxxxxxCSI cameras cannot use this method to preview the camera!
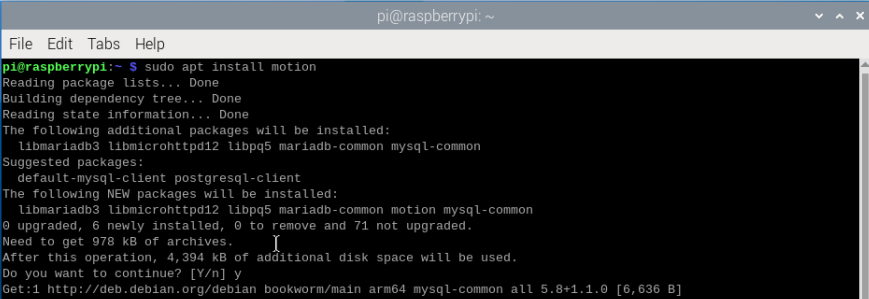
Install Motion
xxxxxxxxxxsudo apt install motion
Modify the configuration file
- motion.conf
xxxxxxxxxxsudo nano /etc/motion/motion.conf
Add or modify the following content:
xxxxxxxxxxdaemon onstream_localhost offpicture_output offmovie_output offstream_maxrate 100framerate 70width 640height 480
Note:
- The above options that are not found in the configuration file can be added directly to the file. For example, the stream_maxrate option needs to be added by yourself, and other options are available.
- Frame rate: You can modify it yourself (the above parameters are my best results)
- The nano editor can use the Ctrl+W shortcut key to search for keywords and quickly locate the content that needs to be modified
xxxxxxxxxxstream_maxrate: real-time streaming frame rateframerate: frame ratewidth: image widthheight: image heightThe above parameters can be adjusted!
- motion
xxxxxxxxxxsudo nano /etc/default/motion
Add the following code: motion runs in the background
xxxxxxxxxxstart_motion_daemon=yes

Start the service
- Start the service
xxxxxxxxxxsudo service motion start
- Stop the service
xxxxxxxxxxsudo service motion stop
- Restart the service
xxxxxxxxxxsudo service motion restart
- Start motion
xxxxxxxxxxsudo motion
Web preview screen
Enter the start motion service and start motion commands in the terminal:
xxxxxxxxxxsudo service motion startsudo motion

- Preview screen
After turning on motion, enter the car IP:8081 in the browser on the same LAN to view the real-time camera screen.
Example: 192.168.2.93:8081