MoveIt Configuration
Preface
We have built MoveIt environments on both the Jetson_Nano motherboard and the Orin series motherboard. Due to the onboard performance of the Jetson_Nano, running the MoveIt program on the motherboard will be slow and slow to load, and it will take about 3 minutes to complete the loading. Therefore, we recommend running the MoveIt program on the configured virtual machine we provide. The Orin motherboard can run MoveIt smoothly on the motherboard without running it on a virtual machine. Whether running on a virtual machine or on the motherboard, the startup instructions are the same. The following tutorials will take running on the Orin motherboard as an example.
1. Create a MoveIt configuration folder
Before configuring MoveIt, you need to create a folder to save the results of the MoveIt configuration. Usually, this folder is stored in the src directory of the workspace, at the same level as the function package. Enter the following command to create,
xxxxxxxxxx#In the source code provided by the program, we already have a function package dofbot_pro_config created. We need to cut the folder to another folder for backup to prevent function package name conflictscd ~/dofbot_pro_ws/srcmkdir dofbot_pro_config2. Start the configuration program
Start roscore
xxxxxxxxxxroscore
Open another terminal and start MoveIt
xxxxxxxxxxrosrun moveit_setup_assistant moveit_setup_assistant
3. Configuration process
- Load URDF model
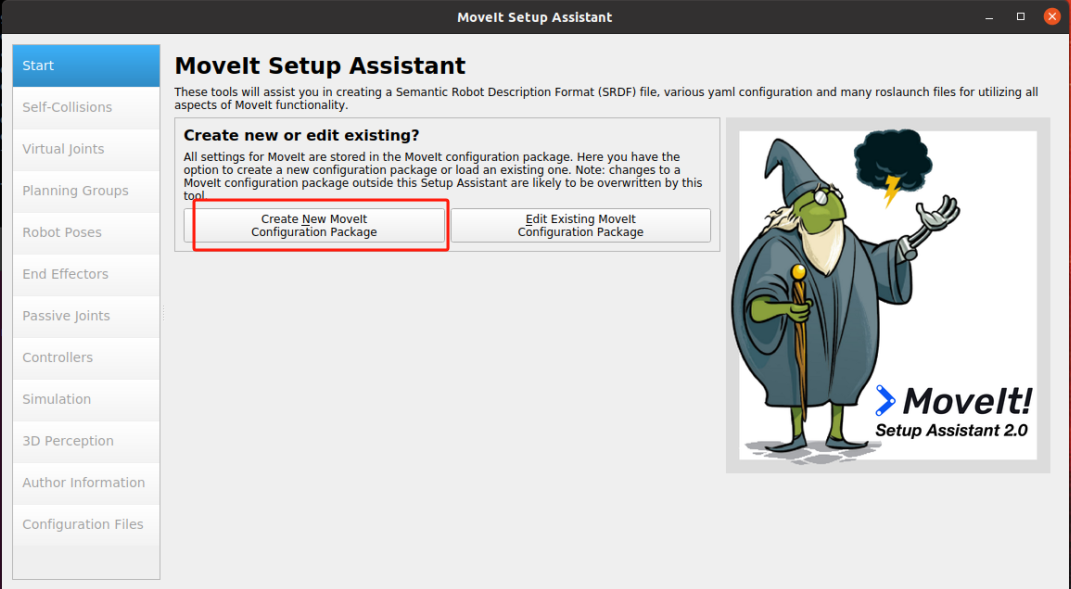
When configuring MoveIt for the first time, we choose to create a new MoveIt configuration function package, click [Create New MoveIt Configuration Package】,
Click the Browse button, find the URDF model file, and click the lower right corner to load. The URDF path is, /home/jetson/dofbot_pro_ws/src/DOFBOT_Pro-V24/urdf/DOFBOT_Pro-V24.urdf
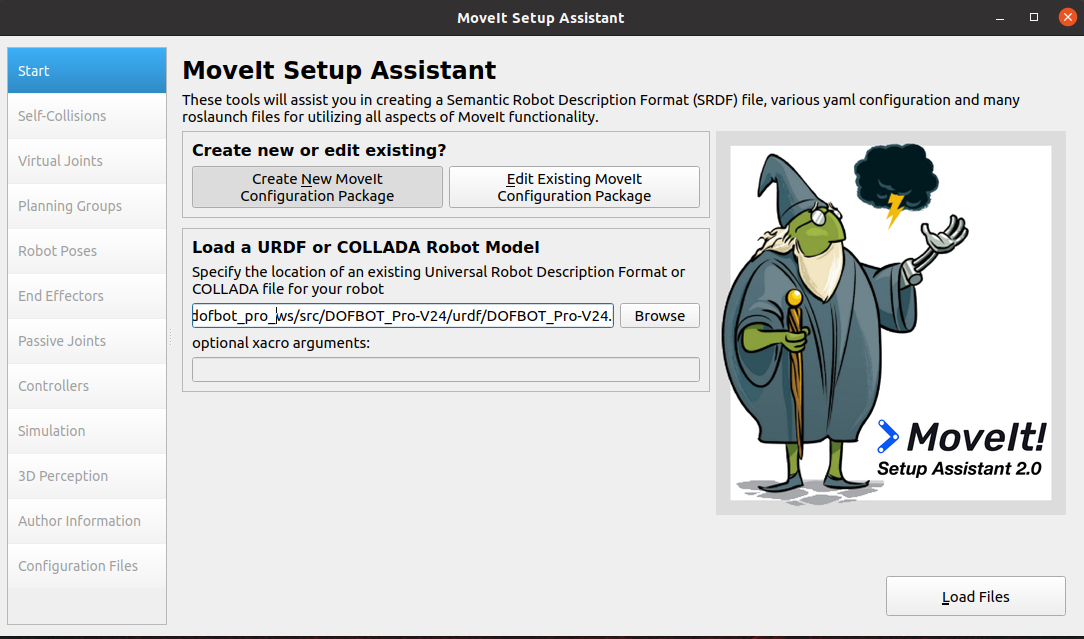
Click [Load Files] to load the URDF model.
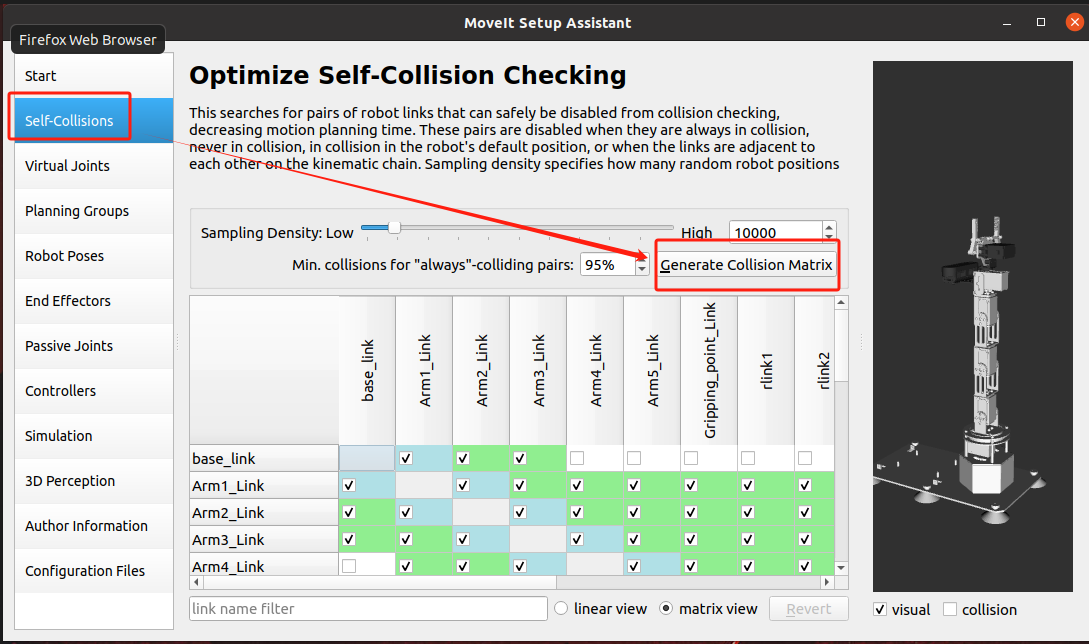
- Create a collision avoidance matrix (ACM)
Collision detection is a very complex calculation process. For multi-joint robotic arms or humanoid robots, the mechanical structure is complex and there are many joints. Collision detection requires a lot of spatial geometry calculations. However, for rigid robots, some joints cannot collide, such as limbs that are originally adjacent. The purpose of generating self-collision here is to tell us which joints will not collide. In the subsequent collision detection algorithm, the detection of these joints can be skipped directly to improve the detection efficiency.
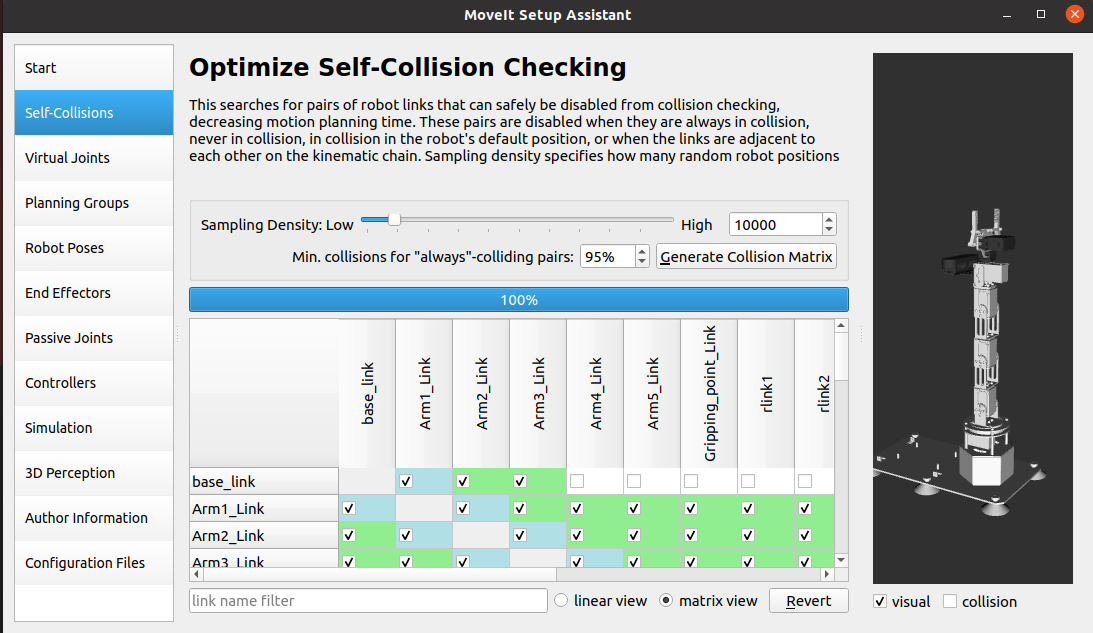
The creation is completed as shown in the figure below,
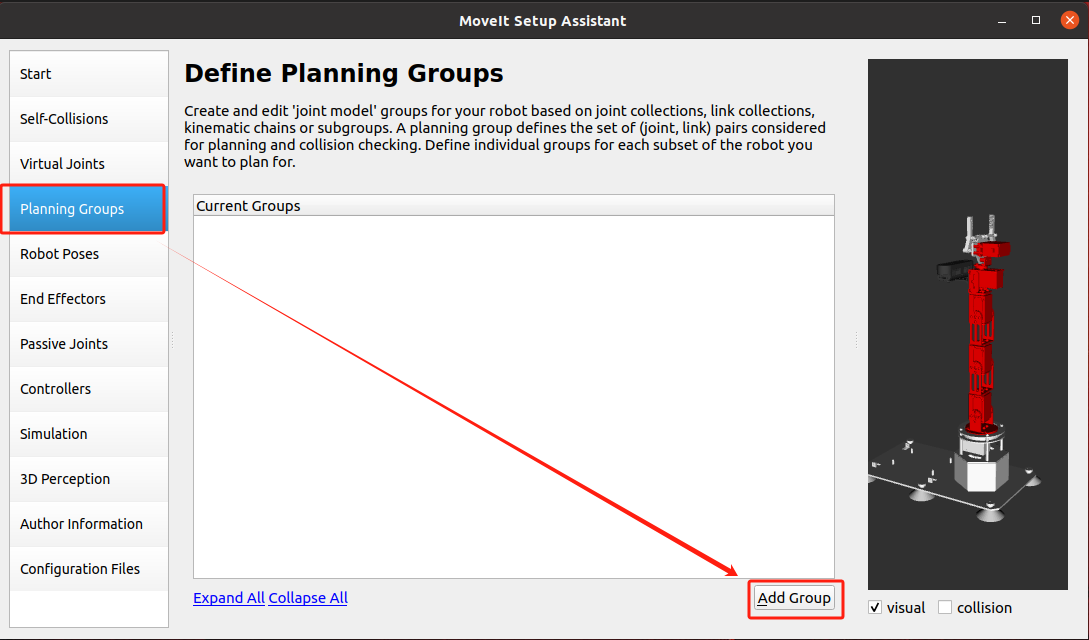
- Create a motion planning group
Planning Group is one of the core of MoveIt. Click [Add Group] to add a planning group
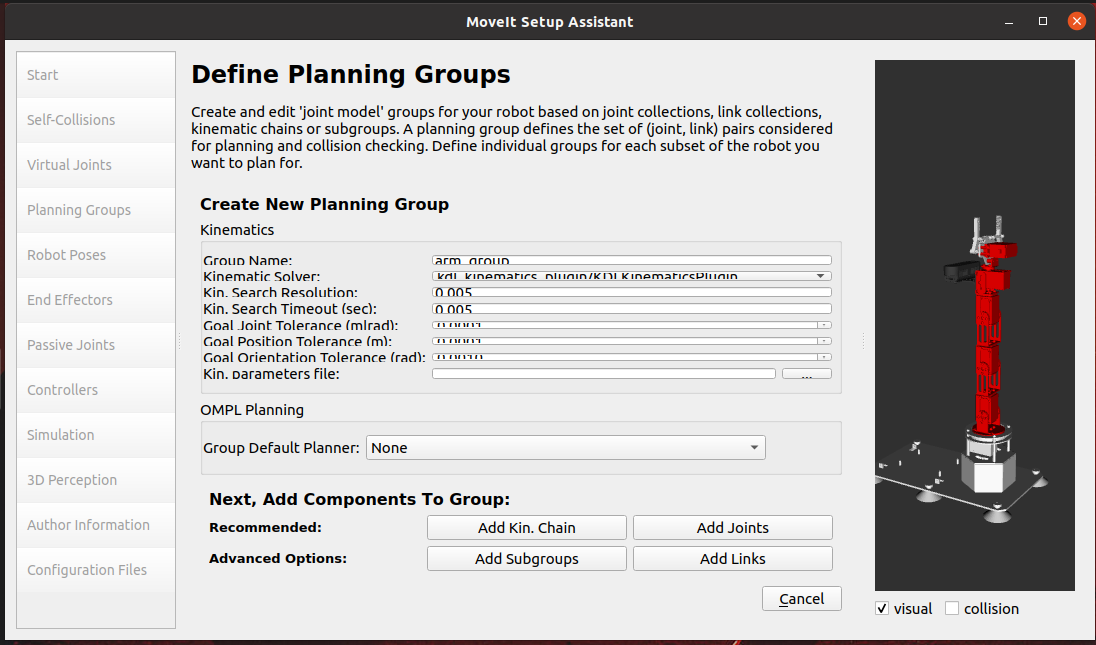
- Add a robotic arm planning group
- Group Name: Create a group name and set it to [arm_group].
- Kinematic Solver: Here we choose [KDL]
Kinematics solver, which is responsible for solving forward kinematics (Forward Kinematics) and inverse kinematics (IK). Generally, we choose KDL, The Kinematics and Dynamics Library. This is a kinematics and dynamics library that can well solve the forward and inverse kinematics problems of single-chain mechanical structures with more than 6 degrees of freedom.
Of course, you can also use other IK Solvers, such as SRV or IK_FAST, or even develop a new Solver yourself and insert it.
- Kin. Search Resolution: Sampling density of joint space
- Kin. Search TImeout: Solving time. If the device performance is insufficient or there is no solution within the specified time in the actual application process, the time can be increased; for example, set to [0.1], [0.01].
Click [Add Joints] to add joints, select Arm1_Joint to Arm5_Joint in [Available Joints] on the left and add them to [Selected Joints] on the right.
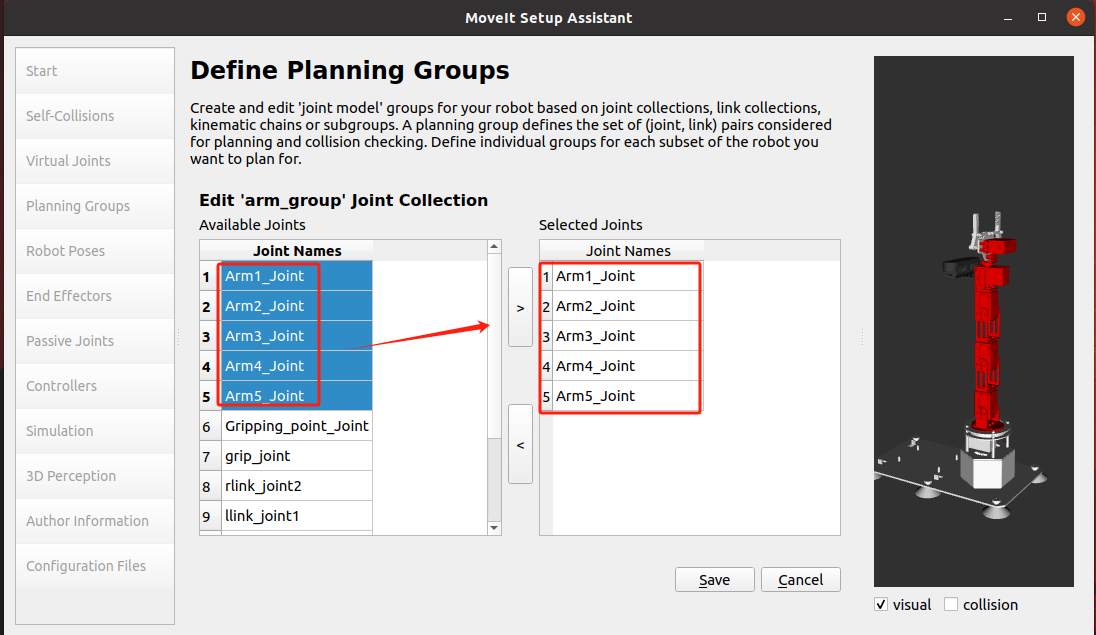
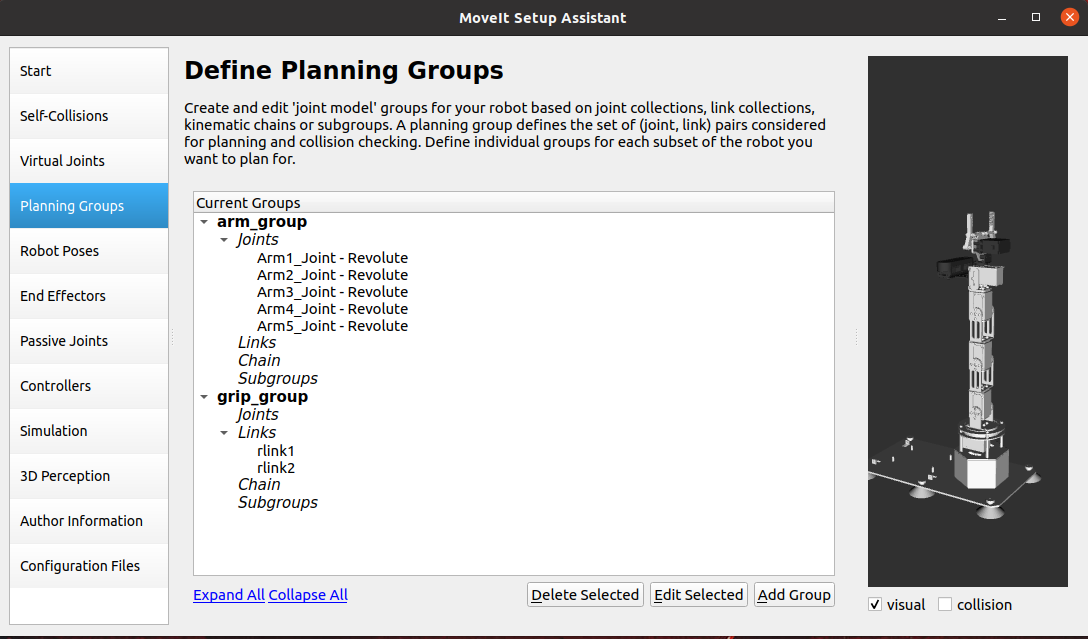
Click [Save] to complete the addition. After adding, it is as shown in the figure below.

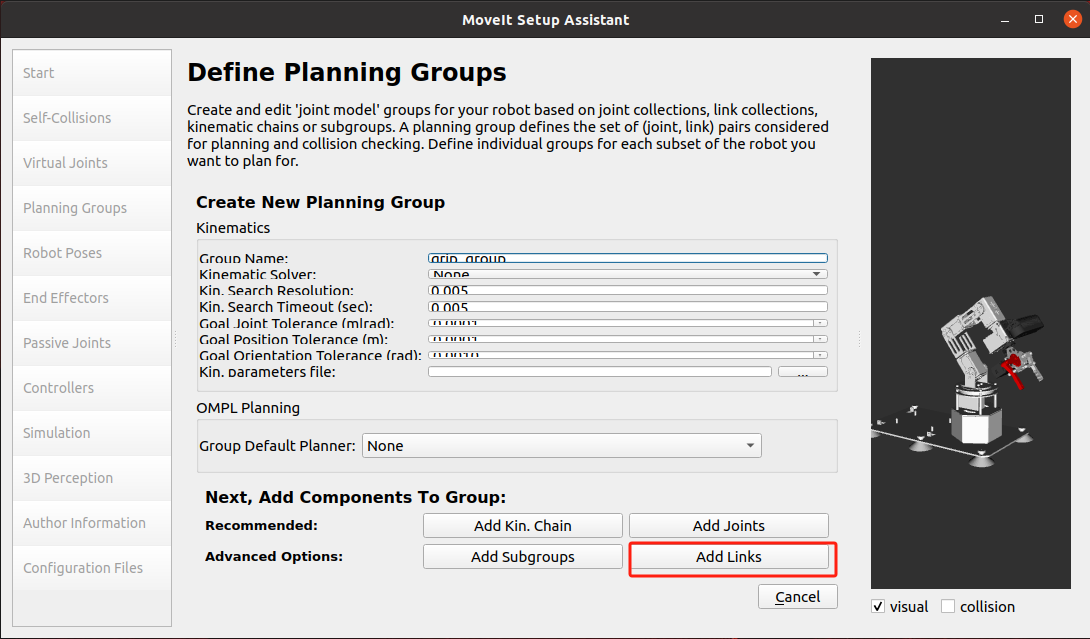
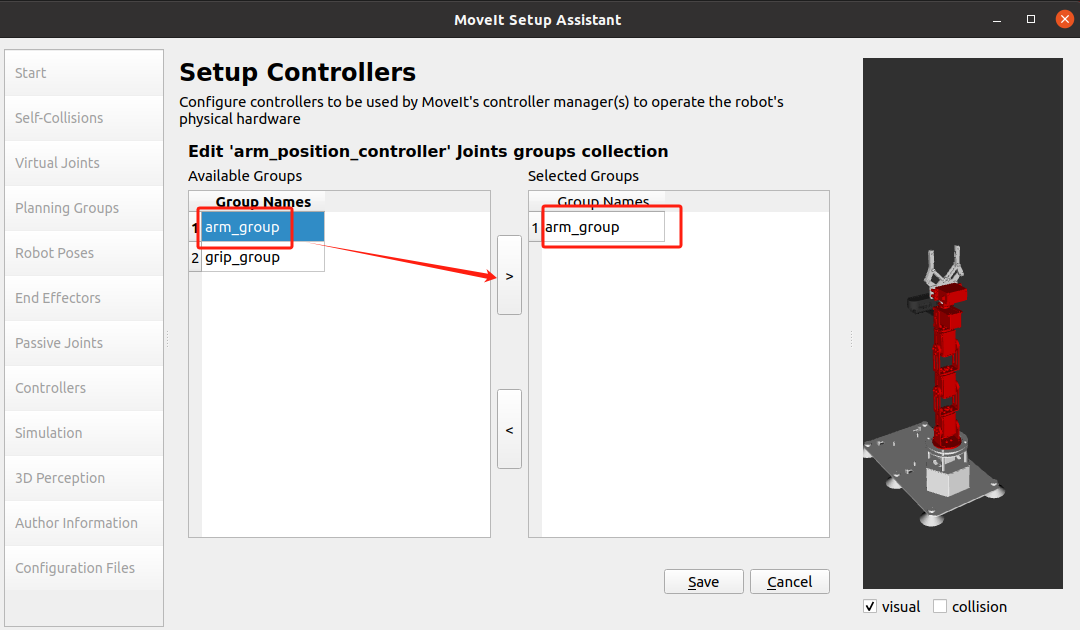
- Add the gripper planning group
Click [Add Group] to add the gripper planning group.
Set the group name to [grip_group], and there is no need to set the kinematic solver; click [Add Links] to add the gripper link.
Select rlink1 to rlink3 in the [Available Links] on the left and add them to the [Selected Links] on the right. Click [>] to automatically add the right side.
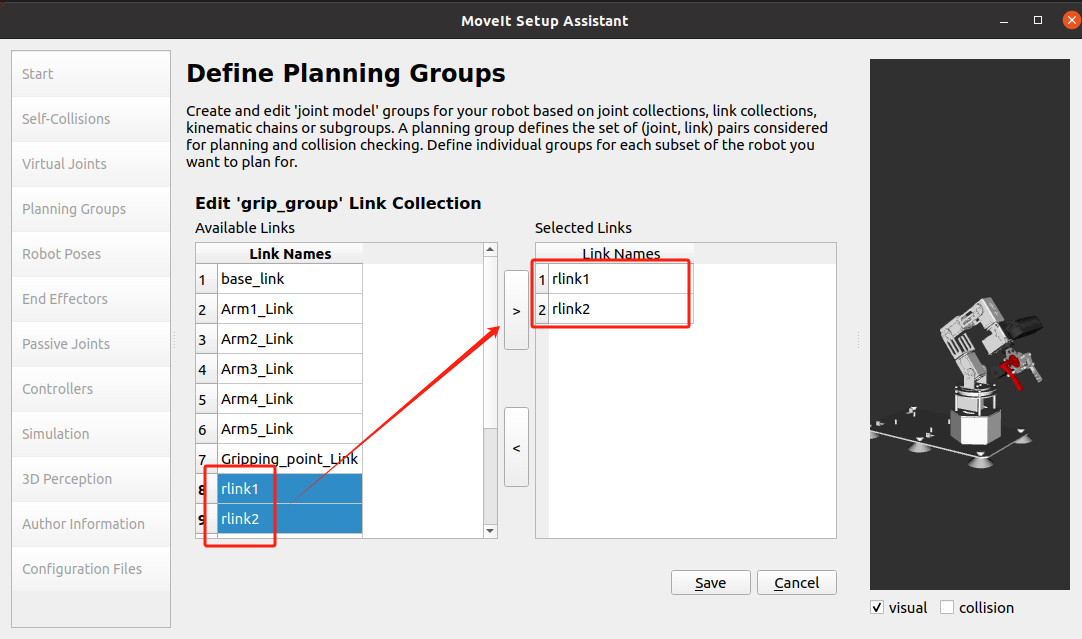
Click [Save] to save. After setting, the following figure is shown.
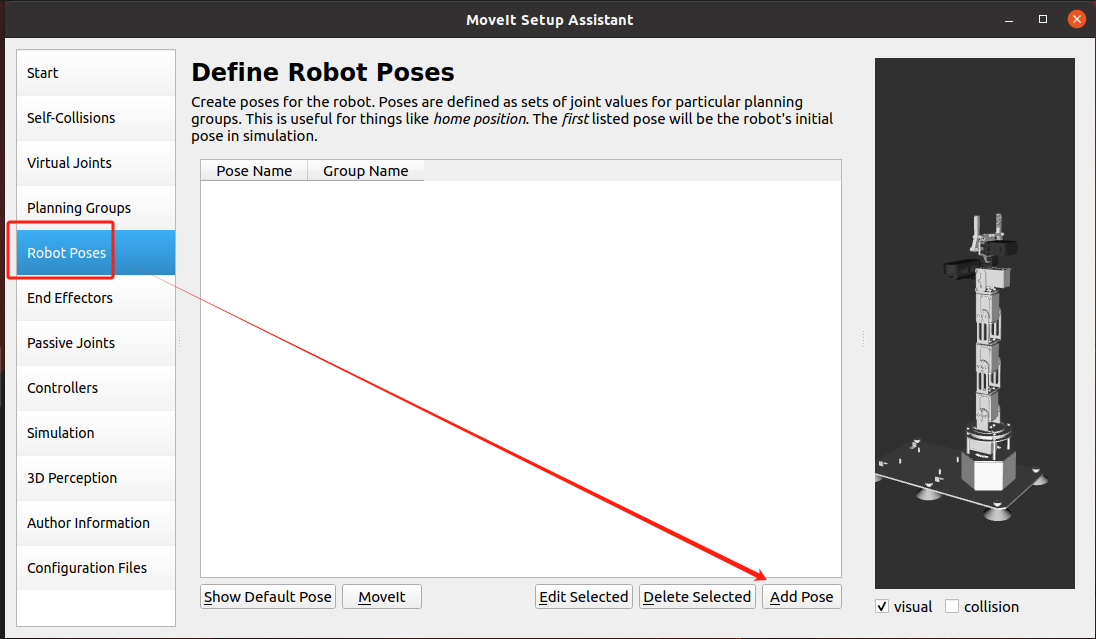
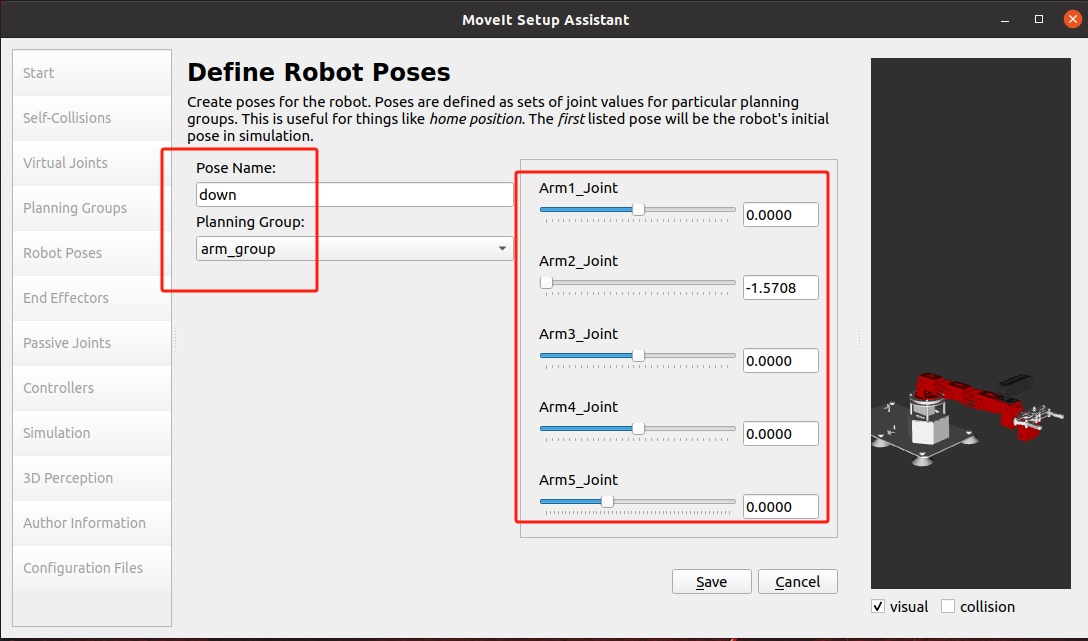
- Create preset poses
Select [Robot Poses] and click [Add pose] to add poses.
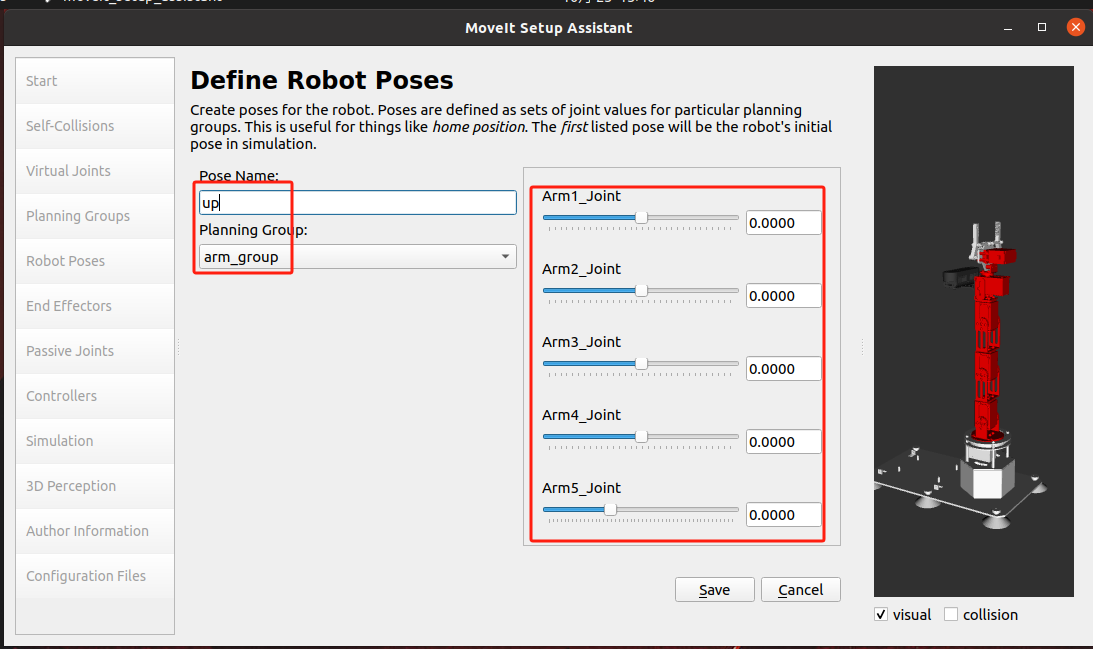
Add the robot arm pose, set the pose name Pose Name to [up], and click [Save] to save the pose.
Add the [down] pose and click [Save] to save the pose.
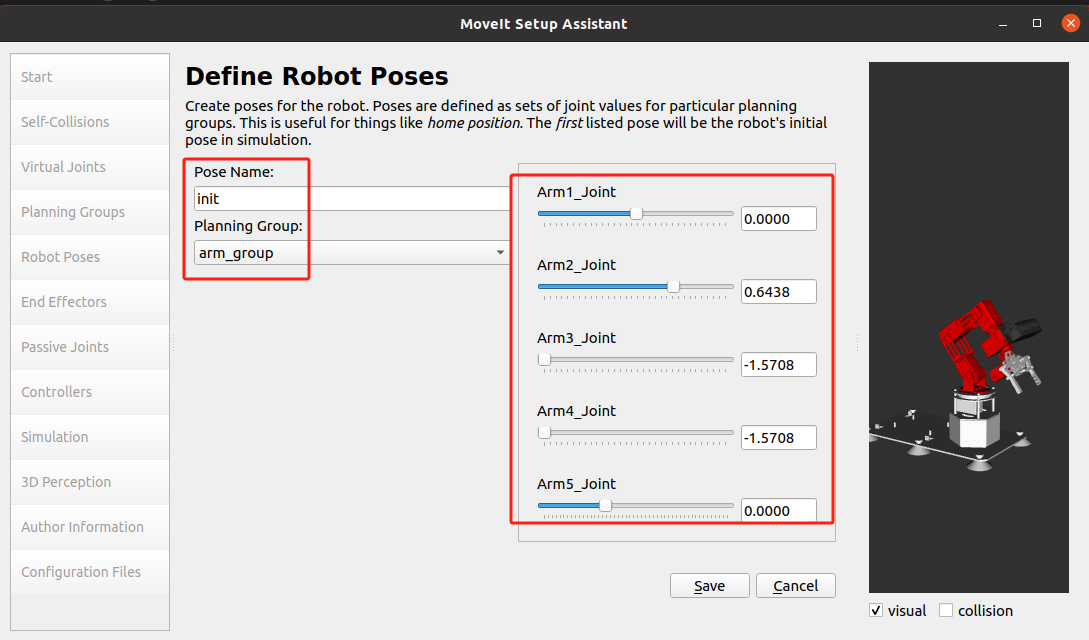
Add [init] posture, click [Save] to save the posture,
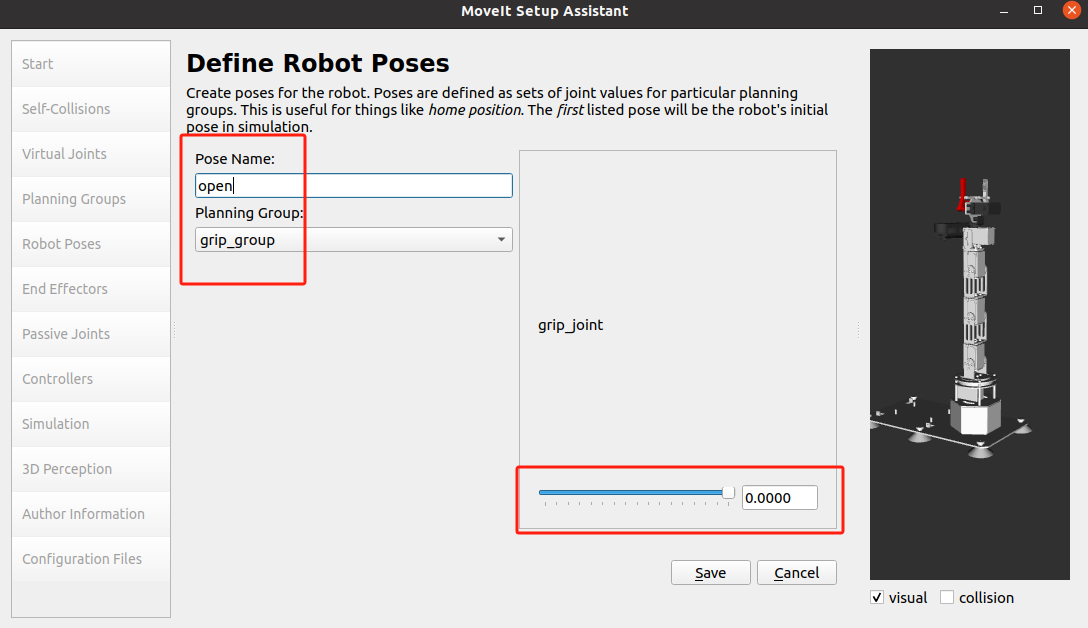
Add the gripper [open] posture, click [Save] to save the posture,
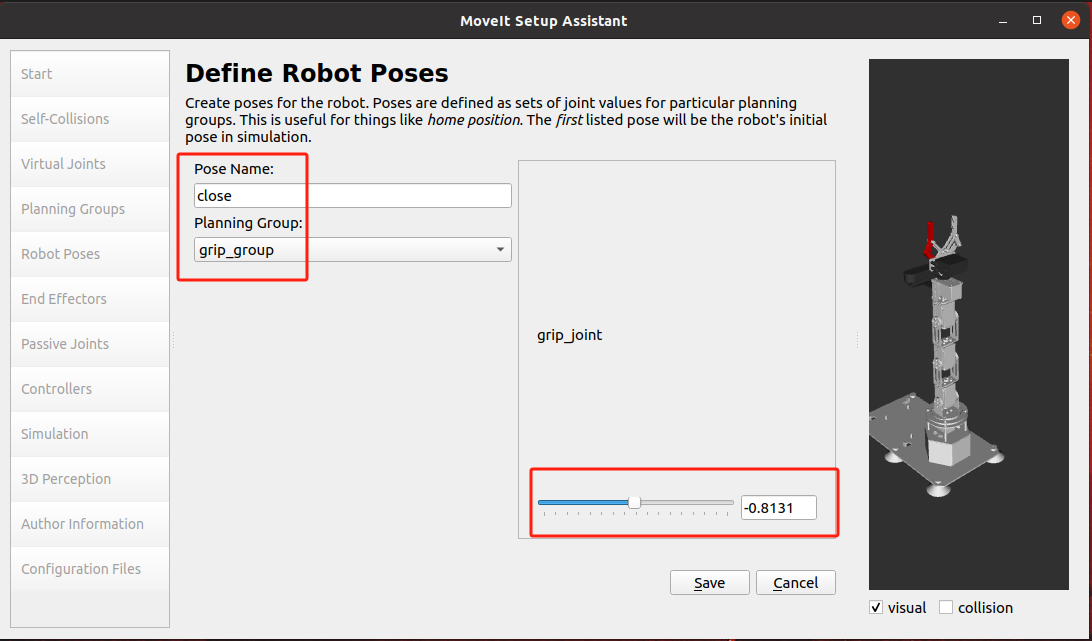
Add the gripper [close] posture, click [Save] to save the posture,
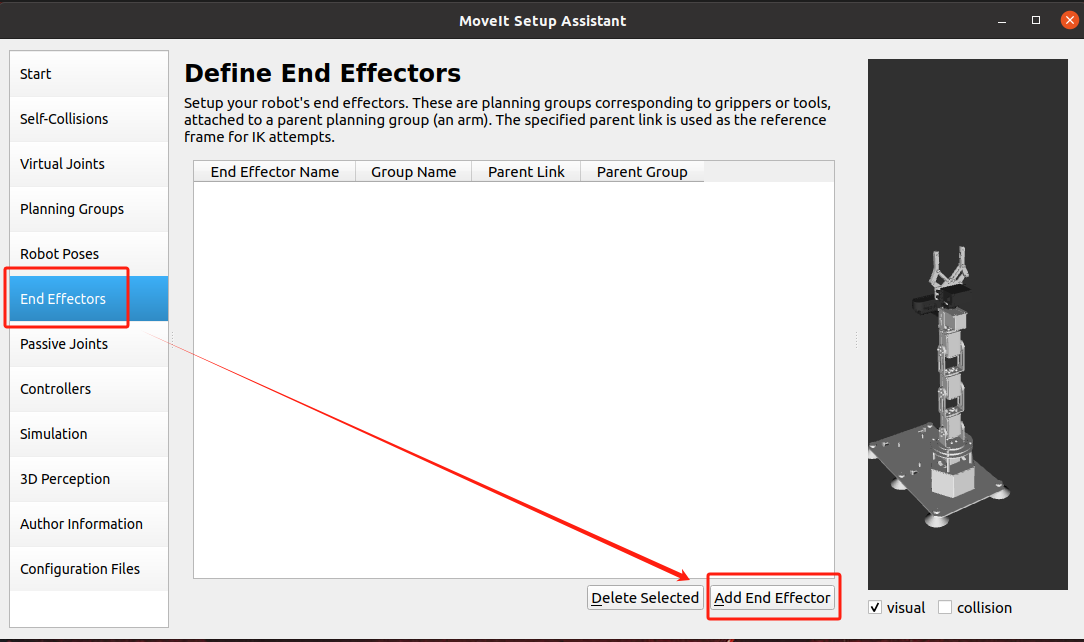
- Set the end effector joint
Select [End Effectors], click [Add End Effector],
Set as shown below, click [Save] to save,
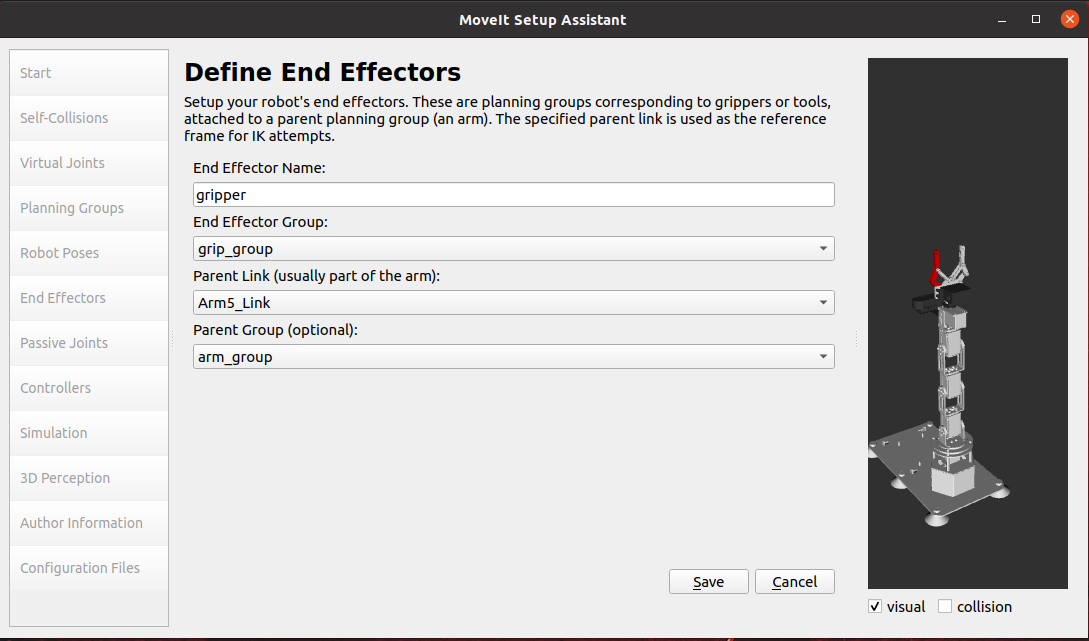
Save the settings as shown below,

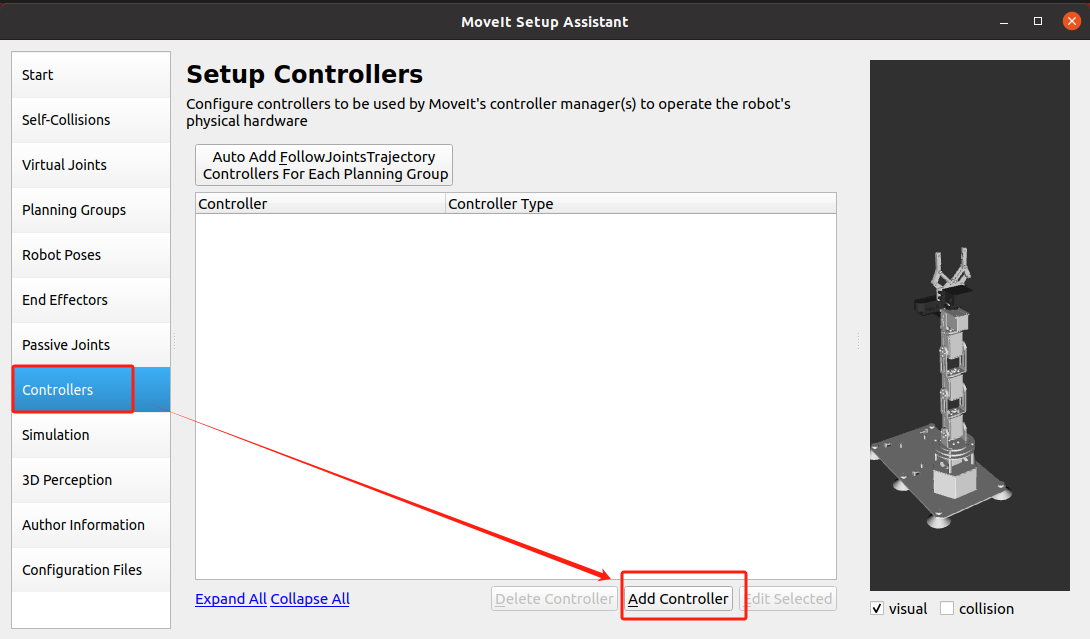
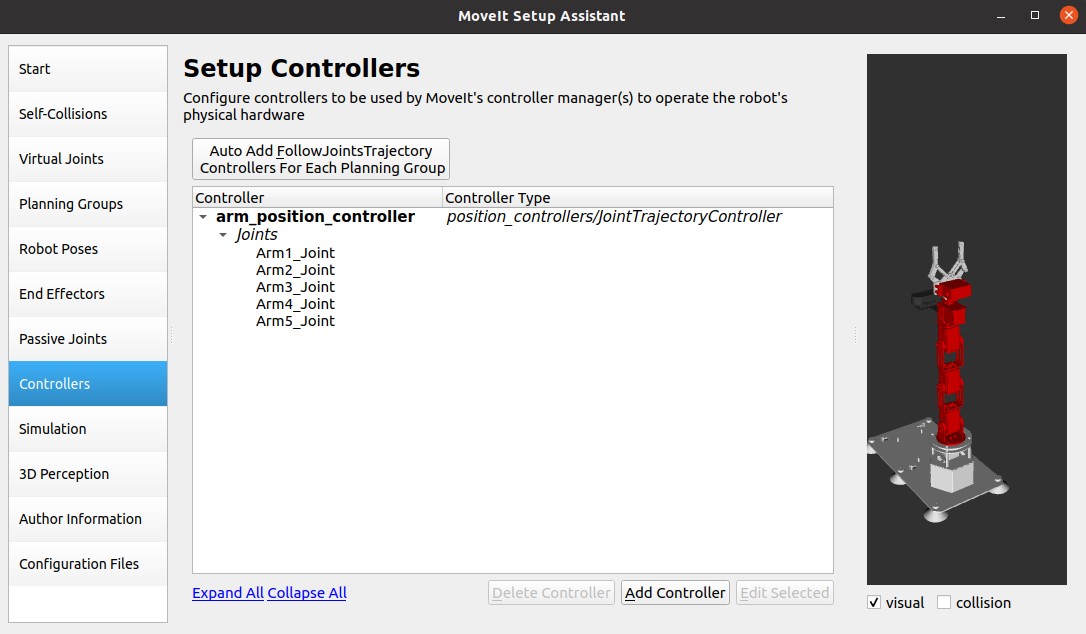
- Create a ROS controller
Select [ROS Control], click [Add Controller】,
Note: On the Jetson-Nano motherboard, here is displayed [ROS Control]

Set as shown below,
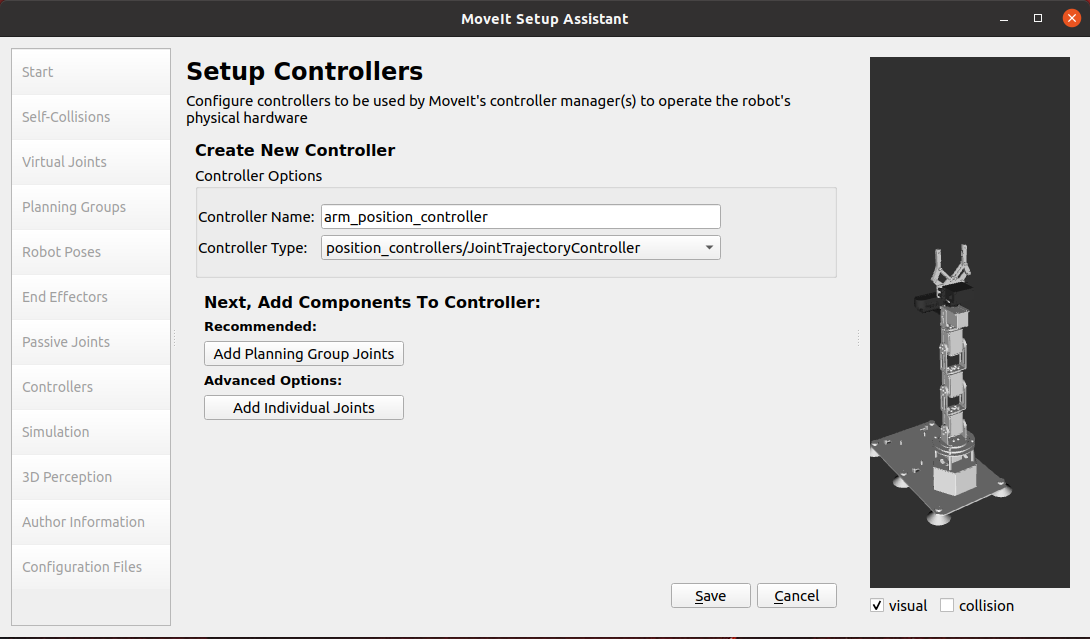
Click [Add Planning Group Joints】, add planning group joints, set as shown below,
Click [Save] to save, and the settings will be as shown below,
- Add author information, if not, it cannot be generated
Select [Author Information], add the following content,

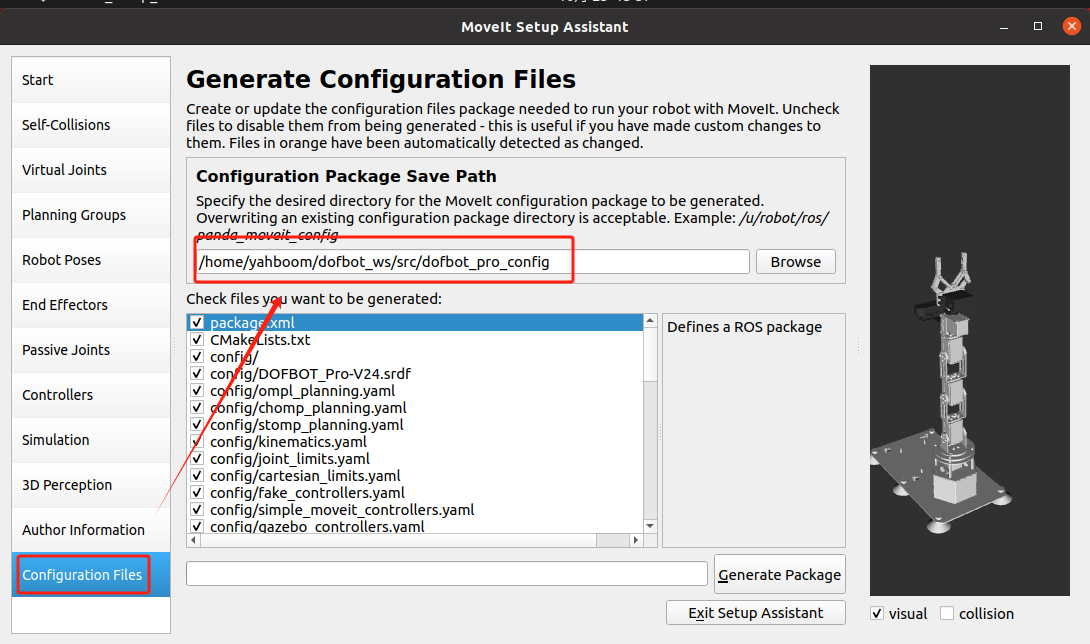
- Generate configuration file
Select [Configuration Files】, click 【Browse】, select the folder dofbot_pro_config created in the first step
 )
)
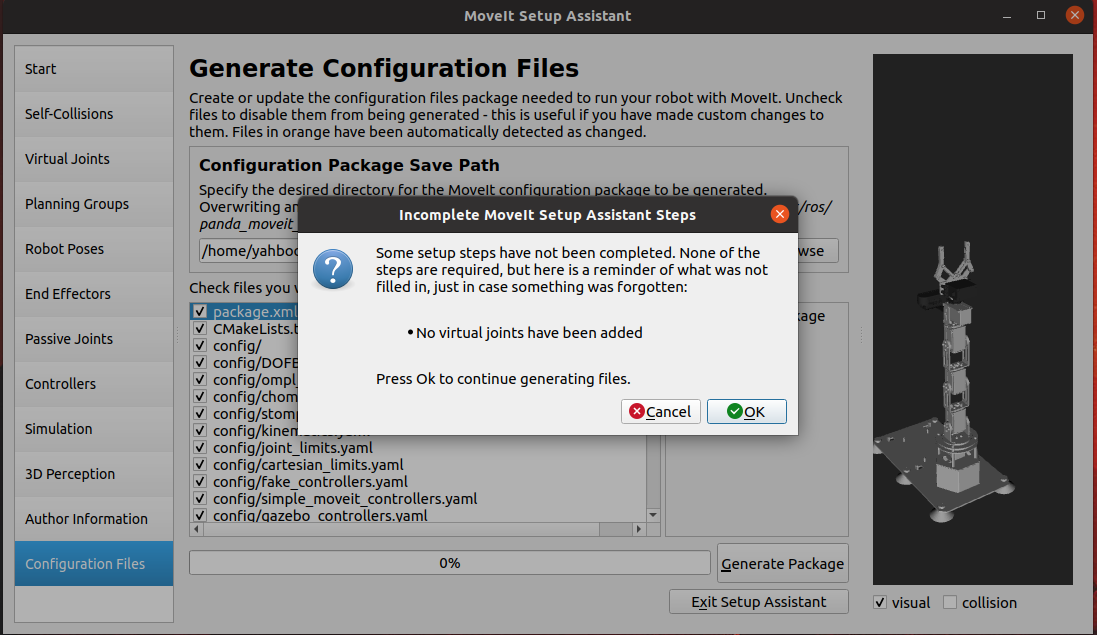
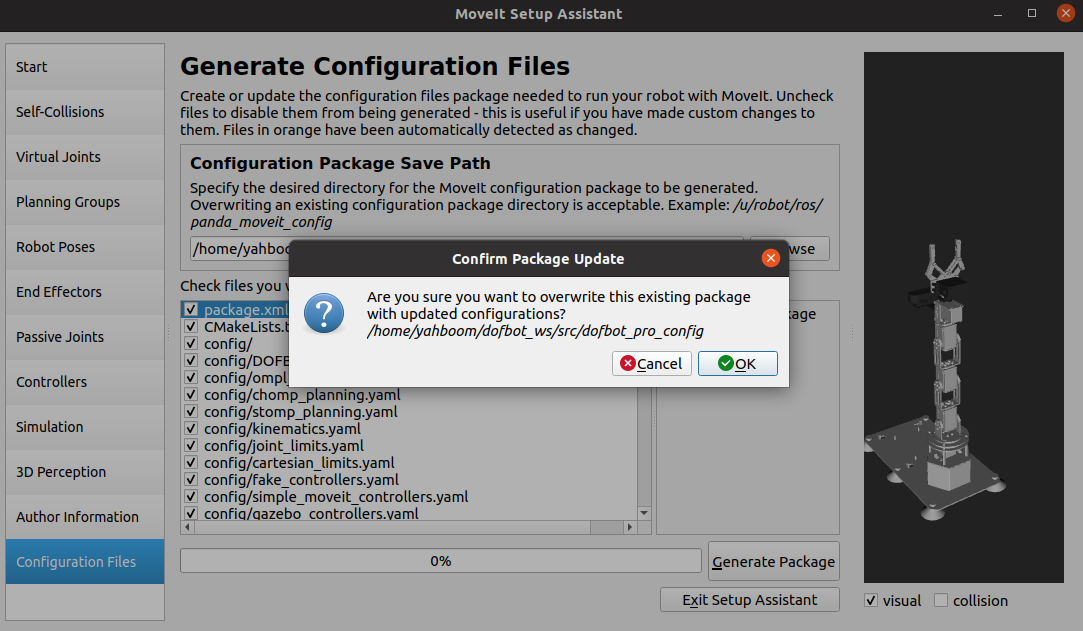
Click the 【Generate Package】 button, a confirmation box pops up, click 【ok】 to generate the configuration file,
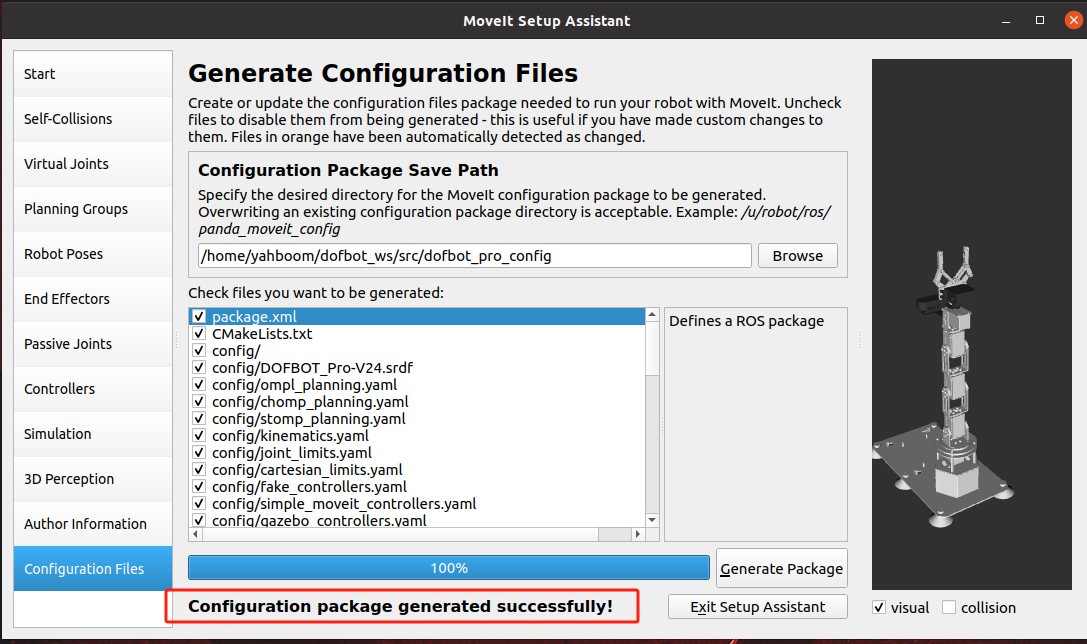
After completion, click 【Exit Setup Assistant】, complete as shown below,
4. Detailed explanation of MoveIt configuration package
Open the newly created [dofbot_pro_config] folder, and we find two folders: config and launch.
config folder
- fake_controllers.yaml: This is a virtual controller configuration file, which allows us to run MoveIt without a physical robot or even without any simulator (such as gazebo) turned on.
- joint_limits.yaml: This records the position, velocity, and acceleration limits of each joint of the robot, which will be used in future planning.
- kinematics.yaml: Things set by the motion planning group, used to initialize the kinematic solution library
- DOFBOT_PRO-V24.srdf: This is an important MoveIt configuration file.
- ompl_planning.yaml: This is where you configure various parameters for various OMPL algorithms.
- SRDF file: SRDF is the configuration file for moveit, used with URDF. We can see that this is an xml-formatted configuration file, with the root being robot and an attribute name='yahboomcar_dofbot'. The following is what we just set up in the Setup Assistant, including the definitions of the group, pose, terminal controller, virtual joint, and collision avoidance matrix ACM. In theory, as long as we have srdf and urdf, we can fully define a robot moveit information.
launch folder
- demo.launch: demo is the summary point of the run, and when we open it, we can see that it includes other launch files.
- move_group.launch: As the name suggests, the function of move group is to make a planning group move. The default is to use the ompl motion planning library. The rest are to set some basic parameters, which can be skipped for now.
- planning_context.launch: Here we can see that the urdf and srdf files used, as well as the kinematic solution library, are defined. It is not recommended to change these manually, but if you need to use different urdf, srdf, you can change them here.
- setup_assistant.launch: If you need to change some configurations, you can run it directly.
5. Configuration verification
Enter the workspace where the configuration file is located and execute the following command
xxxxxxxxxxcd ~/dofbot_pro_ws/ # Enter the workspacecatkin_make -DCATKIN_WHITELIST_PACKAGES= dofbot_pro_config # Compilesource devel/setup.bash # Update the system environmentroslaunch dofbot_pro_config demo.launch # Start moveITThe Jetson-Nano motherboard may start slowly. When the following figure is shown, it means that the startup is successful and the loading is complete.
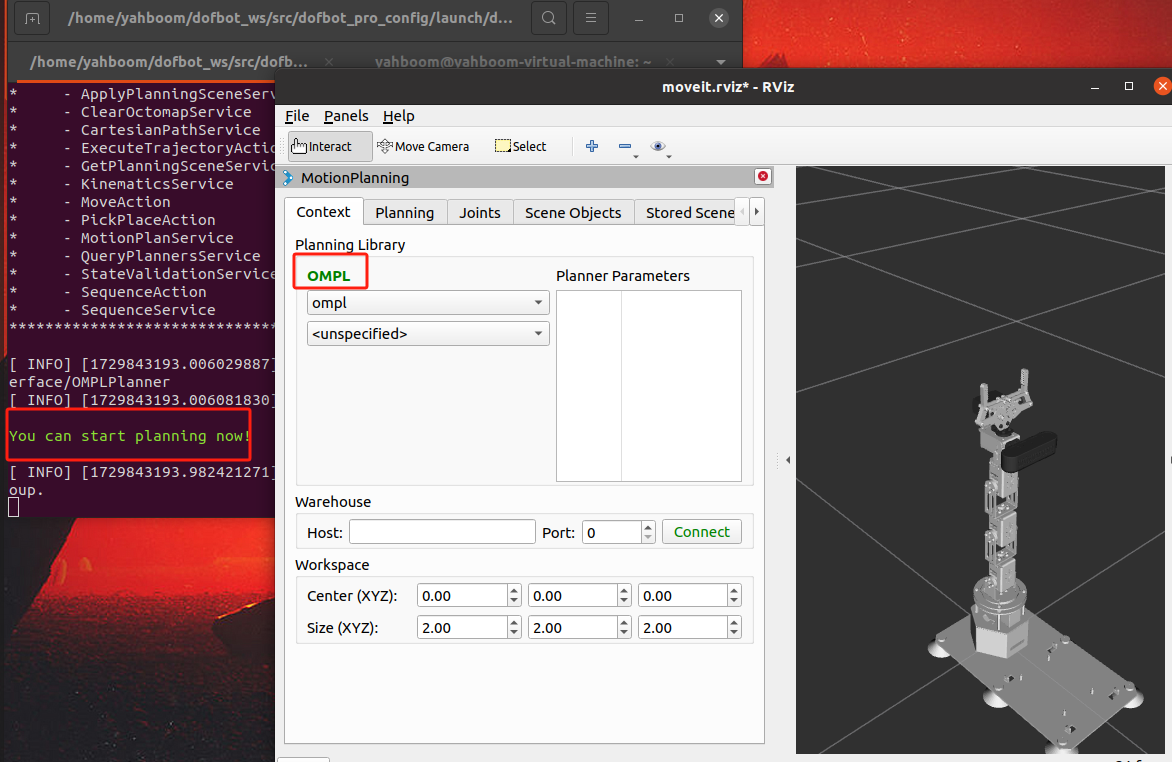
Note: If the green [OMPL] cannot be displayed in [Context] on the Jetson_Nano motherboard, you need to [Planning] in [Planning] Group】, change the default [arm_group] to [gripper_group], and then go back to [Context] to see if the green [OMPL] is displayed. If the green [OMPL] still cannot be displayed, you need to restart demo.launch.
Select the [arm_group] planning group, and change "current" in [Goal State] to "init", as shown below,
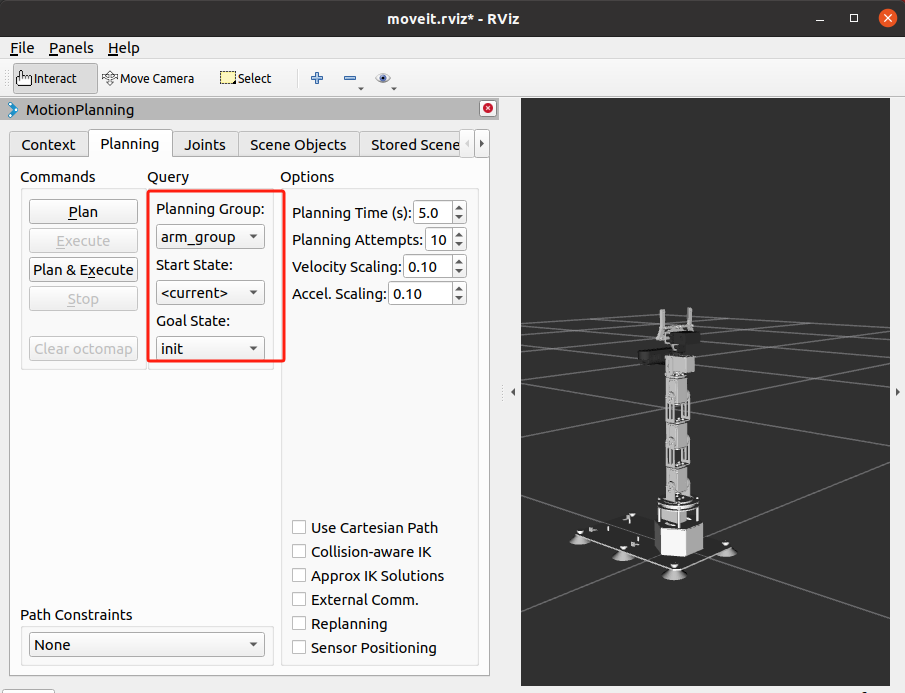
Click [Plan&Execute], plan and execute,
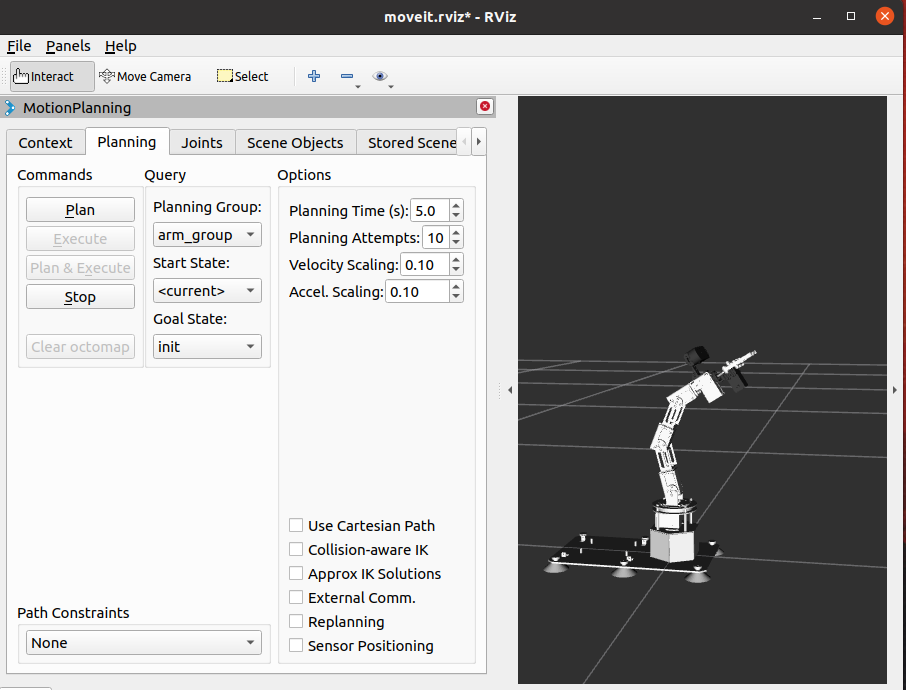
In rviz, the robot arm will move to the [init] posture we preset before. Set it in rviz as shown below,
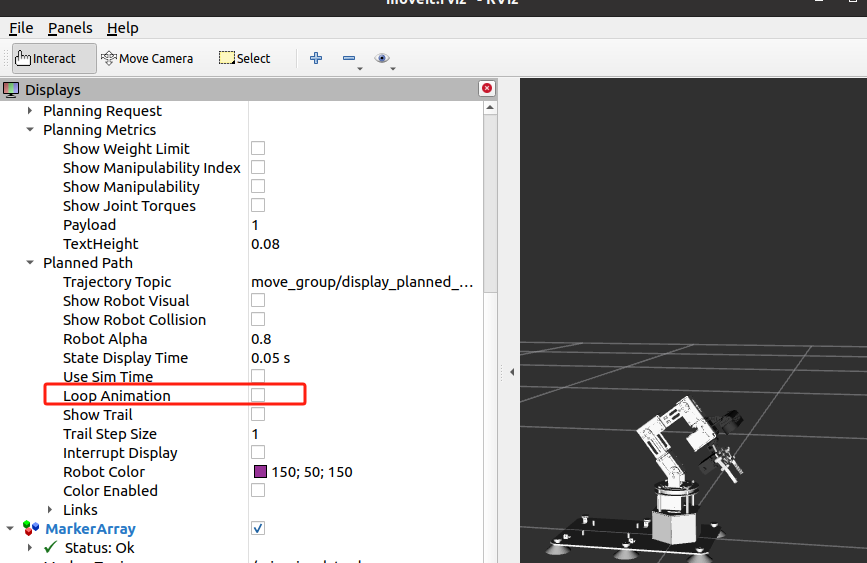
The robot arm will not keep repeating the movement.
As shown in the figure below, cancel Goal_State, and rviz will not always display the state of the goal.

After the setting is completed, press [Ctrl+s] to save the rviz settings.