4. JupyterLab environment construction and use
4. JupyterLab environment construction and use4.1 Get the Raspberry Pi IP address4.2 Start the JupyterLab environment4.3 HelloWorldCode blockWrite codeRun codeCode block descriptionPrecautions
The JupyterLab environment requires the computer and Raspberry Pi to be in the same LAN to use it normally. The factory system starts the JupyterLab service by default.
4.1 Get the Raspberry Pi IP address
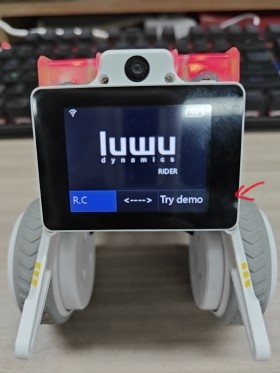
The first time the factory image is turned on, you need to configure the network connection in the startup program, then enter the remote control interface, press the button in the lower right corner of the Rider-pi screen, and you can query the corresponding IP address.

4.2 Start the JupyterLab environment
Open the browser on the computer and enter the IP address + port number of the Raspberry Pi in the address bar.
192.168.2.112:8888
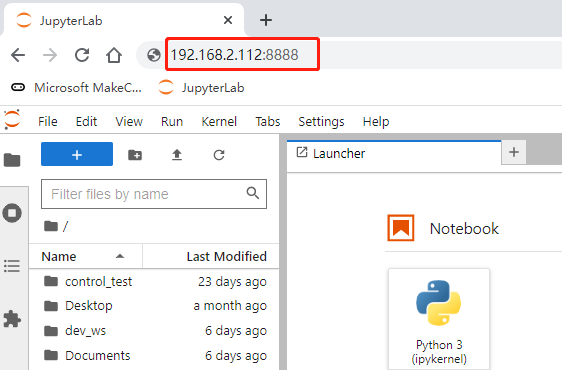
Then enter the JupyterLab login password (yahboom) to log in.
4.3 HelloWorld
Write and run the HelloWorld program.
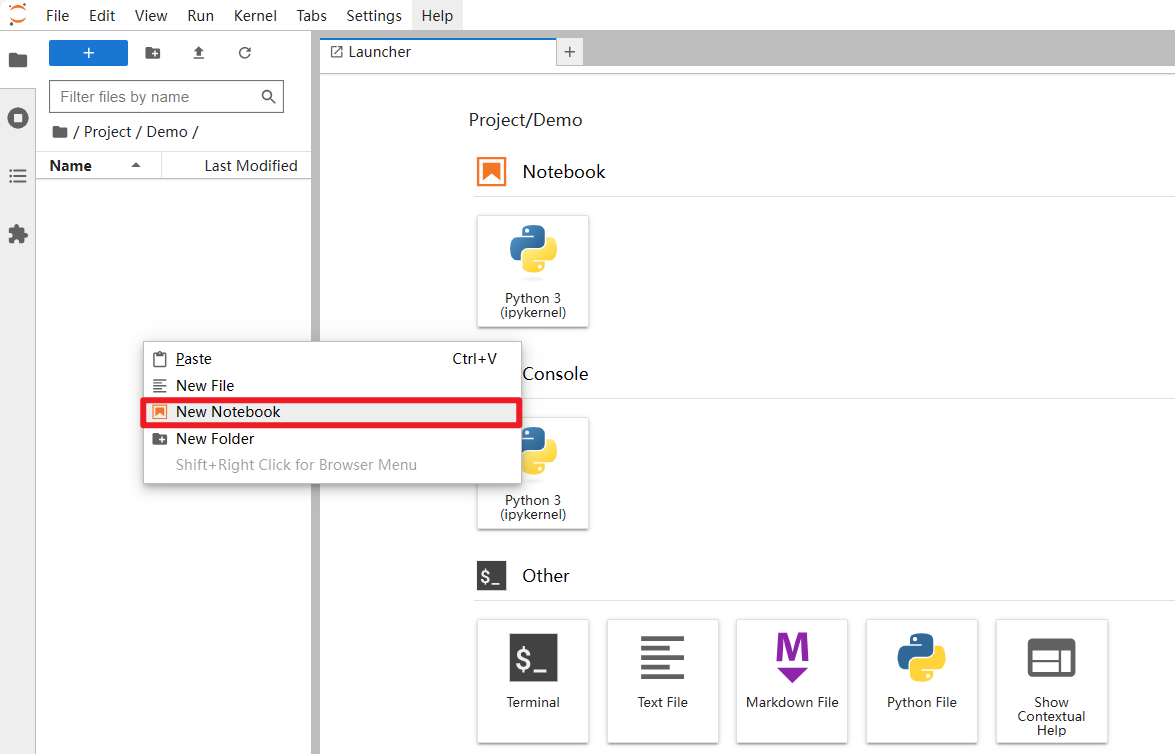
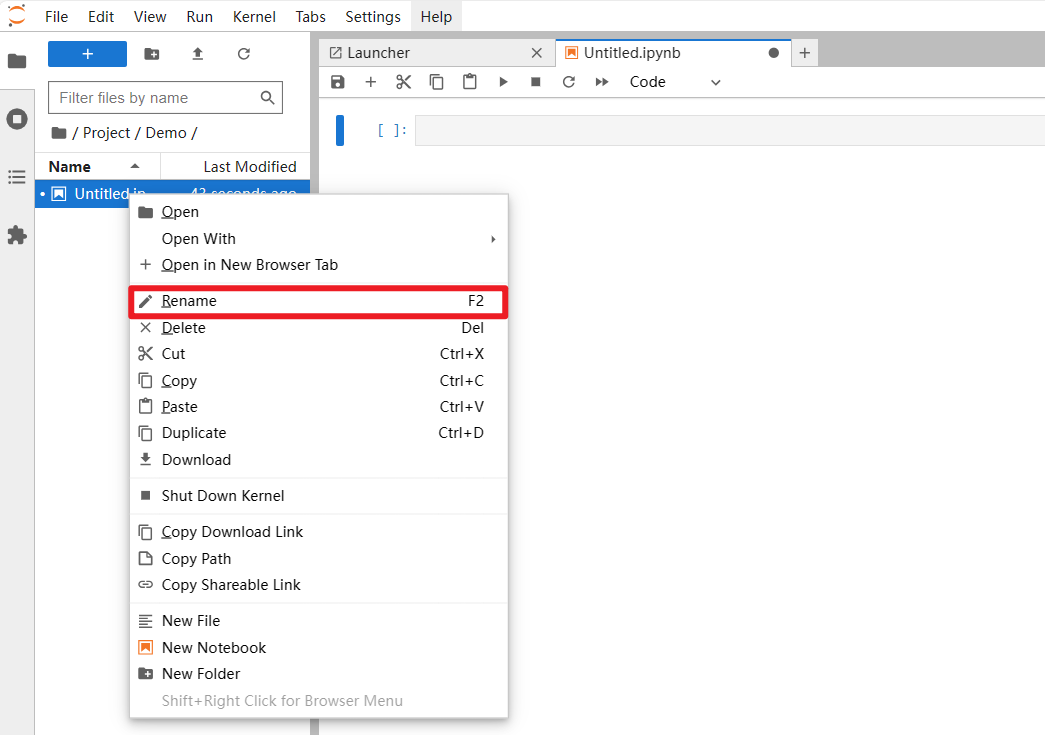
- Create a new file and name it HelloWorld
Right-click the file browser menu bar, select "New Notebook File (New Notebook)", select Python3 for the kernel, and then rename it to HelloWorld
Code block
Select the following positions to add code blocks up or down

Write code

Run code

Code block description
The content in [ ] on the left side of the code block has two states: * and number
*: Indicates that the code block is still running
Number: represents the order in which code blocks are executed

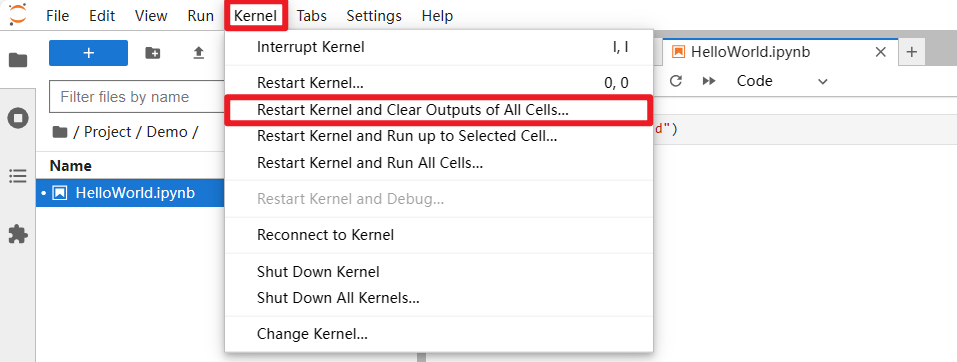
Precautions
If you want to reset or abnormal problems occur while the code is running, you can do the following: restart all cores and clear all code block output.