Image installation and backup
Image installation and backup6.1. Burn the SD card image6.2 Disk expansion6.3, backup SD card image6.2.1 Compress disk space6.2.2 View disk information6.2.3 Start disk backup
Note: The TF card of the RDK X5 robot has been burned with the image at the factory. You can directly insert the TF card into the robot for use. Generally, you do not need to burn the image system according to this tutorial! ! !
6.1. Burn the SD card image
Preparation: Windows 10/11 system computer, card reader, TF card (64G or larger recommended), factory image compressed package file.
Steps:
- Unzip the downloaded system compressed file to get the img image file;
- Insert the TF card into the card reader, and then insert the card reader into the computer USB port;
- Format the SD card to exfat format disk;
- Start the image burning software, here use the Win32DiskImager tool;
- Confirm the SD card device number and select the system image to be burned;
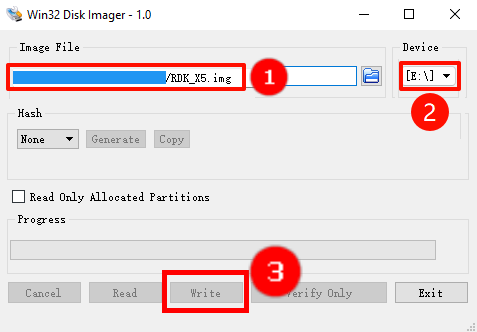
- Wait for the image writing to complete;
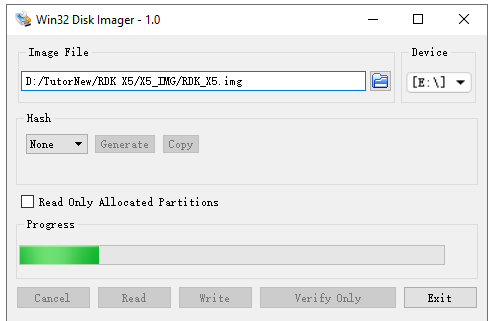
- The progress bar will show the current burning progress. After the burning is completed, you can exit the software.
- Eject the disk
6.2 Disk expansion
Insert the SD card into the RDK X5 motherboard slot and wait for the system to start.
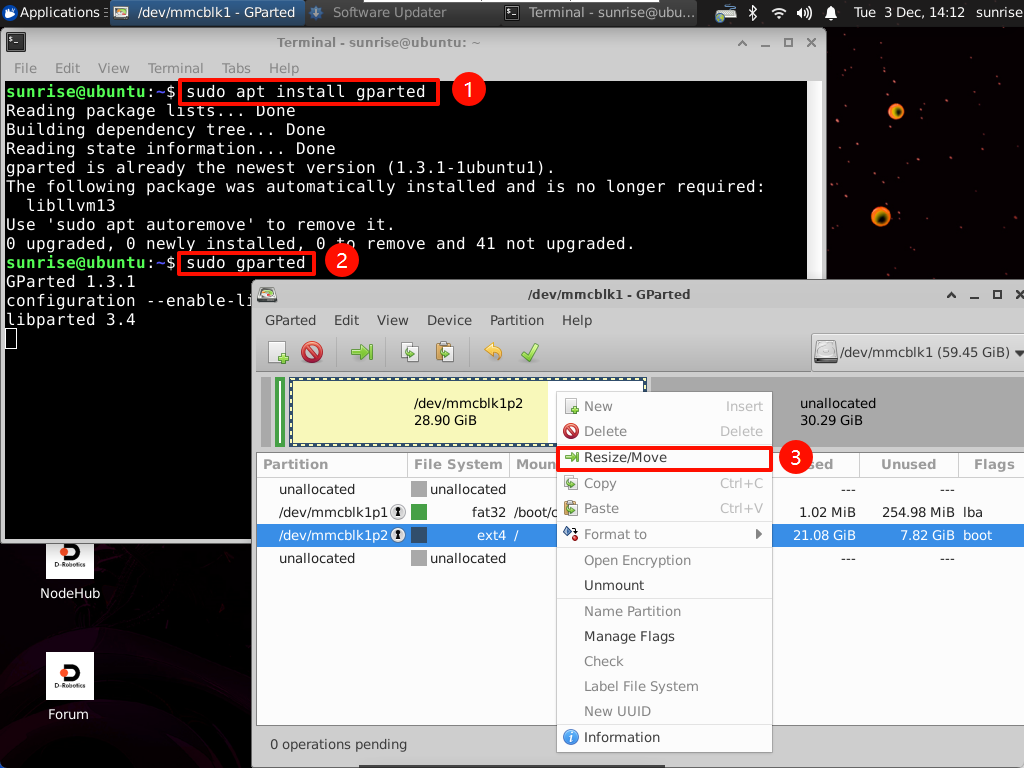
Install and run the GParted software on the system:
sudo apt install gparted #Installsudo gparted #Run
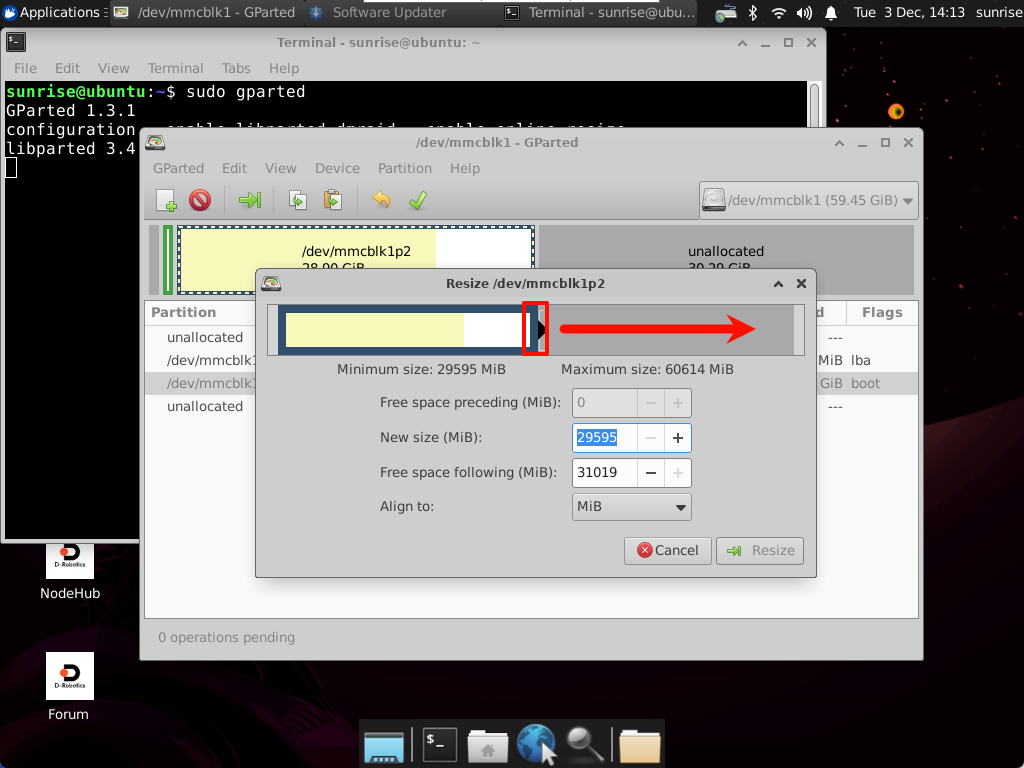
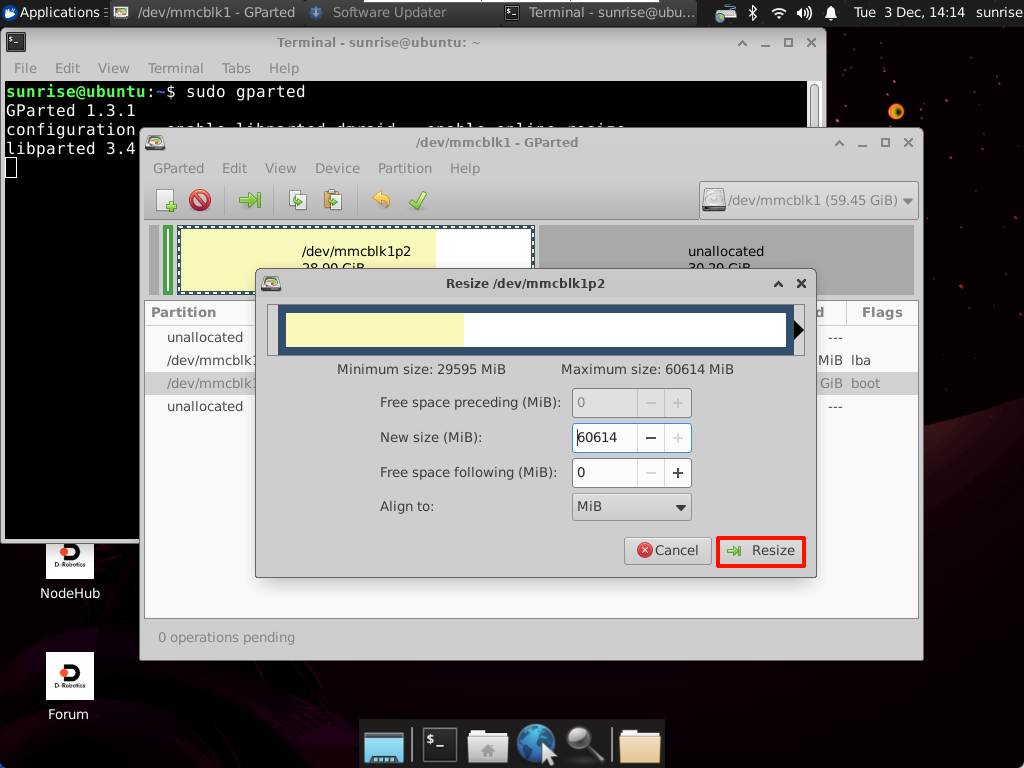
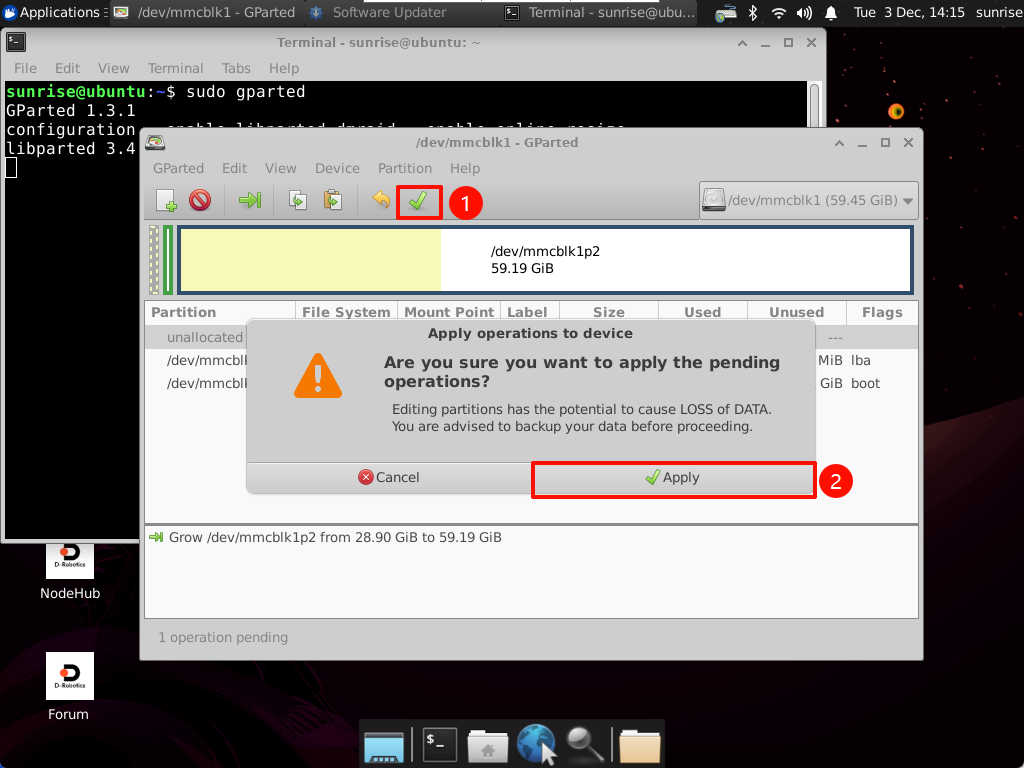
Drag the slider to change the disk space capacity:
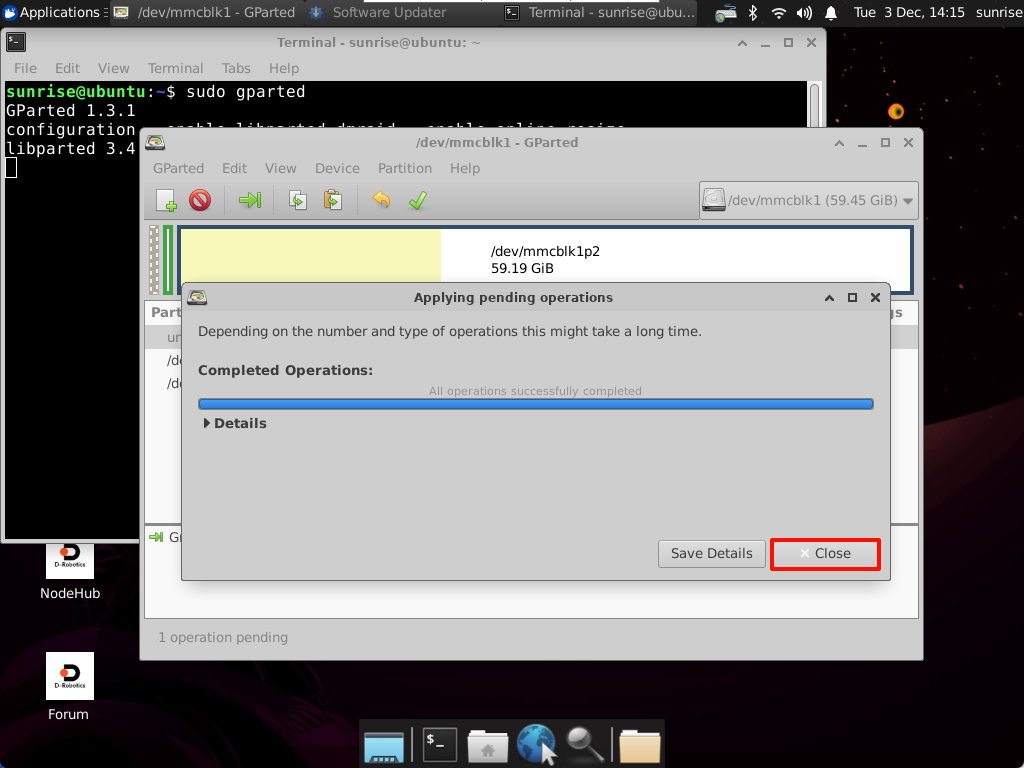
After completing all operations, close the software!
6.3, backup SD card image
6.2.1 Compress disk space
Before backing up the image, use gparted software to compress the disk space of the SD card to reduce the image size.
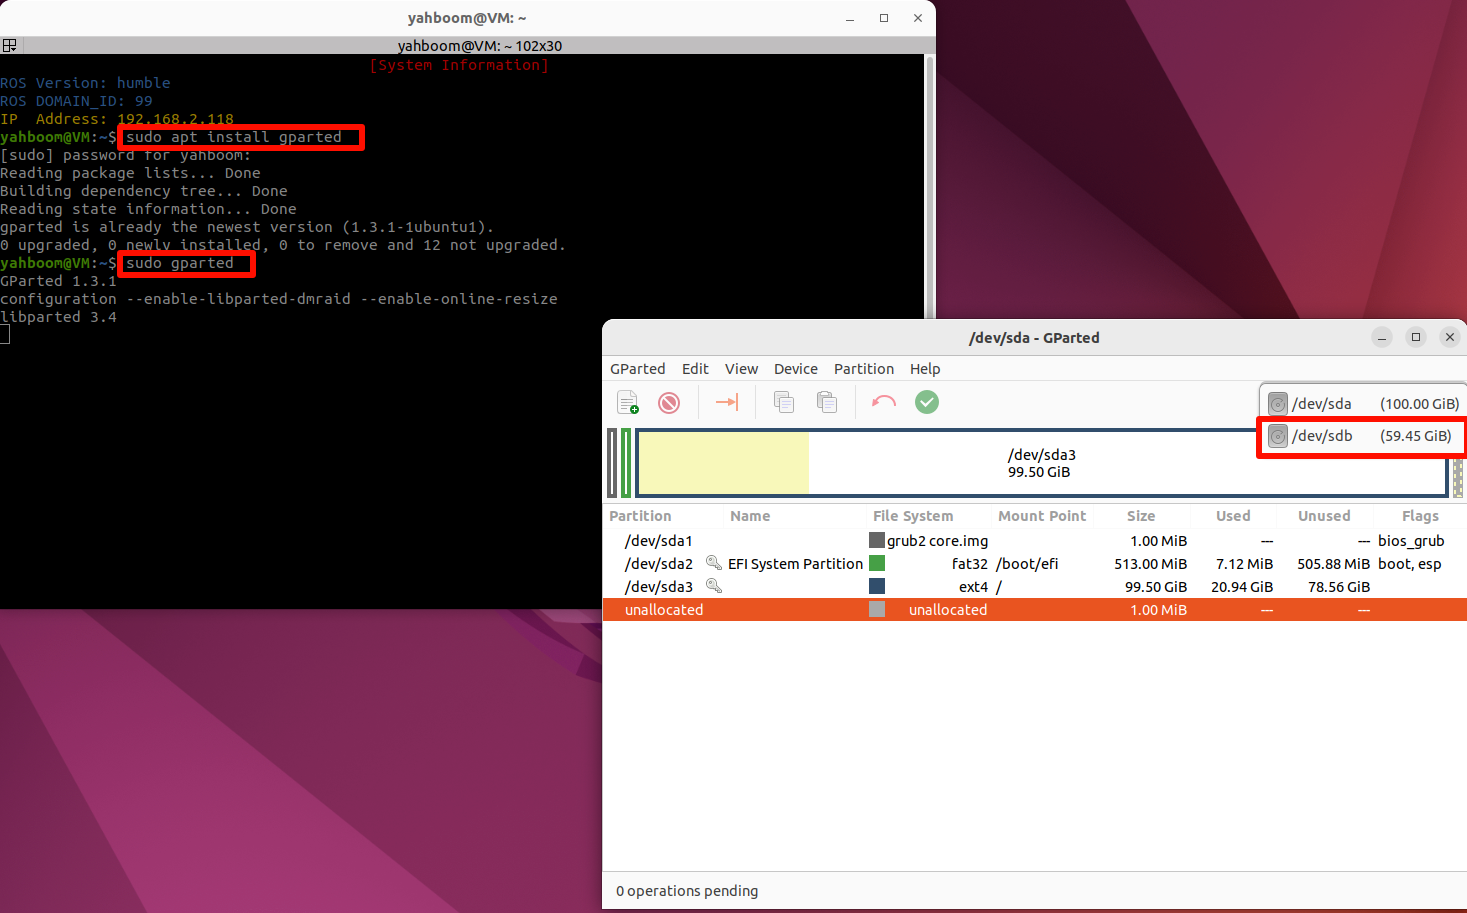
Install and start gparted software in the virtual machine:
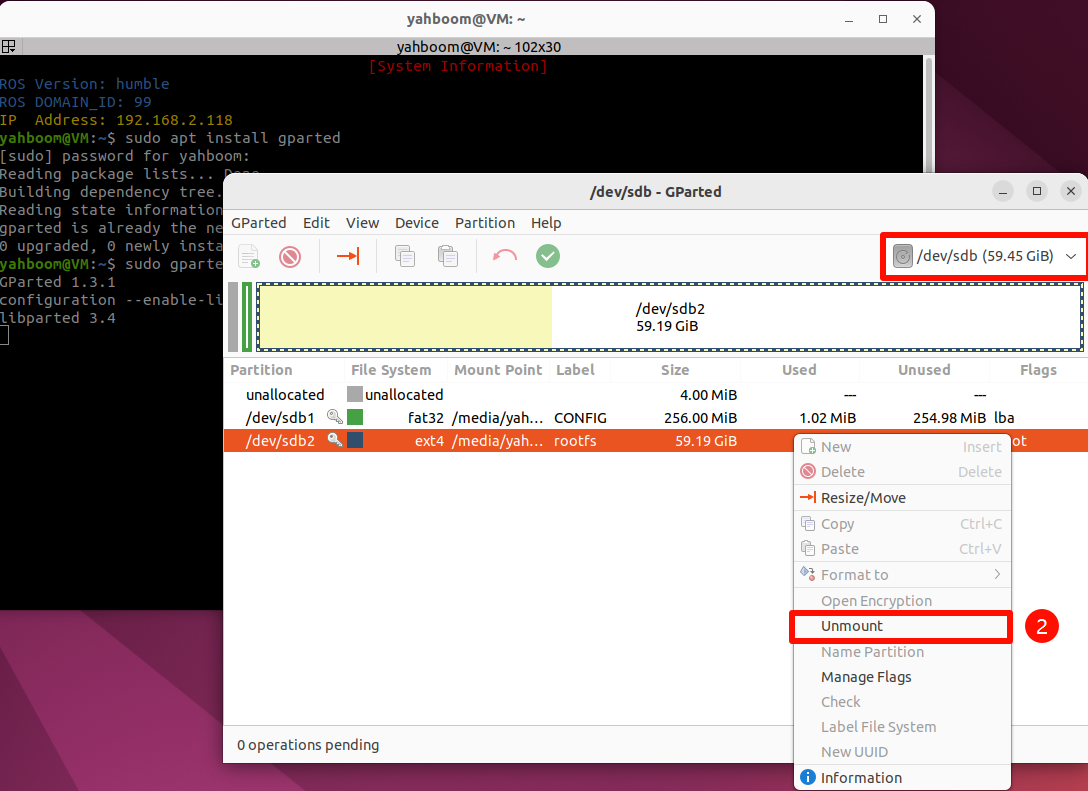
xxxxxxxxxxsudo apt install gparted #Installsudo gparted #RunInsert the SD card into the running computer through the card reader and connect it to the virtual machine. In the opened gparted software, select the SD card in the upper right corner:
Then right-click and select to uninstall the SD card mount:
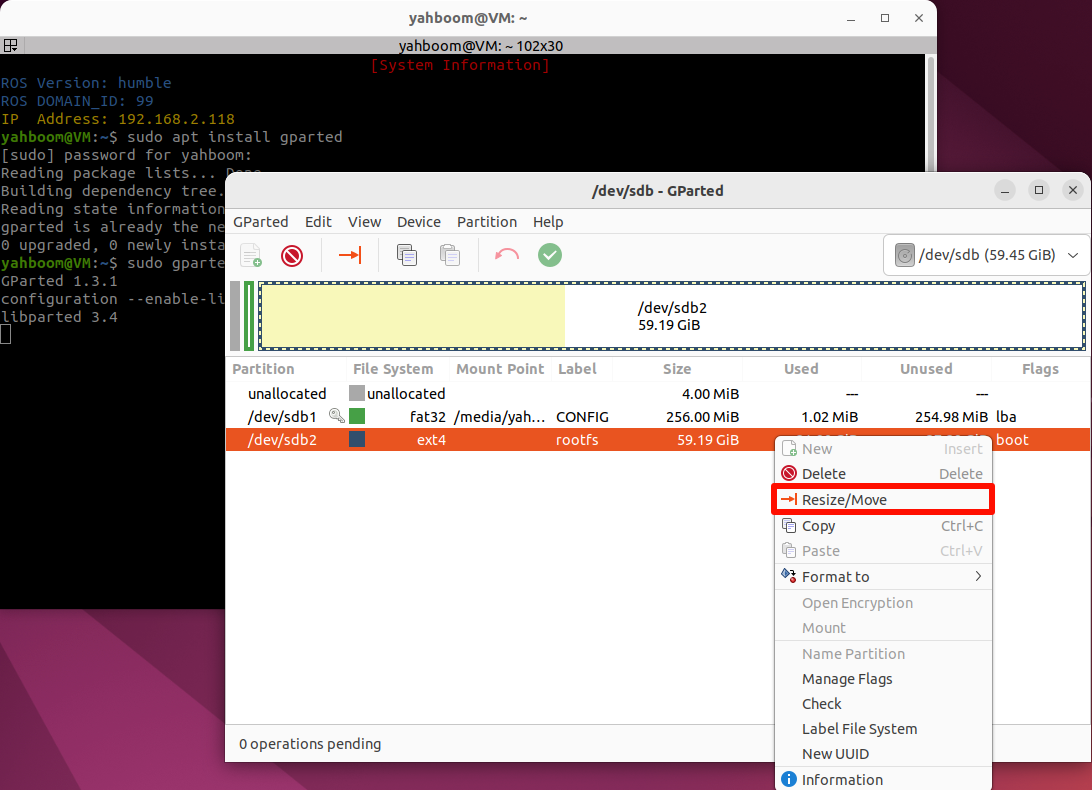
Continue to right-click and select the "Resize/Moves" option to reset the space size of the SD card:
Drag the right side of the space division bar to compress the space. The yellow one is the occupied partition and the white one is the free partition. Be careful to keep a little white free partition to prevent the image from failing to start.
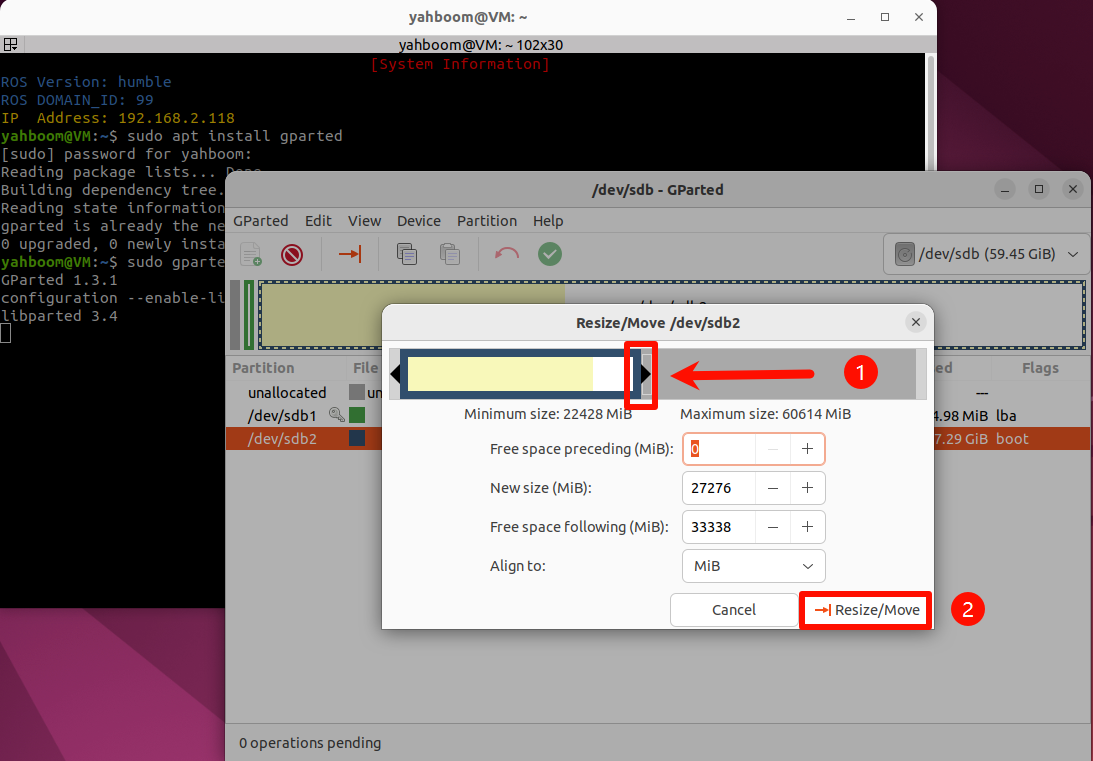
After confirmation, click the execute button in the software to start the compression operation.
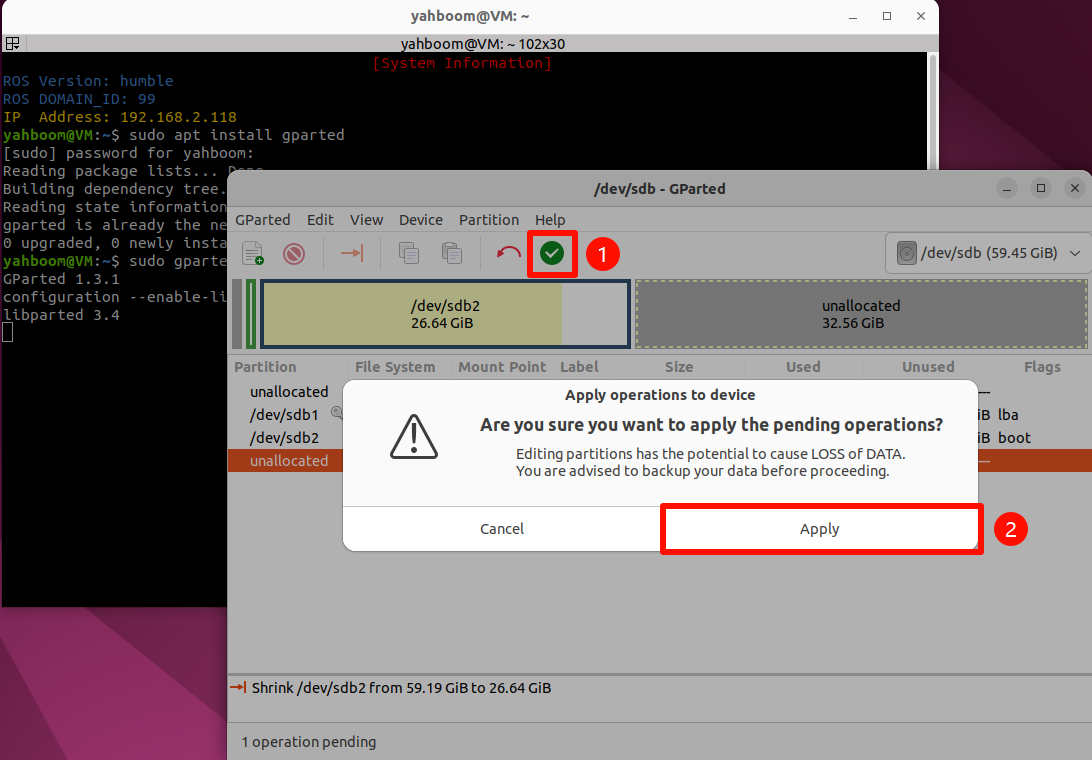
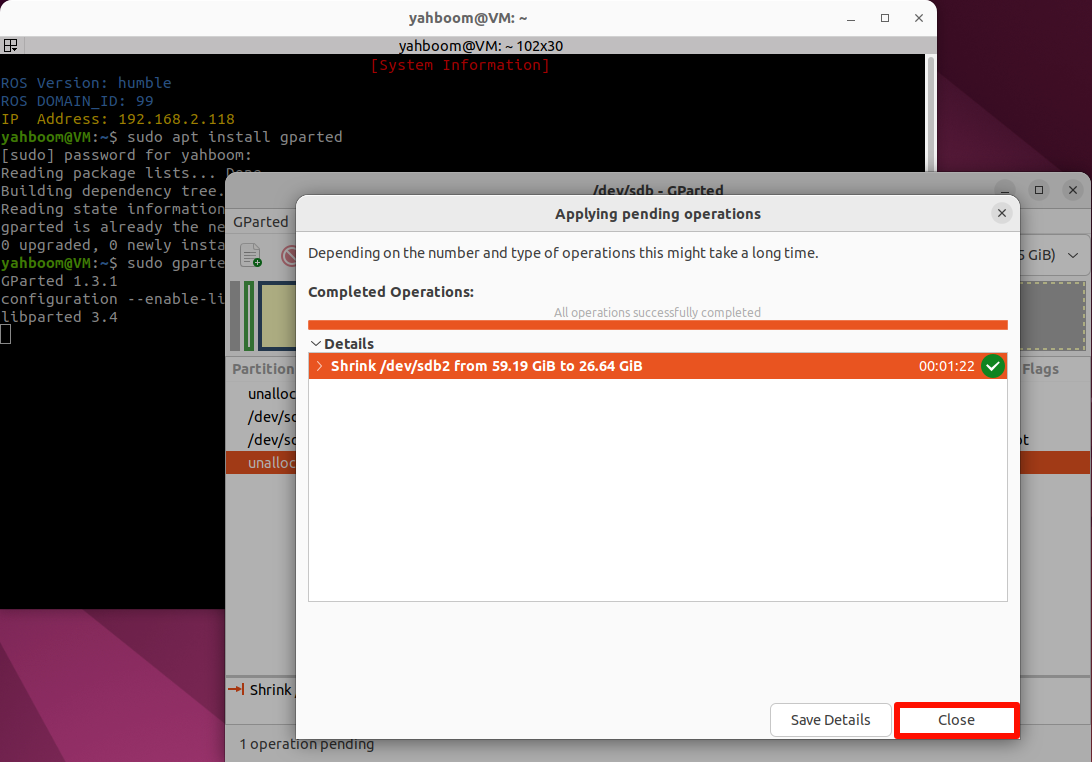
After the compression is completed, you can close the gparted software.
6.2.2 View disk information
Open the terminal and use the script to view the current disk status:
xxxxxxxxxx./parted_info.sh /dev/sdbparted_info.sh script content
xxxxxxxxxx#!/bin/bashdateecho $1sudo parted $1 <<EOFunit sprint freequitEOF
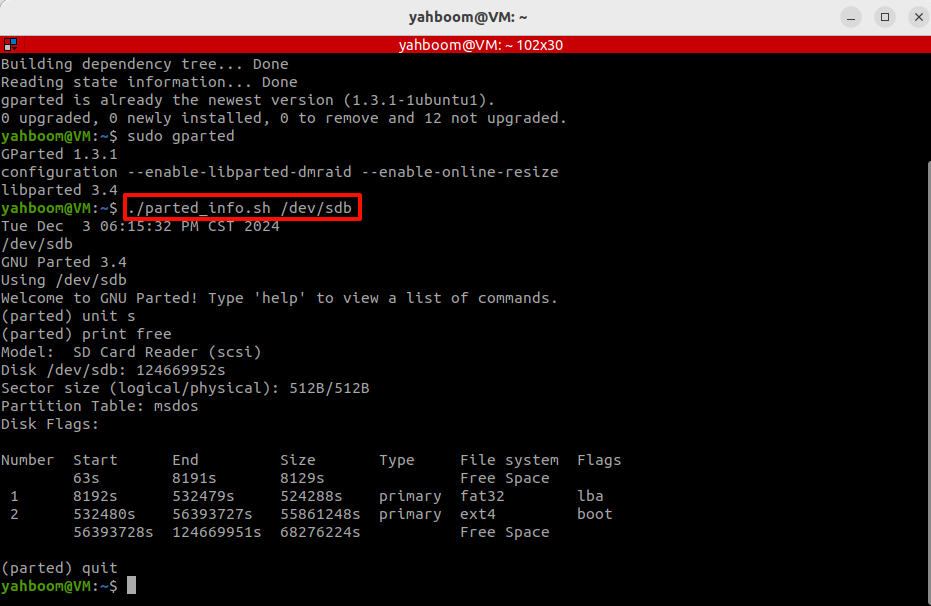
/dev/sdb in the figure is the disk number of the SD card, record this data in the figure: 56393728

6.2.3 Start disk backup
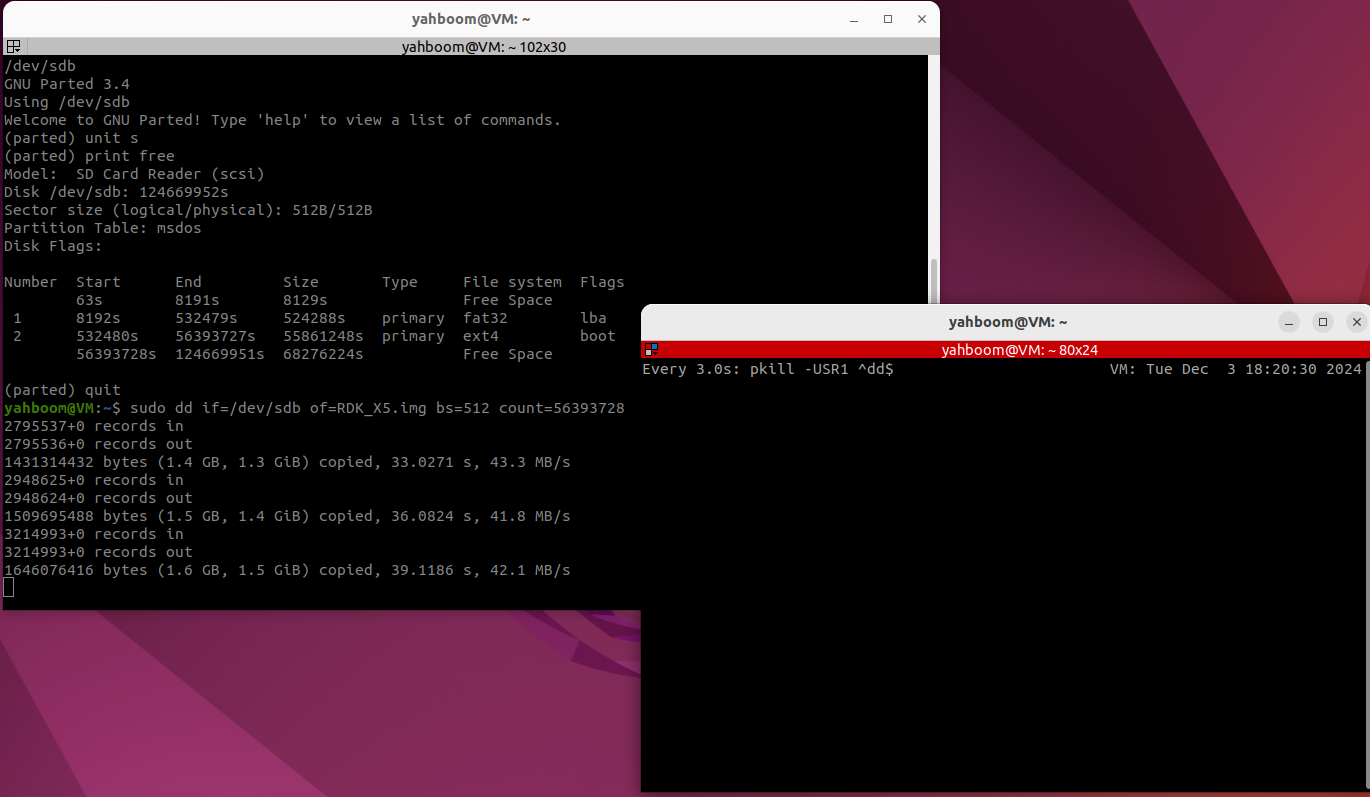
Use the dd command to back up the SD card to the img file. Enter the following in the terminal:
xxxxxxxxxxsudo dd if=/dev/sdb of=RDK_X5.img bs=512 count=56393728where if=/dev/sdb is the disk device number queried in the first step, of=RDK_X5.img is the name of the backup, bs=512 indicates the block size,
count=56393728 indicates the backup size, and this data is obtained from the above steps.
At this time, there is no prompt information in the terminal. Reopen a terminal and run the following command to check the progress.
xxxxxxxxxxsudo watch -n 3 pkill -USR1 ^dd$
Wait for the backup to complete!
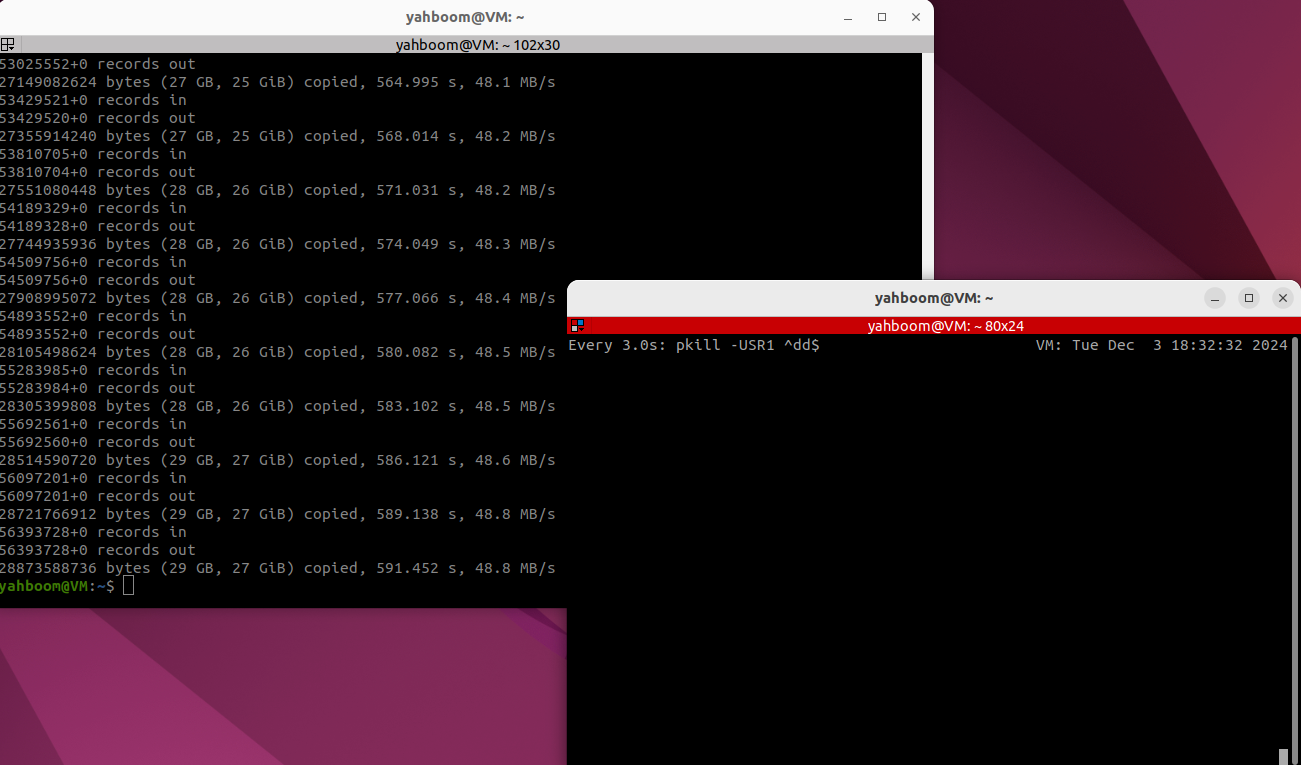
The above is the image burning and backup process!