Color tracking
Note: The virtual machine, ROS-wifi image transmission module and ESP32 communication board ROS_DOMAIN_ID need to be consistent, and both need to be set to 20. You can view [ESP32 communication board parameter configuration] to set the ESP32 communication board ROS_DOMAIN_ID, and view the tutorial [Connecting MicroROS Agent] to determine whether the ID is consistent.
Before running the experiment, please make sure that the microros balance car and ROS-wifi image transmission module have correctly enabled the agent on the virtual machine (linux with humbleROS2 system)
1. Program function description
MicroROS balance car color tracking has the ability to identify multiple colors at any time, and independently store the currently identified color, and control the car to track and detect the identified color left and right.
MicroROS balance car color tracking can also realize the function of HSV real-time control. By adjusting the high and low thresholds of HSV, the interfering colors are filtered out, so that the blocks can be identified in complex environments. If the effect of color picking is not ideal, the car needs to be moved to different environments for calibration at this time, so that it can recognize the color we need in complex environments.
2. Program code reference path
~/yahboomcar_ws/src/yahboom_esp32ai_car/yahboom_esp32ai_car/colorTracker.py
colorTracker.py
Mainly complete image processing, calculate the center coordinates of the tracked object, and calculate the car's movement speed data for the chassis based on the center coordinates and depth information of the tracked object.
3. Program startup
3.1. Startup command
Input in terminal,
xxxxxxxxxx#Start chassis driverros2 launch yahboomcar_bringup yahboomcar_bringup_launch.pyxxxxxxxxxx#Start color tracking programros2 run yahboom_esp32ai_car colorTrackerIf the camera image is inverted, you need to see 3. Camera image correction (select) document to correct it yourself, this experiment will not be described.
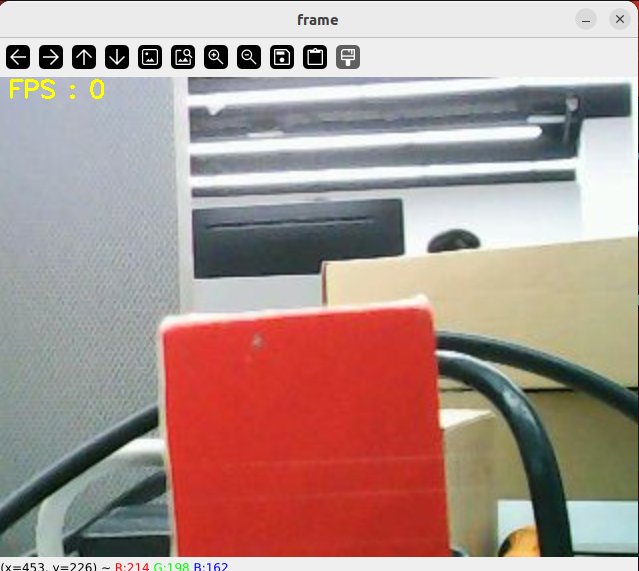
Taking tracking red as an example, after the program is started, the following screen will appear,
Then press the r/R key on the keyboard to enter the color selection mode, and use the mouse to frame an area (the area can only have one color),
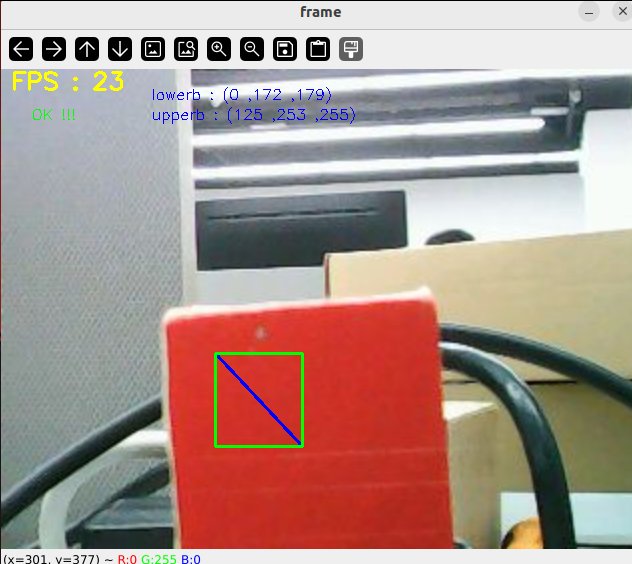
After selection, the effect is as shown below,
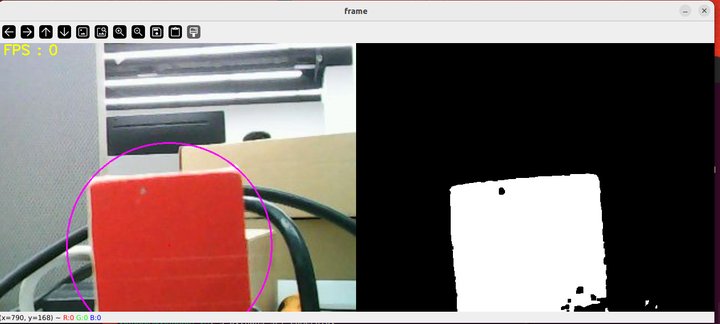
Then, press the space bar to enter the tracking mode, move the object slowly, and you can see that the robot will track the color block left and right.
Press the space bar to see the speed calculated by pid.
3.2, Dynamic parameter adjustment
xxxxxxxxxxros2 run rqt_reconfigure rqt_reconfigure
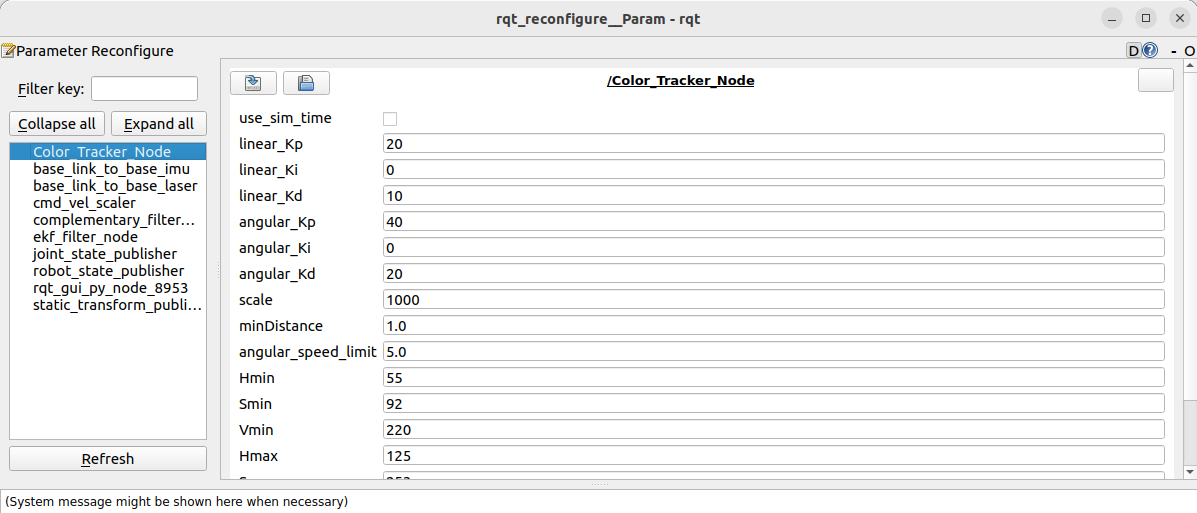
After modifying the parameters, click the blank space in the GUI to write the parameter value, and press the R key to take effect and reset. Or directly modify the source code, and then recompile and update. As can be seen from the above figure,
colorTracker mainly adjusts the three parameters of angularPID to make the car tracking more sensitive.
4, Core code
4.1, colorTracker.py
This program has the following functions:
Open the camera and get the image;
Get keyboard and mouse events for switching modes and picking colors;
Process the image and publish the center coordinates of the tracked object and publish it.
Some core codes are as follows,
x#Get keyboard and mouse events and get the value of hsvif action == 32: self.Track_state = 'tracking' #spaceelif action == ord('i') or action == ord('I'): self.Track_state = "identify"elif action == ord('r') or action == ord('R'): self.Reset()elif action == ord('q') or action == ord('Q'): self.cancel()if self.Track_state == 'init': cv.namedWindow(self.windows_name, cv.WINDOW_AUTOSIZE) cv.setMouseCallback(self.windows_name, self.onMouse, 0) if self.select_flags == True: cv.line(rgb_img, self.cols, self.rows, (255, 0, 0), 2) cv.rectangle(rgb_img, self.cols, self.rows, (0, 255, 0), 2) if self.Roi_init[0] != self.Roi_init[2] and self.Roi_init[1] != self.Roi_init[3]: rgb_img, self.hsv_range = self.color.Roi_hsv(rgb_img, self.Roi_init) self.gTracker_state = True self.dyn_update = True else: self.Track_state = 'init' #Calculate the value of the center coordinates, self.circle stores the xyz valuergb_img, binary, self.circle = self.color.object_follow(rgb_img, self.hsv_range)
#Publish the center coordinates messagethreading.Thread(target=self.execute, args=(self.circle[0], self.circle[1], self.circle[2])).start()def execute(self, x, y, z): position = Position() position.anglex = x * 1.0 position.angley = y * 1.0 position.distance = z * 1.0 self.pub_position.publish(position)xxxxxxxxxx#Define the topic data that the subscriber needs to receiveself.sub_JoyState = self.create_subscription(Bool,'/JoyState', self.JoyStateCallback,1)self.sub_img = self.create_subscription( CompressedImage, '/espRos/esp32camera', self.handleTopic, 1)#Define speed publisherself.pub_cmdVel = self.create_publisher(Twist,'/cmd_vel',10)
#Important callback functionself.handleTopic #x value and z value are calculated based on angular velocity and linear velocityself.execute(x, y,z)
#Processing functiondef execute(self, color_x, color_radius): if self.Joy_active == True: if self.Start_state == True: self.PID_init() self.Start_state = False return self.Start_state = True if z == 0: print("Not Found") self.pub_cmdVel.publish(Twist())
# Initialize twist object twist = Twist()
# twist.linear.x = self.linear [z_Pid, x_Pid] = self.lian_pid.update([(x - 320) * 1.0 / 12, (z - 130) / 10]) print("z_Pid:{:.2f}, x_Pid:{:.2f},x:{:.2f},z:{:.2f}".format(z_Pid, x_Pid, x, z)) if self.img_flip == True: twist.angular.z = -z_Pid else: twist.angular.z = +z_Pid
if abs(x - 320) < 40 or z_Pid > 1.0 and z_Pid < -1.0: twist.angular.z = 0.0
self.pub_cmdVel.publish(twist)