MDK-ARM project usage and transplantation
MDK-ARM project usage and transplantationProject experienceOpen the projectCompile the projectDownload the programProject migrationCopy fileAdd header files/pathsModify the main.c fileCompile the projectDownload the program
Project experience: Use the project files we provide to experience the corresponding functions of the development board
Project migration: Migrate our underlying driver code files to the project files developed by yourself
Tutorial demonstration case: LED control (GPIO)
Project experience
Use the STM32 Getting Started Tutorial: LED Control (GPIO) to demonstrate how to quickly experience our case functions.
xxxxxxxxxxProduct supporting materials source code path: Attachment → Source code summary → 1.Base_Course → 2.LED
Open the project
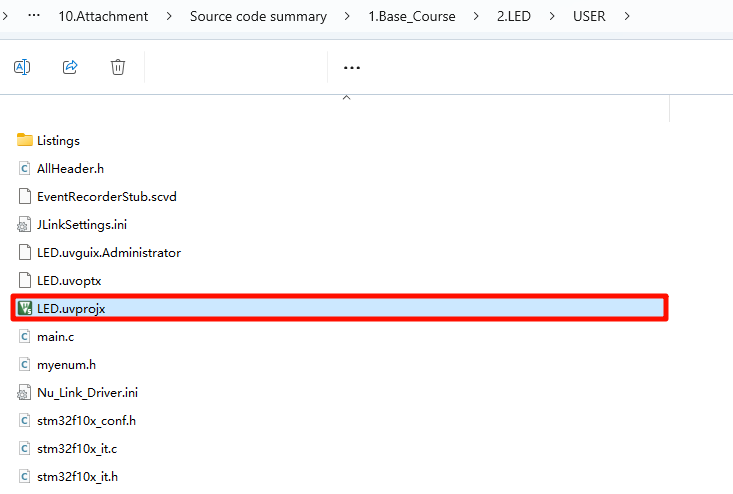
After decompressing the corresponding project file, find the file with the .uvprojx suffix and double-click it to open it.
xxxxxxxxxxThe .uvprojx suffix file is located in the USER directory of the project file
Compile the project
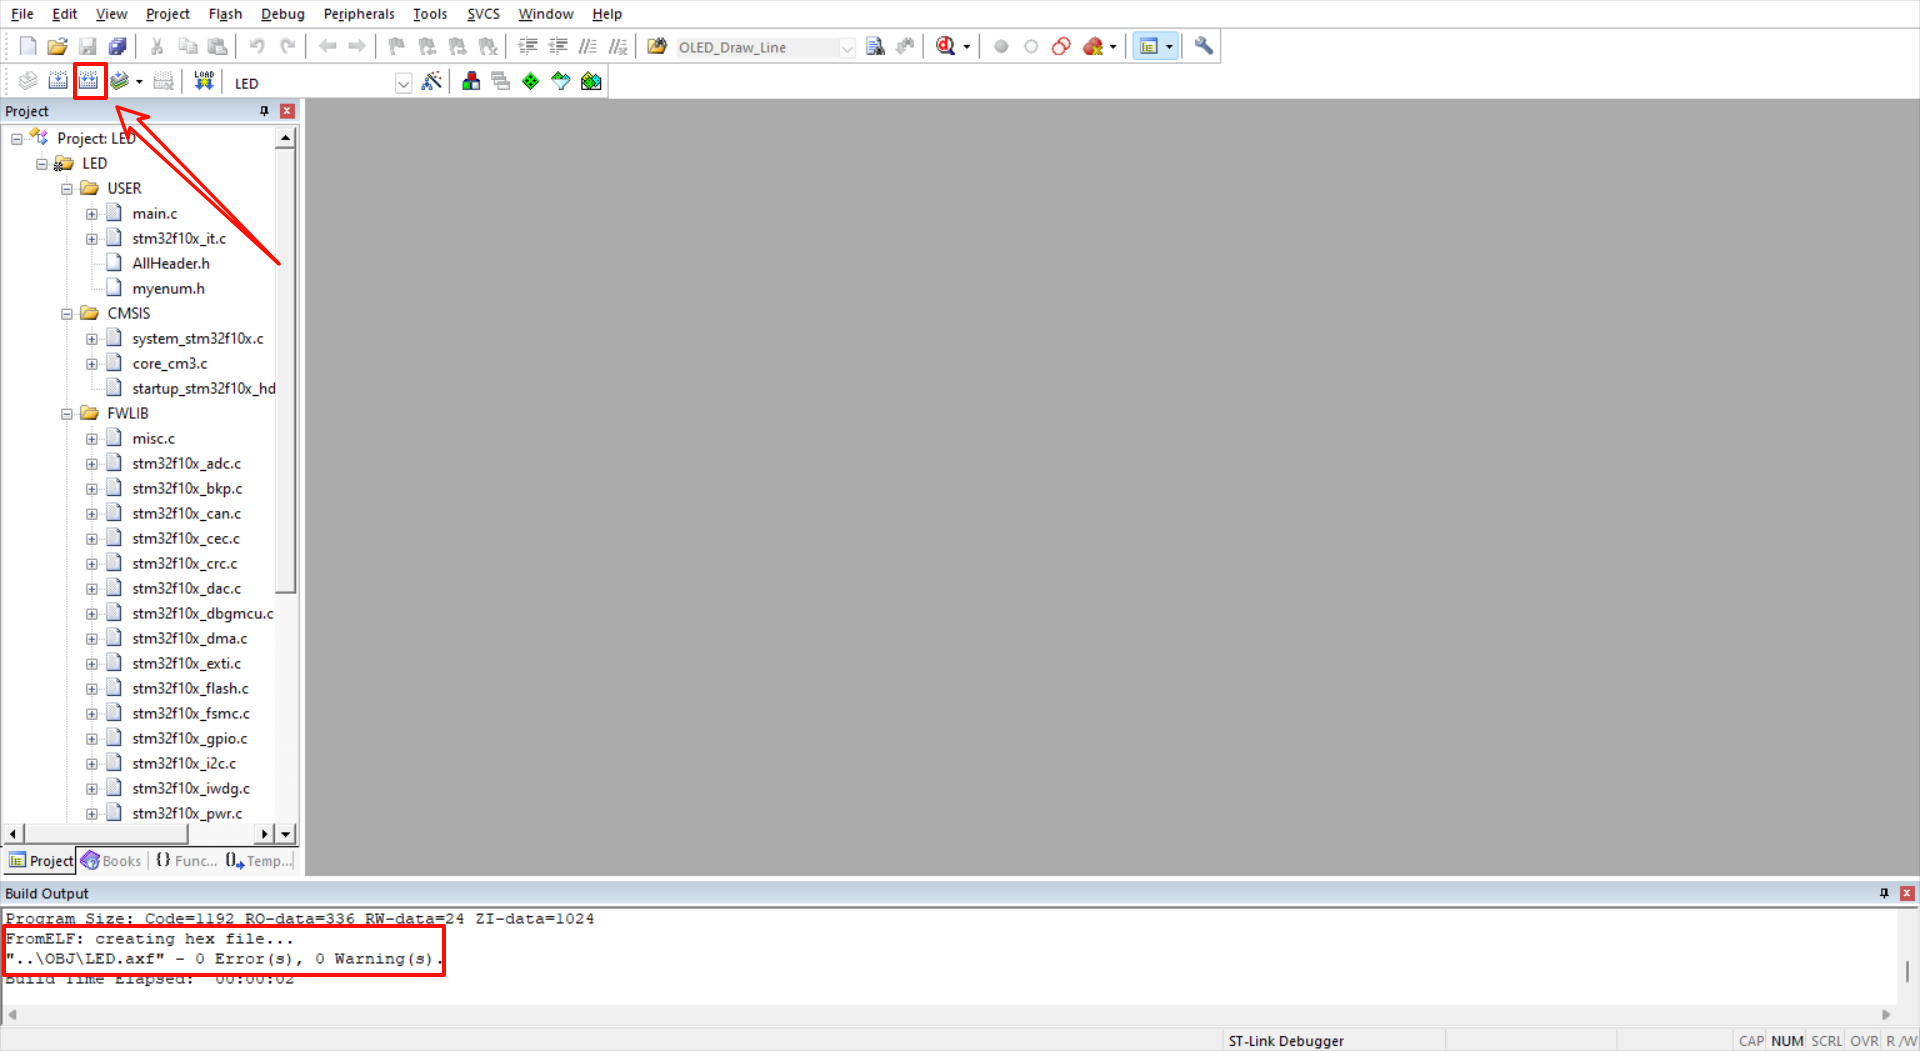
Click the Rebuild option on the toolbar to compile the project, and the compilation output bar will prompt the compilation results.
xxxxxxxxxxBefore compiling the project, you need to check the Create HEX File option in the project target. For details, see the [Download the program] tutorial
Download the program
The generated .hex file is located in the OBJ folder of the project file. Use the FlyMCU software to burn the .hex file into the development board.
xxxxxxxxxxFor detailed burning process, see the [Download the program] tutorial
Project migration
Migrate the driver code of the LED project to the template project (Template) file, and use the template (Template) project to control the LED flashing.
xxxxxxxxxxSecondary development does not provide technical support. Some cases are difficult to transplant and require certain user development capabilities. Users need to solve problems in the transplant process by themselves.
Project files used: 1. Template
xxxxxxxxxxProduct supporting materials source code path: Attachment → Source code summary → 1. Base_Course → 1. Template
Copy file
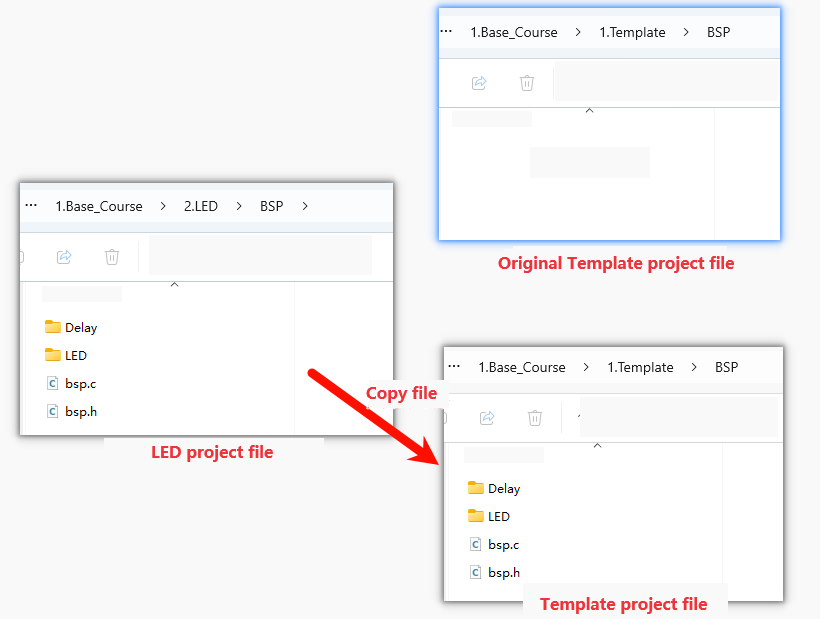
Copy the contents of the BSP folder of the LED project to the BSP folder of the template project:
xxxxxxxxxxOur peripheral driver function is written in the BSP folder of the project file. Users can perform secondary development according to their own ideas!
In the same steps, copy the AllHeader.h and myenum.h files in the LED project USER folder to the template project folder:
xxxxxxxxxxAllHeader.h: contains the header files usedmyenum.h: bit band operation file
Add header files/paths
Project management directory
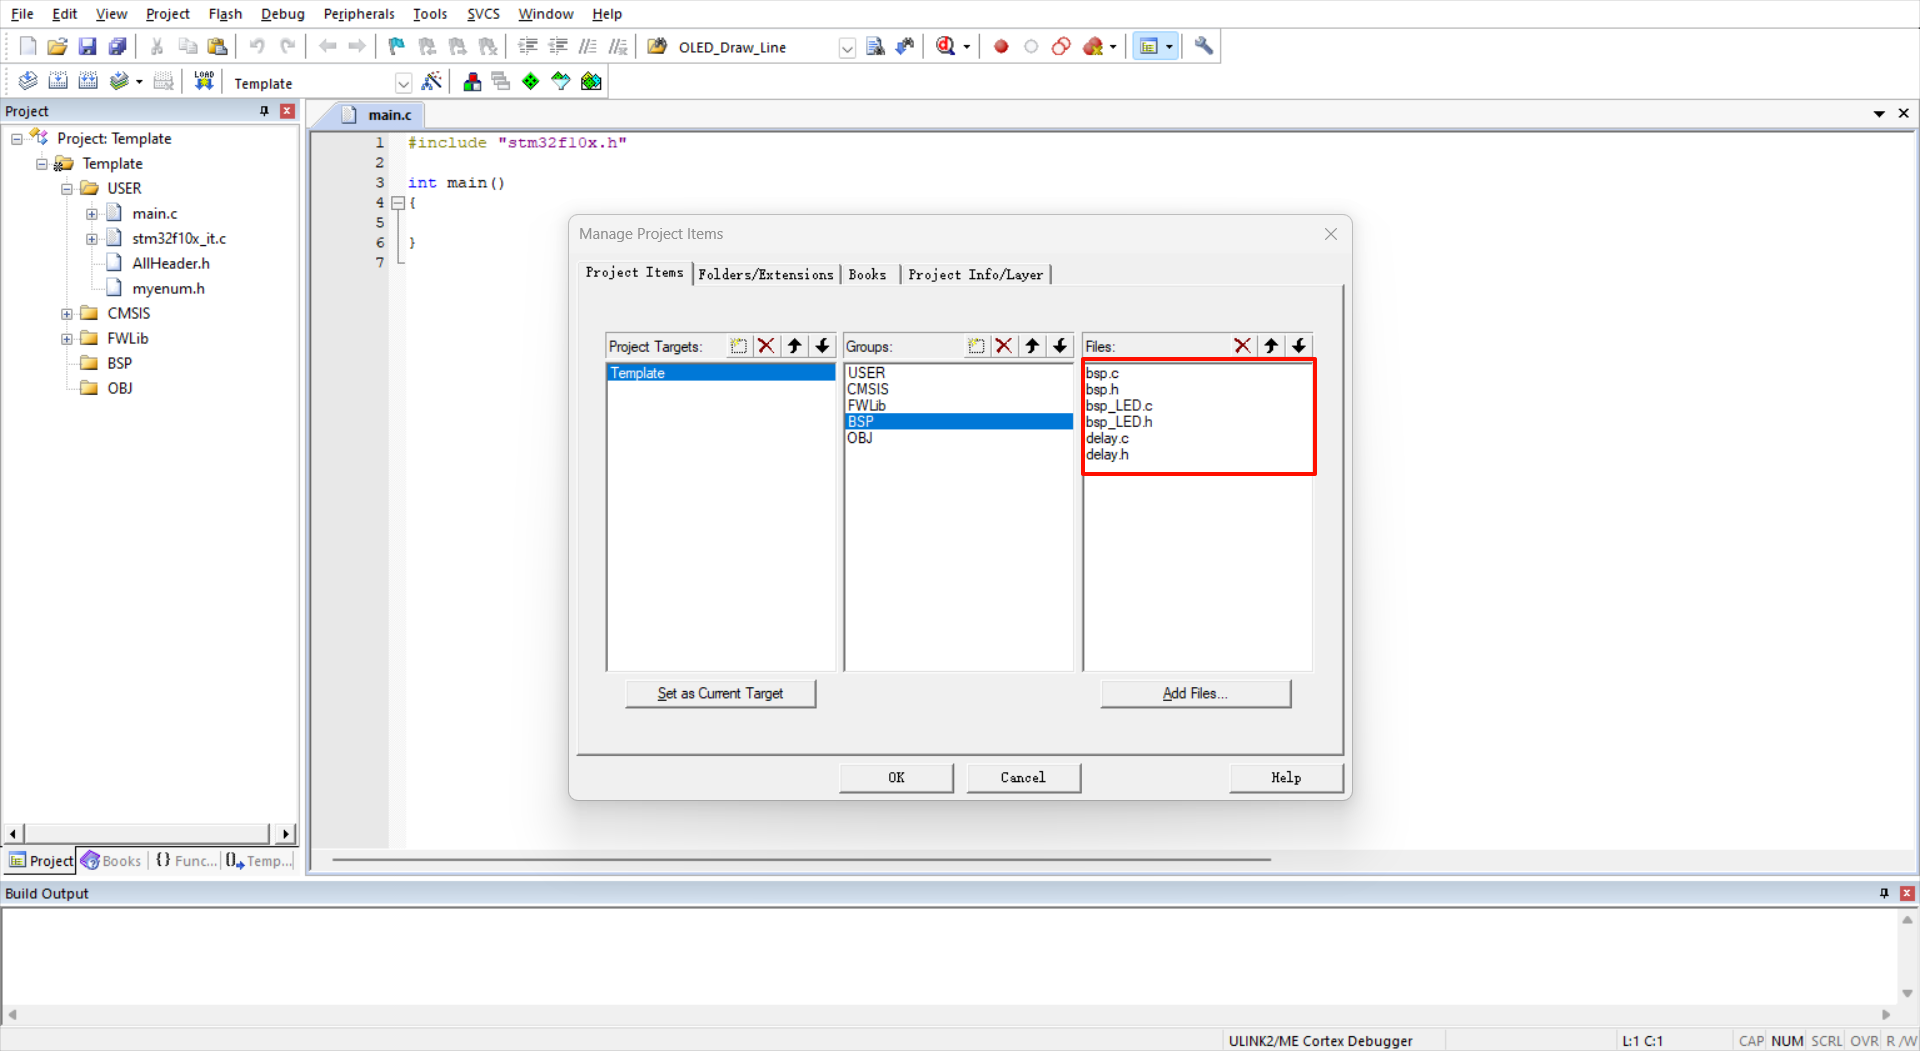
Open the template project file and add the files copied from the LED project to:
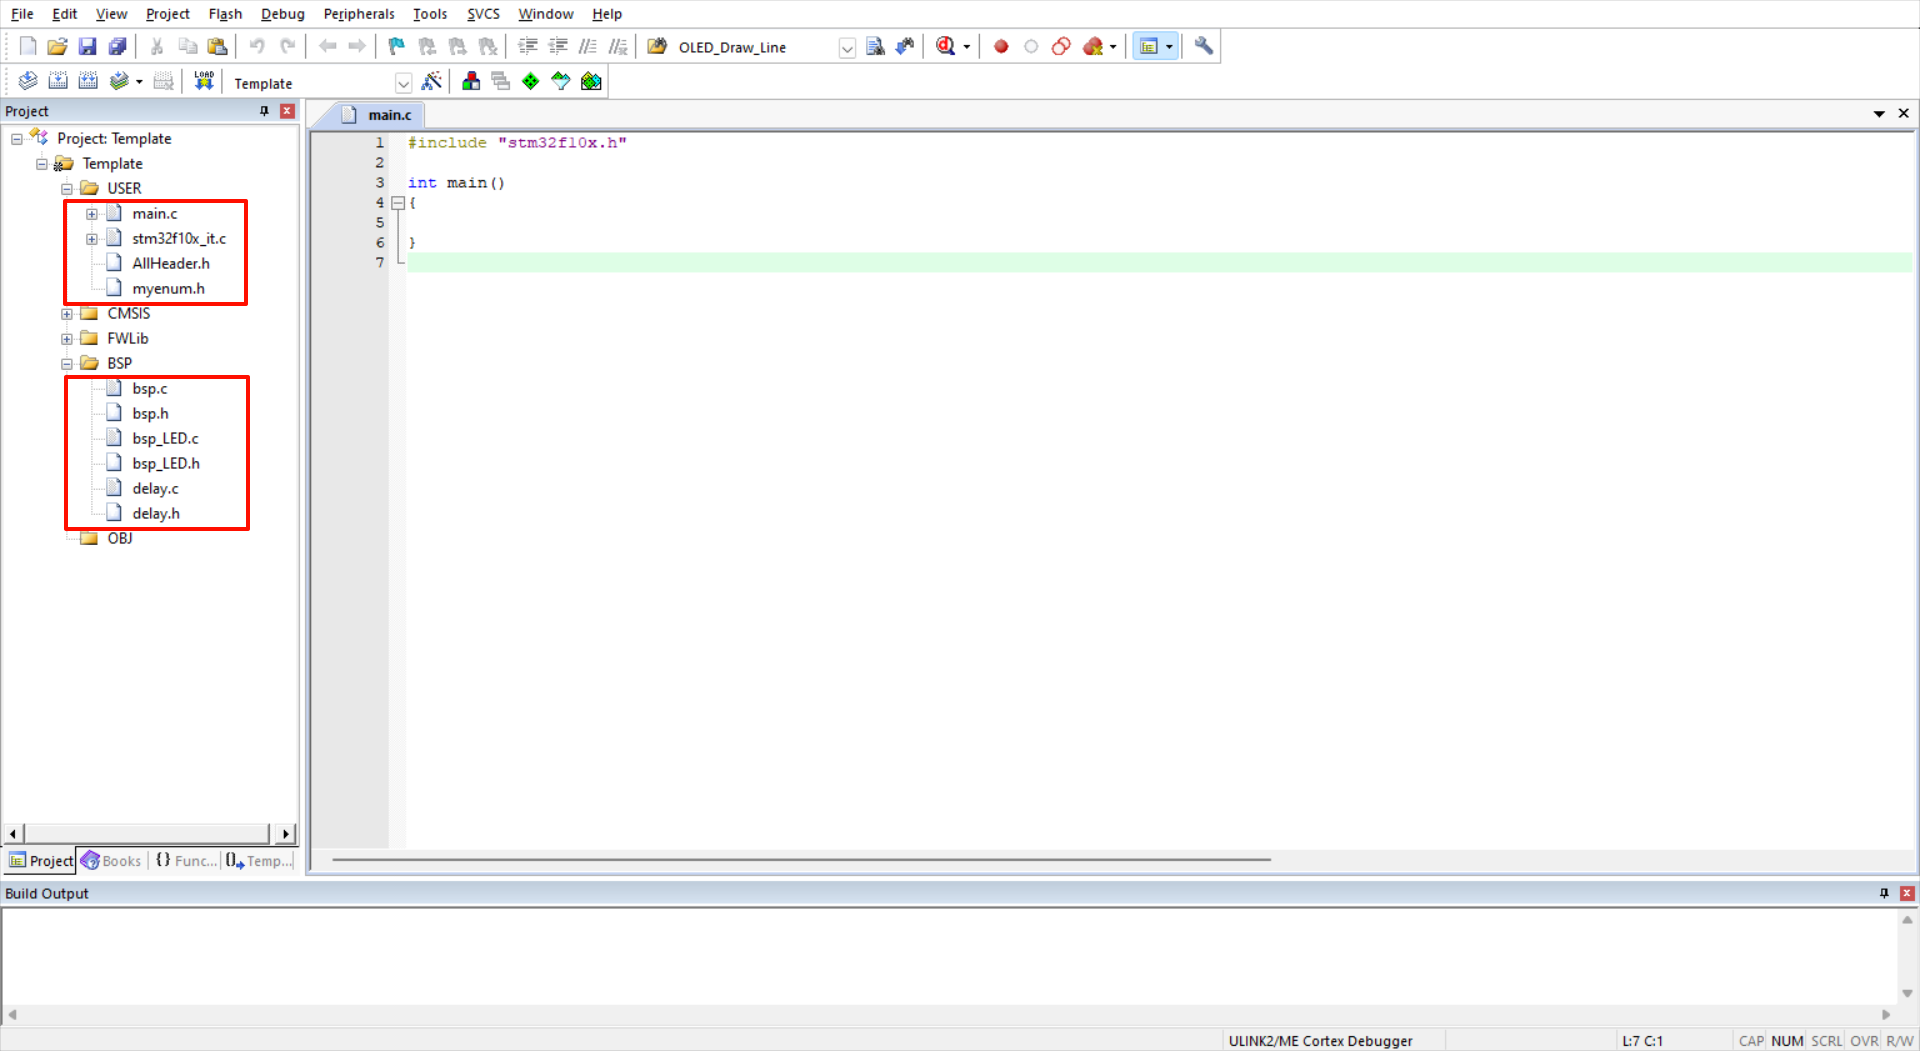
After adding successfully:
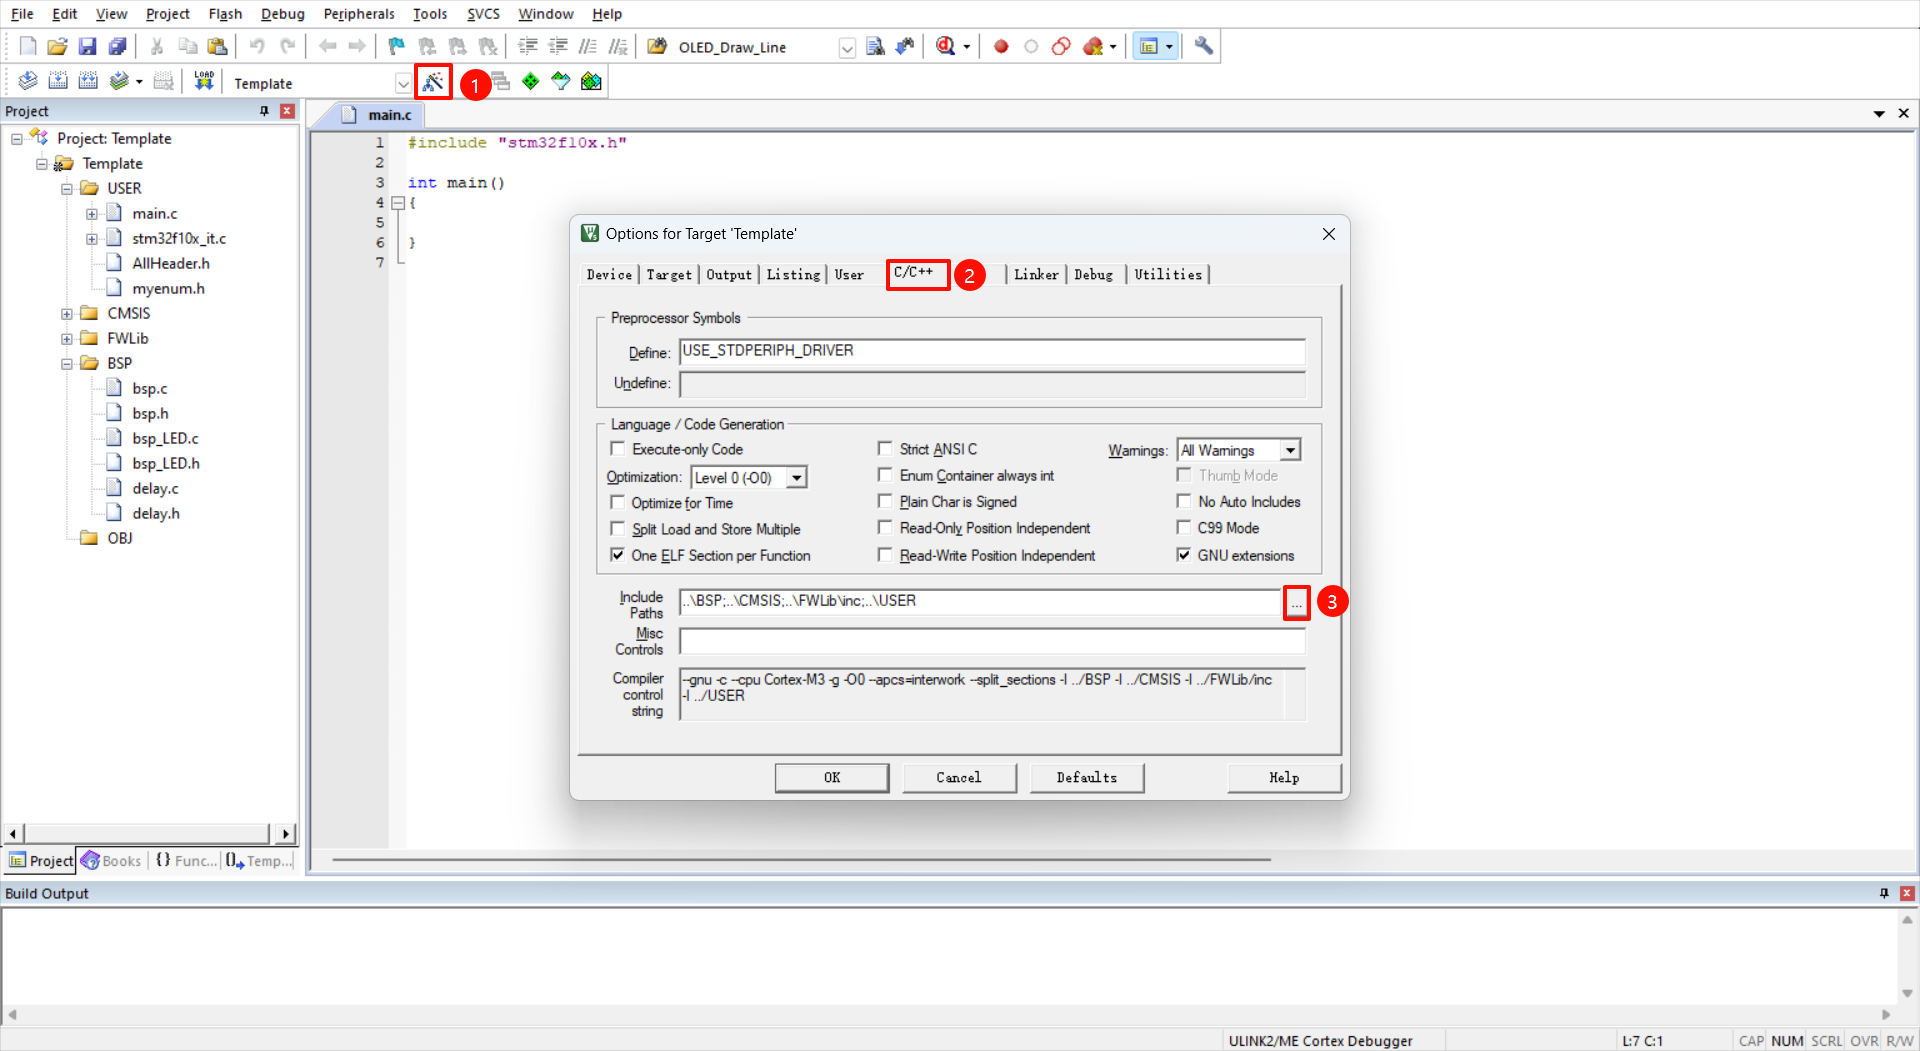
Project target option
Add the previously copied folder path to the project header file path: If you copy a new folder into the project later, you need to add a new folder path
Modify the main.c file
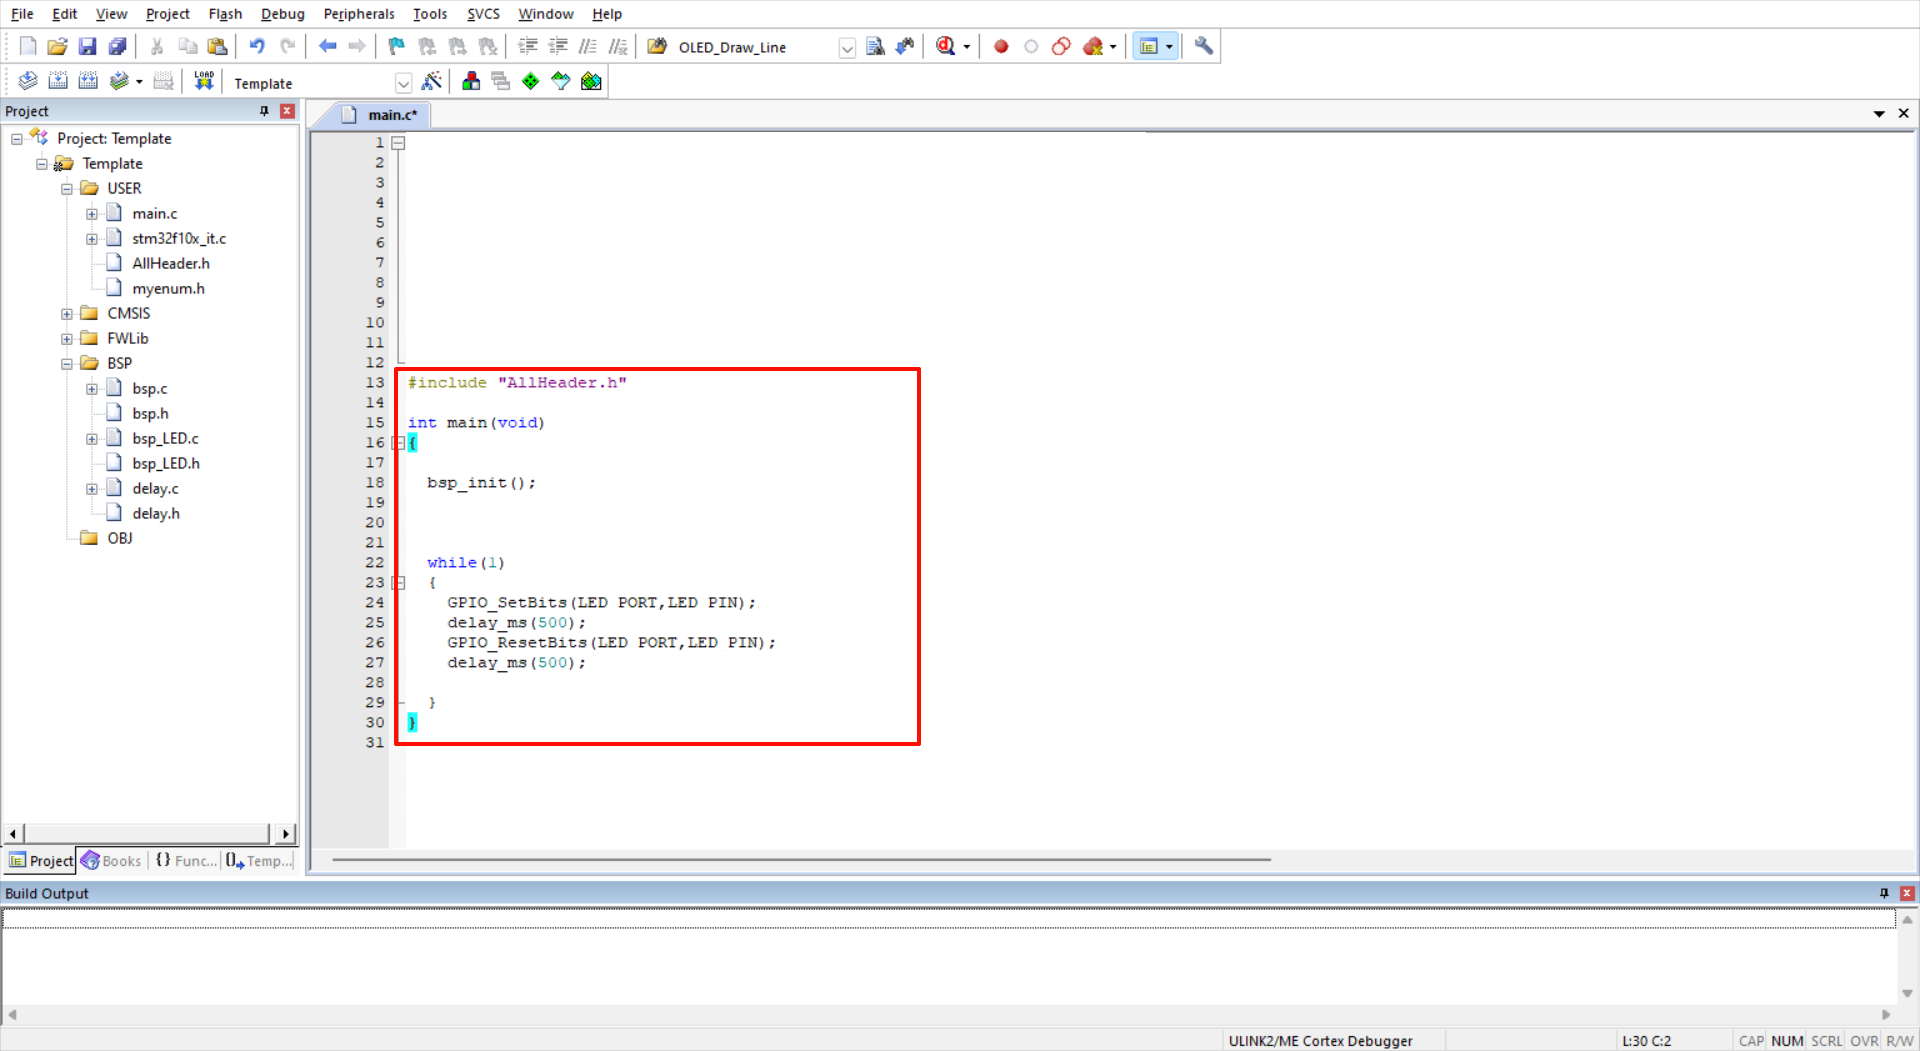
Copy the contents of the main.c file of the LED project to the main.c folder of the template project: Since the template project has no functions, you can completely copy the contents of the main.c file of the LED project. If you want to transplant a certain function later, you cannot directly replace it.
Compile the project
If the compilation is successful and there is no error, it is likely that the transplantation is successful.

Download the program
The generated Template.hex file is located in the OBJ folder of the LED project file. Use the FlyMCU software to burn the Template.hex file into the development board.
For detailed burning process, please refer to the [Download Program] tutorial