Arduino remote control servo gimbal
Note: esp32 camera needs to be burned with factory firmware. If you have not flashed the firmware after receiving the esp32 camera, it is not necessary. The factory default firmware is used
1. Experimental preparation
ESP32 camera
Arduino development board
2-DOF gimbal
Dupont line
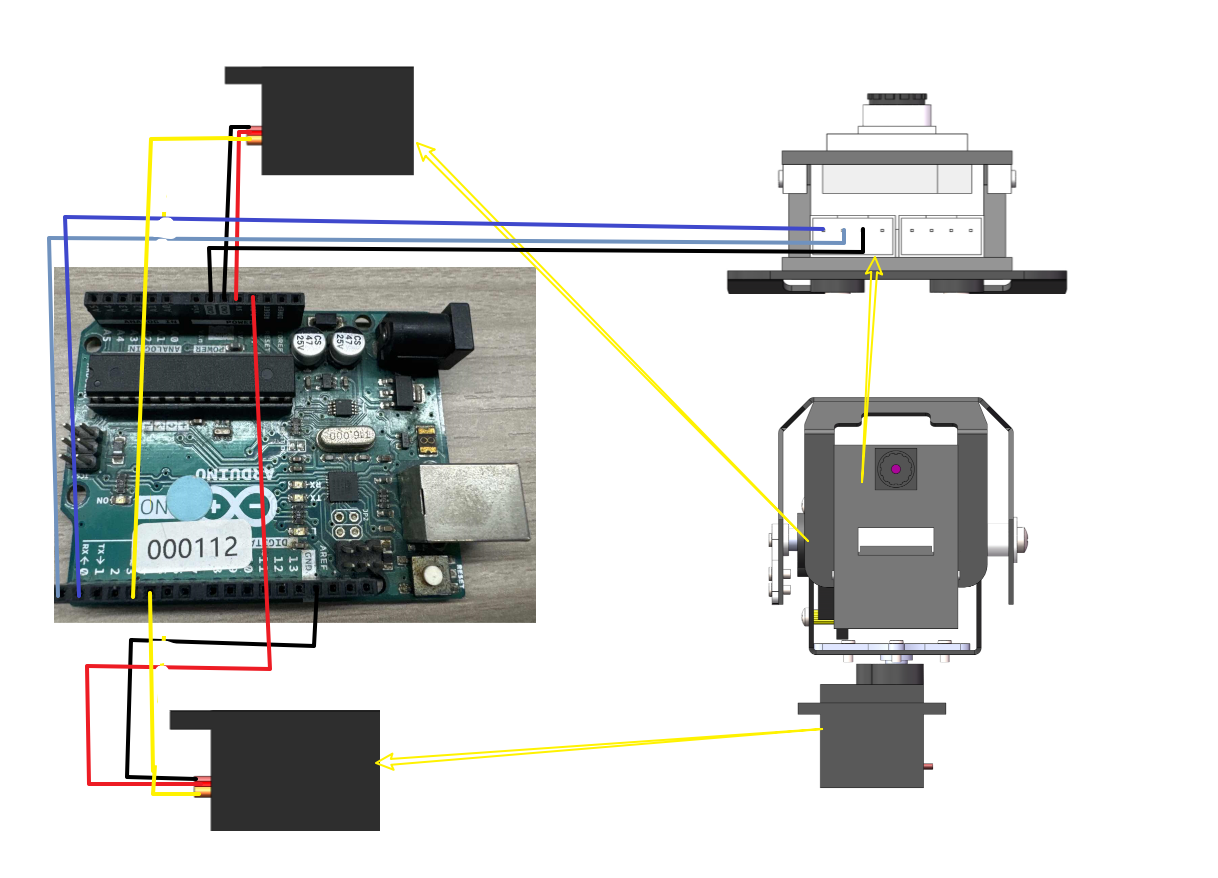
2. Wiring diagram
Note: Due to insufficient voltage, esp32 camera needs additional power supply from type-c data cable
| ARDUINO | esp32 camera |
|---|---|
| P0 | RX |
| P1 | TX |
| GND | GND |
| NC | 5V |
| ARDUINO | s1 servo |
|---|---|
| P5 | Signal line |
| 3.3V | |
| GND | GND |
| ARDUINO | s2 servo |
|---|---|
| P4 | Signal line |
| 3.3V | VCC |
| GND | GND |
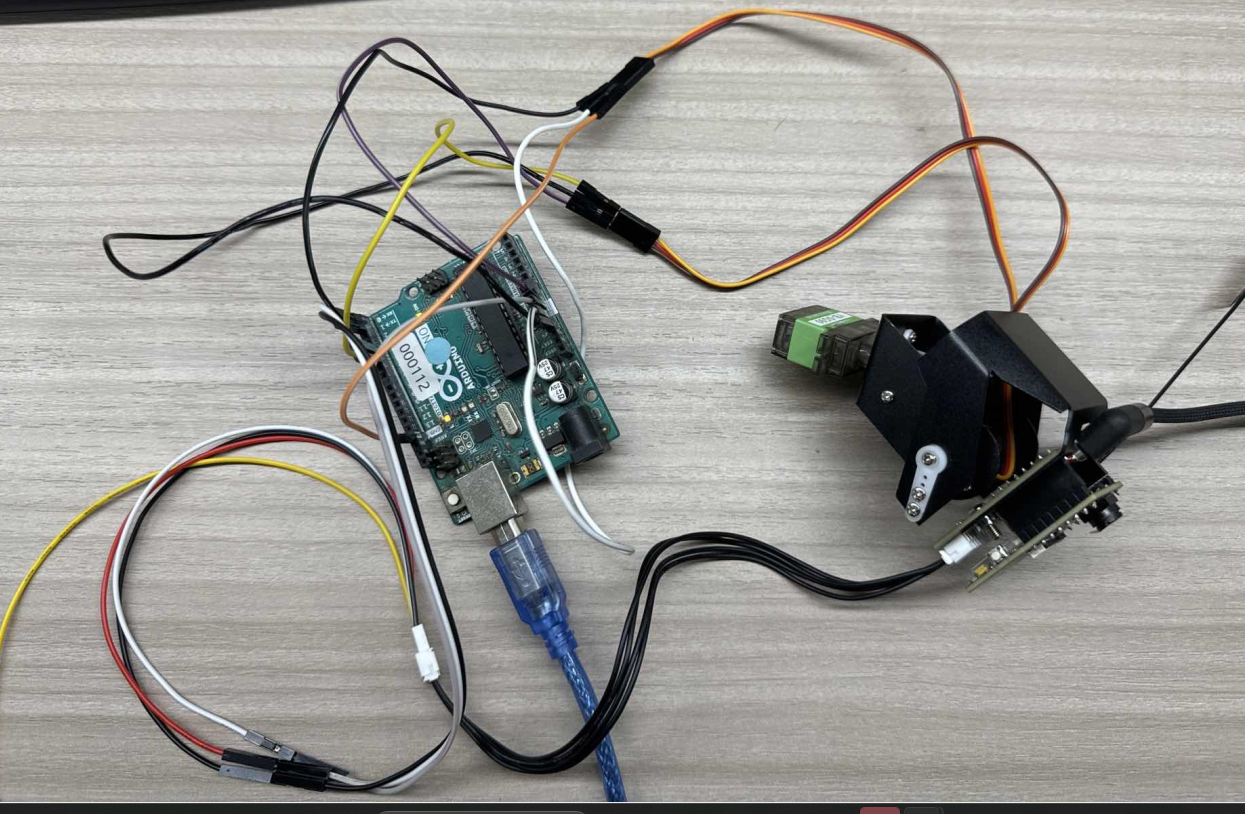
Practical wiring diagram:
3. Experimental steps and experimental results
Quick method: You can directly connect to the wifi opened by esp32. This experiment is named ESP32_WIFI_TEST. Then the IP address camera information of the mobile app is 192.169.4.1. You can use the app to control the servo
Connect the arduino device to the ArduinoIDE compilation platform. If you can see the serial port number, it is normal.

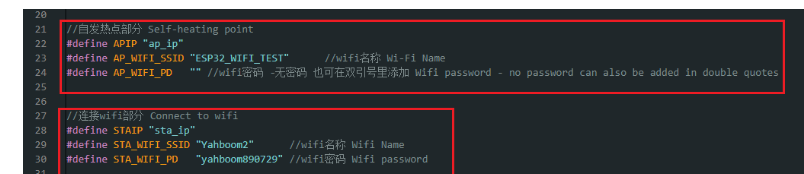
You can modify the WiFi name and password you want to connect to, as well as the name of the hotspot in the esp32_wifi.cpp file
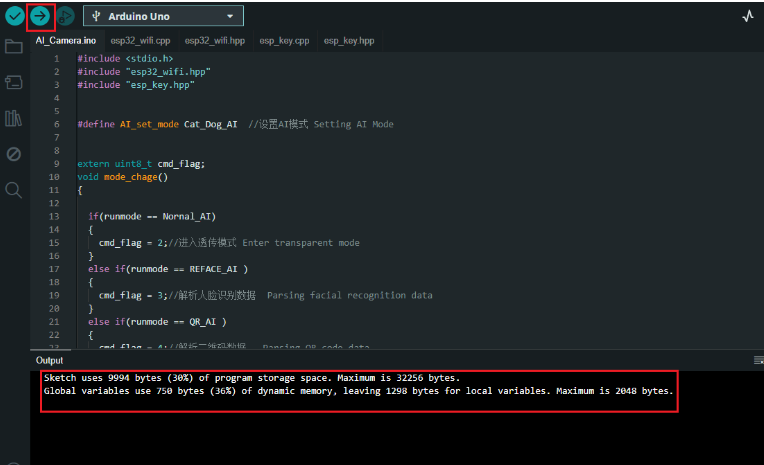
Click Compile and Download to download the program to the uno motherboard. If the download is successful, the following picture will appear
Press the reset button on the uno, wait for a while and you can see the IP address of the network and the address of the hotspot
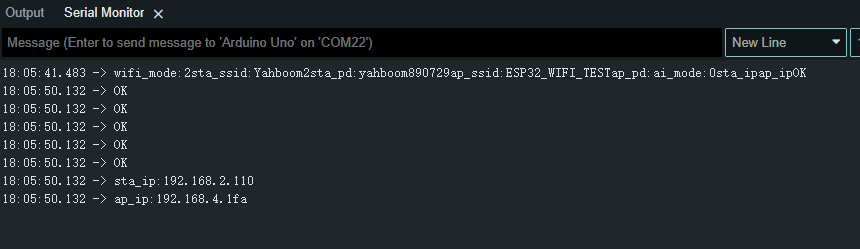
If only one mode is turned on, then sta_ip:null or ap_ip:null, if sta_ip:null occurs, you need to check whether the connected wifi name and password are correct. If they are correct, is only one AP mode turned on, and not the STA mode?
Use the app to control the movement of the car. After installing the "ESP32Cam" app, open it.
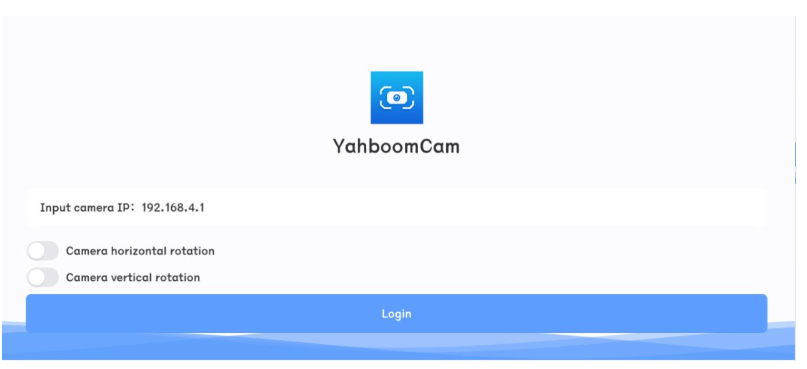
On the login page, set it according to the IP obtained by the serial port assistant. If the IP obtained by the serial port assistant is "192.168.2.110", then the configuration is as follows

Then click login directly
(Optional) If you want to connect to the hotspot of the wifi camera, the IP address must be set to 192.168.4.1, as shown in the figure
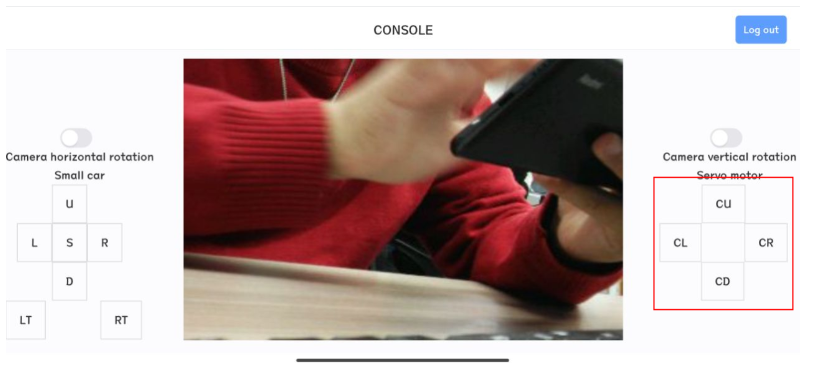
When the IP address is configured correctly and successfully connected, you can control the servo gimbal through the page of the app console
Horizontal screen
Note: Every time you restart the app, you need to click the exit button in the upper right corner, then exit and reconfigure the IP address information before logging in