Oriented Bounding Box Object Detection
Oriented Bounding Box Object Detection1. Model Introduction2. Start2.1. Enter docker2.2. Directed bounding box object detection: imageEffect preview2.3, directional border object detection: videoEffect preview2.4, directional border object detection: real-time detectionEffect previewReferences
Use Python to demonstrate the effect of Ultralytics: Oriented Bounding Boxes Object Detection in image, video, and real-time detection.
1. Model Introduction
Oriented Bounding Box Object Detection, also known as Oriented Object Detection, goes a step further than standard object detection. It introduces an additional angle to more accurately locate objects in the image.
The output of the oriented object detector is a set of rotated bounding boxes that accurately surround objects in the image, as well as the category label and confidence score of each bounding box. Oriented bounding boxes are particularly useful when objects appear at different angles, such as in aerial images, where traditional axis-aligned bounding boxes may include unnecessary background.
Simply put, oriented object detection can accurately surround tilted objects with tilted boxes, thereby reducing unnecessary background areas and improving detection accuracy.
2. Start
2.1. Enter docker
Run YOLOv11's docker script
xxxxxxxxxxsh ~/yolov11_dcoker.sh
2.2. Directed bounding box object detection: image
Use yolo11n-obb.pt to predict images under the ultralytics project (not the images that come with ultralytics).
Enter the code folder:
xxxxxxxxxxcd /ultralytics/ultralytics/yahboom_demo
Run the code:
xxxxxxxxxxpython3 05.obb_image.py
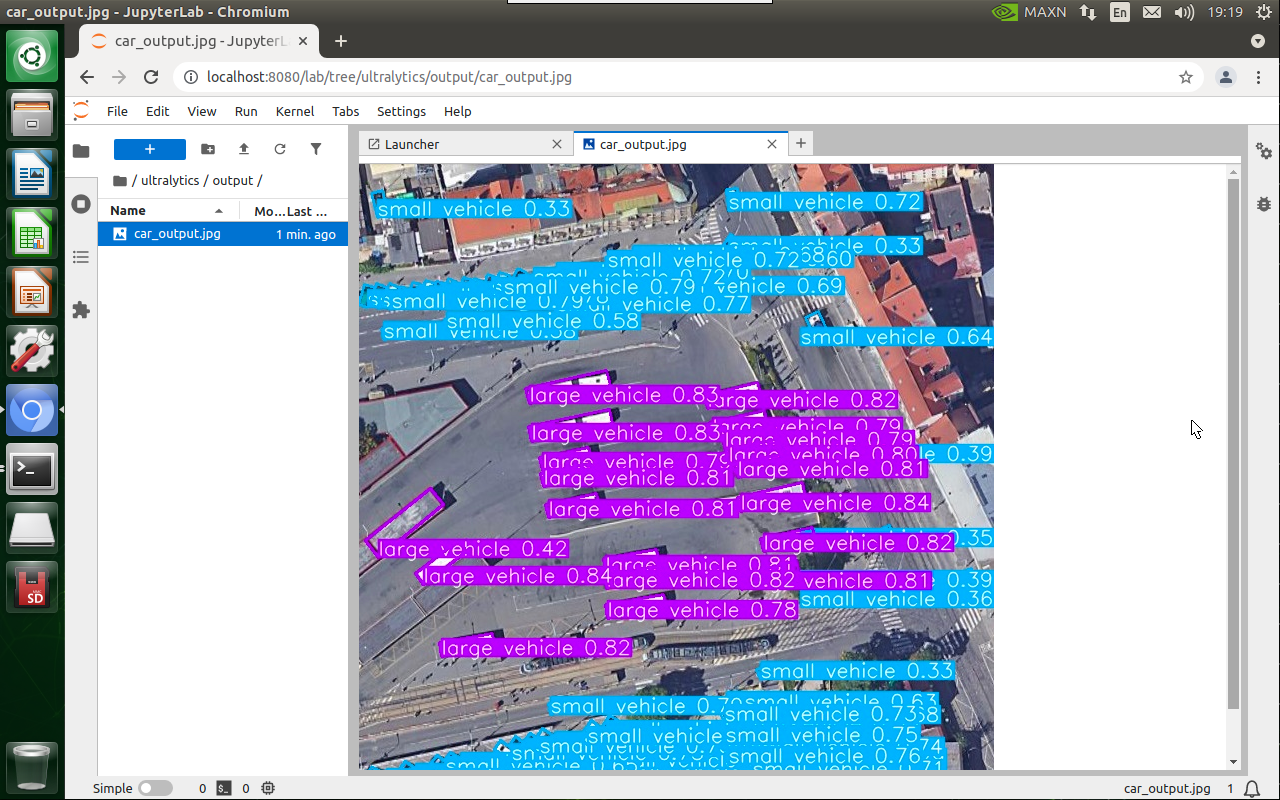
Effect preview
Yolo recognizes the output image location: /ultralytics/ultralytics/output/
1. View using jupyter lab
Open another terminal to enter the docker container and use jupyter lab to view the image
xxxxxxxxxxdocker ps -a

xxxxxxxxxxdocker exec -it be79bf10e970 /bin/bash #Container ID needs to be modified according to the actual one you findcd /ultralyticsjupyter lab --allow-root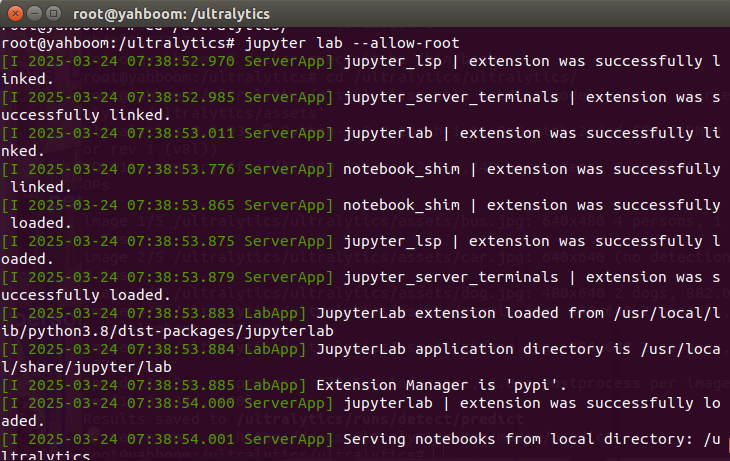
Access directly through http://localhost:8080/ in the system browser:
xxxxxxxxxxhttp://localhost:8080/
2. Copy the file to the host machine for viewing
Enter the following command in the host terminal
xxxxxxxxxxdocker cp be79bf10e970:/ultralytics/ultralytics/output/ /home/jetson/ultralytics/ultralytics/ #Container ID needs to be modified according to the actual information you find
Sample code:
xxxxxxxxxxfrom ultralytics import YOLO# Load a modelmodel = YOLO("/ultralytics/ultralytics/yolo11n-obb.pt")# Run batched inference on a list of imagesresults = model("/ultralytics/ultralytics/assets/car.jpg") # return a list of Results objects# Process results listfor result in results: # boxes = result.boxes # Boxes object for bounding box outputs # masks = result.masks # Masks object for segmentation masks outputs # keypoints = result.keypoints # Keypoints object for pose outputs # probs = result.probs # Probs object for classification outputs obb = result.obb # Oriented boxes object for OBB outputs result.show() # display to screen result.save(filename="/ultralytics/ultralytics/output/car_output.jpg") # save to disk2.3, directional border object detection: video
Use yolo11n-obb.pt to predict the video under the ultralytics project (not the video that comes with ultralytics).
Enter the code folder:
xxxxxxxxxxcd /ultralytics/ultralytics/yahboom_demo
Run the code:
xxxxxxxxxxpython3 05.obb_video.py
Effect preview
Yolo recognizes the output video location: /ultralytics/ultralytics/output/
The output video will be displayed in real time during the code running. If you want to view the video later, you can refer to the above [2. Copy the file to the host machine for viewing] tutorial operation.

Sample code:
xxxxxxxxxximport cv2from ultralytics import YOLO# Load the YOLO modelmodel = YOLO("/ultralytics/ultralytics/yolo11n-obb.pt")# Open the video filevideo_path = "/ultralytics/ultralytics/videos/street.mp4"cap = cv2.VideoCapture(video_path)# Get the video frame size and frame rateframe_width = int(cap.get(cv2.CAP_PROP_FRAME_WIDTH))frame_height = int(cap.get(cv2.CAP_PROP_FRAME_HEIGHT))fps = int(cap.get(cv2.CAP_PROP_FPS))# Define the codec and create a VideoWriter object to output the processed videooutput_path = "/ultralytics/ultralytics/output/05.street_output.mp4"fourcc = cv2.VideoWriter_fourcc(*'mp4v') # You can use 'XVID' or 'mp4v' depending on your platformout = cv2.VideoWriter(output_path, fourcc, fps, (frame_width, frame_height))# Loop through the video frameswhile cap.isOpened(): # Read a frame from the video success, frame = cap.read() if success: # Run YOLO inference on the frame results = model(frame) # Visualize the results on the frame annotated_frame = results[0].plot() # Write the annotated frame to the output video file out.write(annotated_frame) # Display the annotated frame cv2.imshow("YOLO Inference", cv2.resize(annotated_frame, (640, 480))) # Break the loop if 'q' is pressed if cv2.waitKey(1) & 0xFF == ord("q"): break else: # Break the loop if the end of the video is reached break# Release the video capture and writer objects, and close the display windowcap.release()out.release()cv2.destroyAllWindows()2.4, directional border object detection: real-time detection
Use yolo11n-obb.pt to predict the USB camera screen.
Enter the code folder:
xxxxxxxxxxcd /ultralytics/ultralytics/yahboom_demo
Run the code: click on the preview screen, press the q key to terminate the program!
xxxxxxxxxxpython3 05.obb_camera_usb.py
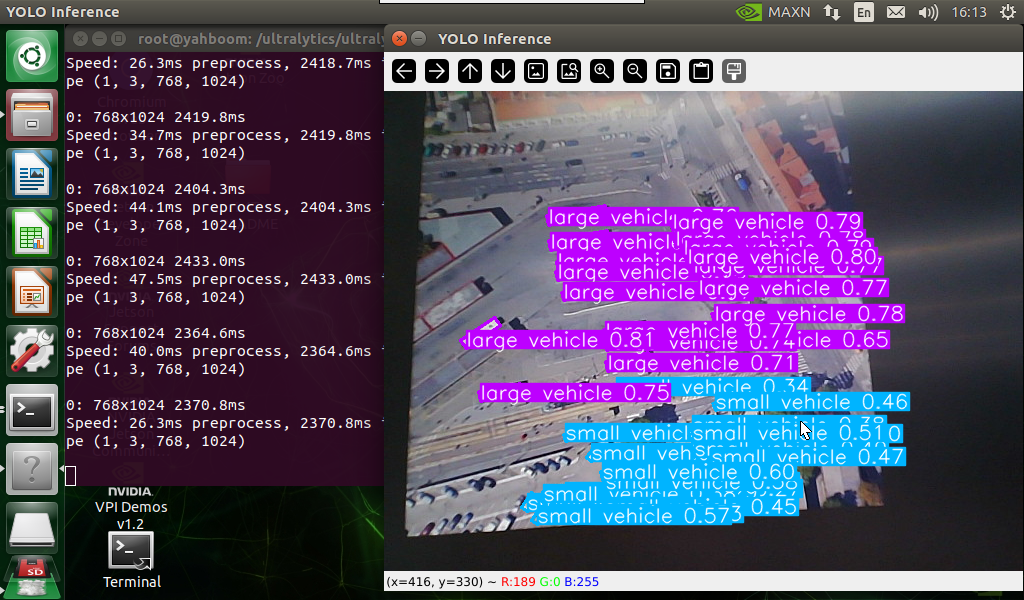
Effect preview
Yolo recognizes the output video location: /ultralytics/ultralytics/output/
The camera screen will be displayed in real time during the code running. If you want to view the video later, you can refer to the above [2. Copy the file to the host machine for viewing] tutorial operation.
Sample code:
xxxxxxxxxximport cv2from ultralytics import YOLO# Load the YOLO modelmodel = YOLO("/ultralytics/ultralytics/yolo11n-obb.pt")# Open the cammeracap = cv2.VideoCapture(0)# Get the video frame size and frame rateframe_width = int(cap.get(cv2.CAP_PROP_FRAME_WIDTH))frame_height = int(cap.get(cv2.CAP_PROP_FRAME_HEIGHT))fps = int(cap.get(cv2.CAP_PROP_FPS))# Define the codec and create a VideoWriter object to output the processed videooutput_path = "/ultralytics/ultralytics/output/05.obb_camera_usb.mp4"fourcc = cv2.VideoWriter_fourcc(*'mp4v') # You can use 'XVID' or 'mp4v' depending on your platformout = cv2.VideoWriter(output_path, fourcc, fps, (frame_width, frame_height))# Loop through the video frameswhile cap.isOpened(): # Read a frame from the video success, frame = cap.read() if success: # Run YOLO inference on the frame results = model(frame) # Visualize the results on the frame annotated_frame = results[0].plot() # Write the annotated frame to the output video file out.write(annotated_frame) # Display the annotated frame cv2.imshow("YOLO Inference", cv2.resize(annotated_frame, (640, 480))) # Break the loop if 'q' is pressed if cv2.waitKey(1) & 0xFF == ord("q"): break else: # Break the loop if the end of the video is reached break# Release the video capture and writer objects, and close the display windowcap.release()out.release()cv2.destroyAllWindows()