Jetpack old system upgraded to SUPER system
Jetpack old system upgraded to SUPER system1、ReadMe2、Write SUPER boot file2.1、Connect hardware2.2、Connect VM software2.3、Write SUPER boot file3、Write Yahboom robot system file into SSD3.1、Format SSD3.1.1、Download DiskGenius3.1.2、Use DiskGeniusDelete partitionCreate a new partition3.2、Write Yahboom robot car system file3.2.1、Install Win32DiskImager3.2.2、Use Win32DiskImager4、SSD expansion4.1、Install GParted4.2、Use GParted4.3. Adjust partitions
1、ReadMe
If you purchased a Jetson ORIN NANO/Jetson ORIN NX board, and you want to turn it into a Jetson ORIN NANO SUPER or Jetson ORIN NX SUPER. Please read this tutorials carefully.
2、Write SUPER boot file
The purpose of this tutorial is to write SUPER boot to the Jetson Orin series board (for use with Jetpack 6.2 system).
The process of writing the boot file does not require the install SSD.
2.1、Connect hardware
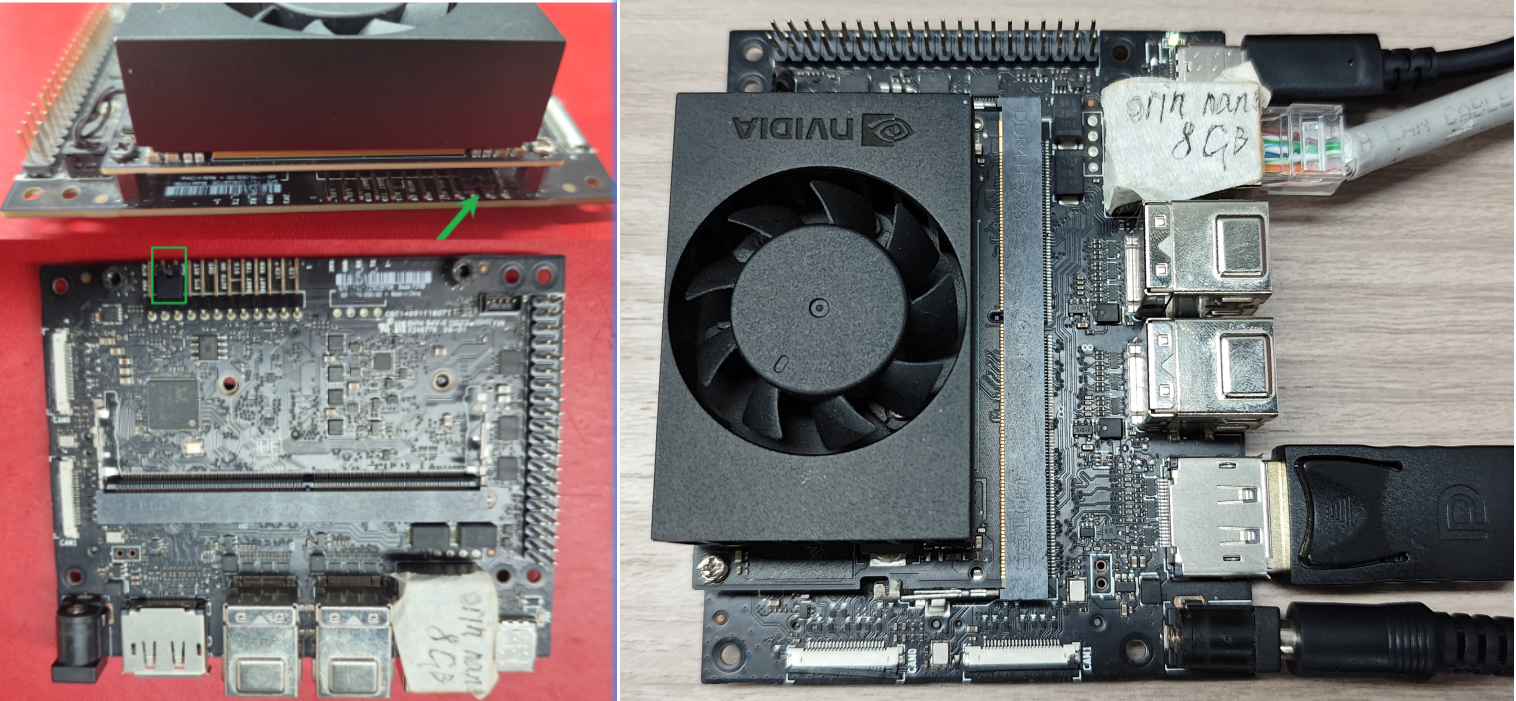
1.Use a jumper cap to short-circuit the FC REC and GND pins under the core board. You don't need to remove the core board, the picture is just for a clearer observation
2.The Jetson Orin board needs to be connected to a DC power adapter, DP data cable, and network cable. And connect it to the computer via a Type C data cable
Note: You don't need to connect the DP data cable and network cable when writing the boot, but they will be needed when using the motherboard later.
2.2、Connect VM software
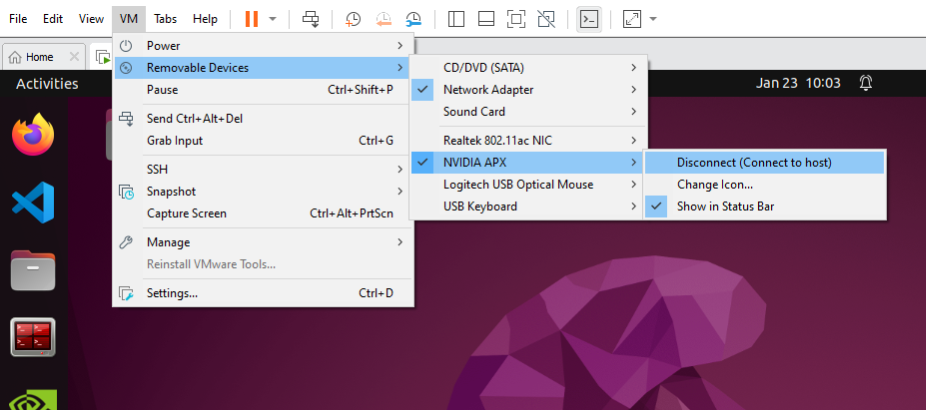
Users need to use the virtual machine file provided by Yahboom to write the SUPER boot file.
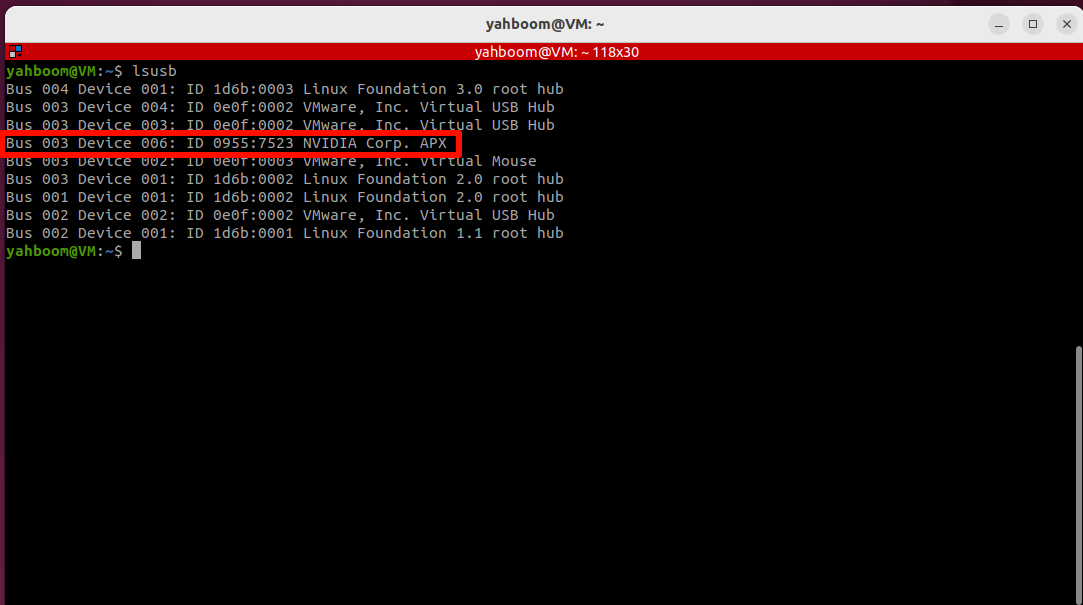
We need to connect the motherboard to the virtual machine so that it can be recognized by the Ubuntu system.
User name:yahboomPassword:yahboom
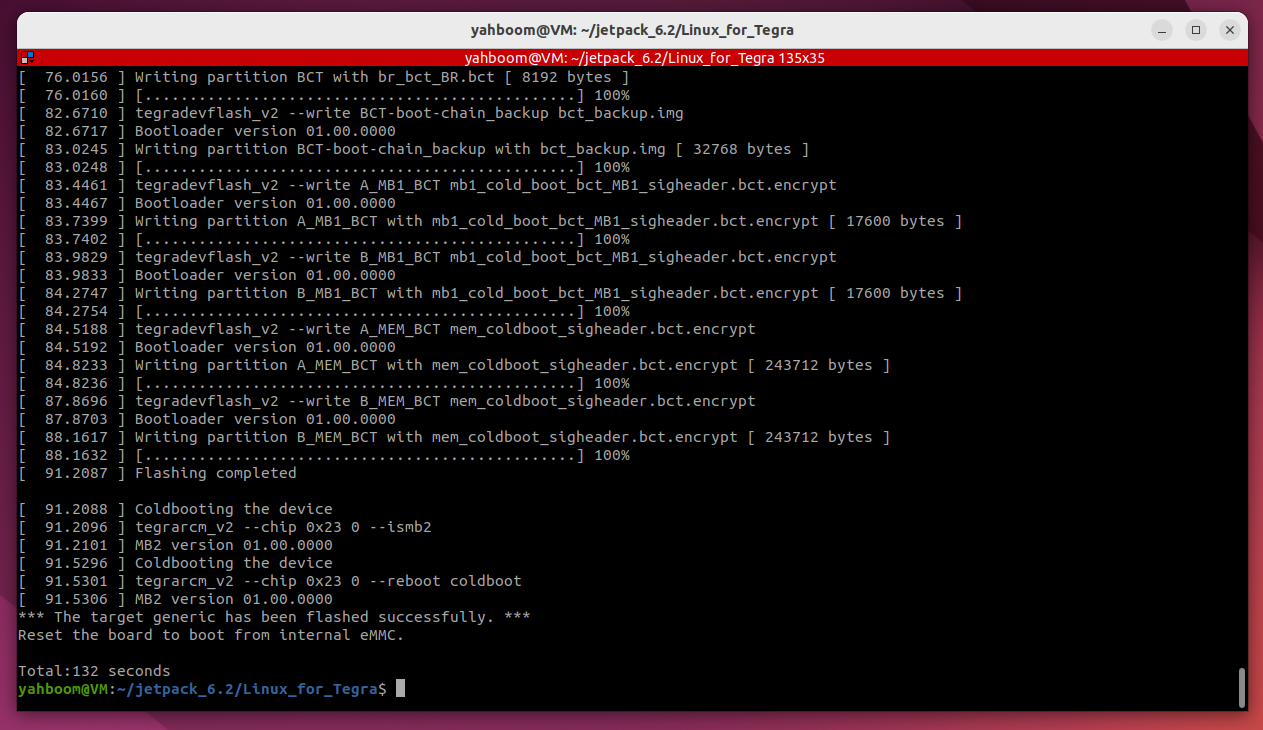
2.3、Write SUPER boot file
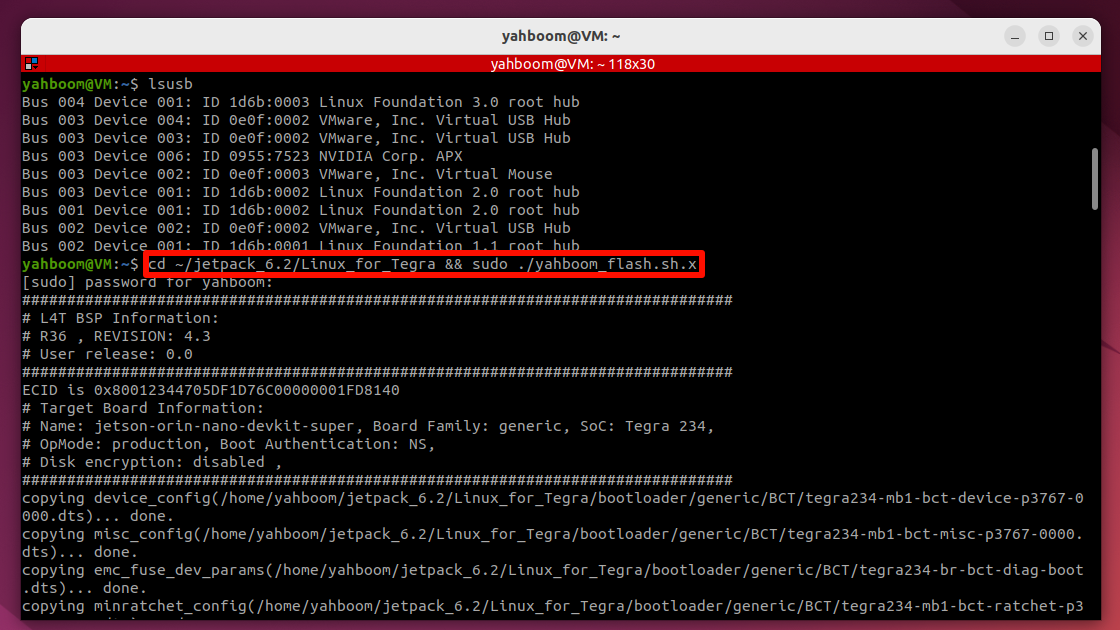
Open the terminal, enter the specified folder and run the script.
If writing fails, you can disconnect the motherboard power supply, reconnect the virtual machine to run the command, and try again
xxxxxxxxxxcd ~/jetpack_6.2/Linux_for_Tegra && sudo ./yahboom_flash.sh.x
3、Write Yahboom robot system file into SSD
This tutorial allows you to write the system image file of the robot car SUPER (Jetpack6.2) provided by Yahboom to the SSD
Note: Users need to prepare the M.2 SSD Enclosure in advance, install the SSD into the M.2 SSD Enclosure, connect it to the computer, format it and write the new system image file.
3.1、Format SSD
Before writing the Yahboom robot car system image file, you need to format the solid-state drive into exFAT format.
3.1.1、Download DiskGenius
Download link:https://www.diskgenius.cn/

Unzip the downloaded compressed file and open DiskGenius.exe to use.
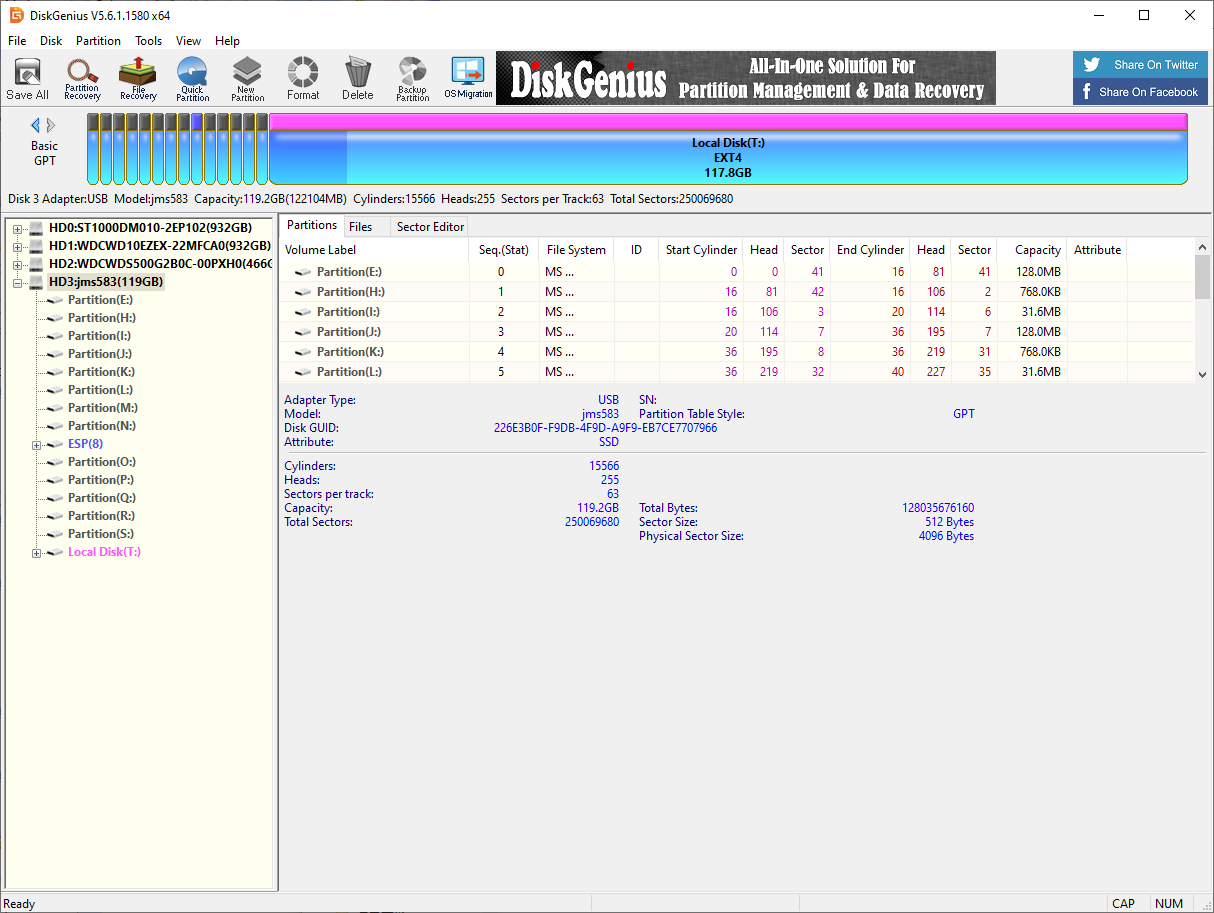
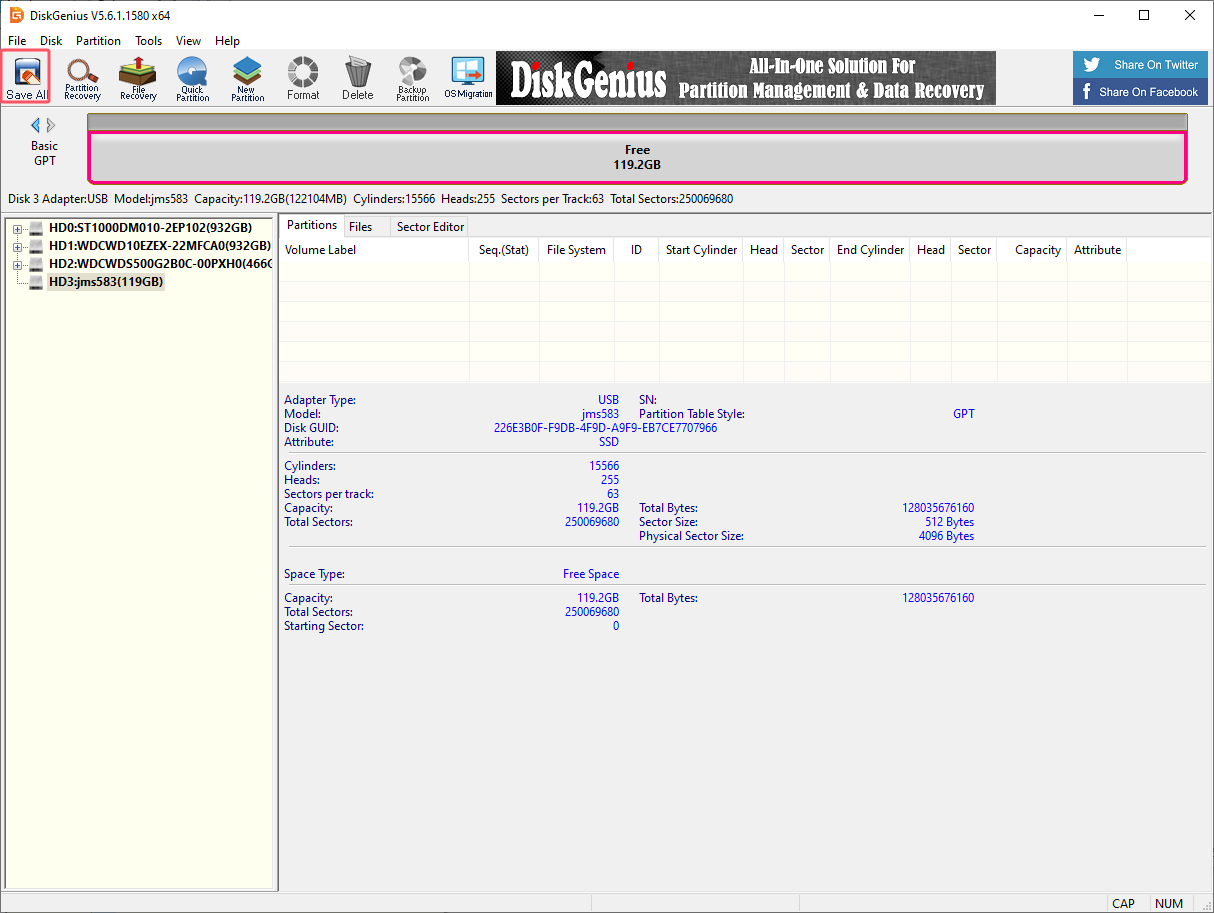
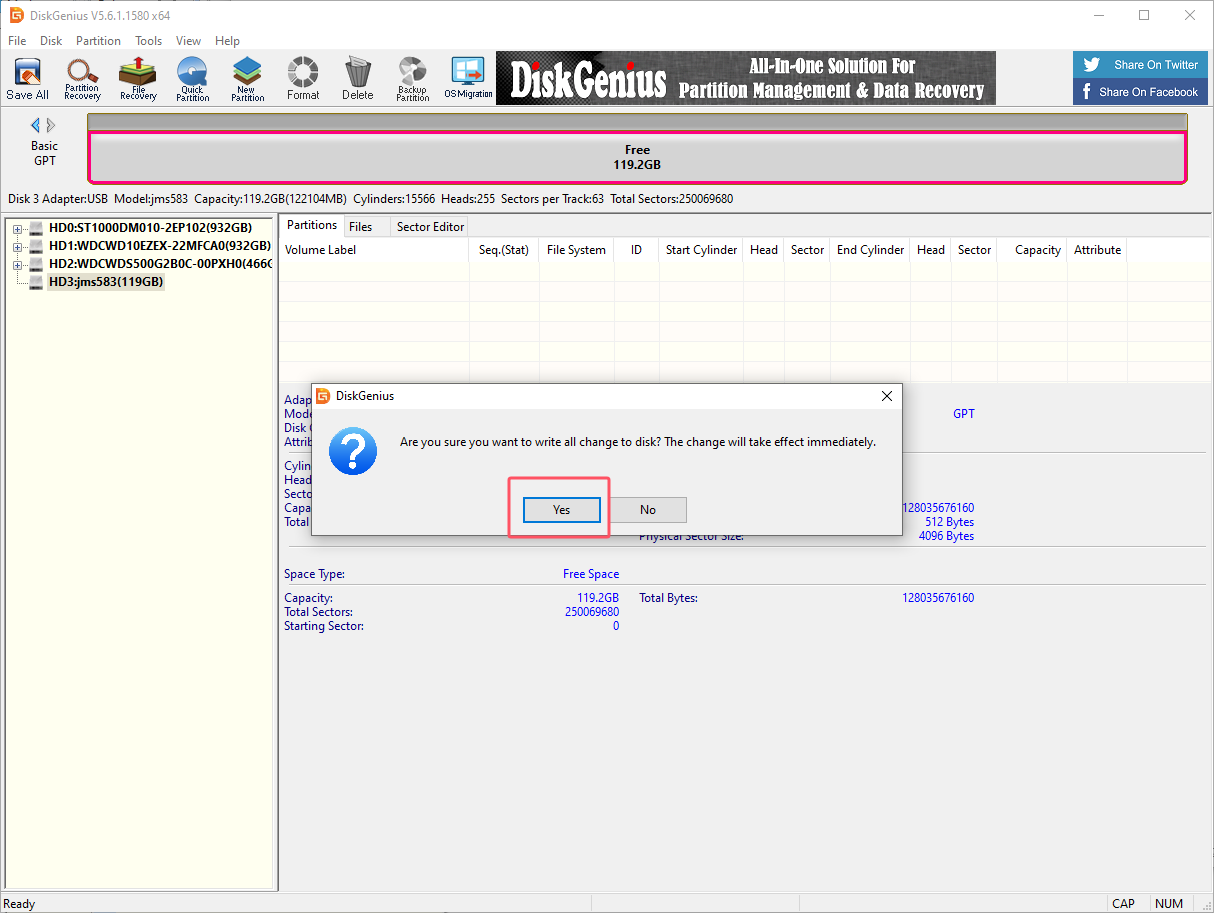
3.1.2、Use DiskGenius
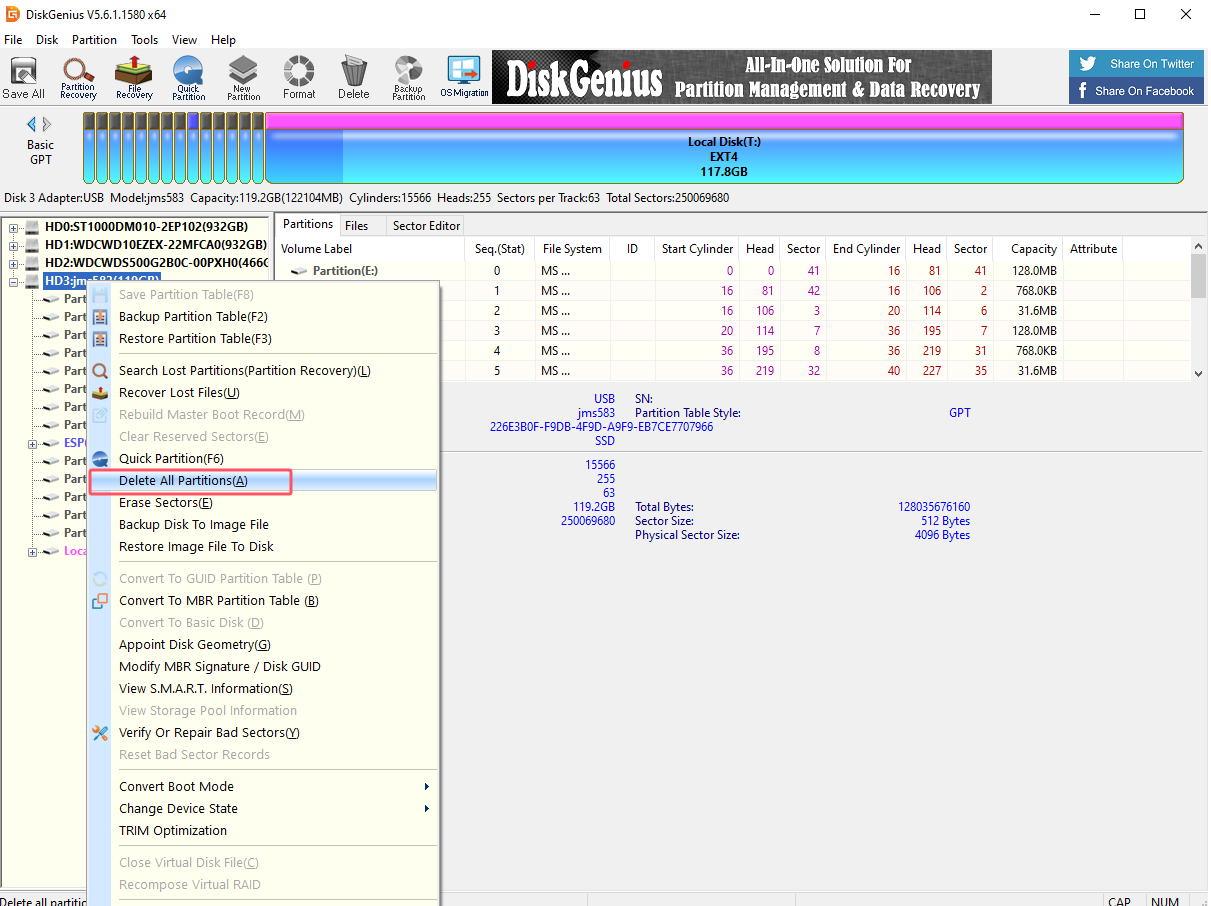
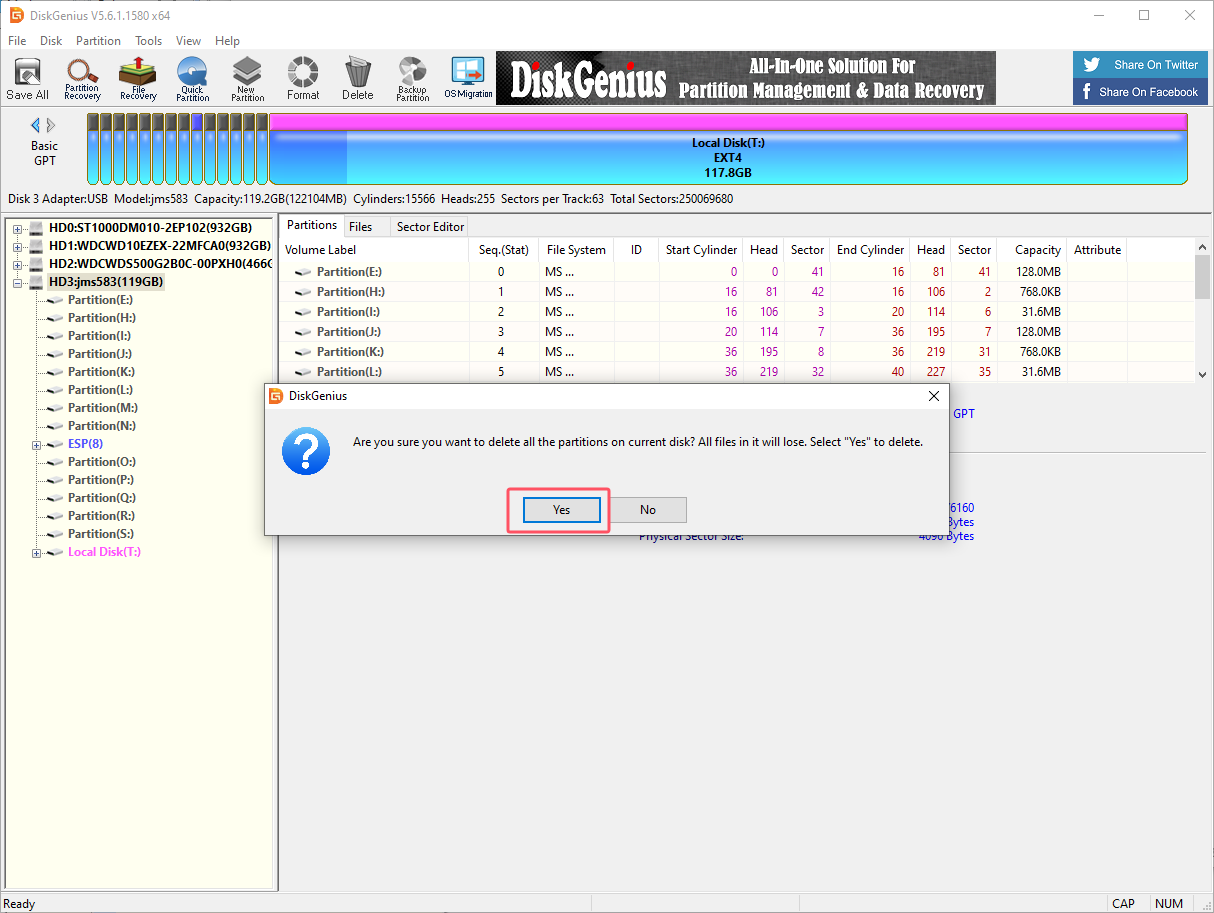
Delete partition
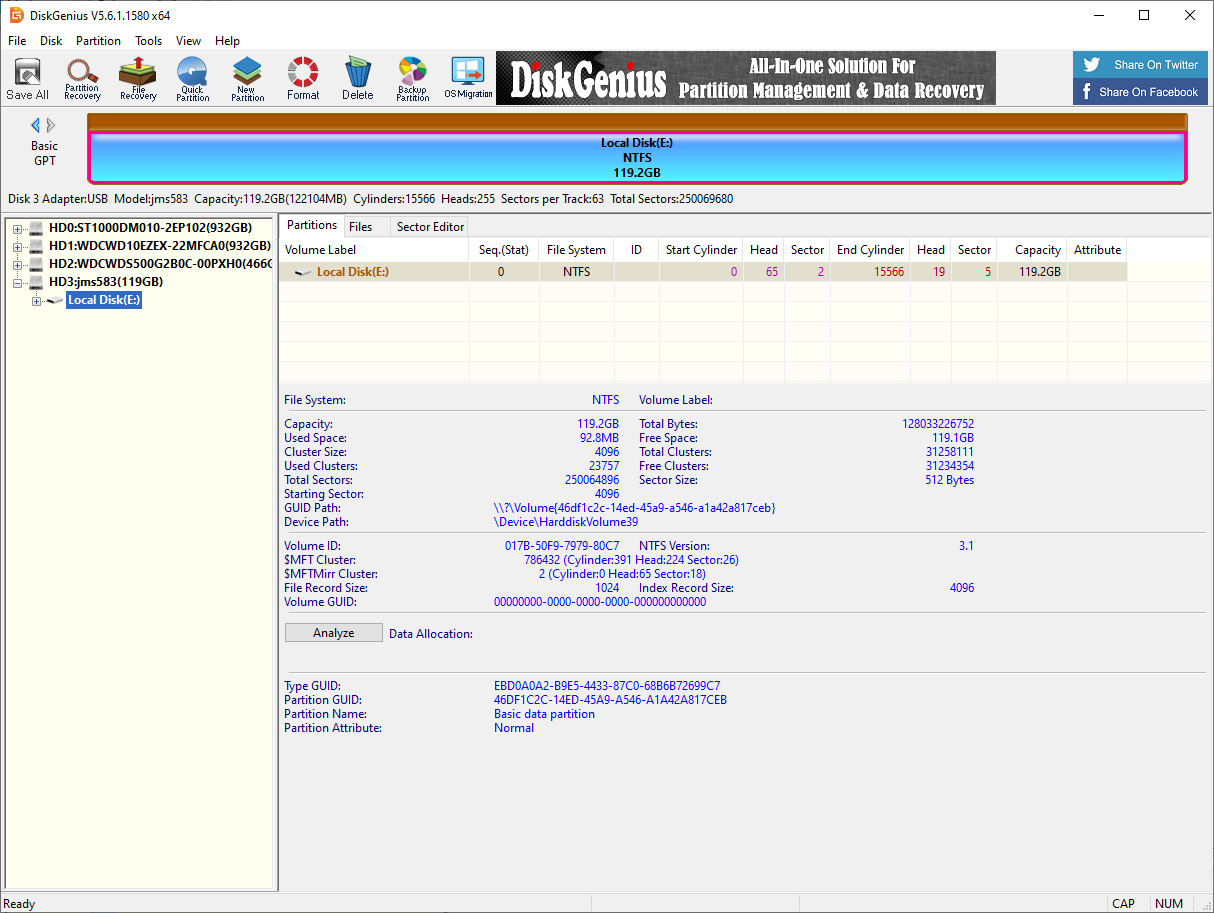
Deleting a partition will clear the disk data. Please confirm that the drive letter is the disk that needs to be formatted before confirming the operation.
You can judge based on the disk size and the newly added drive letter of the connected disk.
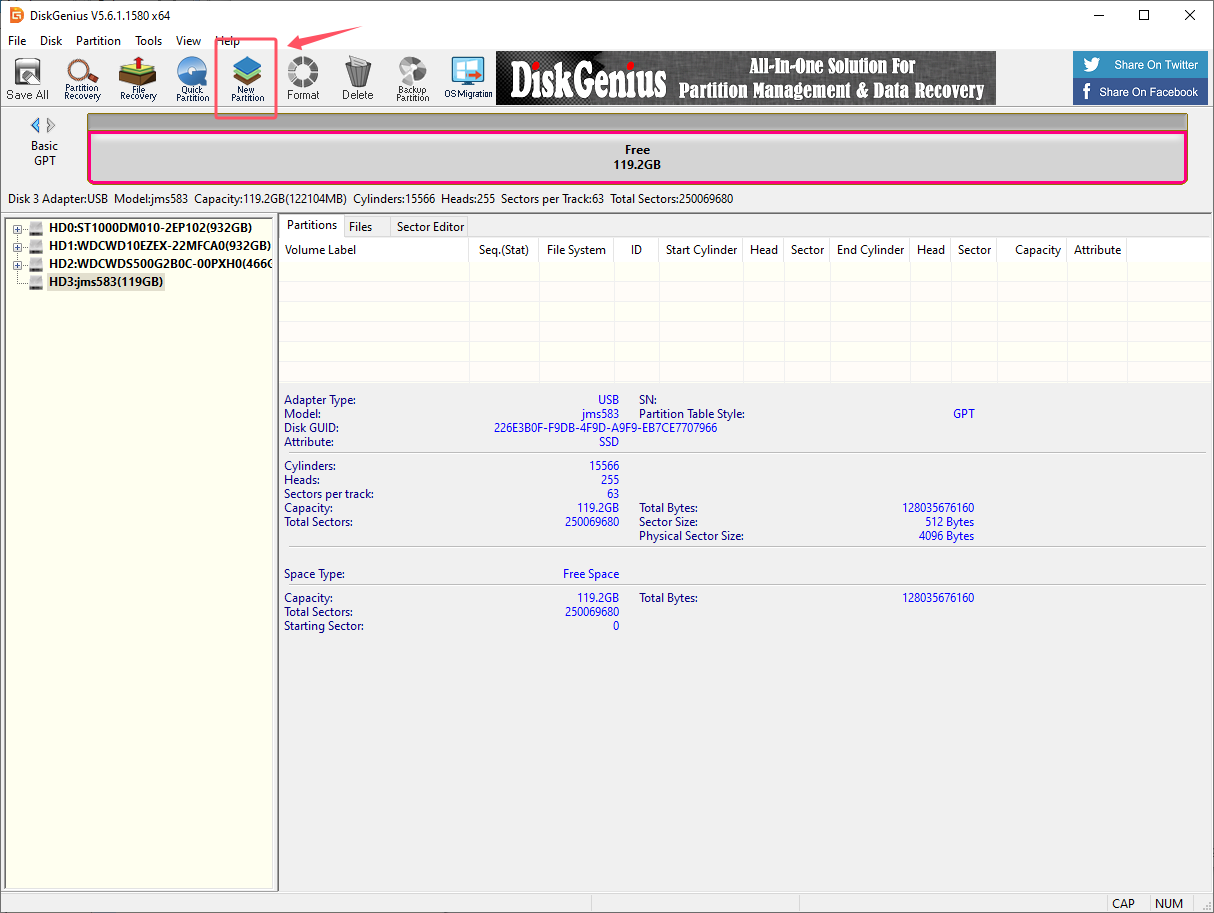
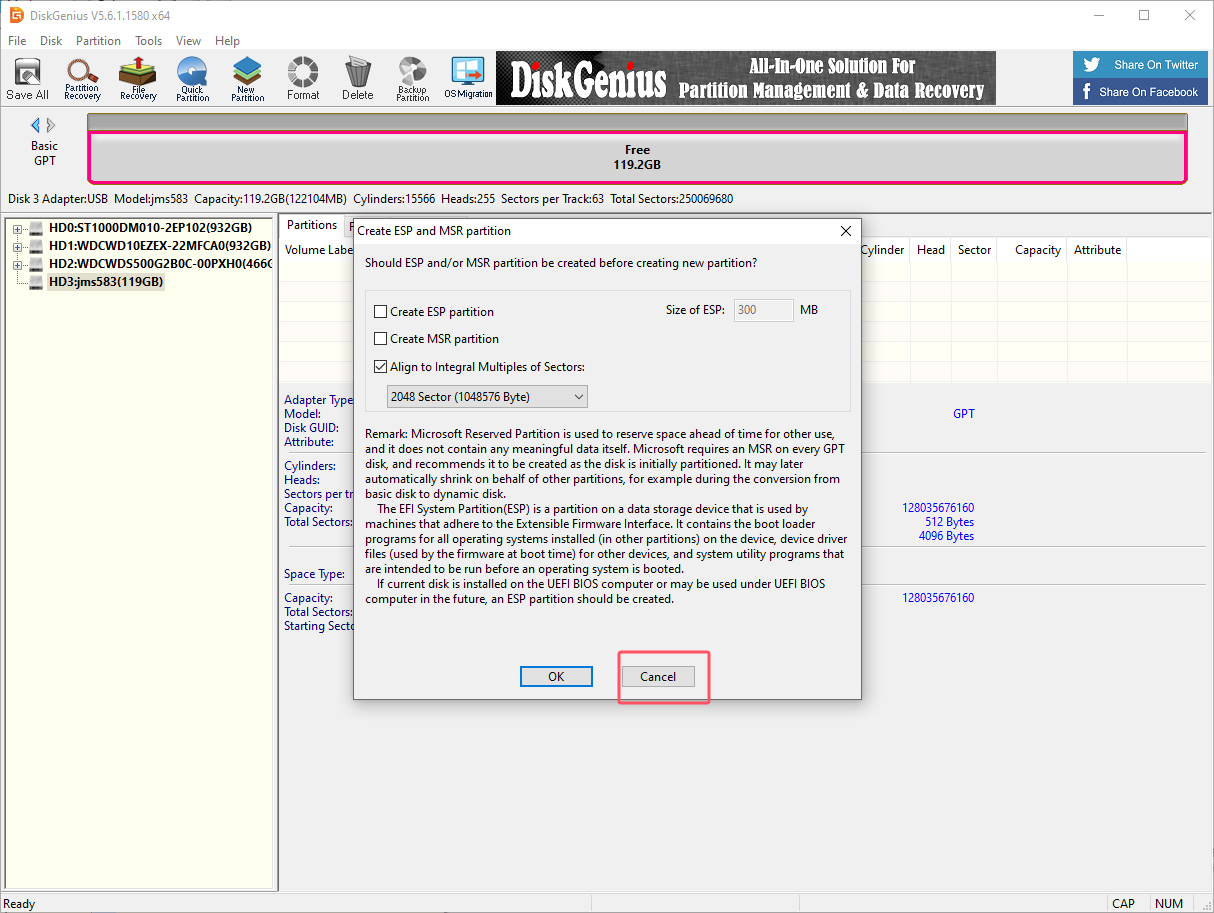
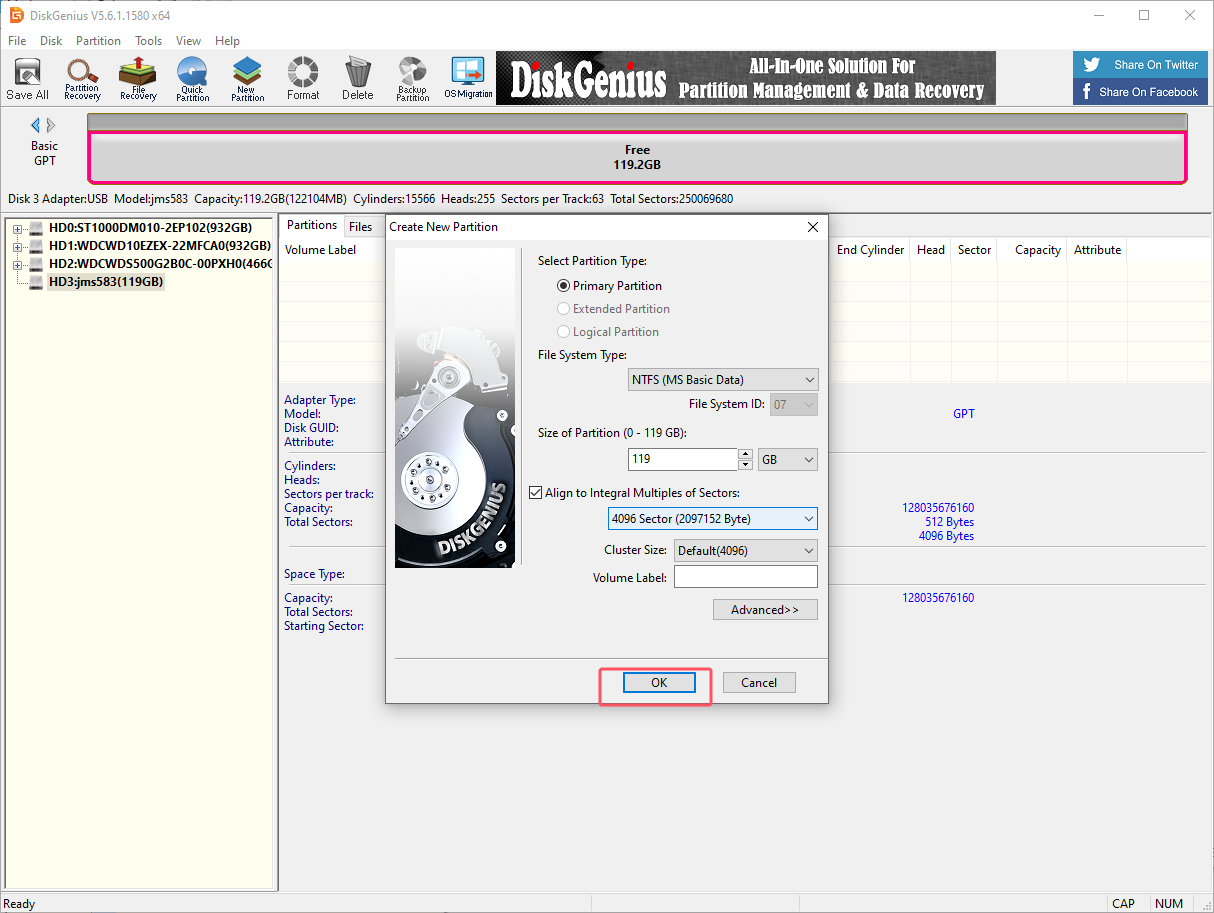
Create a new partition
Partition the SSD into exFAT format.
Select the drive letter corresponding to the SSD and click Quick Partition。
Partition options: You can check as shown below
3.2、Write Yahboom robot car system file
You need to download the image system file in the tutorials in advance and decompress it to get the .img file. Download the system and decompress it locally.
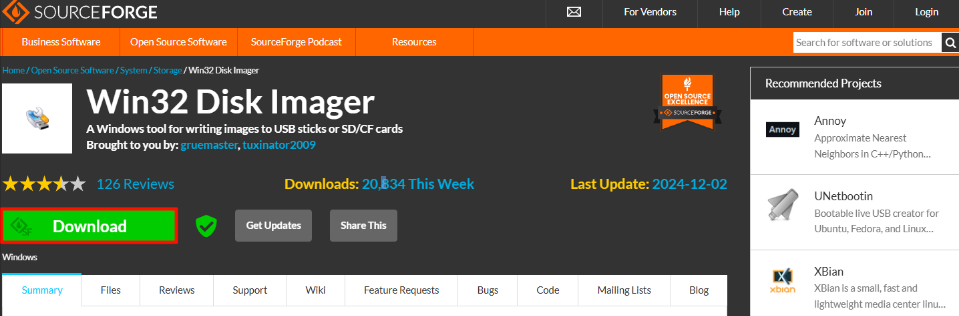
3.2.1、Install Win32DiskImager
Download link:https://sourceforge.net/projects/win32diskimager/
Open the win32diskimager-1.0.0-install.exe installation package as an administrator and accept the agreement.
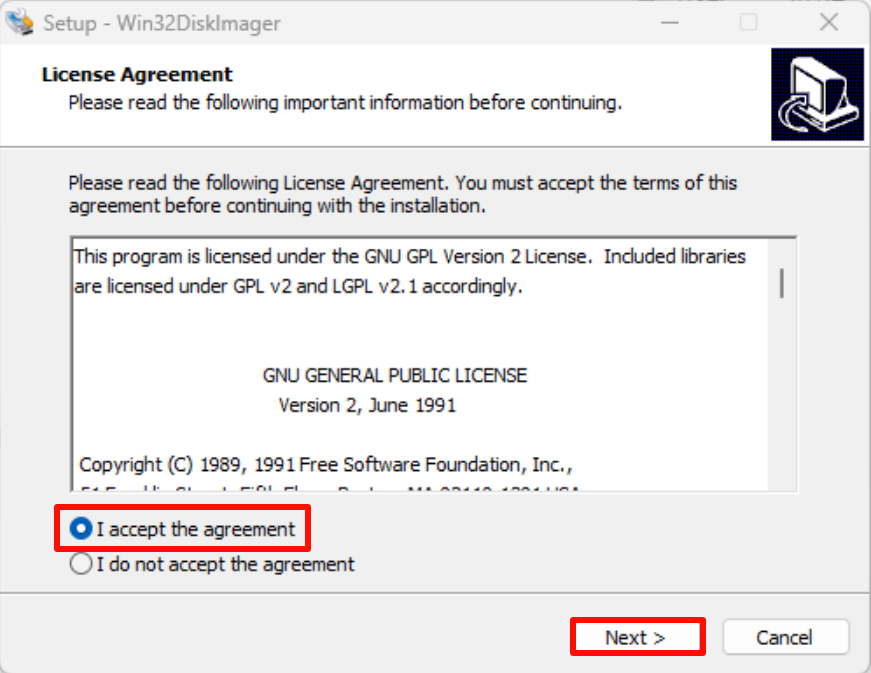
Installation location: Default location is recommended.

Click " Install"

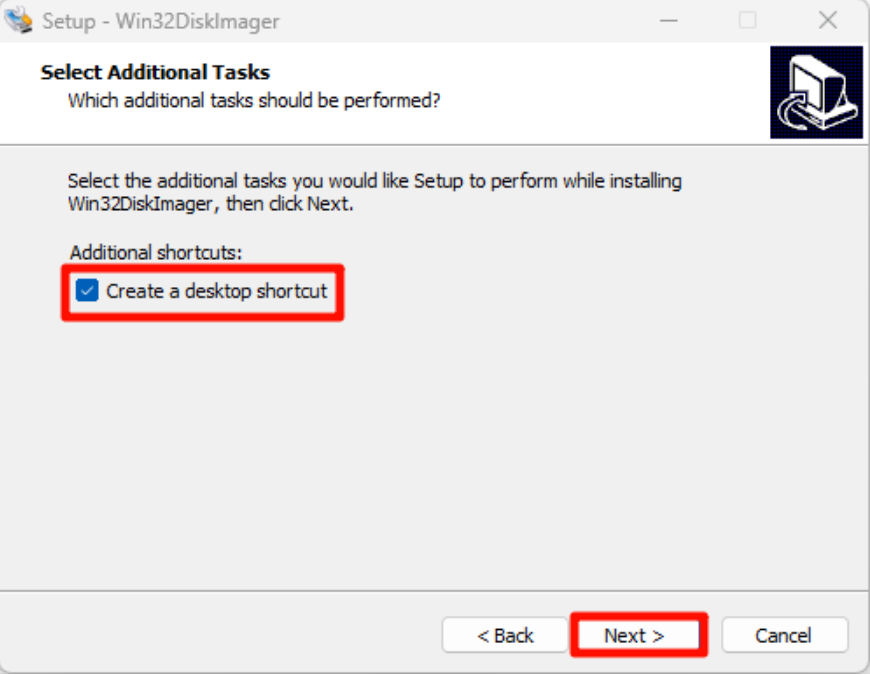
Click " Install"

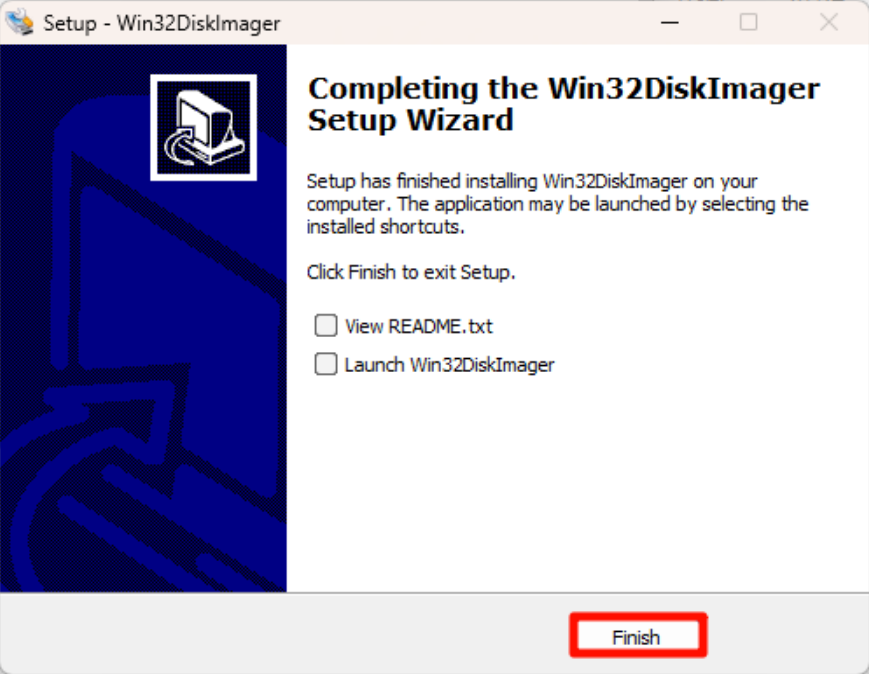
Complete the installation.
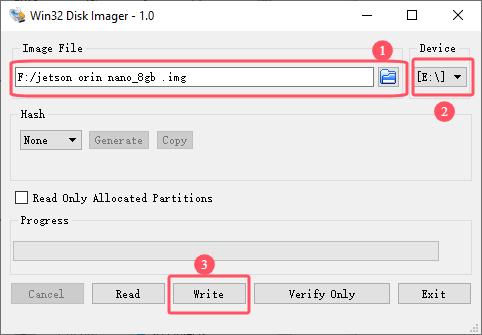
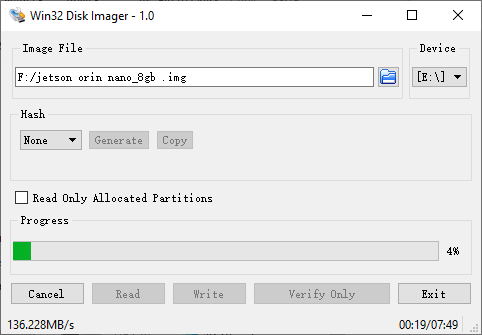
3.2.2、Use Win32DiskImager
①: Select the factory image file (*.img) in the data
②: Select the drive letter corresponding to the SSD
③: Write the Yahboom system image to the SSD
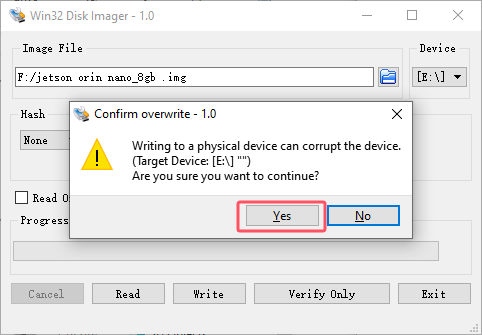
Click "Yes"
wait it
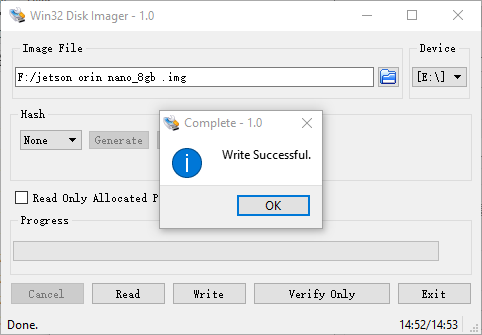
After the system is written, you can close this software.
And install the SSD to the Jetson Orin board.
4、SSD expansion
This tutorial can be used to allocate the unallocated space of the solid state drive.
4.1、Install GParted
xxxxxxxxxxsudo apt updatesudo apt install gparted -y

4.2、Use GParted
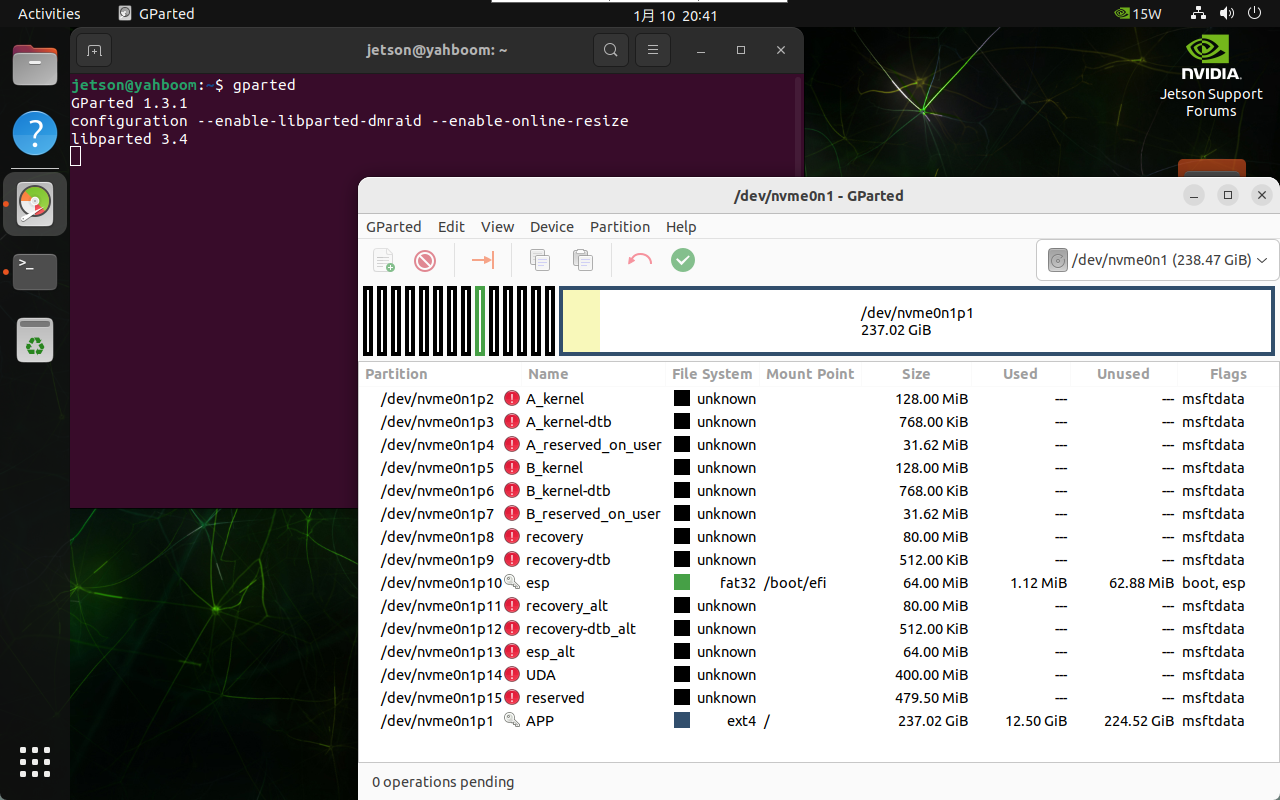
Find the GParted application icon in the system application menu bar to open it or enter the following command in the terminal to start it.
xxxxxxxxxxgparted
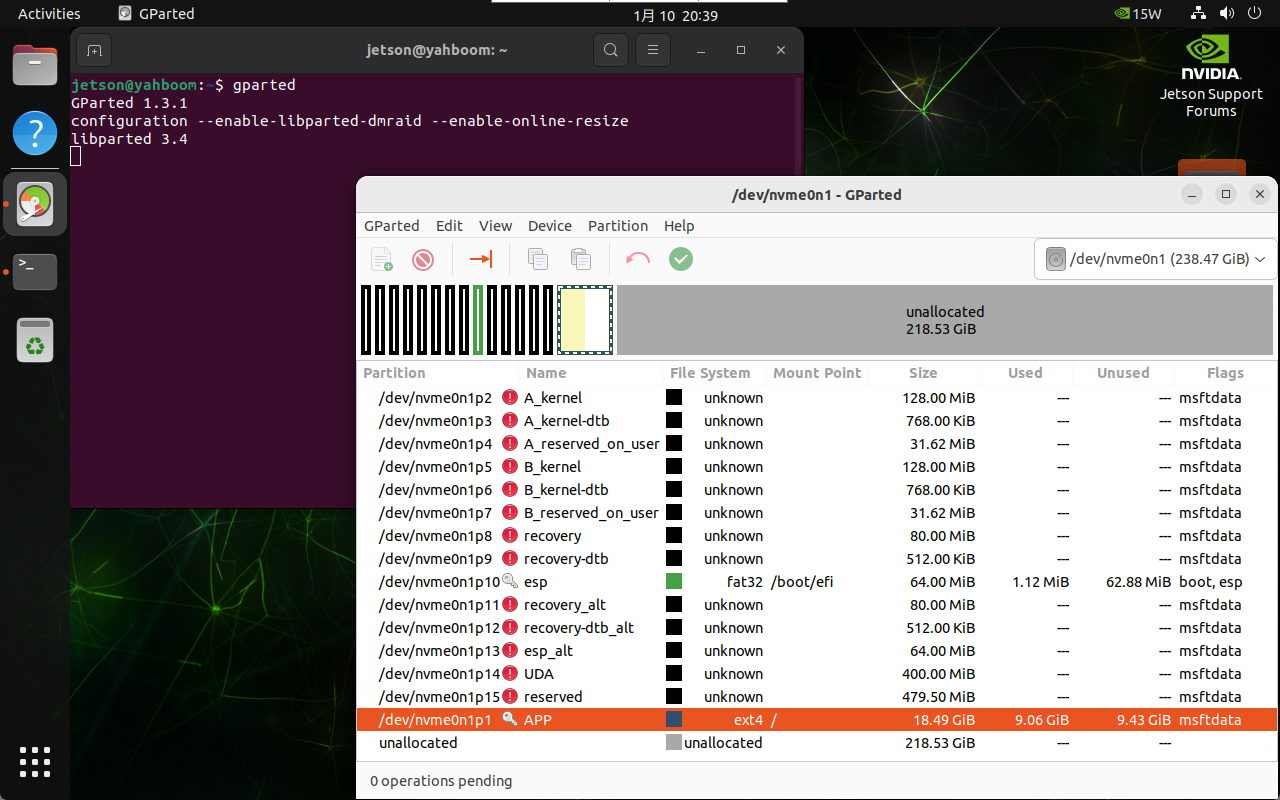
4.3. Adjust partitions
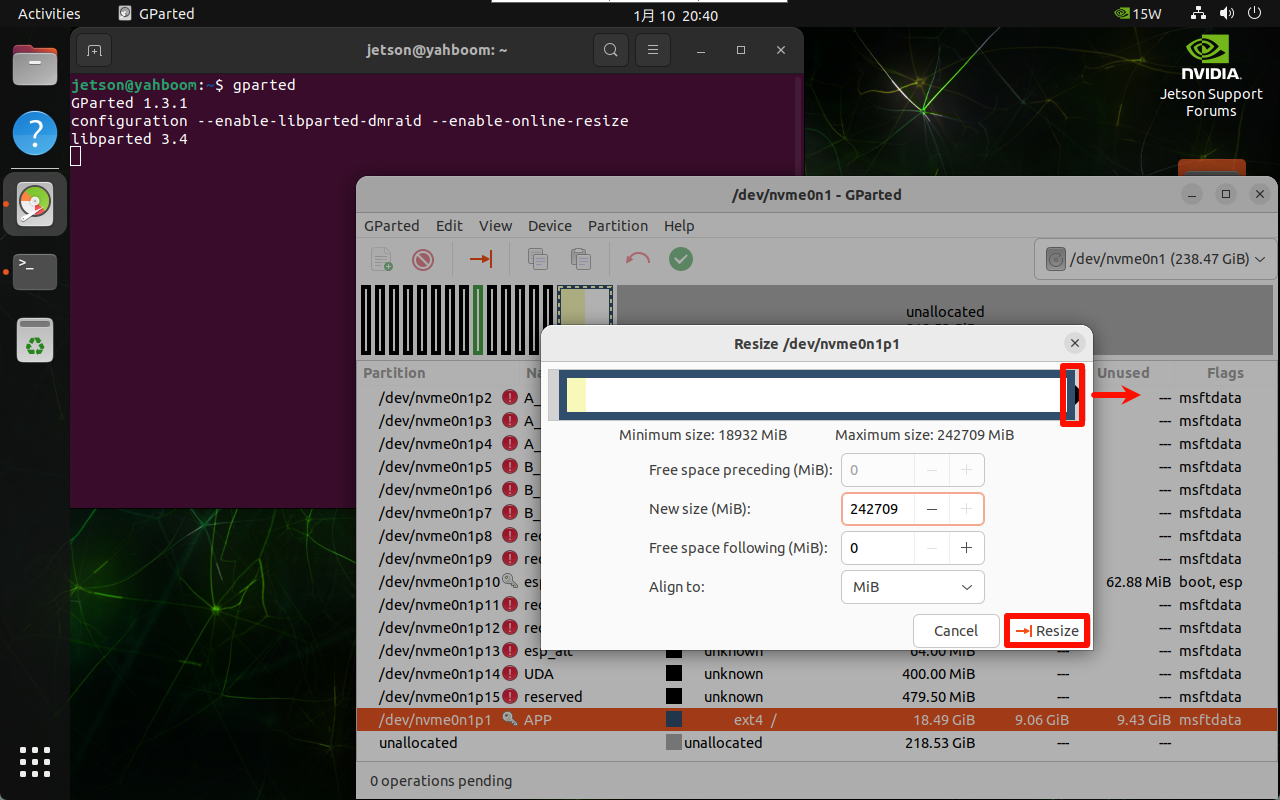
Right-click the disk partition that needs to be expanded: generally select the largest partition on the disk
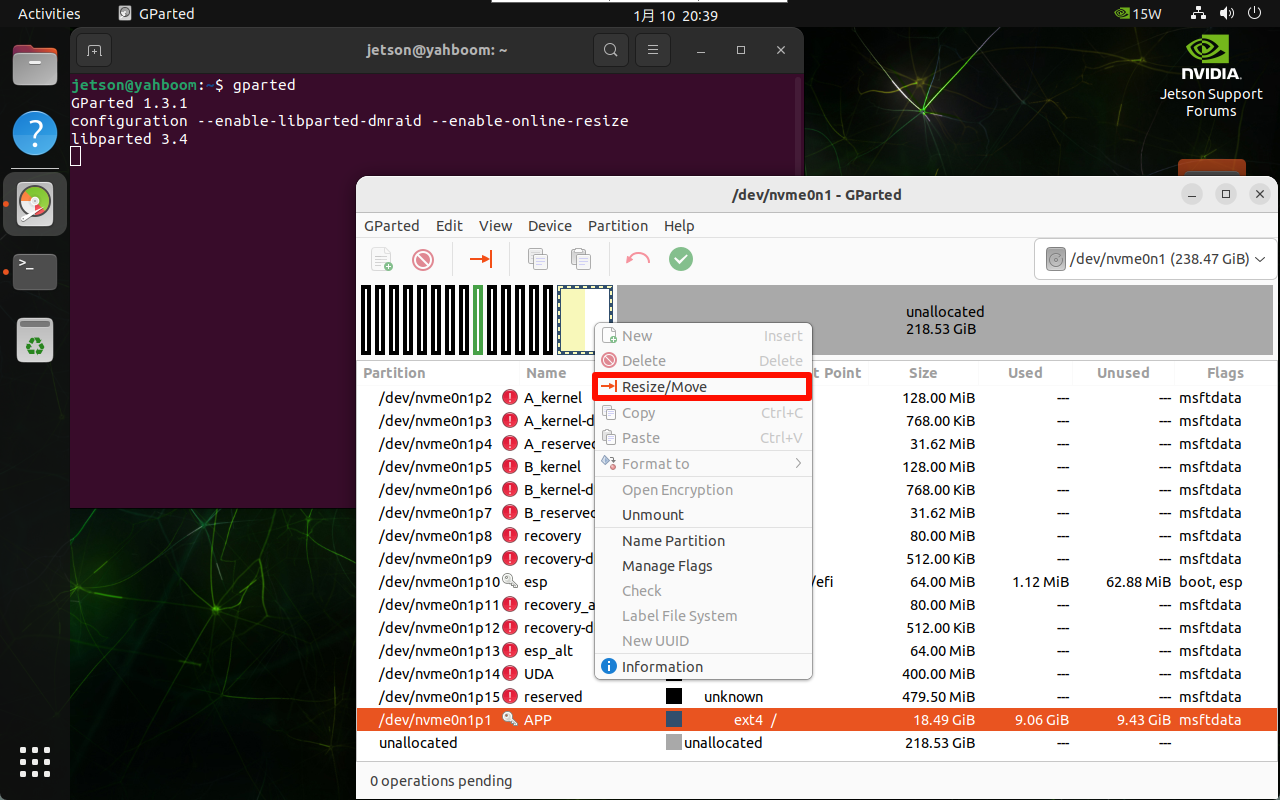
You can adjust the partition size by sliding the slider to the right to maximize the space.
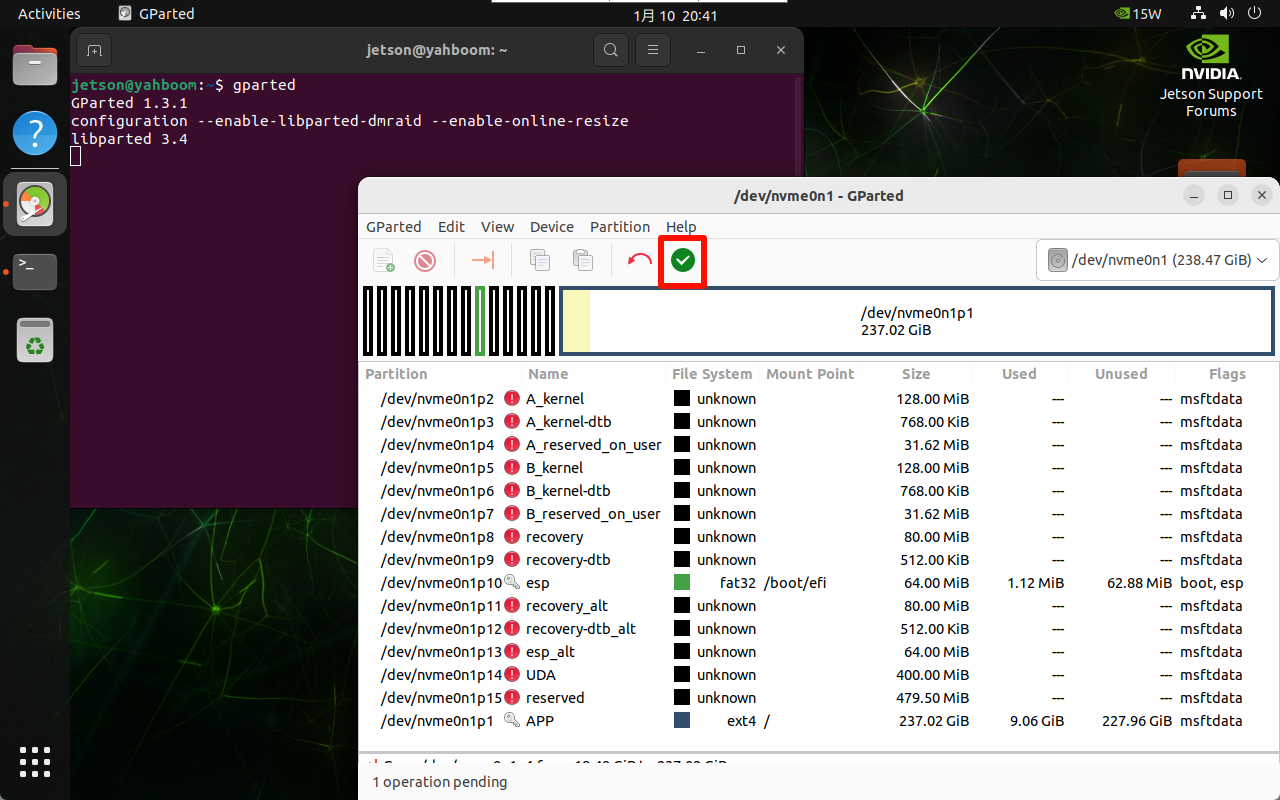
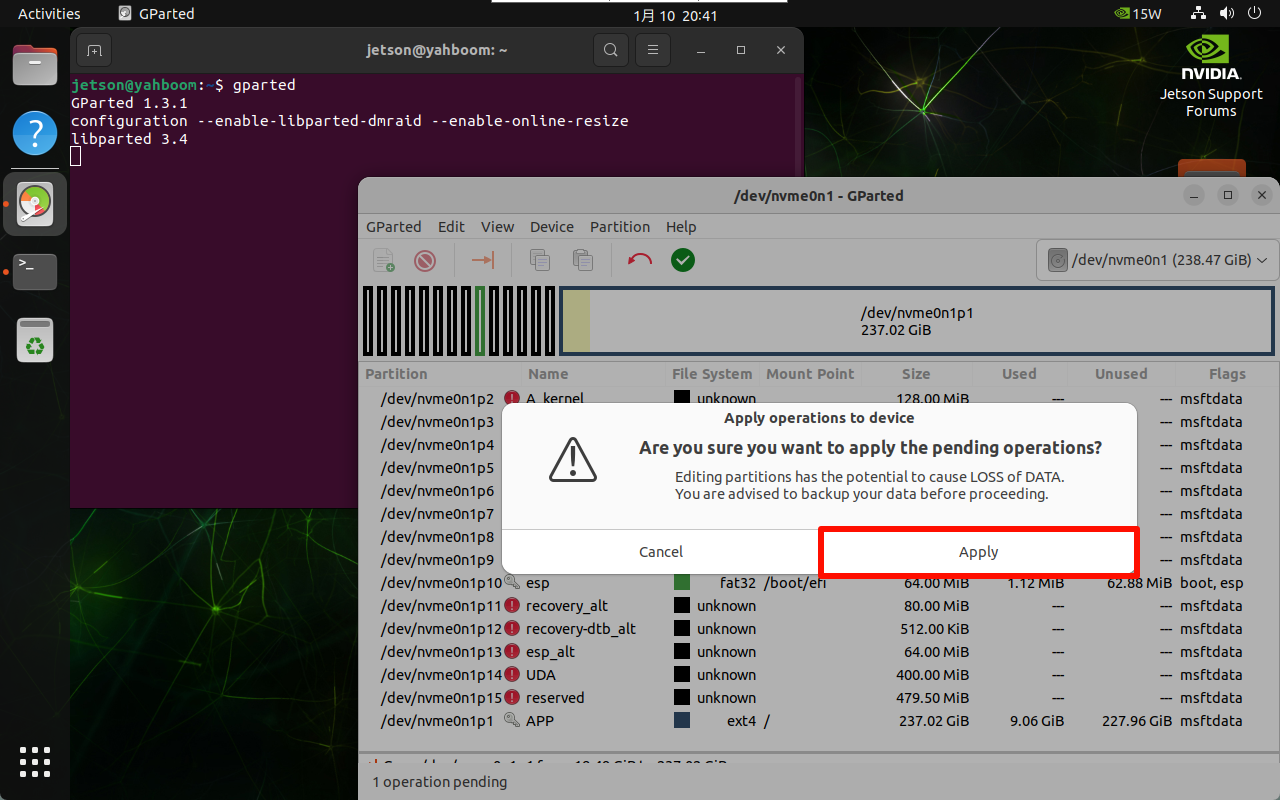
Confirm the partition adjustment operation.
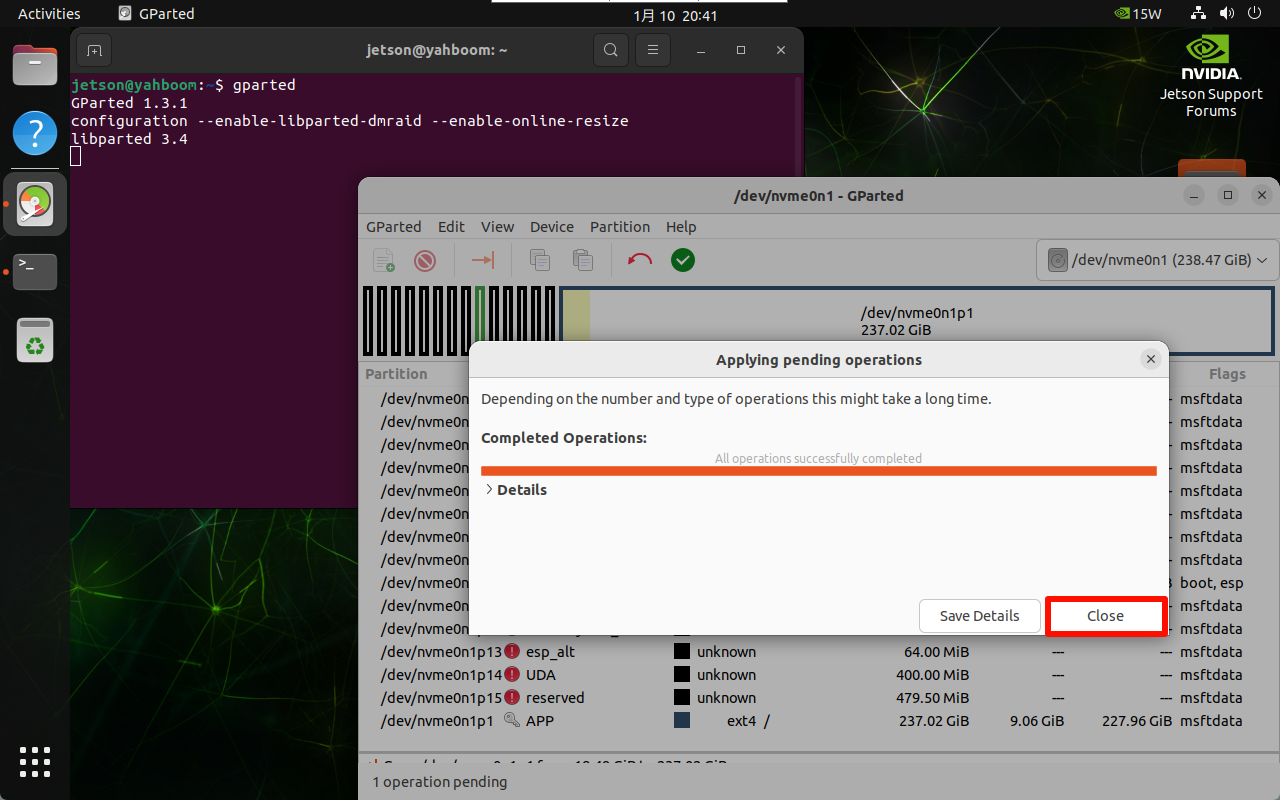
After the partitioning is completed, close the GParted software.