Depth camera distance measurement
Before starting this function, you need to close the process of the big program and APP. If you need to start the big program and APP again later, start the terminal,
xxxxxxxxxxbash ~/dofbot_pro/APP_DOFBOT_PRO/start_app.sh1. Function description
After the program is started, click the point in the pseudo-color image with the mouse. Within the effective data range of the depth camera, the screen will show the distance between the point and the depth camera.
2. Start and operate
2.1. Start
Terminal input,
xxxxxxxxxx#Start the cameraros2 launch orbbec_camera dabai_dcw2.launch.py#Start the distance measurement programros2 run dofbot_pro_depth get_center_disAfter the program is started, the distance of the center point of the image is obtained by default. If the distance is not within the effective range of the depth camera, an error may be reported. The normal startup is as follows,
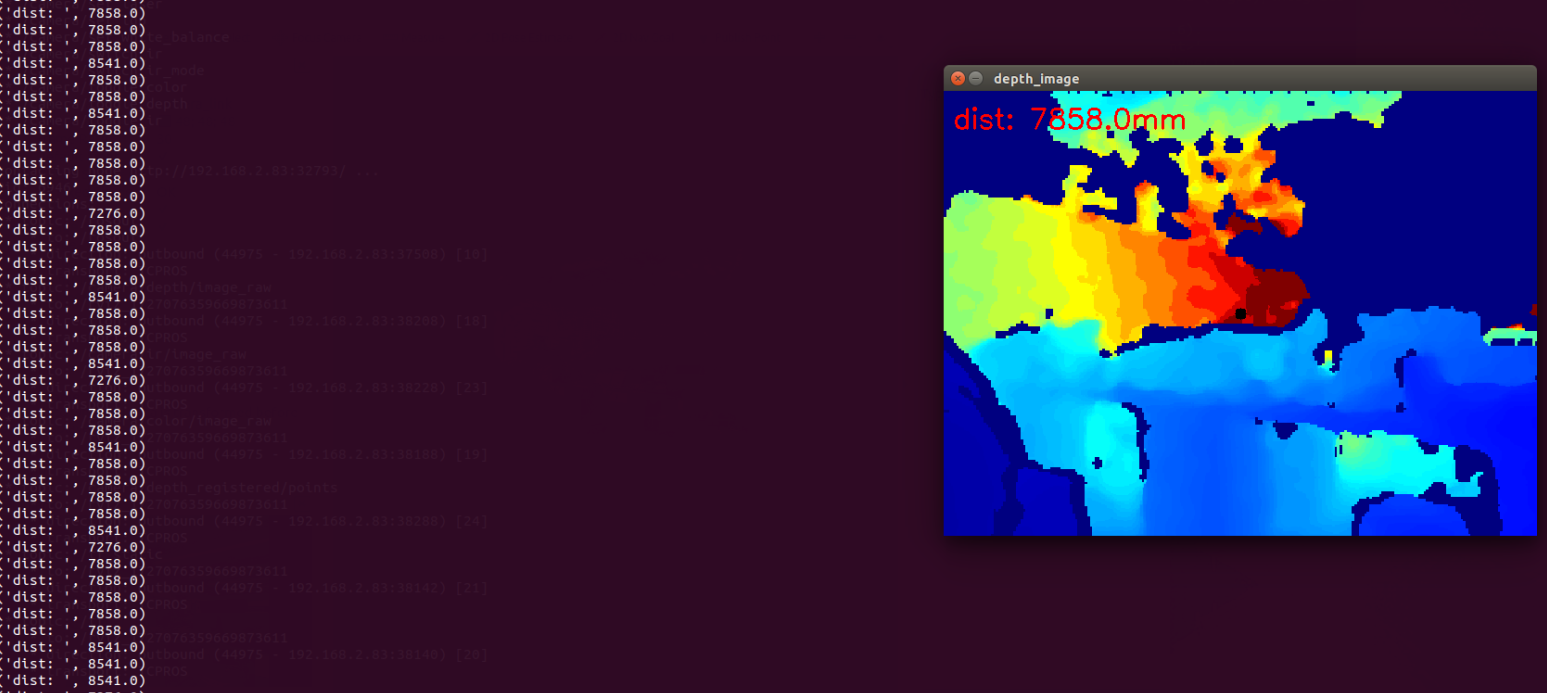
The distance of the point will be printed in the image in millimeters, and the terminal will also display the distance.
2.2, Operation
Click any point in the pseudo-color image frame with the mouse, and a black dot will appear after clicking, indicating the location of the current point; the distance of the point will be displayed in the image, and the terminal will also display it synchronously,
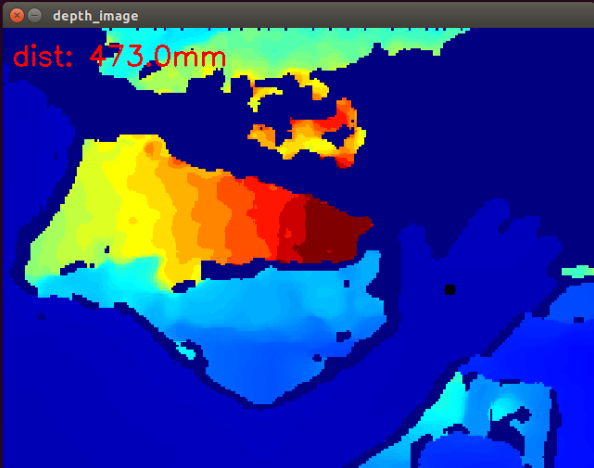
Here is a demonstration, I took a point on my hand, the distance is 47.3 cm, that is, 473 mm.
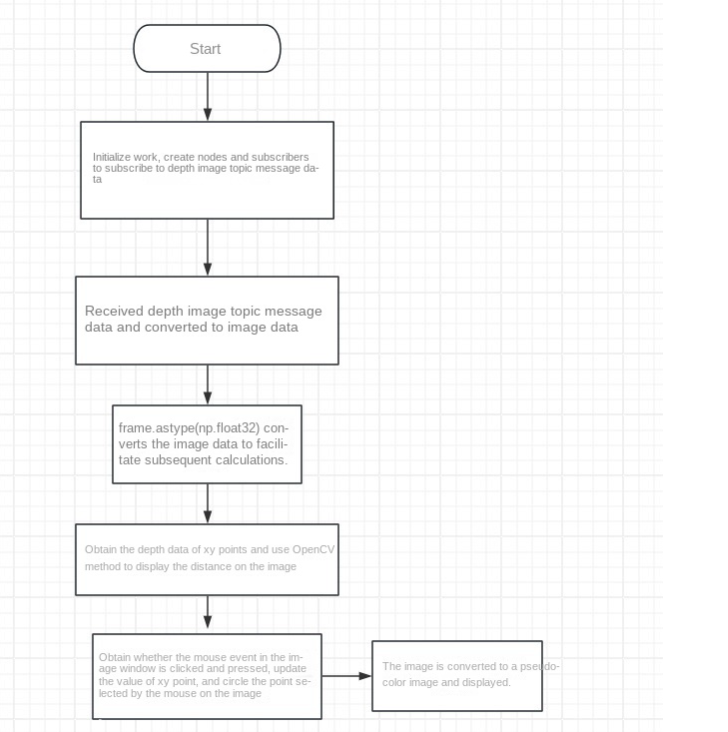
3. Program flow chart
4. Core code analysis
Under the code path,
xxxxxxxxxx/home/jetson/dofbot_pro_ws/src/dofbot_pro_depth/dofbot_pro_depth/get_center_dis.py
Import library
xxxxxxxxxx#ros2py libraryimport rclpyfrom rclpy.node import Node#opencv image processing libraryimport cv2 as cv#cv_bridge library, used for conversion between message data and imagesfrom cv_bridge import CvBridge#Import image message data typefrom sensor_msgs.msg import Image#Import numpy library, convert image dataimport numpy as npDefine the image encoding format
xxxxxxxxxxencoding = ['16UC1', '32FC1']Initialize data,
xxxxxxxxxx#Define a subscriber to subscribe to the depth image topic messageself.sub = rospy.Subscriber("/camera/depth/image_raw", Image, self.topic)#Define the name of the image window to facilitate the subsequent program to identify the mouse click eventself.window_name = "depth_image"#The initial xy coordinates are the center point, that is, (320,240)self.y = 240self.x = 320#Create a CVBridge object to facilitate the conversion between the depth image topic message data and the image dataself.depth_bridge = CvBridge()Define the click_callback function to handle the detected mouse event,
x
def click_callback(self, event, x, y, flags, params): '''Event equals 1, indicating that the left mouse button is pressed. cv.EVENT_MOUSEMOVE: Mouse move event, value is 0 cv.EVENT_LBUTTONDOWN: Left button pressed event, value is 1 cv.EVENT_LBUTTONUP: Left button released event, value is 2 cv.EVENT_RBUTTONDOWN: Right button pressed event, value is 3 cv.EVENT_RBUTTONUP: Right button released event, value is 4 cv.EVENT_MBUTTONDOWN: Middle button pressed event, value is 5 cv.EVENT_MBUTTONUP: Middle button released event, value is 6 cv.EVENT_LBUTTONDBLCLK: Left button double-click event, value is 7 cv.EVENT_RBUTTONDBLCLK: Right button double-click event, value is 8 cv.EVENT_MBUTTONDBLCLK: Middle button double-click event, value is 9''' if event == 1: #按下左键后,会返回x和y,把他们更新到之前定义的self.x和self.y #After pressing the left button, x and y will be returned and updated to the previously defined self.x and self.y self.x = x self.y = y print(self.x) print(self.y)Write the callback function of the subscriber to process the received depth image topic data,
x
def topic(self,msg): #使用创建的depth_bridge的imgmsg_to_cv2方法,把接收的消息msg数据转换成图像imgae数据,输入的参数是接收到的msg数据和图像的编码格式,这里取值是'32FC1' #Use the imgmsg_to_cv2 method of the created depth_bridge to convert the received message msg data into image imgae data. The input parameters are the received msg data and the encoding format of the image. Here the value is '32FC1' depth_image = self.depth_bridge.imgmsg_to_cv2(msg, encoding[1]) #对图像进行分辨率设置,设置成640*480的分辨率 #Set the image resolution to 640*480 frame = cv.resize(depth_image, (640, 480)) #数据转换,把原来数据中的uint8转换成float32的类型的数据,避免溢出和方便后边获取距离信息 #Data conversion, convert the uint8 in the original data into float32 type data to avoid overflow and facilitate the acquisition of distance information later depth_image_info = frame.astype(np.float32) #根据xy的值,获取该点的距离 #According to the value of xy, get the distance of the point dist = depth_image_info[self.y,self.x] #把深度图转换成伪彩色图像 #Convert the depth map into a pseudo-color image depth_image_orin = cv.applyColorMap(cv.convertScaleAbs(depth_image, alpha=0.03), cv.COLORMAP_JET) print("dist: ",dist) #四舍五入到小数点后 3 位 Round to 3 decimal places dist = round(dist,3) #把距离信息由数字转换成字符并且与单位'mm'进行合并 #Convert the distance information from numbers to characters and merge it with the unit 'mm' dist = 'dist: ' + str(dist) + 'mm' #把使用opencv的putText函数,把距离信息打印到图像中 #Use opencv's putText function to print the distance information into the image cv.putText(depth_image_orin, dist, (10, 40), cv.FONT_HERSHEY_SIMPLEX, 1.0, (0, 0, 255), 2) #检测self.window_name窗口内的鼠标事件,进入click_callback回调函数处理鼠标事件 #Detect mouse events in the self.window_name window and enter the click_callback callback function to process mouse events cv.setMouseCallback(self.window_name, self.click_callback) #使用opencv的circle函数,在图像上圈出鼠标点击的点 #Use opencv's circle function to circle the point where the mouse is clicked on the image cv.circle(depth_image_orin,(self.x,self.y),1,(0,0,0),10) #显示图像 Display the image cv.imshow(self.window_name, depth_image_orin) cv.waitKey(1)