Download and burn K230 firmware
Download and burn K230 firmwareAbout CanMV K230 firmwarePrepare equipmentDownload firmwareConnect the K230 deviceInstall the K230 driverInstall the burning toolConfigure the burning toolBurn firmwareDetection effect
About CanMV K230 firmware
What is firmware?
It can be understood as the system of a mobile phone or computer.
Under what circumstances do you need to burn firmware?
If the package you purchased does not come with a TF card, you need to prepare a TF card larger than 4G, burn the firmware to the TF card, and then insert the TF card into the TF card slot to use the K230 visual module. If the package you purchased comes with a TF card, the firmware has been burned at the factory and can be used by plugging the TF card slot.
Can I burn third-party firmware?
Because the firmware is configured with pin information, peripheral drivers, etc., it is not recommended to burn third-party K230 firmware, which will cause incompatibility
Prepare equipment
Please prepare the K230 visual module, a TF card with a memory larger than 4G, a type-C data cable, and a Windows system computer.
Note: If there is data on the TF card, please remove the backup first, otherwise it may be cleared.
Download firmware
Download the factory firmware from the K230 visual module data, named: CanMV_K230_YAHBOOM_micropython_Vx.x.x.img.gz
Where Vx.x.x is the version number.
After decompressing the file, you will get the firmware, named: CanMV_K230_YAHBOOM_micropython_local_nncase_v2.9.0.img.
Connect the K230 device
Confirm that the TF card is removed from the TF card slot of the K230 module.
Use a type-C data cable to connect the K230 module to the computer USB port.
If it is the first time to connect, the K230 USB Boot Device will be displayed as an exclamation mark in the device manager, and the K230 driver needs to be installed first.

Note: Since the K230 vision module consumes a lot of power, please use the USB3.0 interface to connect the device.
Install the K230 driver
Download the driver tool from the K230 vision module data, the name is: zadig-2.9.exe.
Double-click the run file, select K230 USB Boot Device, and then click Install Driver to start installing the driver.
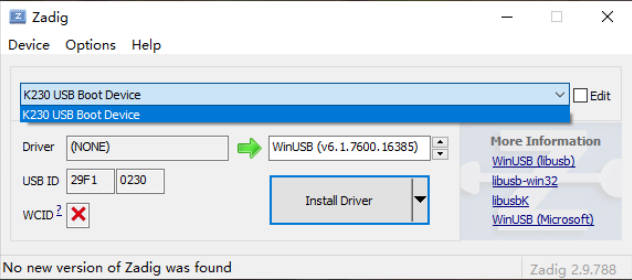
Note: This tool only needs to install the driver once.
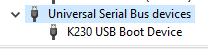
After installing the driver, replug the K230 vision module and you can see that the exclamation mark has disappeared, indicating that the driver has been installed.
Install the burning tool
Download the burning tool from the K230 visual module data, the name is: K230BurningTool-Windows.zip
After decompressing the file, find the K230BurningTool.exe file and double-click to open it.
Note that the decompression path should not contain Chinese.
Configure the burning tool
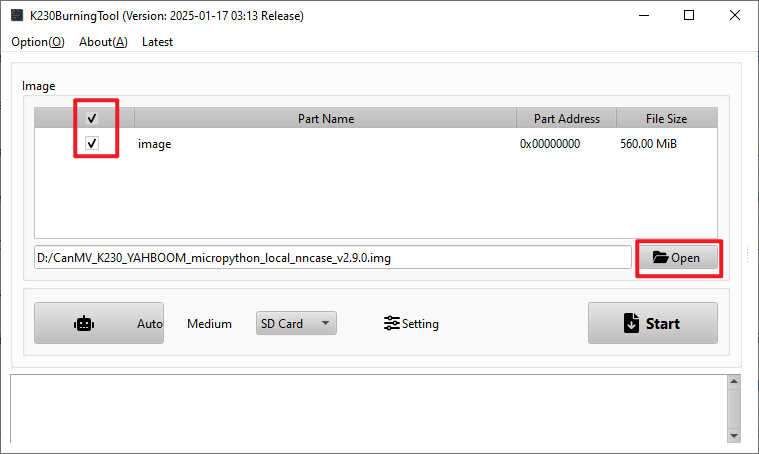
Click the [Open] button and select the firmware you just decompressed. You need to confirm that the image is checked.
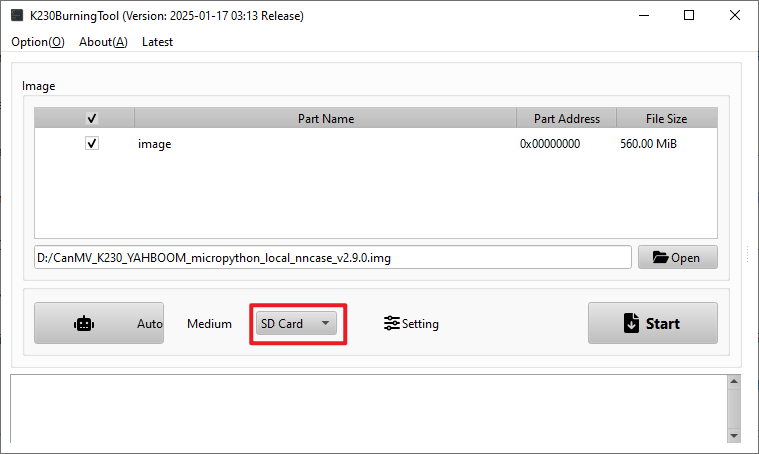
Select [SD Card] in [Target Media]
Burn firmware
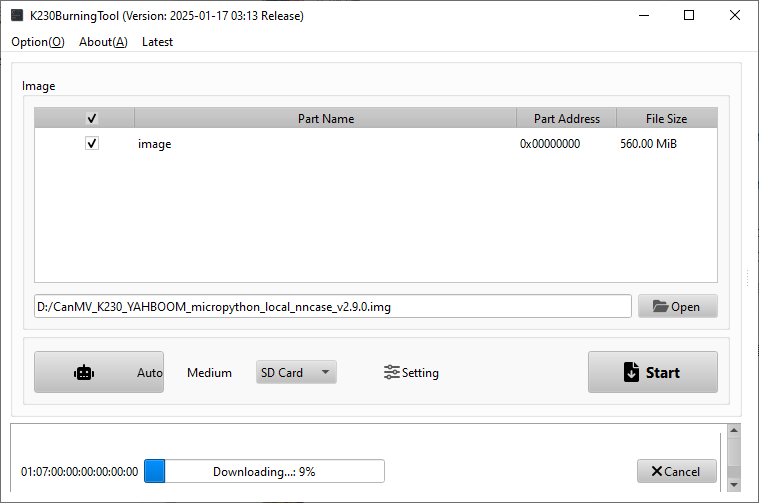
At this time, you need to insert the prepared TF card into the TF card slot of the K230 visual module, and then click the [Start] button to burn the firmware.
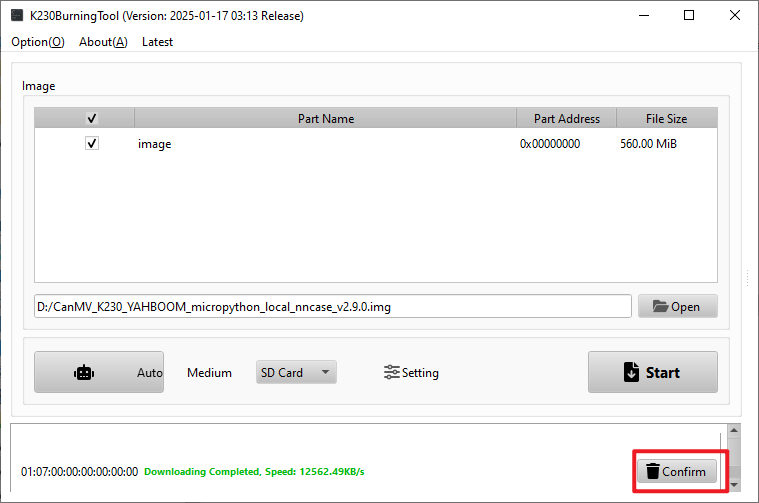
Wait for the burning progress bar to reach 100%, click the [Confirm] button, and the burning is complete.
Detection effect
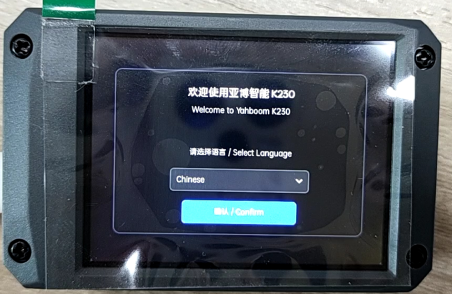
At this time, re-plug the type-C cable of the K230 visual module and power it on again.
Note: Since the content of the TF card needs to be initialized for the first connection after burning, the system may pop up the problem of not being able to recognize the USB device. Re-plug the type-C of the K230 visual module and reconnect it.
After reconnecting, the OpenMV Cam USB COM Port device number appears in the port of the device manager, indicating that the device is running successfully.
