Camera
Case Experiment Results
When training your own AI vision model later, it is recommended to use K230 to shoot the target to be identified and save the picture as a training set.
This can optimize and reduce some of the poor results caused by the difference between the training photos and the actual recognition environment.
The sample code for this section is located in: [Source code/02.Basic/19.snapshot.py]
We use CanMV IDE to open the sample code and connect K230 to the computer via USB.
In the system's file manager, open the directory corresponding to CanMV. We enter the directory CanMV/sdcard
The path of the pictures saved is in the [/data/snapshot/] directory
Run the program, the camera will be awakened, and the screen will show the photo currently being taken.

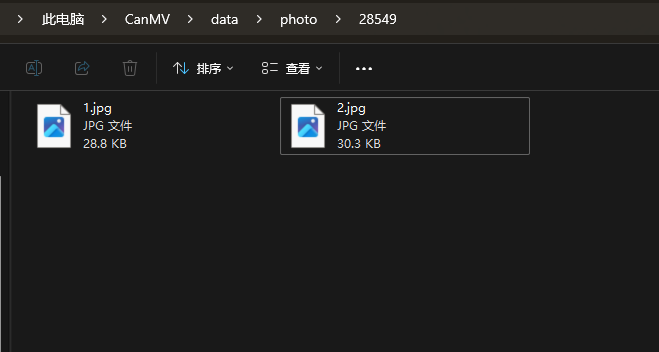
Press the Key key, K230 will take a picture of the current screen and save it in the [/sdcard/photo/(xxx)] directory. The saved folder (xxx) will be displayed on the screen each time the program is run.
Taking the code in the above figure as an example, the photo taken this time is saved in the path [/sdcard/photo/28549/]
Code Explanation
The example code in this section is as follows
x
# 导入必要的系统和操作系统模块# Import necessary system and OS modulesimport uosimport timefrom media.sensor import *from media.display import *from media.media import *import ybUtils.YbKey as YbKey# 定义图片保存路径和文件命名相关变量# Define variables for image saving path and file namingsave_path = "/data/snapshot/" # 保存基础路径 Base saving pathprefix = time.ticks_us() % 10000 # 使用时间戳作为文件夹名 Use timestamp as folder namei = 1 # 照片计数器 Photo counter# 保存图像原始数据,可使用7yuv预览# save image raw data, use 7yuv to previewdef ensure_dir(directory): """ 递归创建目录 (Recursively create directory) """ # 如果目录为空字符串或根目录,直接返回 # (If directory is empty string or root directory, return directly) if not directory or directory == '/': return # 处理路径分隔符,确保使用标准格式 # (Process path separators to ensure standard format) directory = directory.rstrip('/') try: # 尝试获取目录状态,如果目录存在就直接返回 # (Try to get directory status, if directory exists then return directly) os.stat(directory) print(f'目录已存在: {directory}') # (Directory already exists: {directory}) return except OSError: # 目录不存在,需要创建 # (Directory does not exist, need to create) # 分割路径以获取父目录 # (Split path to get parent directory) if '/' in directory: parent = directory[:directory.rindex('/')] if parent and parent != directory: # 避免无限递归 # (Avoid infinite recursion) ensure_dir(parent) try: # 创建目录 # (Create directory) os.mkdir(directory) print(f'已创建目录: {directory}') # (Directory created: {directory}) except OSError as e: # 可能是并发创建导致的冲突,再次检查目录是否存在 # (Possible conflict due to concurrent creation, check again if directory exists) try: os.stat(directory) print(f'目录已被其他进程创建: {directory}') # (Directory has been created by another process: {directory}) except: # 如果仍然不存在,则确实出错了 # (If it still doesn't exist, there is definitely an error) print(f'创建目录时出错: {e}') # (Error creating directory: {e}) except Exception as e: # 捕获其他可能的异常 # (Catch other possible exceptions) print(f'处理目录时出错: {e}') # (Error processing directory: {e})if __name__ == "__main__": try: # 使用默认配置构造传感器对象 # Construct a Sensor object with default configuration key = YbKey.YbKey() sensor = Sensor() # 重置传感器 # Reset sensor sensor.reset() # 设置通道1的输出格式 # Set channel 1 output format sensor.set_framesize(width = 640, height = 480, chn = CAM_CHN_ID_1) sensor.set_pixformat(Sensor.RGB565, chn = CAM_CHN_ID_1) Display.init(Display.ST7701,width=640,height=480,to_ide = True) # 初始化媒体管理器 # Initialize media manager MediaManager.init() # 启动传感器 # Start sensor sensor.run() last_status = False while True: # 捕获图像 # Capture image img = sensor.snapshot(chn = CAM_CHN_ID_1) # 创建显示用的图像缓冲 # Create image buffer for display img2 = image.Image(640, 480, image.RGB565) img2.clear() img2.copy_from(img) # 在图像上绘制信息文本 # Draw information text on image img2.draw_string_advanced(10, 10, 30,"存储目录: " + str(prefix)+", 照片 " + str(i) + " ", color=(255, 0, 0)) img2.draw_string_advanced(10, 45, 30,"Save Folder: " + str(prefix)+" , photo: " + str(i) + " ", color=(255, 0, 0)) Display.show_image(img2, 0, 0, Display.LAYER_OSD2) key = YbKey.YbKey() # 按键检测和图片保存逻辑 # Button detection and image saving logic if key.is_pressed() == 1: if last_status == False: last_status = True ######################### ensure_dir(save_path + str(prefix) + "/") path = save_path + str(prefix) + "/" + str(i) + ".jpg" i = i+1 print(path) img.save(path) print("已保存至:" + path) time.sleep_ms(1) ######################### else: last_status = False except KeyboardInterrupt as e: print(f"用户停止程序 User stopped the program") except BaseException as e: print(f"发生异常 Exception occurred: '{e}'") finally: # 清理资源和退出程序 # Clean up resources and exit program # 停止传感器 # Stop sensor if isinstance(sensor, Sensor): sensor.stop() # 反初始化显示 # Deinitialize display Display.deinit() os.exitpoint(os.EXITPOINT_ENABLE_SLEEP) time.sleep_ms(100) # 释放媒体缓冲 # Release media buffer MediaManager.deinit()Specific workflow:
Initialization settings:
- Set the photo save path to "/data/snapshot/"
- Create unique folder names with current timestamp
- Set up photo counter
Camera Settings:
- Initialize the camera sensor and set the resolution to 800x480
- Set RGB565 color format
- Configuring HDMI display output
- Initialize the Media Manager
Main loop function:
Continuously capture camera images
Overlay the current photo information (save path and photo sequence number) on the preview screen
Monitoring key input
When a key press is detected:
Make sure the storage directory exists
- Save photos with increasing serial numbers
- Short delay after saving to prevent repeated triggering
Exception handling:
- Can handle user interrupts (such as pressing Ctrl+C)
- Catch and display other possible exceptions
Program end processing:
- Stop the camera
- Turn off display device
- Release the media cache
- Clean up system resources