1、APP remote control tutorial
1、APP remote control tutorial1.1、Download and install APP1.2、Connect DOGZILLA1.2.1、Select device1.2.2、Establish a network connection1.3、APP function introduction1.3.1、Remote control1.3.2、FPV control1.3.3、Action(Performance Mode)1.3.4、Servo control(Servo Control Mode)1.3.5、Single-leg control(Motor Coordination Mode)
1.1、Download and install APP
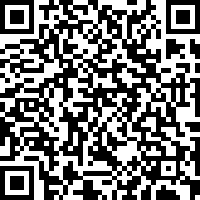
For Android system users, please open the Google Play app store and search for [YahboomRobot], or open the mobile browser, scan the QR code below, download and install the [YahboomRobot] APP.
For iOS users, please open the App store and search for [YahboomRobot], or open the code scanner, scan the QR code below, and download and install the [YahboomRobot] APP.
If the latest version of [YahboomRobot] APP is already installed on your phone, you do not need to install it again.
1.2、Connect DOGZILLA
The TF card provided in the kit has been written into thesystem file, we only needs to insert the TF card into theRaspberry Pi, assemble the DOGZILLA according to thesteps,and then it can be turned on normally. Press the switch button on the side of DOGZILLA, the green indicator light of the switch is keep on, DOGZILLA will stand up, wait for about 2 minutes, until DOGZILLA completes stretch action, it means that the system starts normally, and we can see the information will be displayed by the OLED at this time.
User name: pi
Password: yahboom
VNC login password: yahboom Jupyterlab login password: yahboom
DOGZILLA comes with a hotspot signal 【DOGZILLA_WIFI]】 , you can use your mobile phone to connect to this WIFl to form a LAN. Hotspot password is 12345678.
1.2.1、Select device
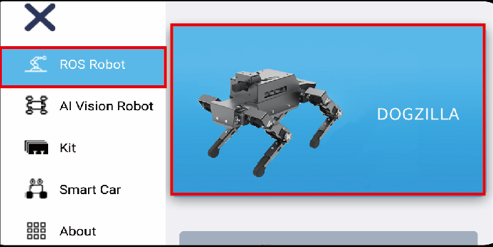
Open the [YahboomRobot] APP for the first time, according to the purchased robot model, you need to select the [DOGZILLA] device in [ROS Robot].
1.2.2、Establish a network connection
Fill in the IP address displayed by the OLED in DOGZILLA in the IP column, and use the default parameters in the Port and Video columns. Click [Connect], and it will automatically jump to the main control interface after the connection is successful.
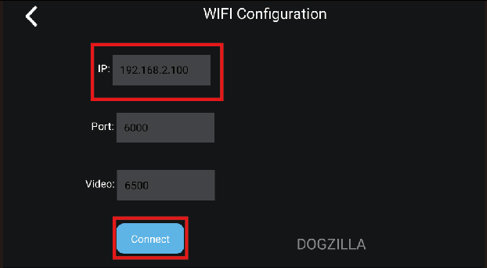
Note: Before connecting the device, please confirm that the mobile phone is connected to the ROSMASTER hotspot signal, or the mobile phone and the ROSMASTER car are connected to the same router. And the app program has been started (the factory system defaults to start the app program).
1.3、APP function introduction
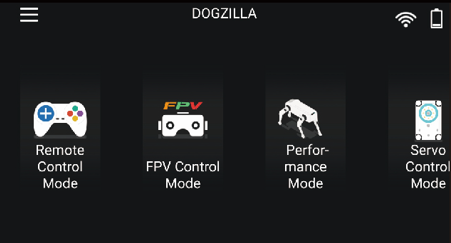
The main interface of DOGZILLA APP is mainly divided into five modules, each of which corresponds to different functions.
1.3.1、Remote control
[Remote control] interface functions are shown as follows.
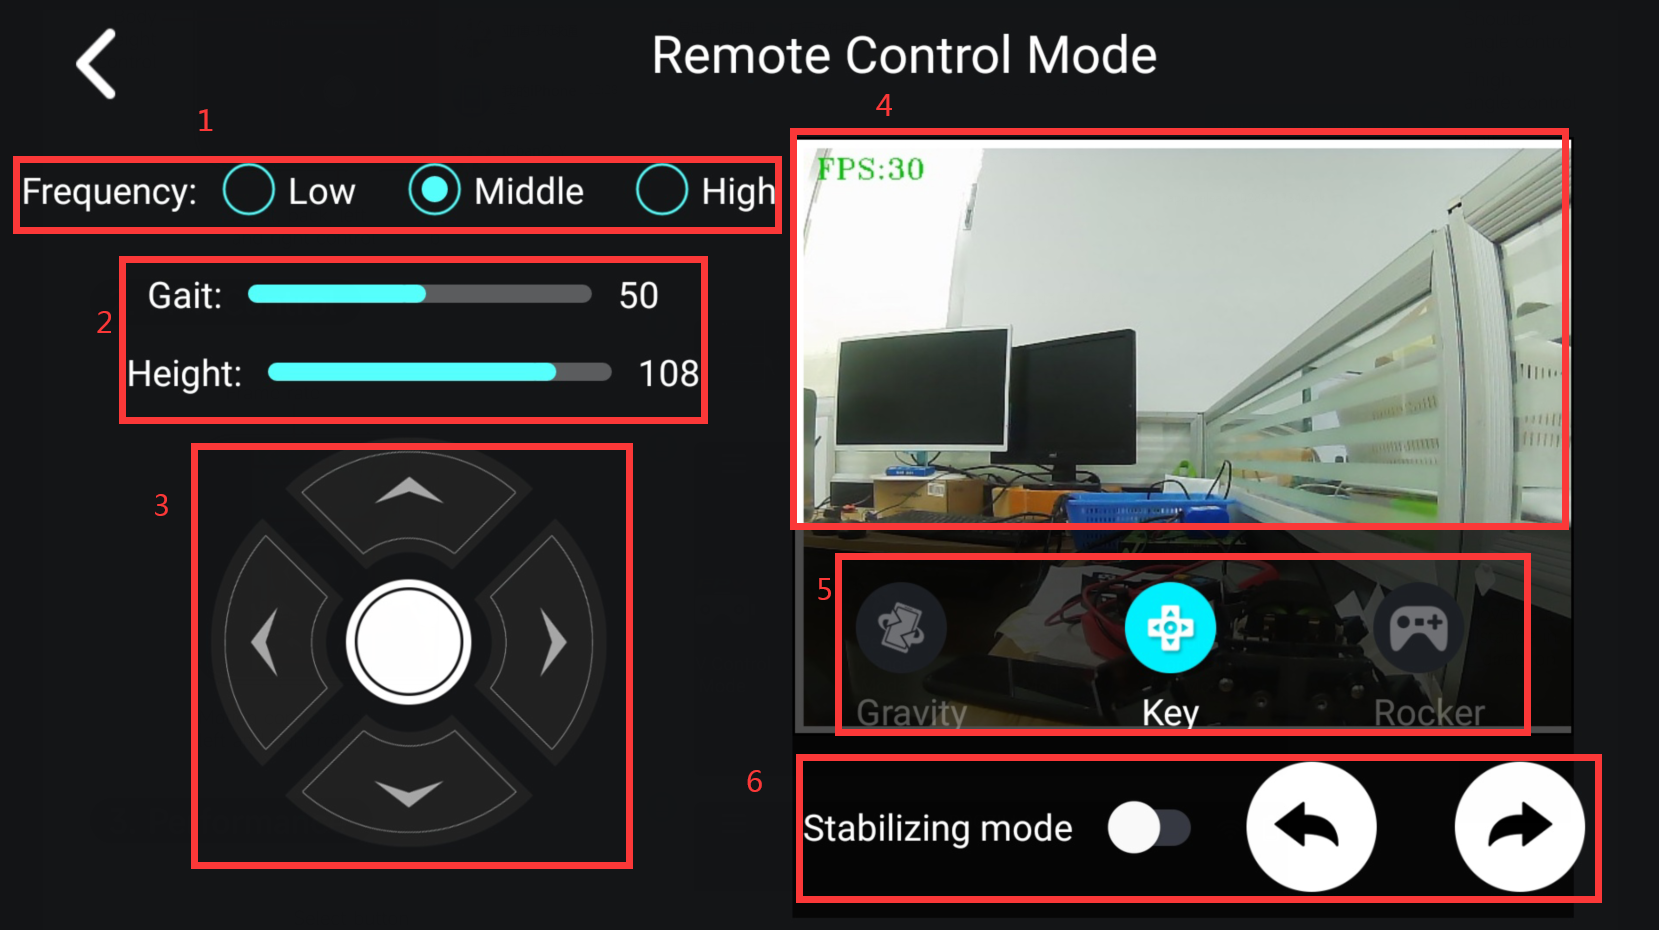
Part 1. Speed control.
Part 2. Body Height Control.
Part 3. Front, back, left and right motion control.
Part 4. Camera image.
Part 5. Select the control method.
Part 6. Turn on the self-stabilizing mode, keep the feet still, and keep the back level.
Part 7. Left and right rotation.
1.3.2、FPV control
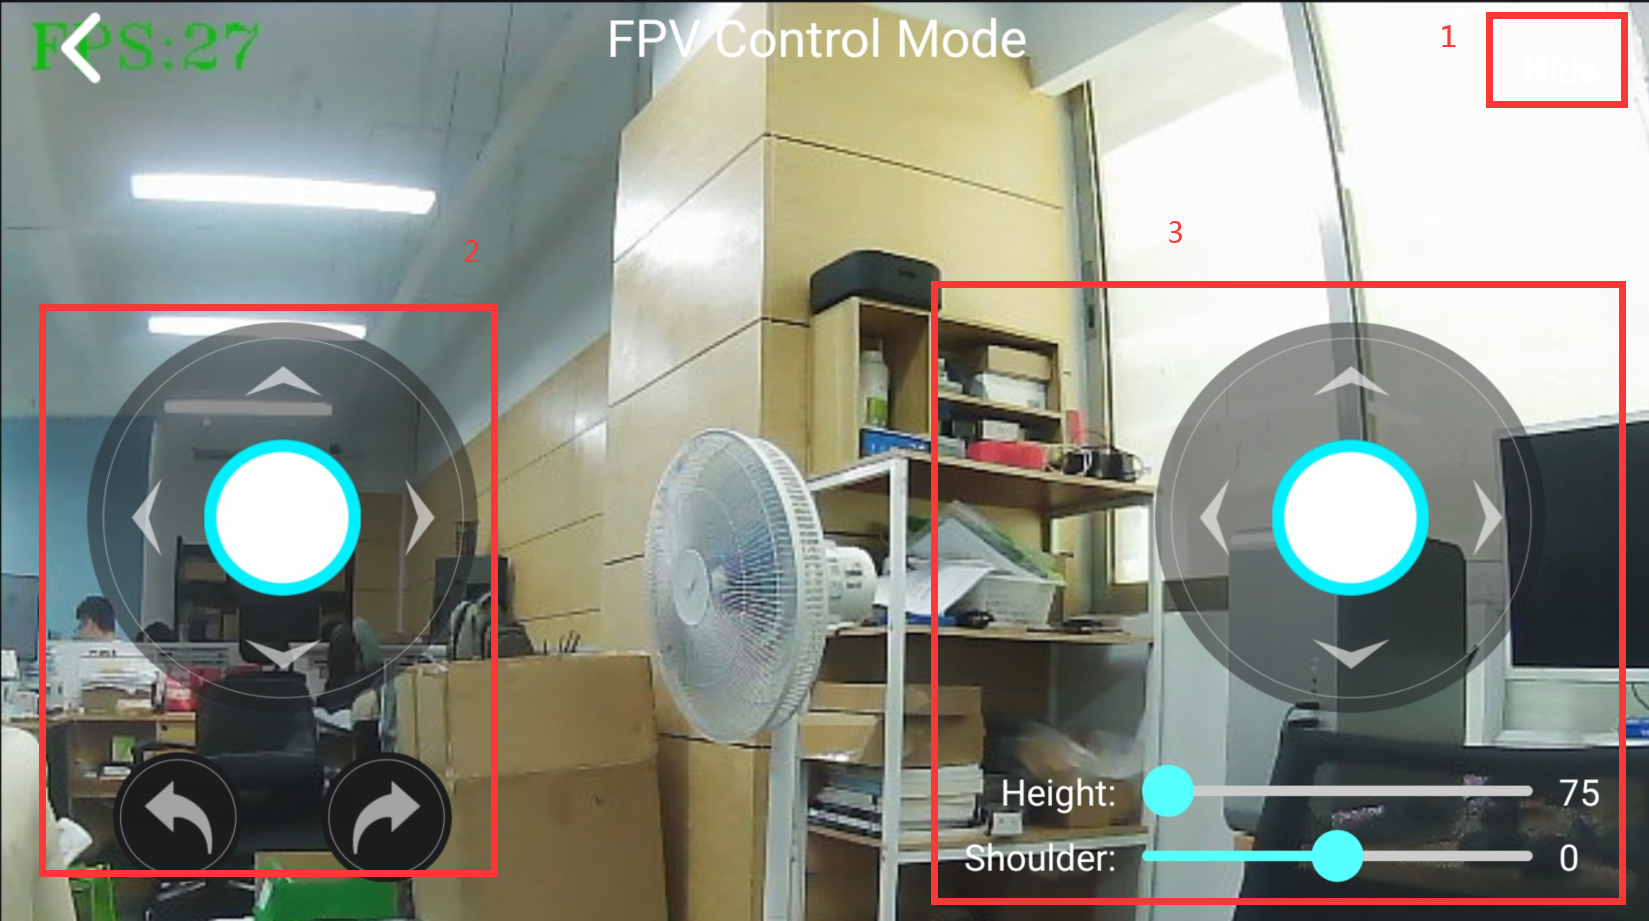
Part 1. Hide the controls and keep the full-screen camera image, which can be controlled with a wireless controller, and click again to display the controls.
Part 2. Control the moving position of the robot dog.
Part 3. Control the body posture of the robot dog.
1.3.3、Action(Performance Mode)
[Action] The interface functions are shown as follows.
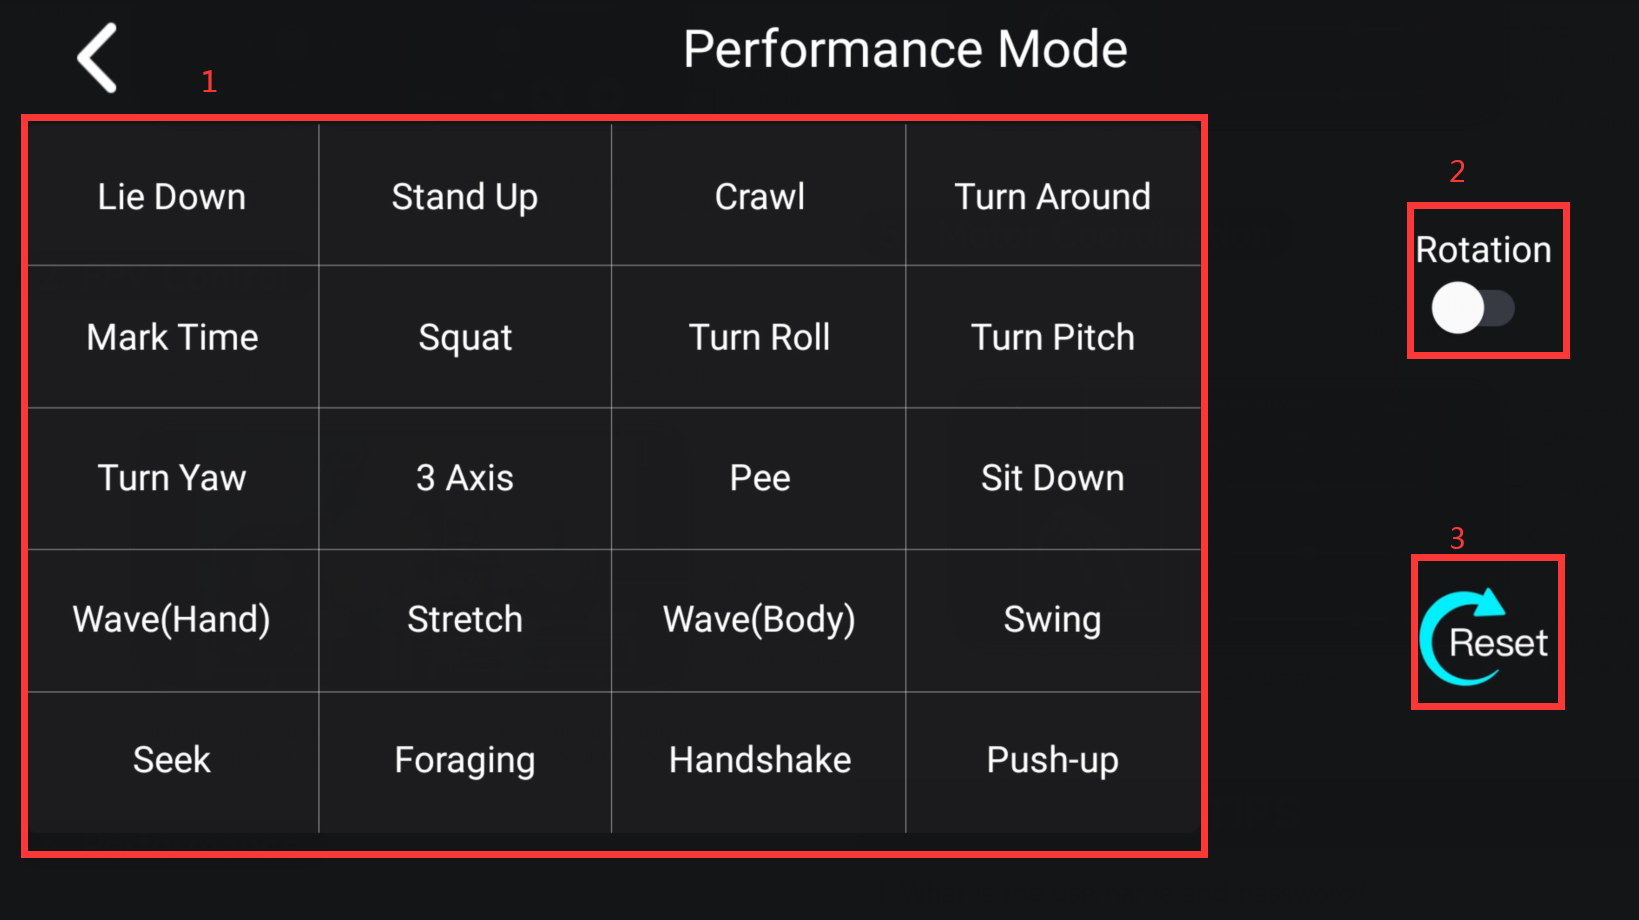
Part 1. Twenty preset actions, run once per click.
Part 2. Turn on the action carousel, and all actions will run in turn.
Part 3. Reset button, stop motion and restore default posture.
1.3.4、Servo control(Servo Control Mode)
The function of the [Servo Control] interface is shown as follows.
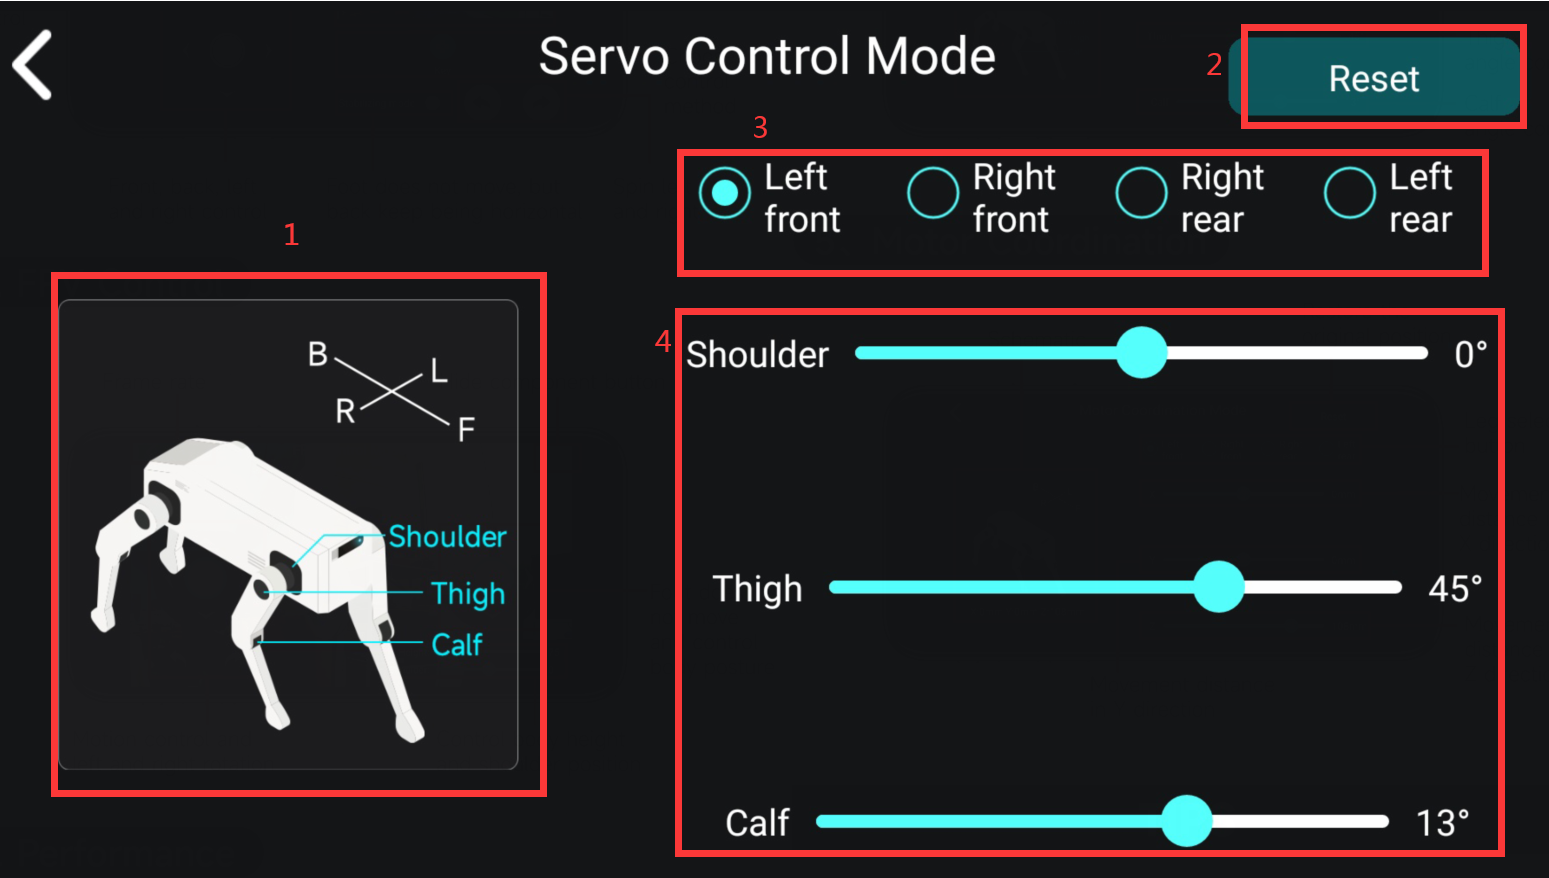
Part 1. Schematic diagram of joint position.
Part 2. Restore the default posture.
Part 3. Choose which leg joint is to be controlled.
Part 4. Control the joint angle.
1.3.5、Single-leg control(Motor Coordination Mode)
[Single-leg control] interface functions are shown as follows.
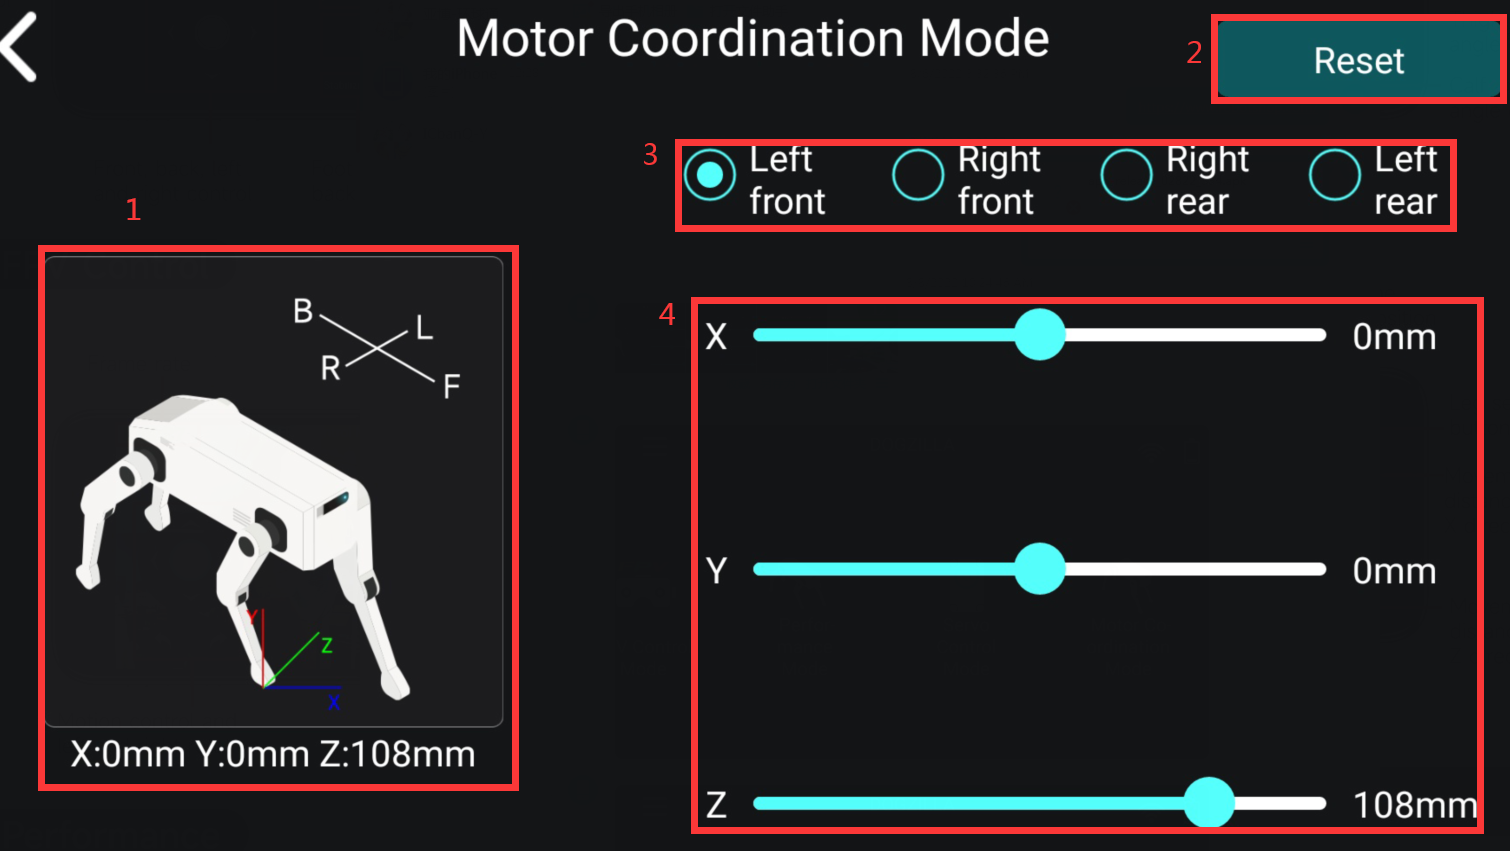
Part 1. Schematic diagram.
Part 2. Restore the default posture.
Part 3. Choose which leg to control.
Part 4. Control foot position.