YOLO5 construction
YOLO5 constructionThis tutorial is suitable for building the official image of Jetson Orin nx yourself. If you are using the YAHBOOM version of the image, this tutorial can be ignored.1.preparation2.Environment construction of YOLO5(yolo5 v5.0)2.1 Download the required module for YOLO5- torch2.2 Install the corresponding version of torchvision2.3 Download the source code of YOLO53.Verify if yolo5 has been successfully built
This tutorial is suitable for building the official image of Jetson Orin nx yourself. If you are using the YAHBOOM version of the image, this tutorial can be ignored.
1.preparation
jetson orin nx *1
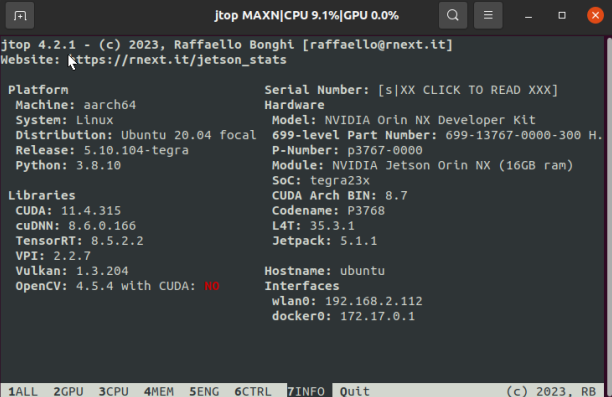
jetson orin nx configuration is as follows:
If you have read the installation tutorials for torch and torch vision in the previous chapter, you can start directly from section 2.3
2.Environment construction of YOLO5(yolo5 v5.0)
2.1 Download the required module for YOLO5- torch
(If you follow the tutorial to install the Jetson-reference environment, this section can be ignored)
sudo apt-get install python3-pip libopenblas-base libopenmpi-dev pip3 install Cythonpip3 install numpy torch-1.12.0a0+2c916ef.nv22.3-cp38-cp38-linux_aarch64 sudo apt-get install libjpeg-dev zlib1g-dev libpython3-dev libavcodec-dev libavformat-dev libswscale-devtorch-1.12.0a0+2c916ef.nv22.3-cp38-cp38-linux_aarch64 This file is obtained from the attachment built in the environment and transferred to Jetson through WinSCP
2.2 Install the corresponding version of torchvision
xxxxxxxxxxgit clone --branch v0.13.0 https://github.com/pytorch/vision torchvisioncd torchvisionexport BUILD_VERSION=0.13.0python3 setup.py install --user
If git clone reports an error, please check the network and run again
2.3 Download the source code of YOLO5
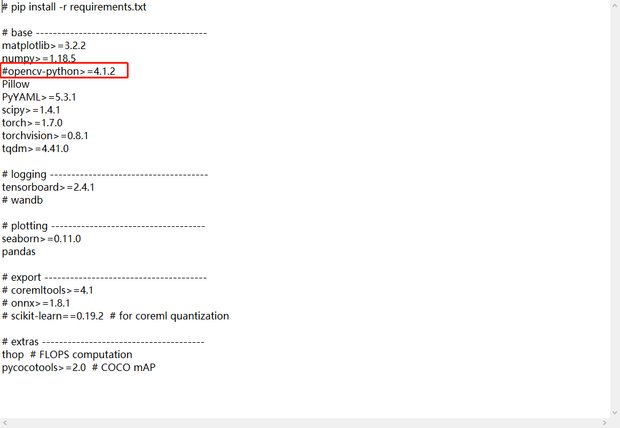
xxxxxxxxxxcd ~git clone https://github.com/marcoslucianops/DeepStream-Yolopython3 -m pip install --upgrade pip cd yolov5Because Jetson orin nx already comes with opencv4.5.4, there is no need to install Python's opencv. You can verify it through import cv2
Therefore, we need to open the requirements file in the yolo5 directory and add a # sign before this line
 Run after modification
xxxxxxxxxxpip3 install -r requirements.txt -i https://mirror.baidu.com/pypi/sampleWait until the download is complete
3.Verify if yolo5 has been successfully built
xxxxxxxxxxcd ~/yolov5python3 detect.pyWait for him to automatically download the weight file. If the network is not working, please obtain the yolov5s.pt file from the attachment provided by us and place it under the yolov5 folder If there are no errors reported, it indicates that YOLO5 has been successfully built and the identified results will be stored in the YOLOv5/runs/detect/exp path
The following is a picture of successful operation
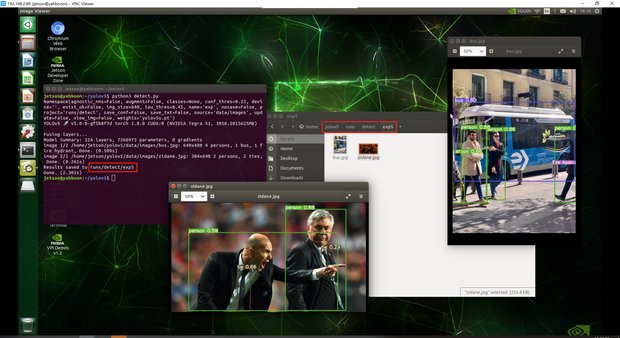 Exp5: Because the command python3 detect.py was run for the fifth time, the results were stored in the directory of exp5
If you run the third step, there may be an error due to the high version of the torch, so we need to make some modifications
xxxxxxxxxxsudo gedit /usr/local/lib/python3.8/dist-packages/torch/nn/modules/upsampling.py
Make a modification to line 153, recompute_scale_factor=self.recompute_scale_factor Just add '#' in front of the factor line.
The modified results are shown in the following figure:
 Run step 3 again and it will work properly.