07.Webpage real-time monitoring
07.Webpage real-time monitoring7.1. Environment Setup7.2 Usage7.2.1 Entering the docker container7.2.2 Starting related nodes7.2.3 Viewing images
Here is the main real-time display of the camera screen
The operating environment and hardware and software reference configuration are as follows:
- Reference model: ROSMASTER X3
- Robot hardware configuration: Arm series main control, Silan A1 LiDAR, AstraPro Plus depth camera.
- Robot system: Ubuntu (version not required) + docker (version 20.10.21 and above)
- PC virtual machine: Ubuntu (20.04) + ROS2 (Foxy)
- Usage scenario: use on a relatively clean 2D plane
7.1. Environment Setup
You need to install the corresponding ros2 version of the web_video_server functionality package, docker container has been configured in the environment, here to docker to demonstrate.
7.2 Usage
Here we use AstraPro Plus camera to demonstrate, you can also use other cameras (monocular, binocular, etc.).
7.2.1 Entering the docker container
To enter the docker container, please refer to [docker course chapter ----- 5, Entering the robot's docker container].
Here you just need to make sure the camera has been mounted correctly to use it.
7.2.2 Starting related nodes
- In the docker container, start the camera.
ros2 launch astra_camera astro_pro_plus.launch.xml
- In the docker container, start web_video_server
xxxxxxxxxxros2 launch web_video_server view_web_video_demo_launch.py
7.2.3 Viewing images
- Local web browser view
xxxxxxxxxxhttp://localhost:8080/
- Other devices to view (must be on the same LAN, 192.168.2.102 is the IP address of the master)
xxxxxxxxxxhttp://192.168.2.102:8080/
3, Note: It is recommended to use Google Chrome or mobile QQ browser, other browsers may not be able to open the image
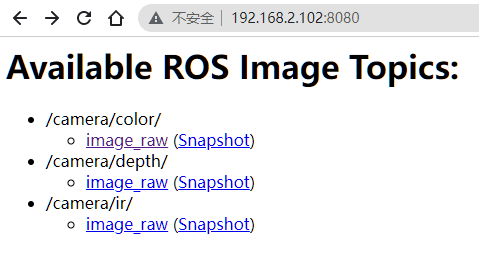
- Click [image_raw] to view the camera screen in real time, and click [Snapshot] to display only one frame.
