4、Yolov5 detects objects in real time
The Raspberry Pi motherboard series does not currently support this tutorial.。
yolov5 official tutorial website: https://github.com/ultralytics/yolov5/blob/master/tutorial.ipynb
yolov5 official source code website: https://github.com/ultralytics/yolov5
yolov5 weight file website: https://github.com/ultralytics/yolov5/releases
4.1、Introduction to yolov5
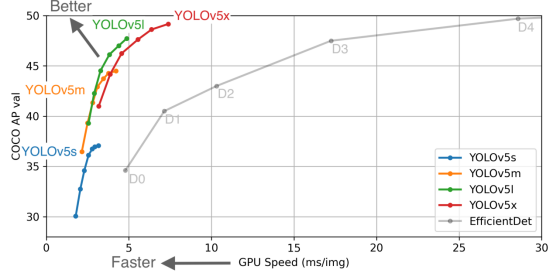
In February 2020, Joseph Redmon, the father of YOLO, announced his withdrawal from the field of computer vision research. YOLOv4 was released on April 23, 2020, and YOLOv5 was released on June 10, 2020. The developer of YOLOv5 claims that YOLOv5 can achieve a fast detection of 140 FPS on Tesla P100; while the detection speed of YOLOv4 is 50 FPS .Not only that, YOLOv5 is only 27 MB in size. YOLOv4 is 244 MB. YOLOv5 is nearly 90% smaller than YOLOv4. In terms of accuracy metrics, YOLOv5 is comparable to YOLOv4.
As a result, YOLOv5 is very fast, has a very lightweight model size, and is as accurate as the YOLOv4 baseline.
4.2、Instructions
If you are using the YAHBOOM version of the image directly and using a USB camera, open the desktop terminal and run the following command
cd ~/yolov5python3 detect.py --source 0
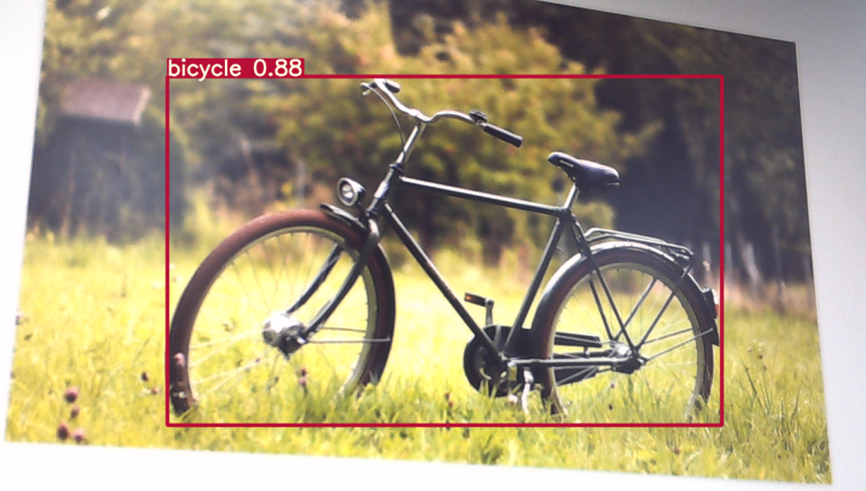
Wait for the program initialization to complete. The camera screen will be displayed on the desktop. You can see that the detected objects will be framed on the screen.
If you need to end the program, press q to end the program.
4.3、Precautions
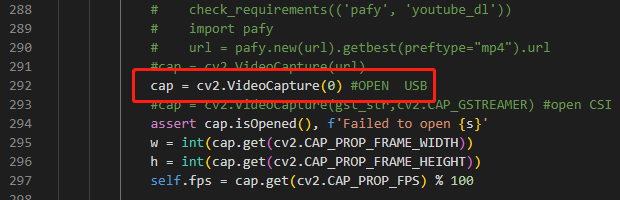
A USB camera is used here, and the default camera device number is /dev/video0. If the device number of the camera in the system is other, please initialize the camera on line 292 in the datasets.py file of ~/yolov5/utils The function modifies the corresponding device number.
If you build the image yourself instead of using the YAHBOOM version configured image, you need to rewrite the datasets.py file yourself. You can refer to the link below. https://blog.csdn.net/AlwaysNoError/article/details/123298884 .If you still get SPPF errors in the image you built, you can refer to the tutorial. https://blog.csdn.net/m0_50004939/article/details/126739291