Autoware.ai mapping
1、Offline mapping
Here we take the demo that comes with Autoware as an example. The location of the offline package is as follows
autoware_share/xxx.bag
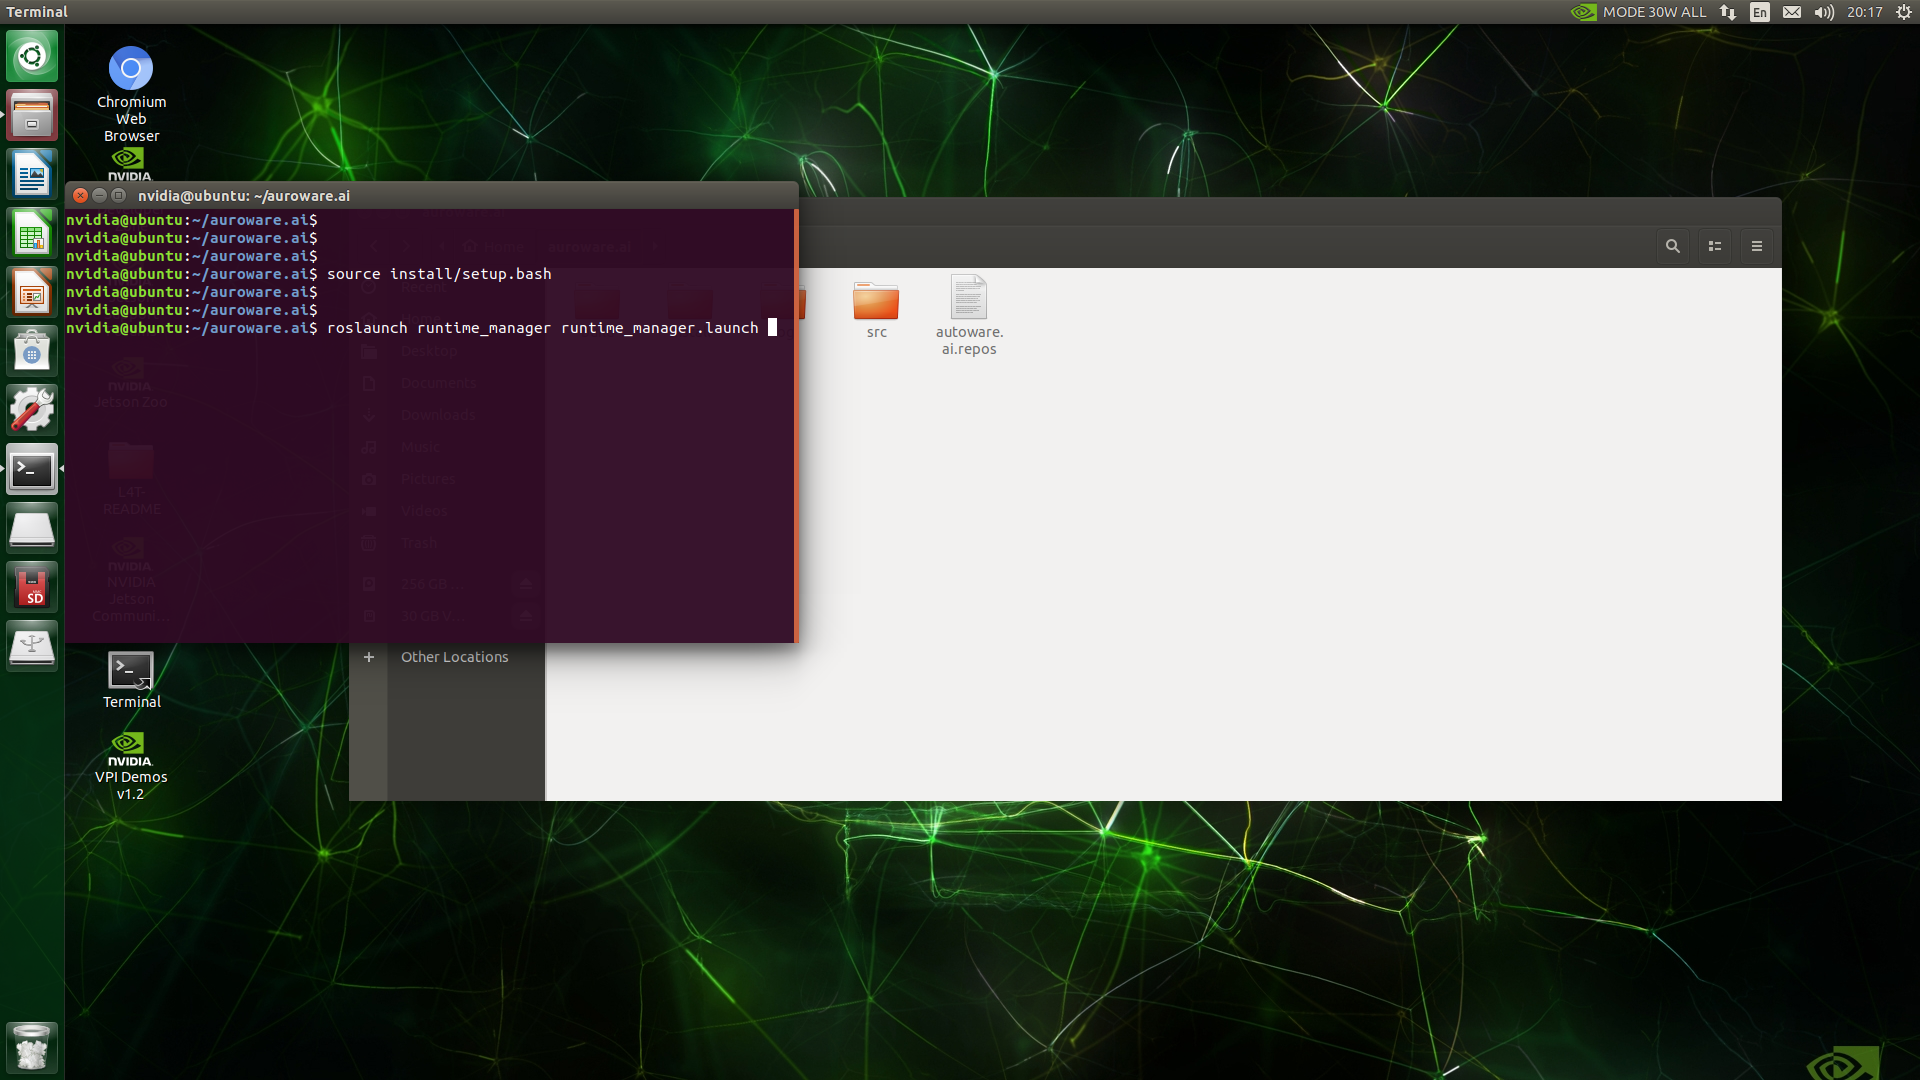
Enter the workspace of autoware.ai, right-click to open the terminal, enter the command in the terminal and press the Enter key.
xxxxxxxxxxsource install/setup.bashroslaunch runtime_manager runtime_manager.launch
Then follow the steps below:
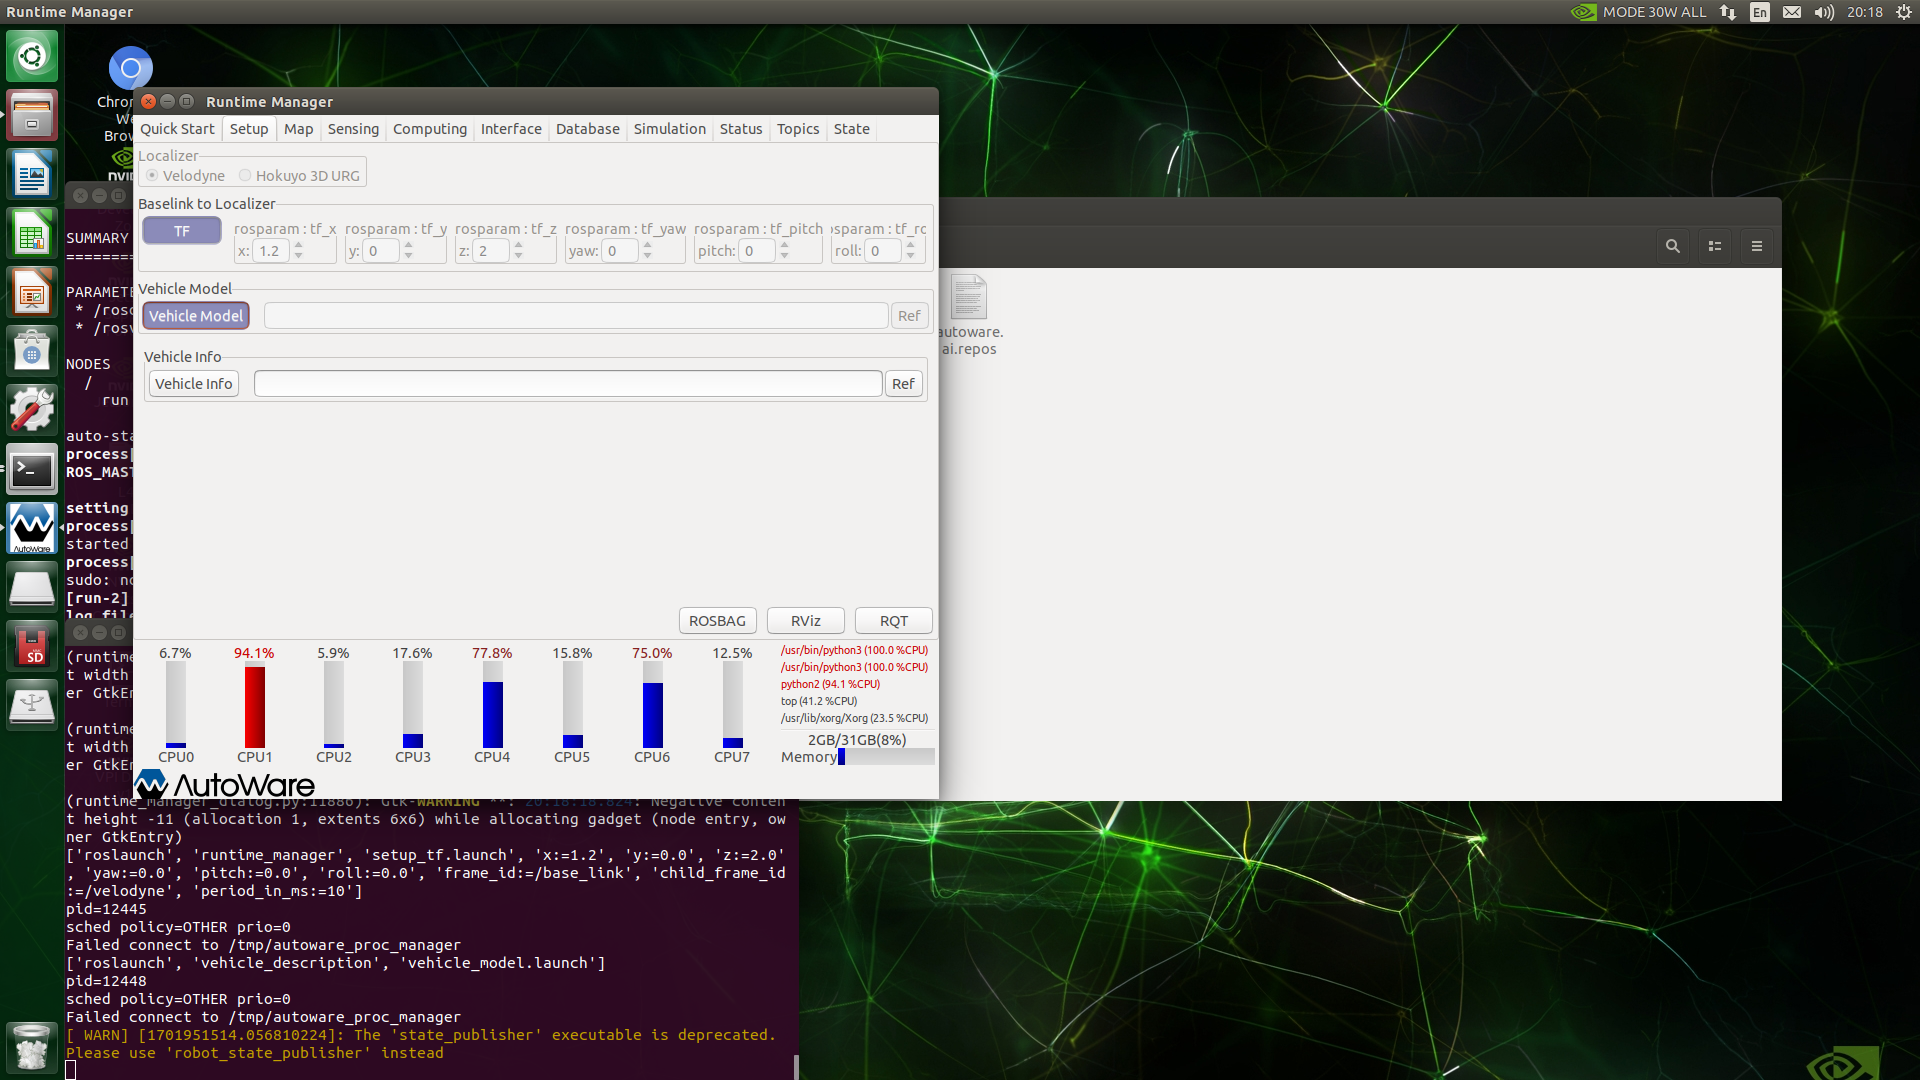
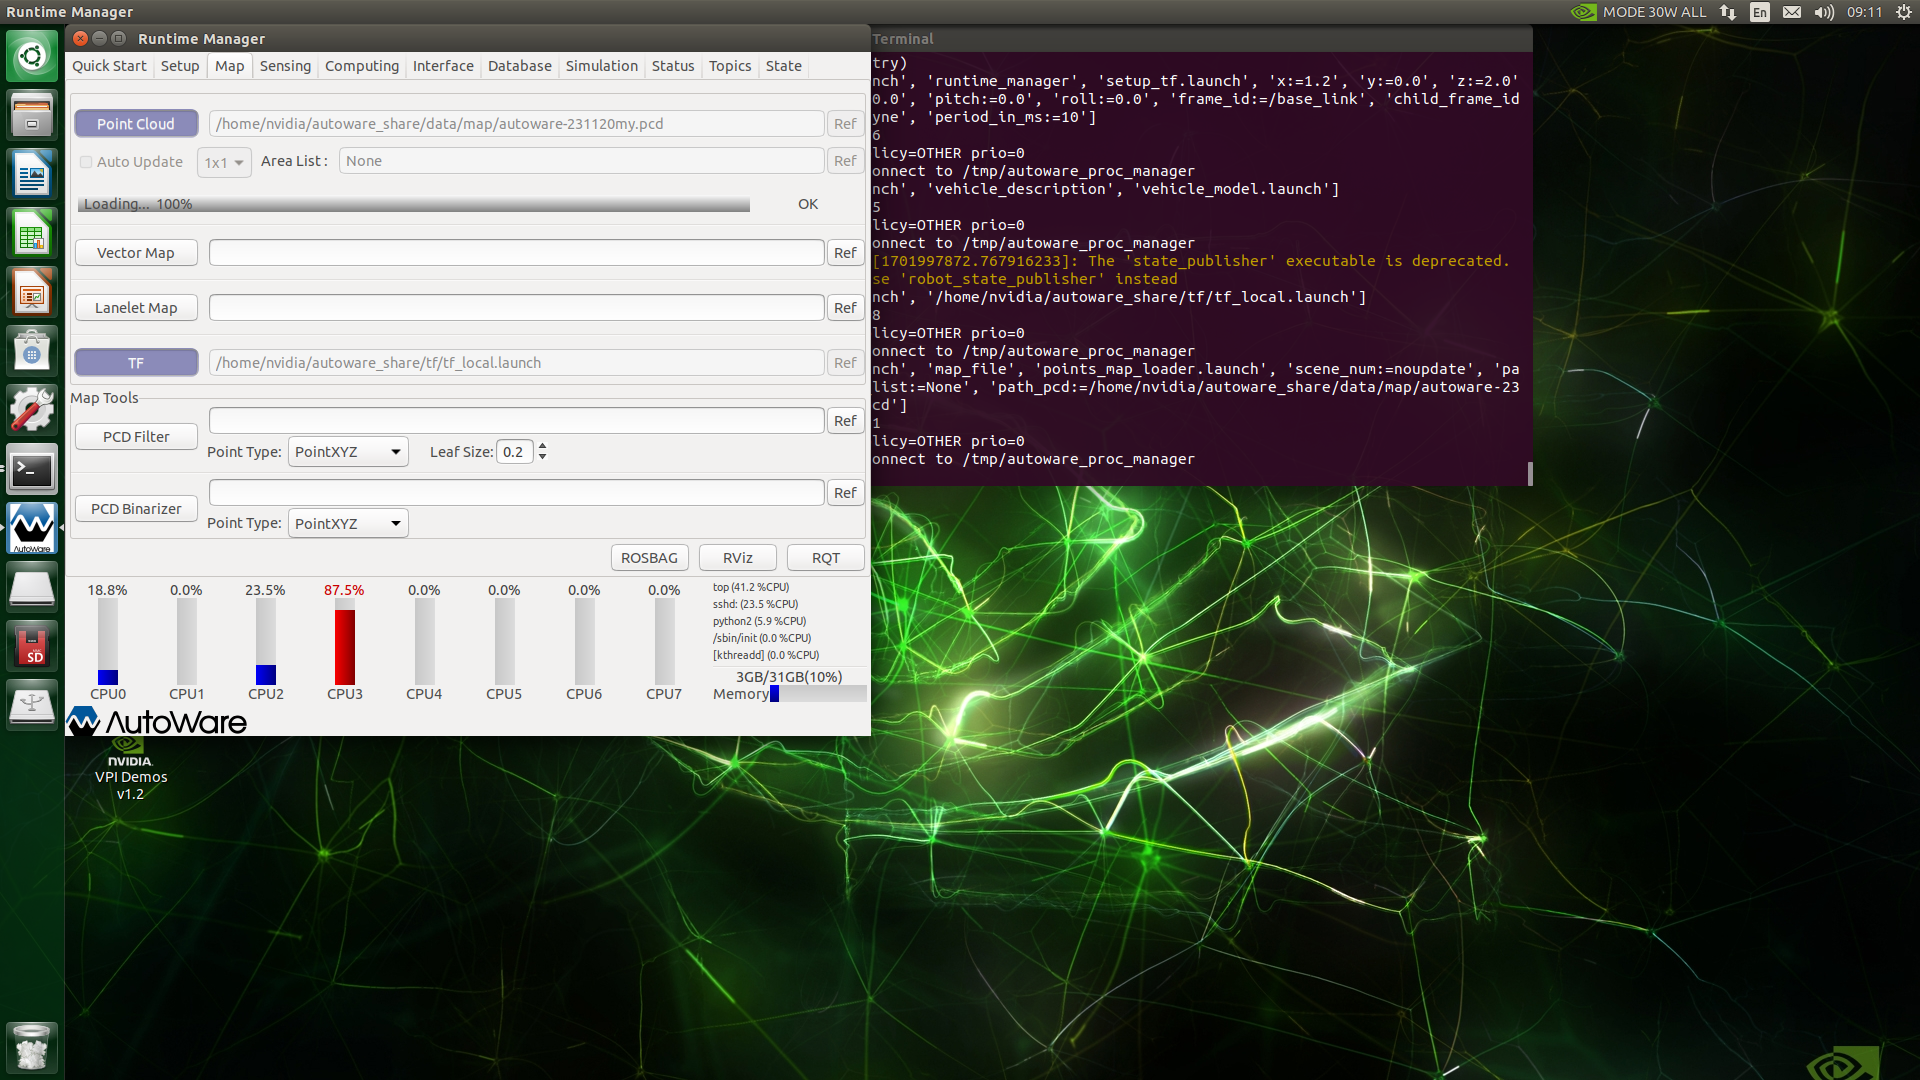
Under the Setup page of autoware, make sure that Velodyne is selected for Localizer, set the x, y, z, yaw, pitch, and roll values of Baselink to Localizer, which are the relative positional relationship between the radar center point and the center point of the rear axle of the vehicle body, and then click TF button, and finally click the Vehicle Model button. If it is empty, a default model will be loaded.
Under the Map page of autoware, click the Ref button to the right of TF to load the launch file with the following path, which is the tf transformation from the /world coordinate system to the /map coordinate system, and finally click TF button.
xxxxxxxxxxautoware.ai/src/autoware/documentation/autoware_quickstart_examples/launch/tf_local.launch

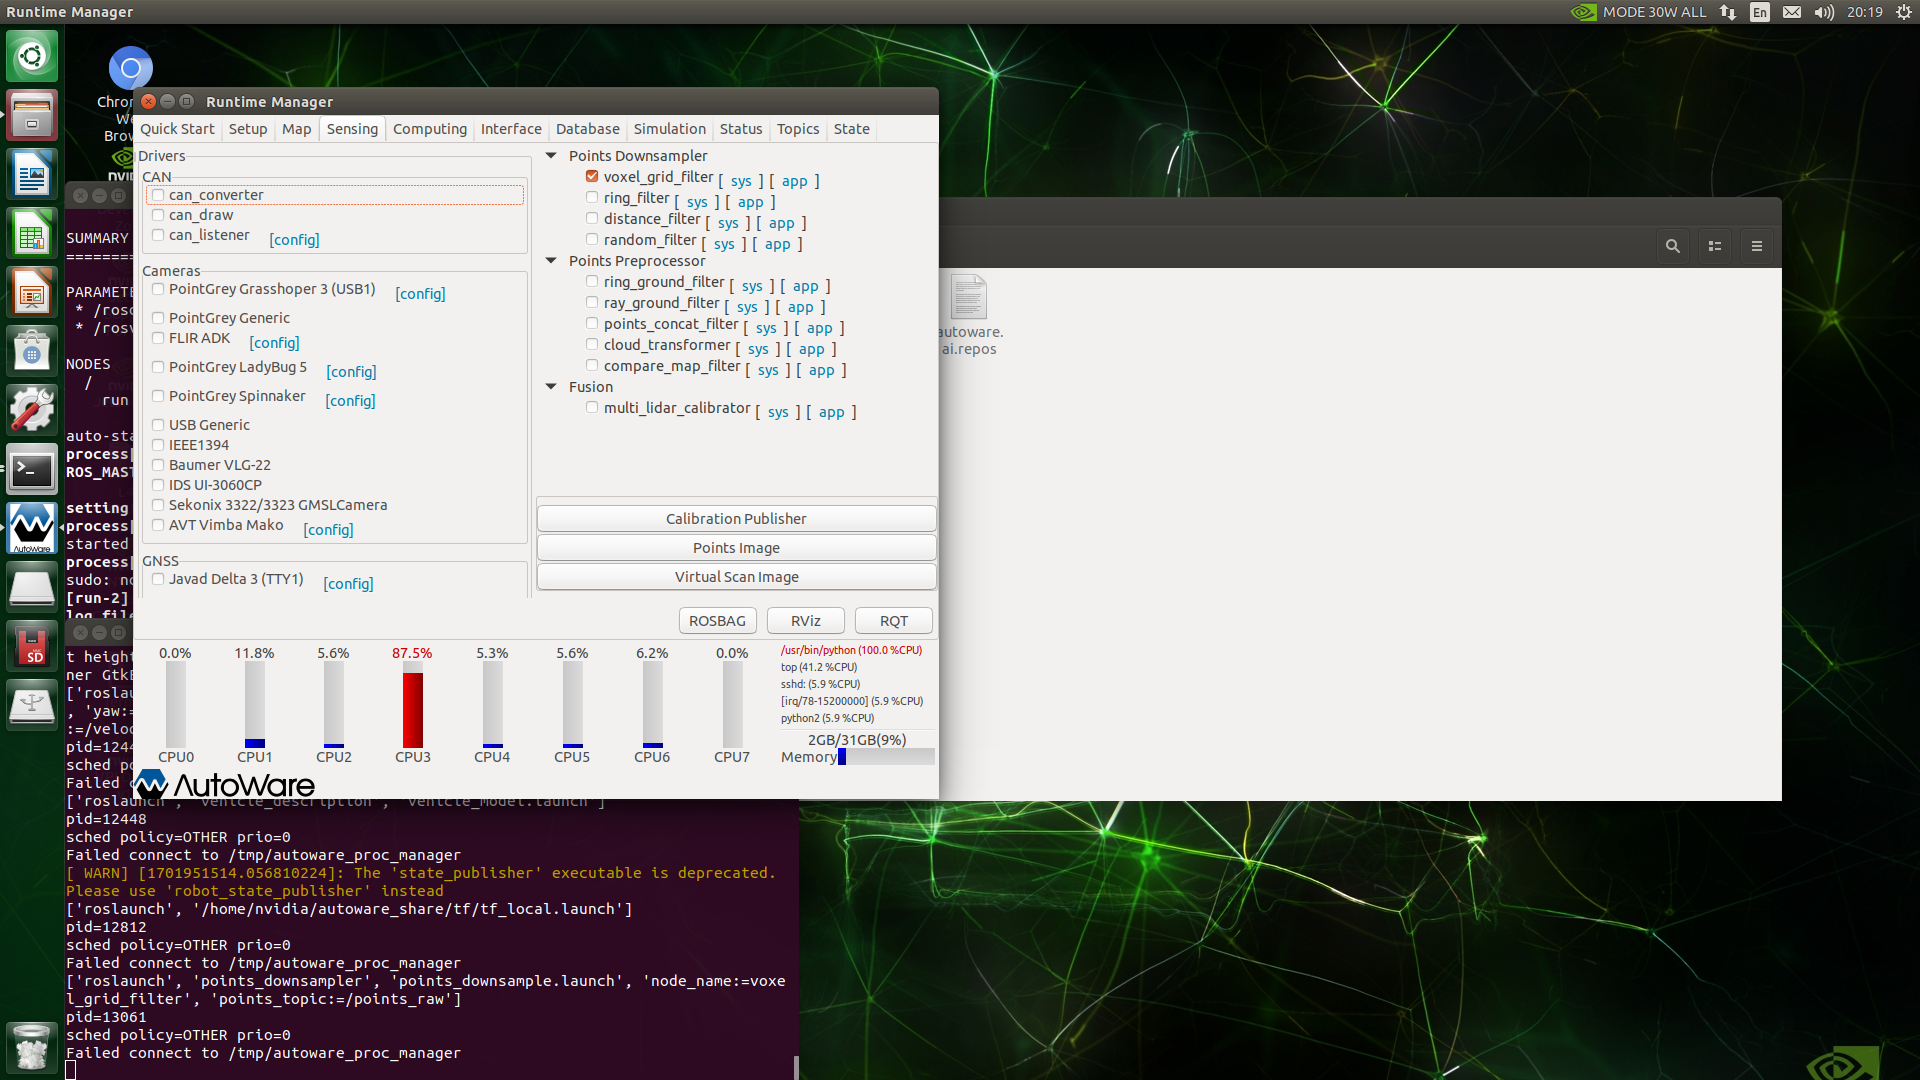
Under the Sensing page of autoware, check voxel_grid_filter.
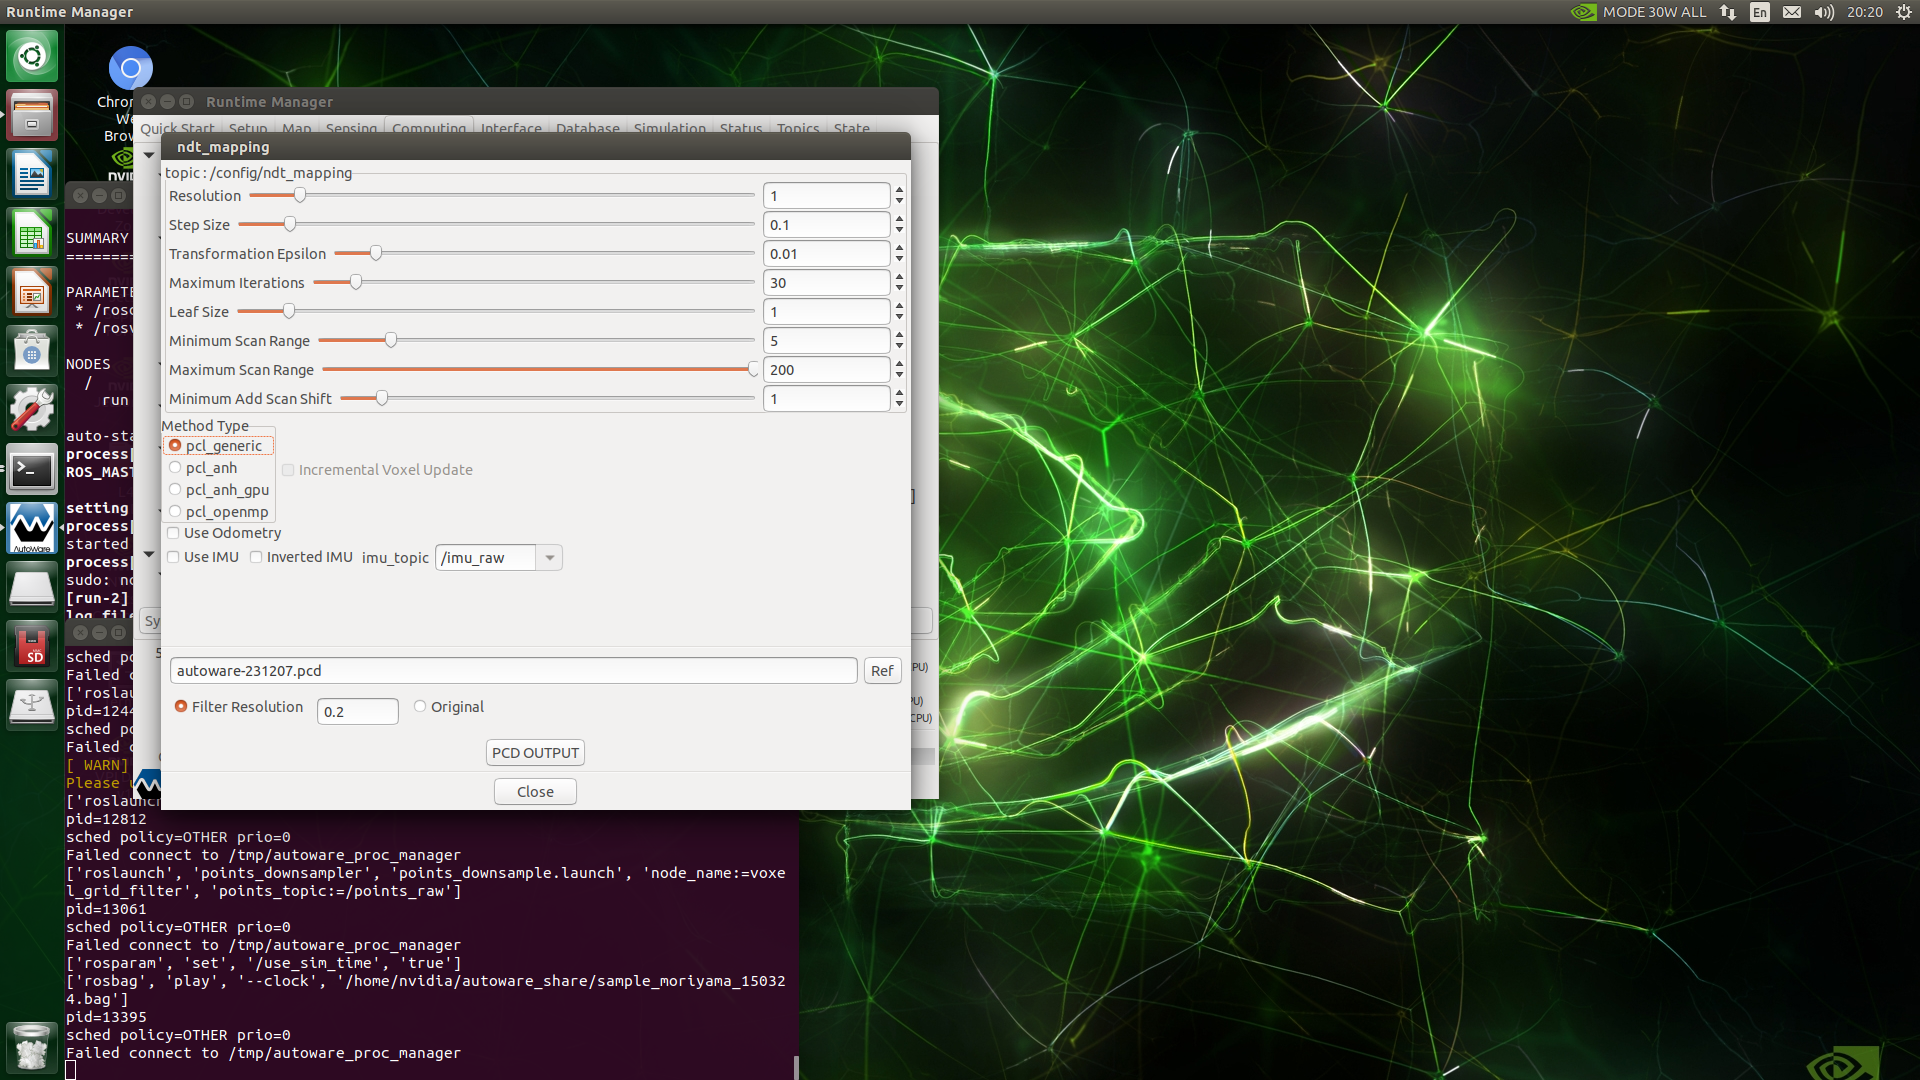
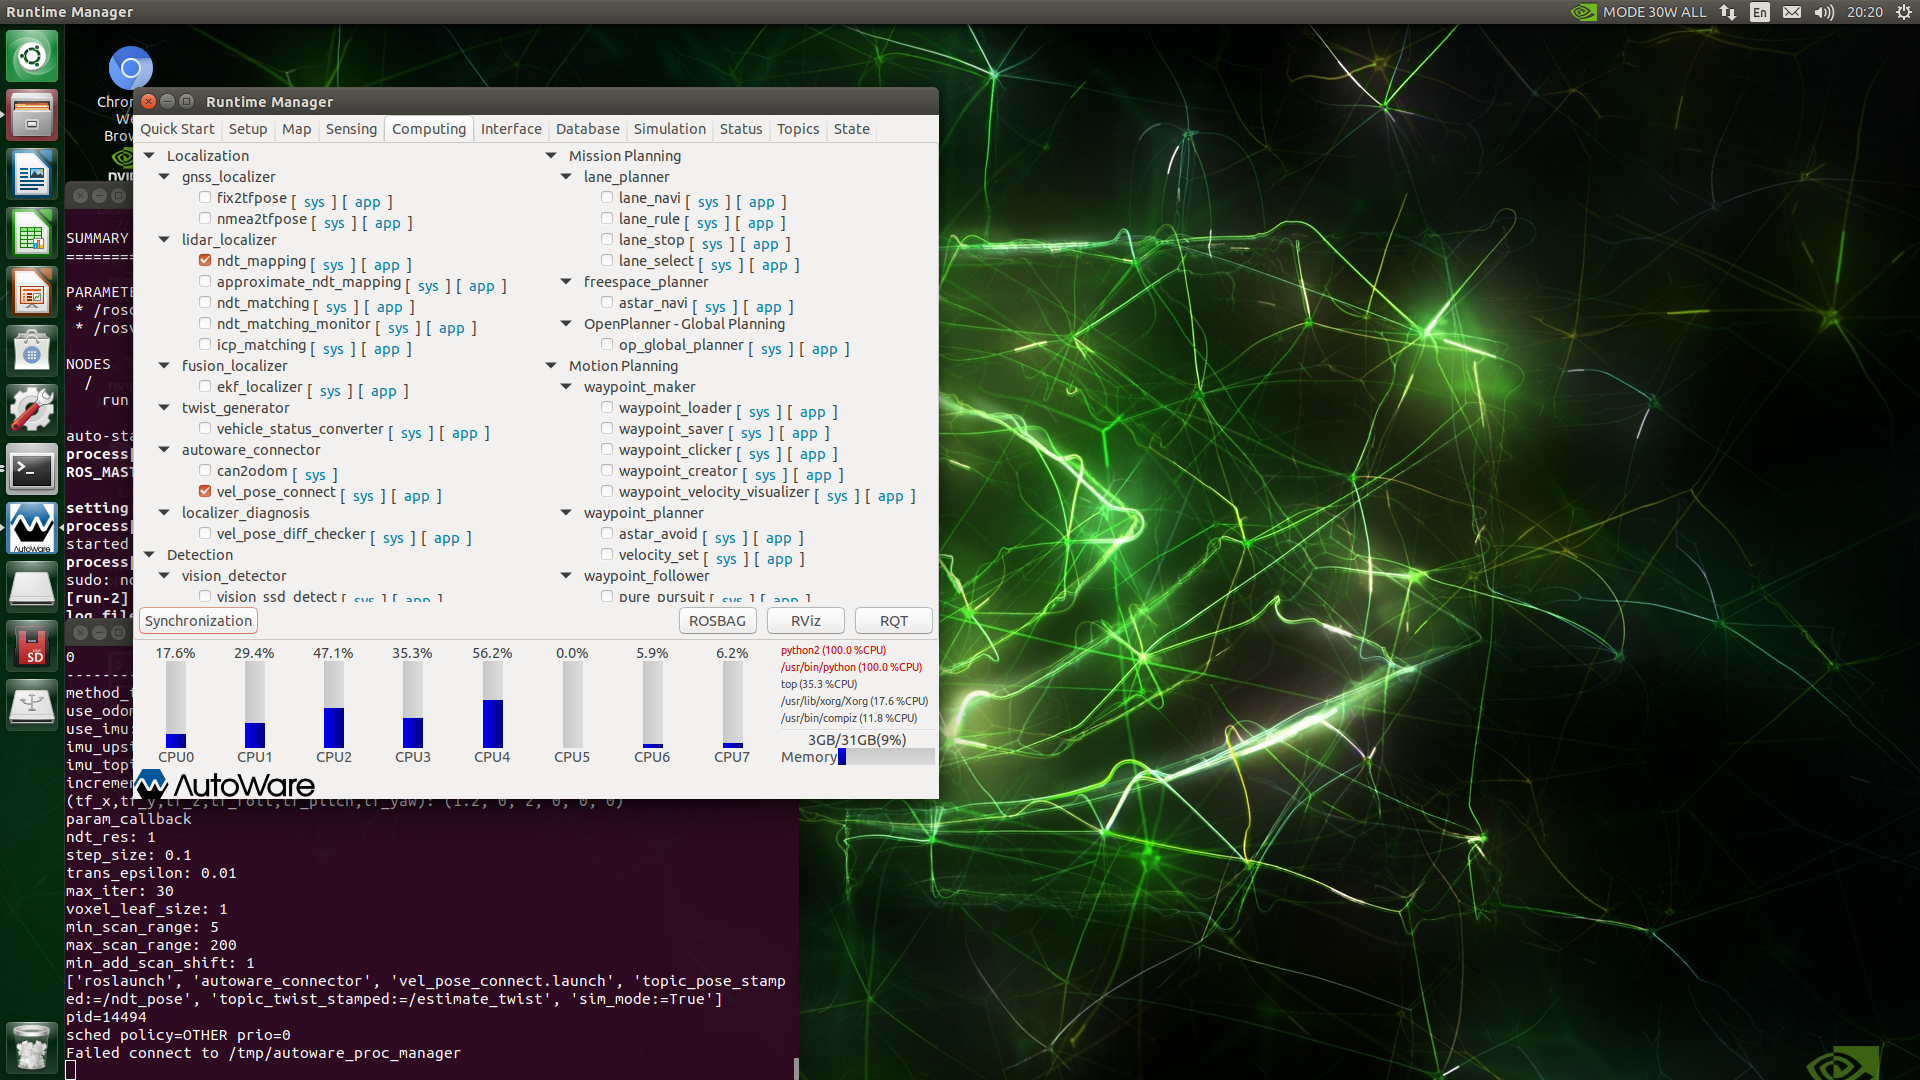
Under the Computing page of autoware, click the app button to the right of nat_mapping under lidar_localizer. Use the default parameters. If there is a GPU, select pcl_anh_gpu for the Method Type, that is, use the GPU for construction. Graph calculation, if there is no GPU, select ppl_generic, click the Close button, and finally check nat_mapping.
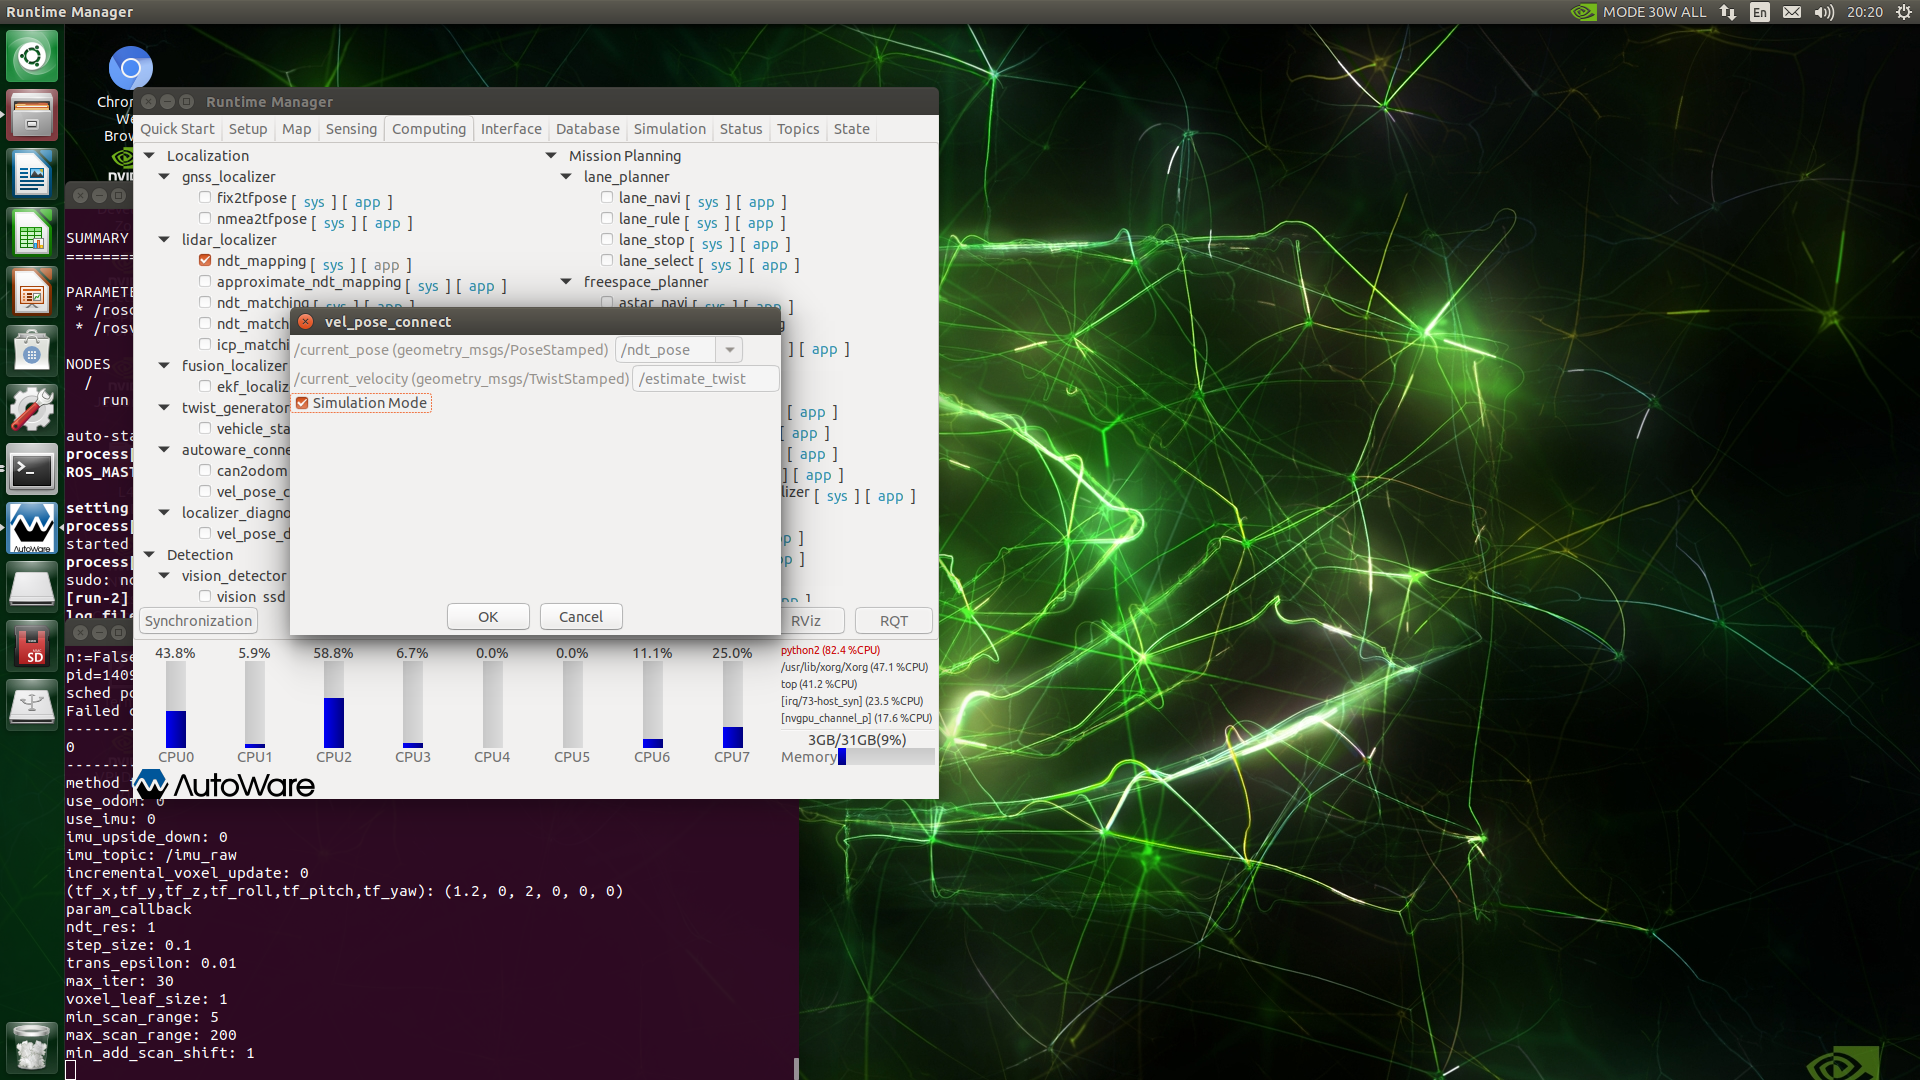
Under the Computing page of autoware, click the app button to the right of vel_pose_connect under autoware_connector. Use the default parameters, check Simulation Mode, click the ok button, and finally check vel_pose_connect. (Note: If you are building a map online, you do not need to check Simulation Mode)
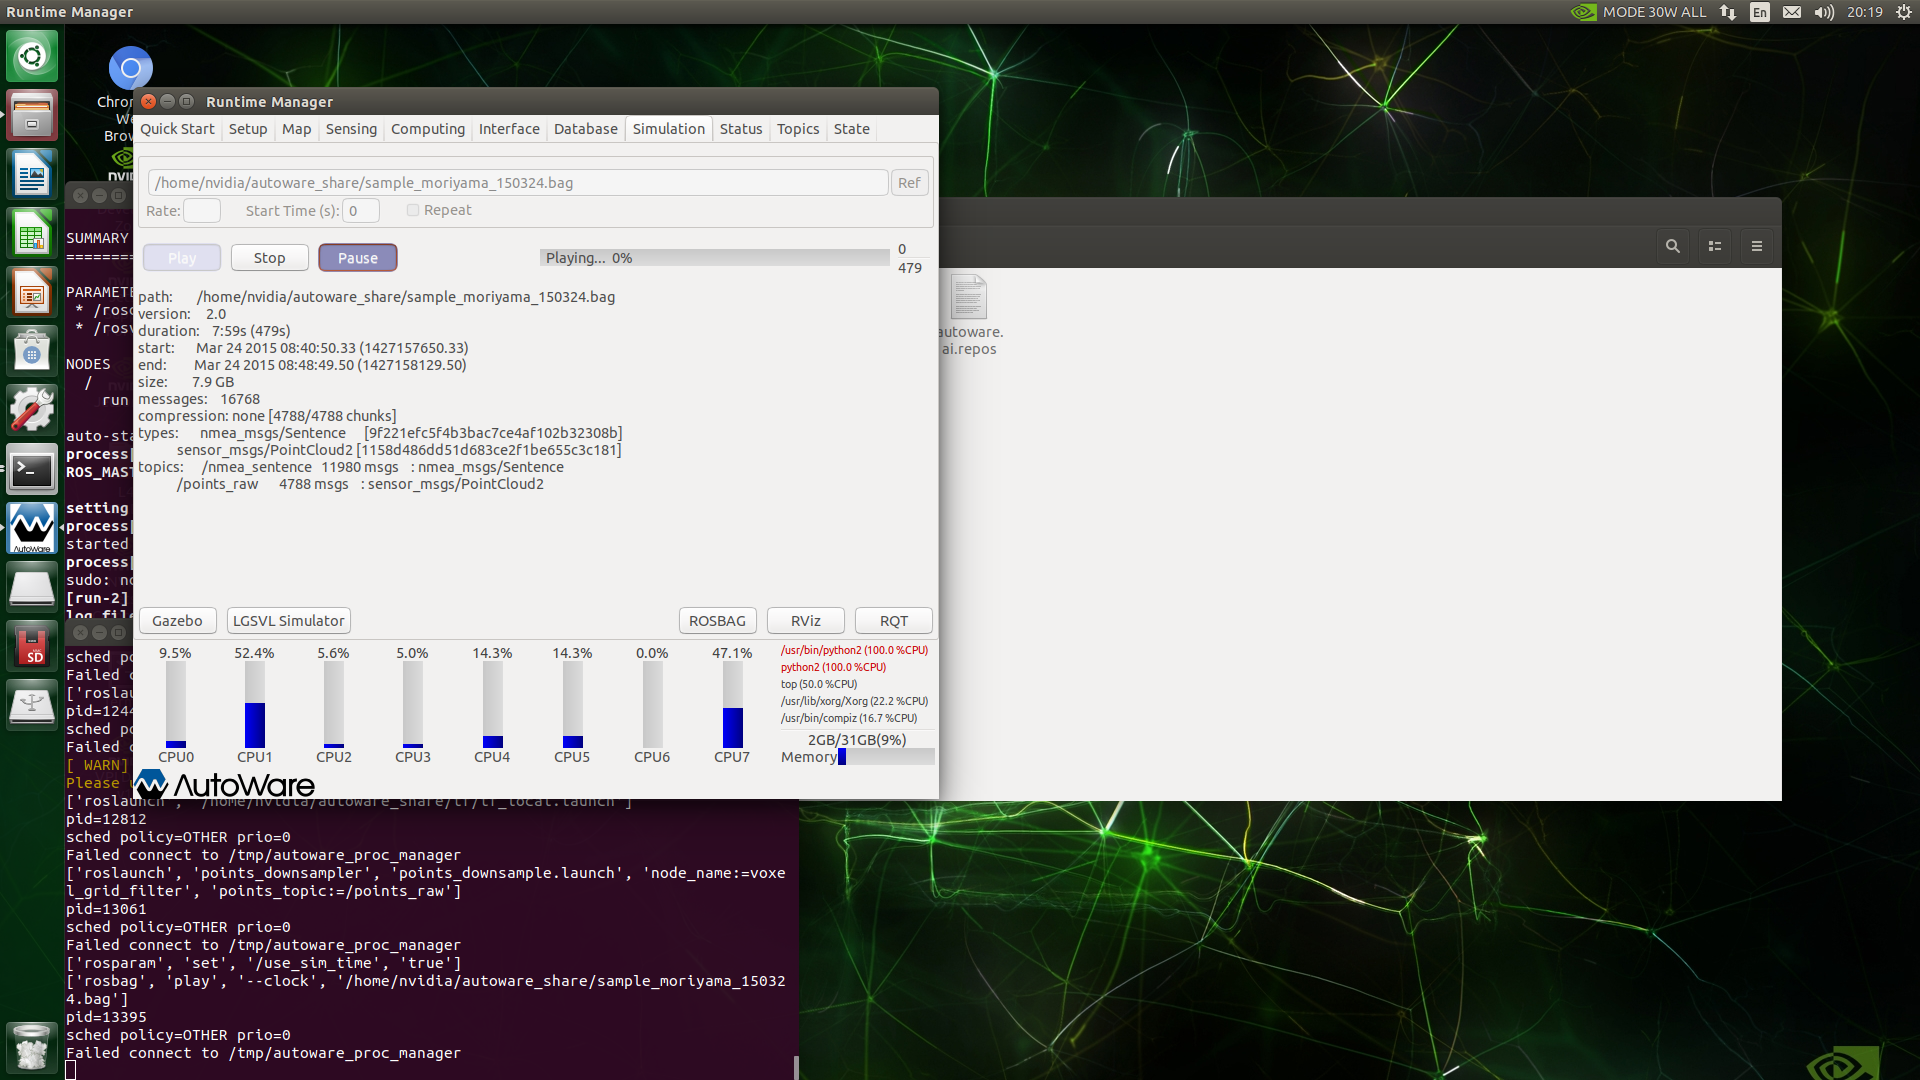
Click to enter the Simulaton page, click the Ref button to load the previously recorded bag file, click the Play button to play the data, and then click Pause to pause playback. Click the Rviz button at the bottom right of the interface to start the Rviz visual interface and load the Rviz configuration file ndt_mapping.rviz.
xxxxxxxxxx#The ndt_mapping.rviz path is as followsautoware_share/tf/ndt_mapping.rviz
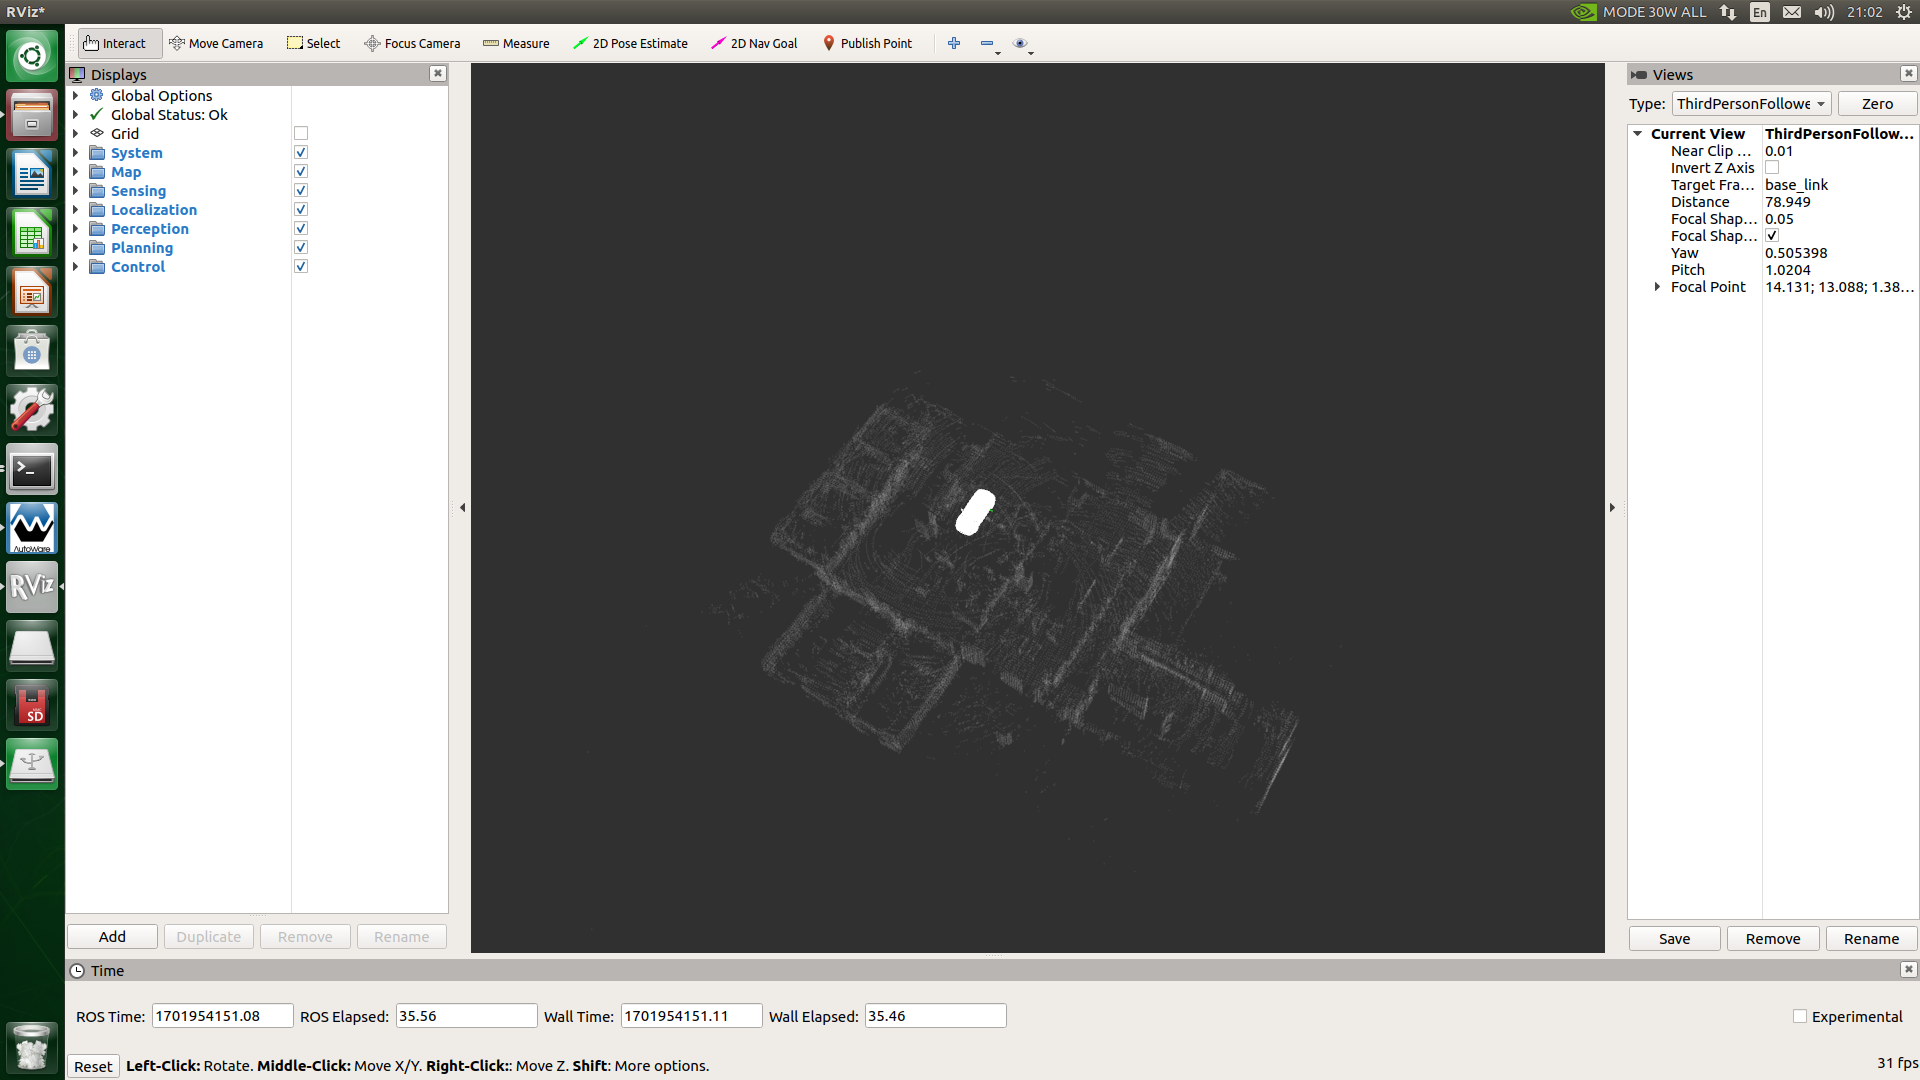
Data printed by the terminal when starting mapping

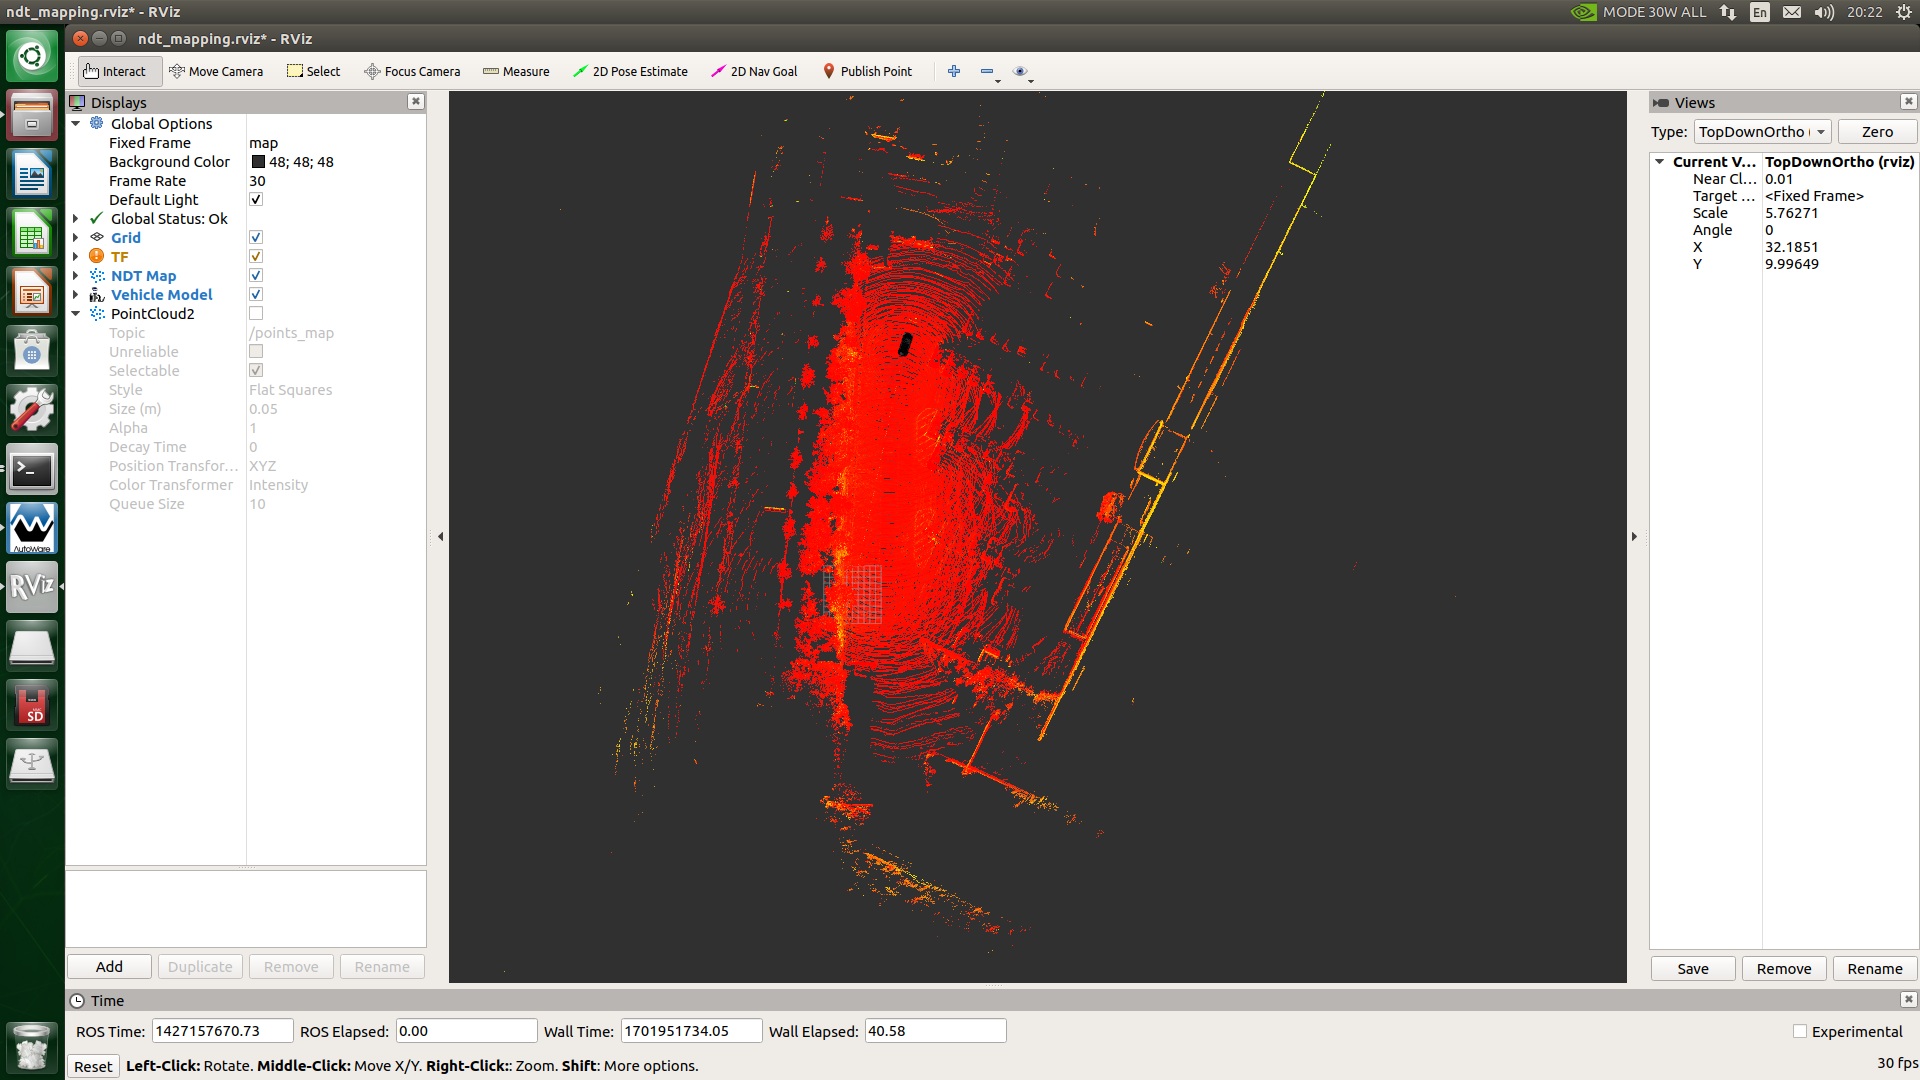
The map being built after rviz is opened.
After the map is created, under the Computing page of autoware, click the app button to the right of nat_mapping under lidar_localizer. Use the default parameters. Click the PCD OUTPUT button to save the map (click ref to customize Map path), click the Close button, and finally uncheck nat_mapping to stop mapping.

Open the Map menu of autoware, click the Ref button to the right of the Point Cloud button, load the .pcd file you just saved, and click the Point Cloud button. If the progress bar shows OK, the loading is complete, as shown below:
Then open rviz, click the Add button in the lower left corner of the rviz display interface, find /points_map through By Topic and open it, set Fixed Frame to map, then it will be displayed in rviz as follows:
2、Online mapping
Online mapping requires a real connection to multi-line lidar for mapping. It should be noted here that the data format required for autoware.ai mapping is velodyne data format, and the topic name is /points_raw. Here, our WANJEE 16-line lidar has converted the data. The data of WANJEE radar has been converted into velodyne book data format, and the topic published at the same time is /points_raw.
建图前,我们新建一个工作空间,比如navrobo_ws,将我们autoware资料文件夹下的navrobo文件夹下的src文件夹放到您新建的navrobo_ws工作空间内,然后在终端中输入下面命令进行编译。
xxxxxxxxxxsudo apt-get install libasio-devsudo apt-get install ros-melodic-serialcatkin build

Before building the map, we create a new workspace, such as navrobo_ws, put the src folder under the navrobo folder under our autoware folder into your new navrobo_ws workspace, and then enter the following command in the terminal to compile.
xsource deve/setup.bashroslaunch vanjee_to_velodyne vanjee_to_velodyne.launch
It should be noted that when there is no navrobo unmanned vehicle, you need to add imu and Obi Zhongguang's depth camera yourself.
vanjee_to_velodyne.launch will launch imu, Vanji lidar, depth camera, vehicle chassis, and cmd_val conversion package. Details can be found in the vanjee_to_velodyne.launch file. After the startup is completed, /points_raw will be released for autoware mapping.
The subsequent operations are the same as offline mapping. You can refer to offline mapping. It should be noted that online mapping does not require starting the bag package of the Simulaton page.