8. APP mapping
Quick use
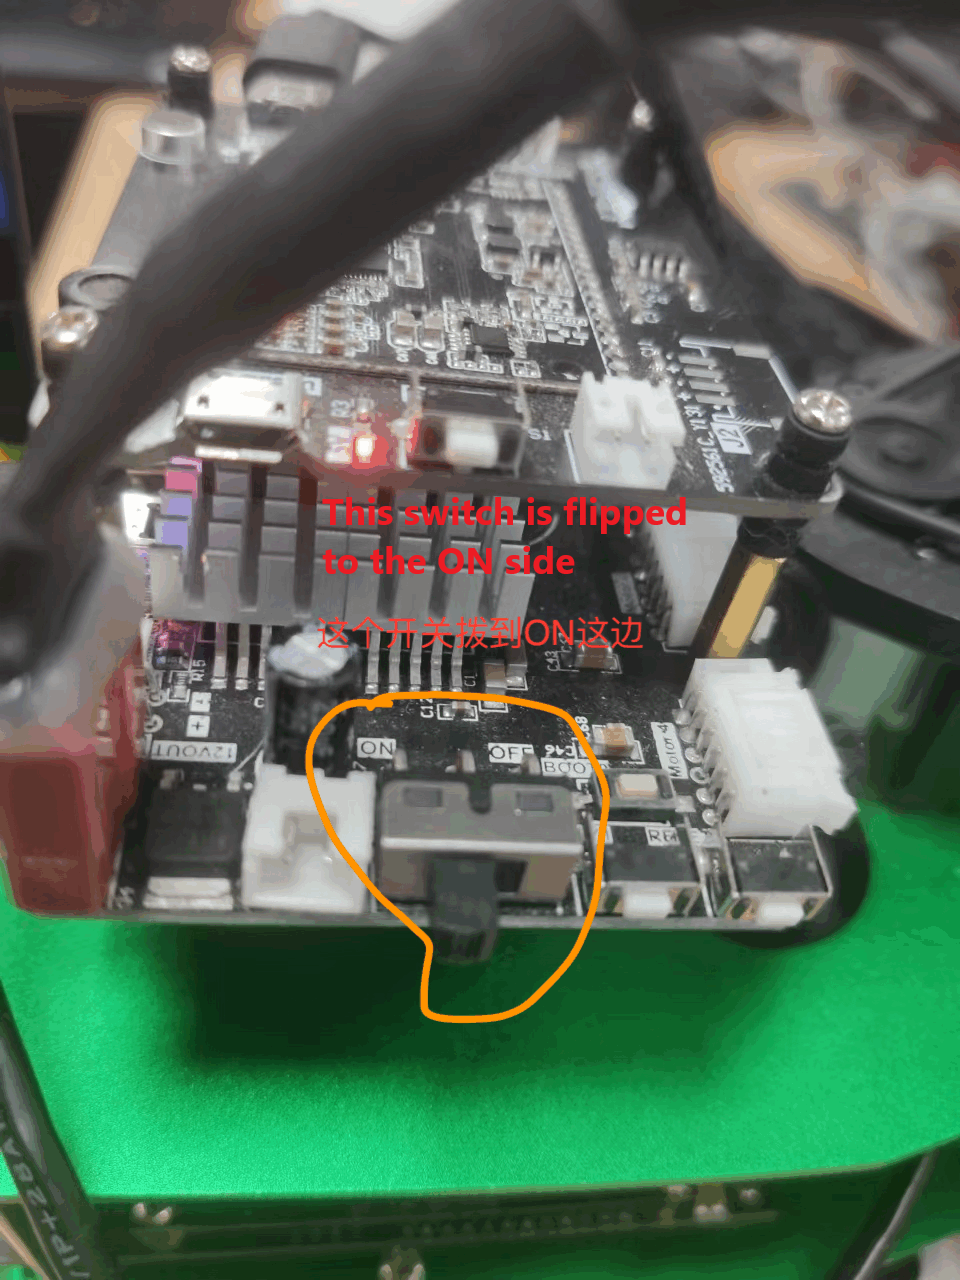
1. Rosmaster_R2 Power Up
Power up the R2 with the switch shown below flipped to the ON direction.
Connecting to the network can be visualized through the touchscreen display that comes with the X3, and connecting to WiFi on the LAN.
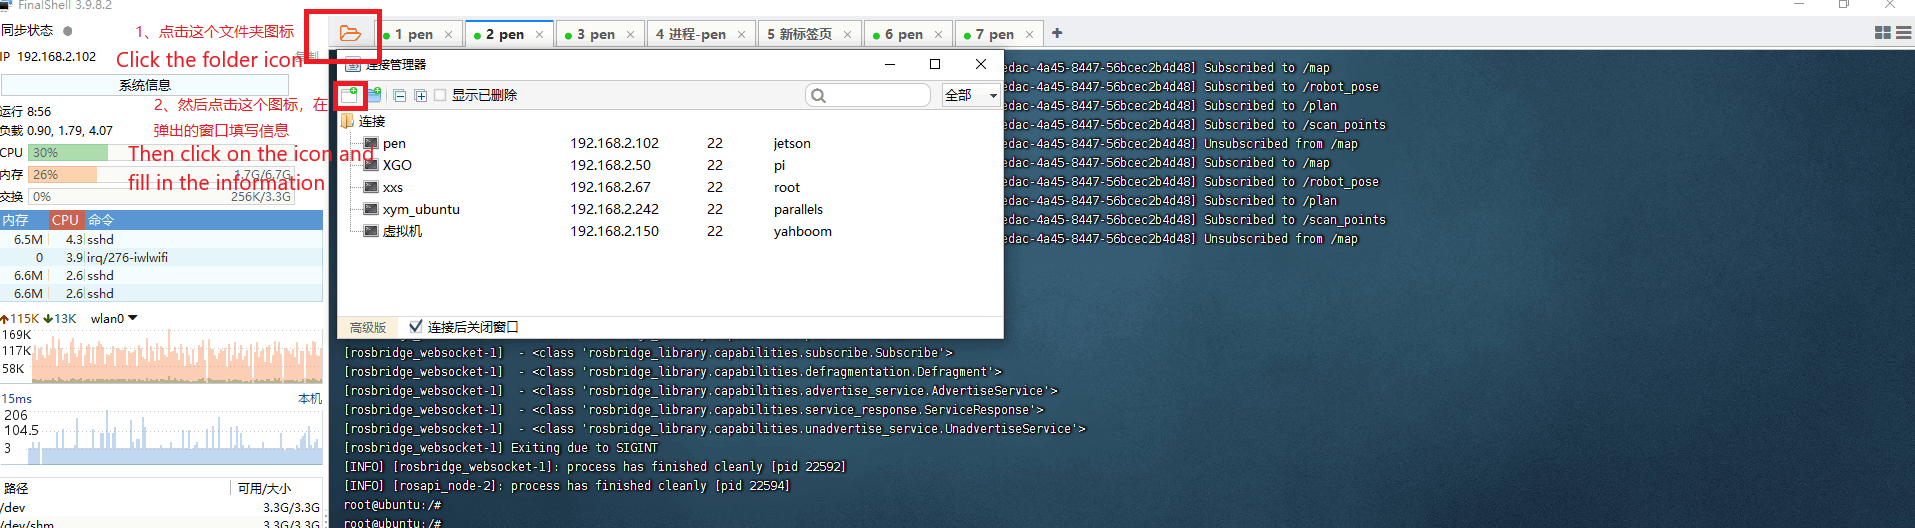
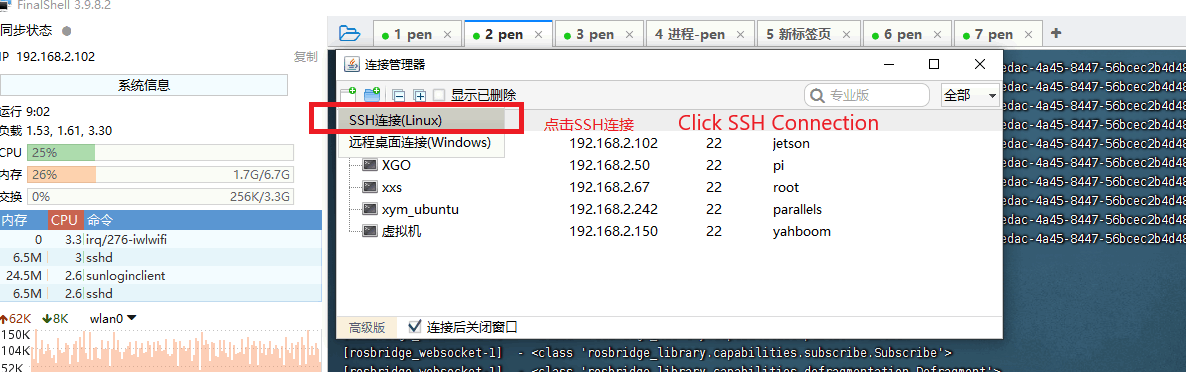
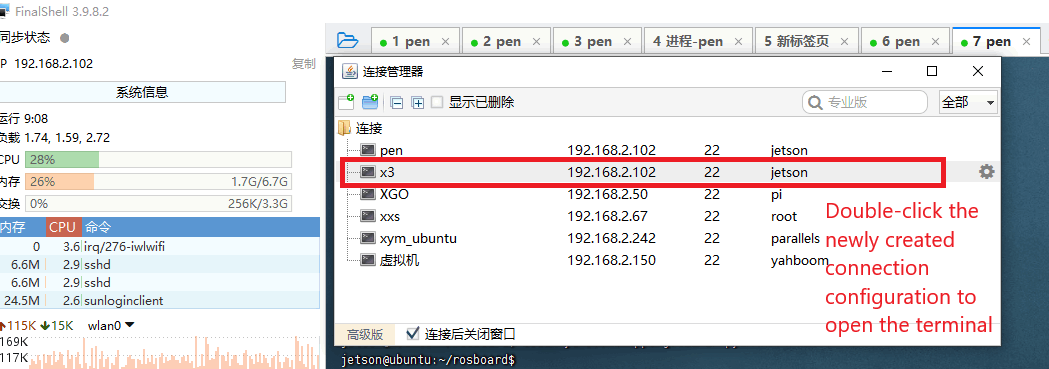
2. Open the shell and connect to Rosmaster_R2.
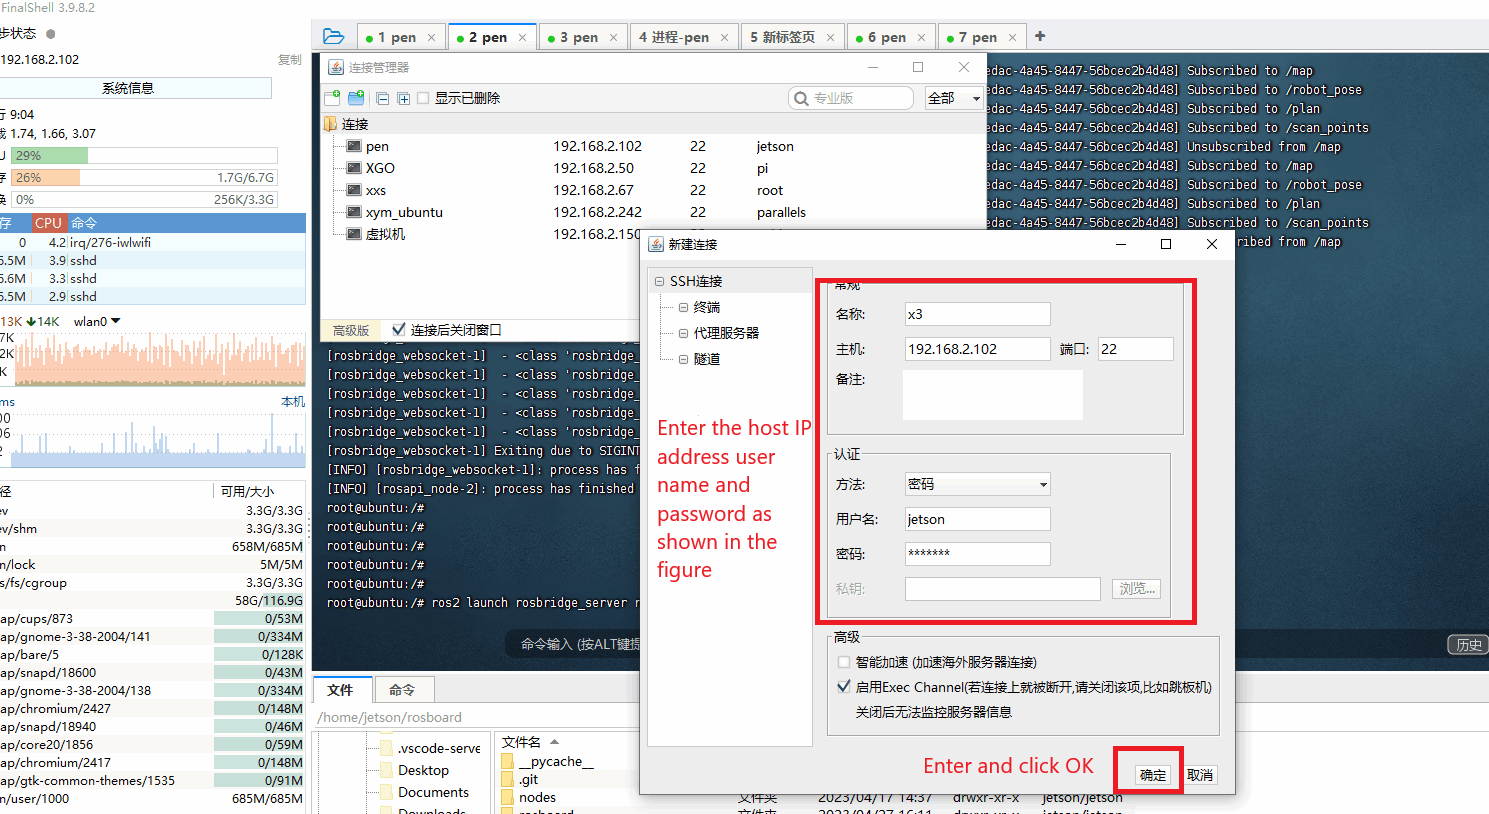
Note: At the time of writing this tutorial, we are using the IP address 192.168.2.102, username is jetson, password is yahboom, and the actual IP address is based on the actual use.
Open a shell utility, in this case FinalShell, and enter your username, password, port and connection name.
3. Starting ROSBridge and web services
Create a docker environment by entering commands in the terminal.
./img/run_docker.sh
Then enter the command:
docker ps
to view the docker environment you just created.
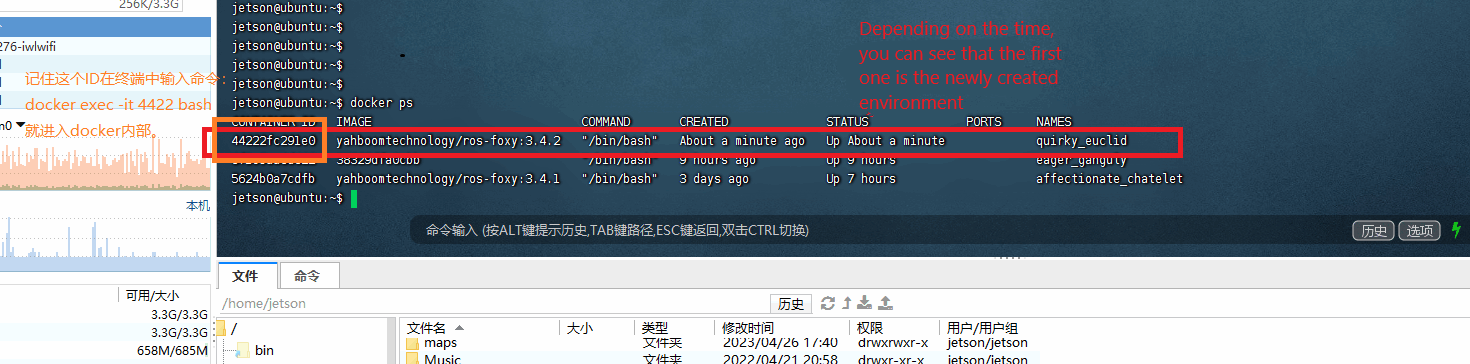
Find the docker environment you just created and find the CONTAINER ID's and enter the command in the terminal:
xxxxxxxxxxdocker exec -it CONTAINER ID bash
Note: The CONTAINER ID is the ID of the latest docker environment you just found.
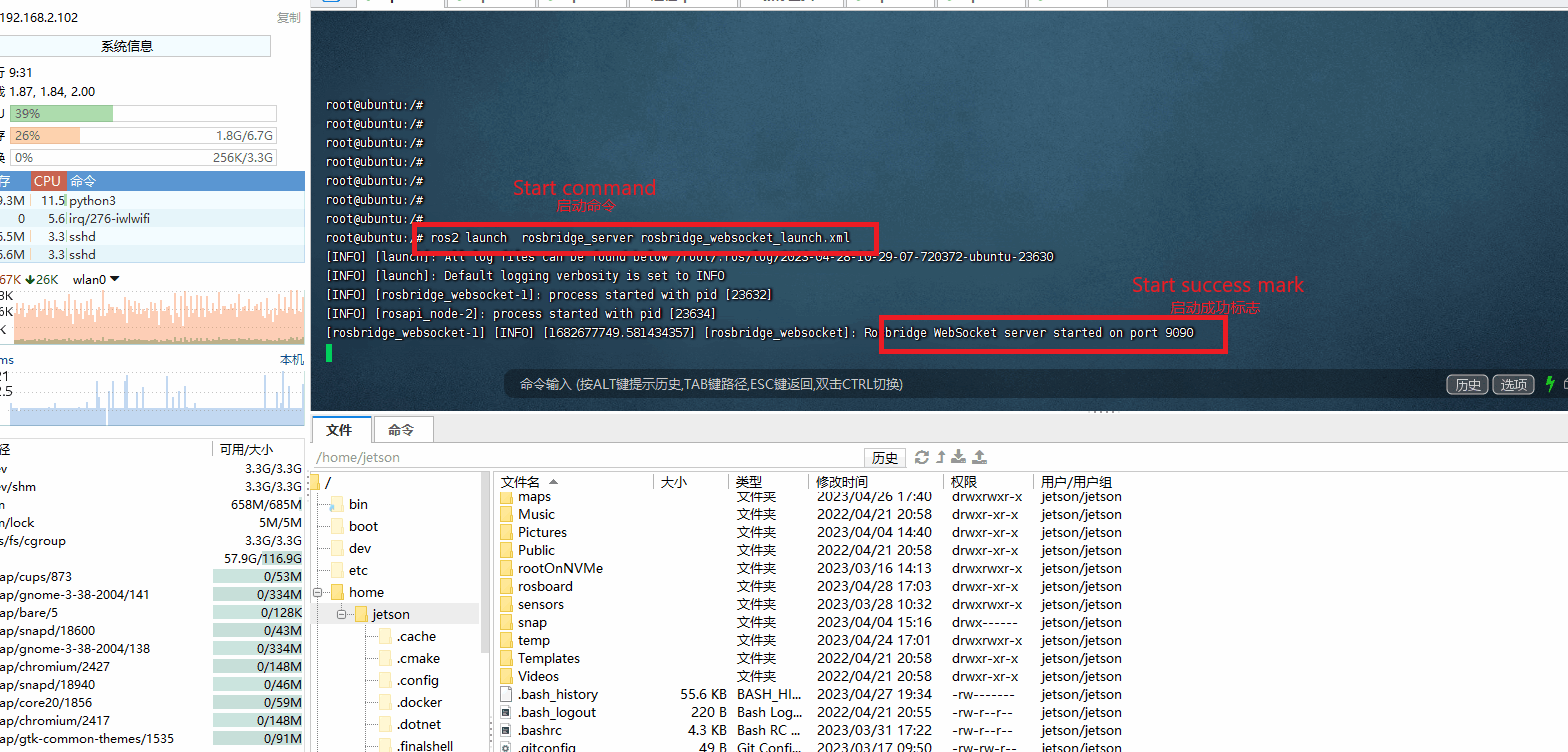
After entering docker, start rosbridge by entering the following command
xxxxxxxxxxros2 launch rosbridge_server rosbridge_websocket_launch.xml
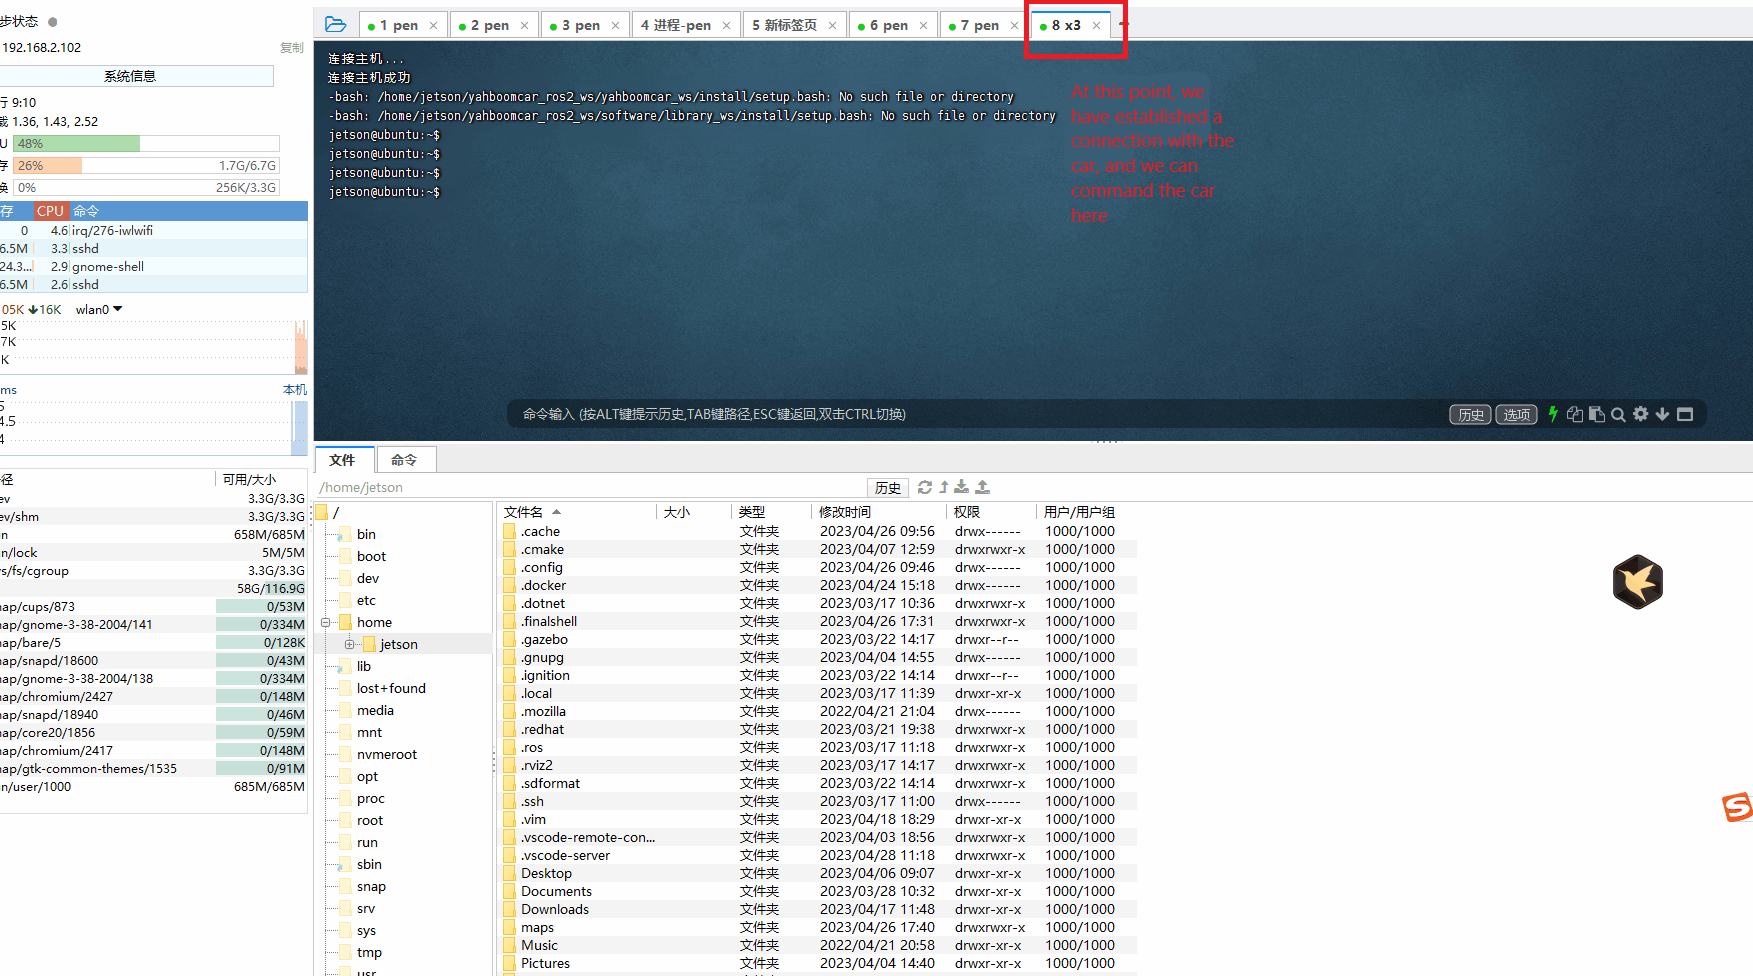
Follow the steps above to reopen a terminal and enter the docker environment. The docker you are entering is freshly created, so you do not need to execute the command . /img/run_docker.sh command.
After entering the docker environment, enter the command:
xxxxxxxxxxcd ~/yahboomcar_ros2_ws/yahboomcar_ws
xxxxxxxxxxsource install/setup.bash
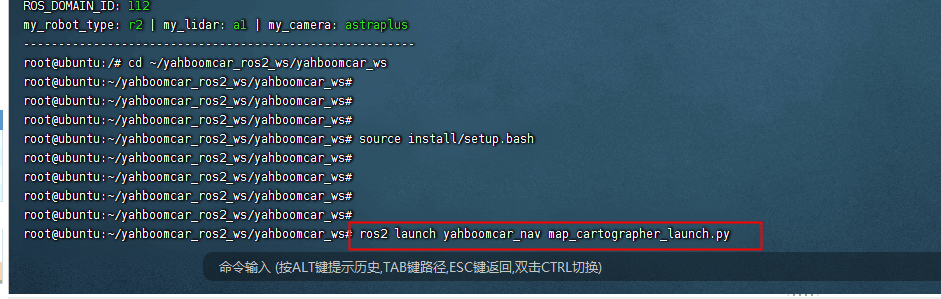
Start cartographer to build a diagram
xxxxxxxxxxros2 launch yahboomcar_nav map_cartographer_launch.py
Or start gmapping to build a map
xxxxxxxxxxros2 launch yahboomcar_nav map_gmapping_launch.py
Re-open a terminal and go into docker and enter the following command
xxxxxxxxxxcd ~/yahboomcar_ros2_ws/yahboomcar_ws
xxxxxxxxxxsource install/setup.bash
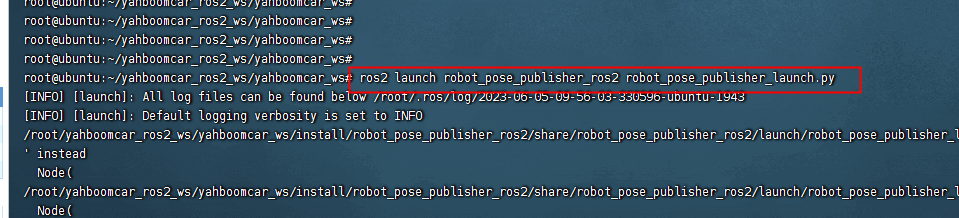
Initiate release of robot location nodes
xxxxxxxxxxros2 launch robot_pose_publisher_ros2 robot_pose_publisher_launch.py
Note: If the point cloud information does not show up after a full start, wait for the map building module to start and then restart the robot position node again.
Reopen a terminal again and go into docker and enter the following command
xxxxxxxxxxcd ~/yahboomcar_ros2_ws/yahboomcar_ws
xxxxxxxxxxsource install/setup.bash
Initiates the release of the node for the laser data transit point.
xxxxxxxxxxros2 run laserscan_to_point_pulisher laserscan_to_point_pulisher

Re-open a terminal and go into docker and enter the following command
xxxxxxxxxxcd ~/yahboomcar_ros2_ws/yahboomcar_ws
xxxxxxxxxxsource install/setup.bash
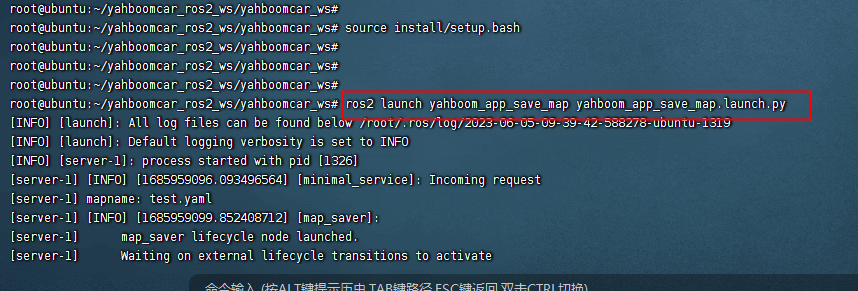
Launch Save Map Service node
xxxxxxxxxxros2 launch yahboom_app_save_map yahboom_app_save_map.launch.py
4. Open the APP and start the building mode.
Install the APP on your phone and open the APP, the following figure shows the interface of opening the APP:
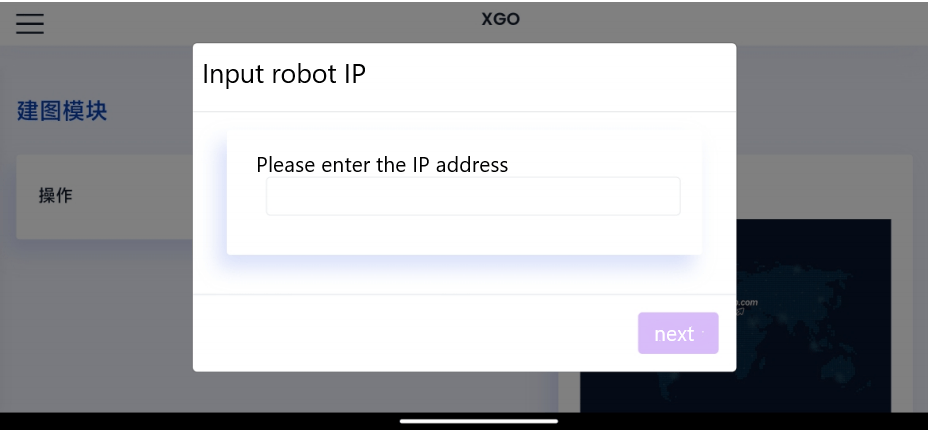
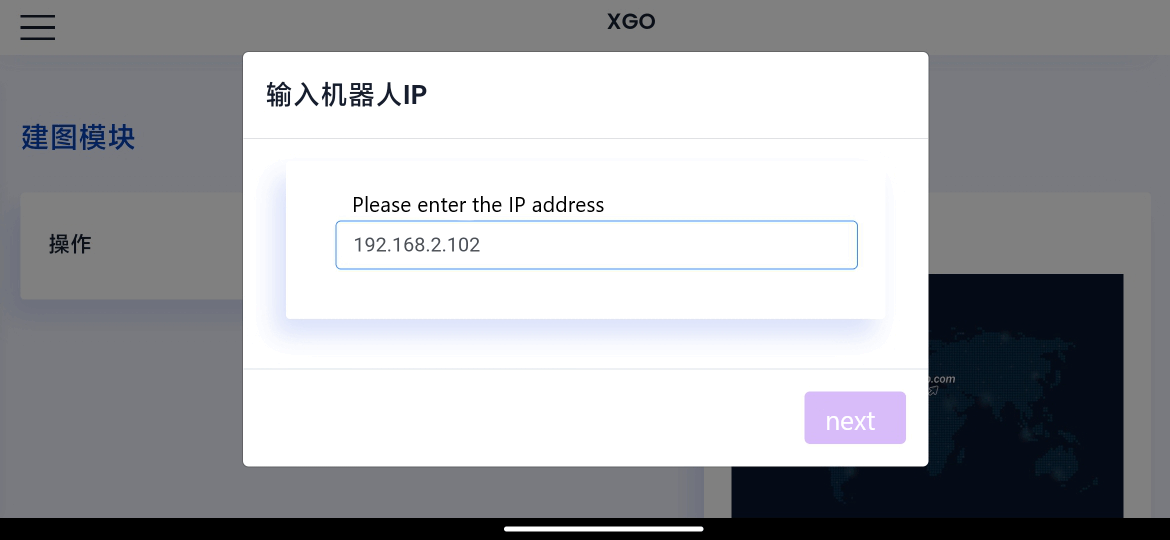
Enter the IP address in the input box, here the IP address is the IP address of the cart, such as 192.168.2.102, this address is the actual IP address of the cart, please enter it according to the actual situation in practice. Click on the Next button after you have finished entering the IP address.
Once the map building mode is activated, you can see the current laser point cloud, as well as the map of the laser scan.
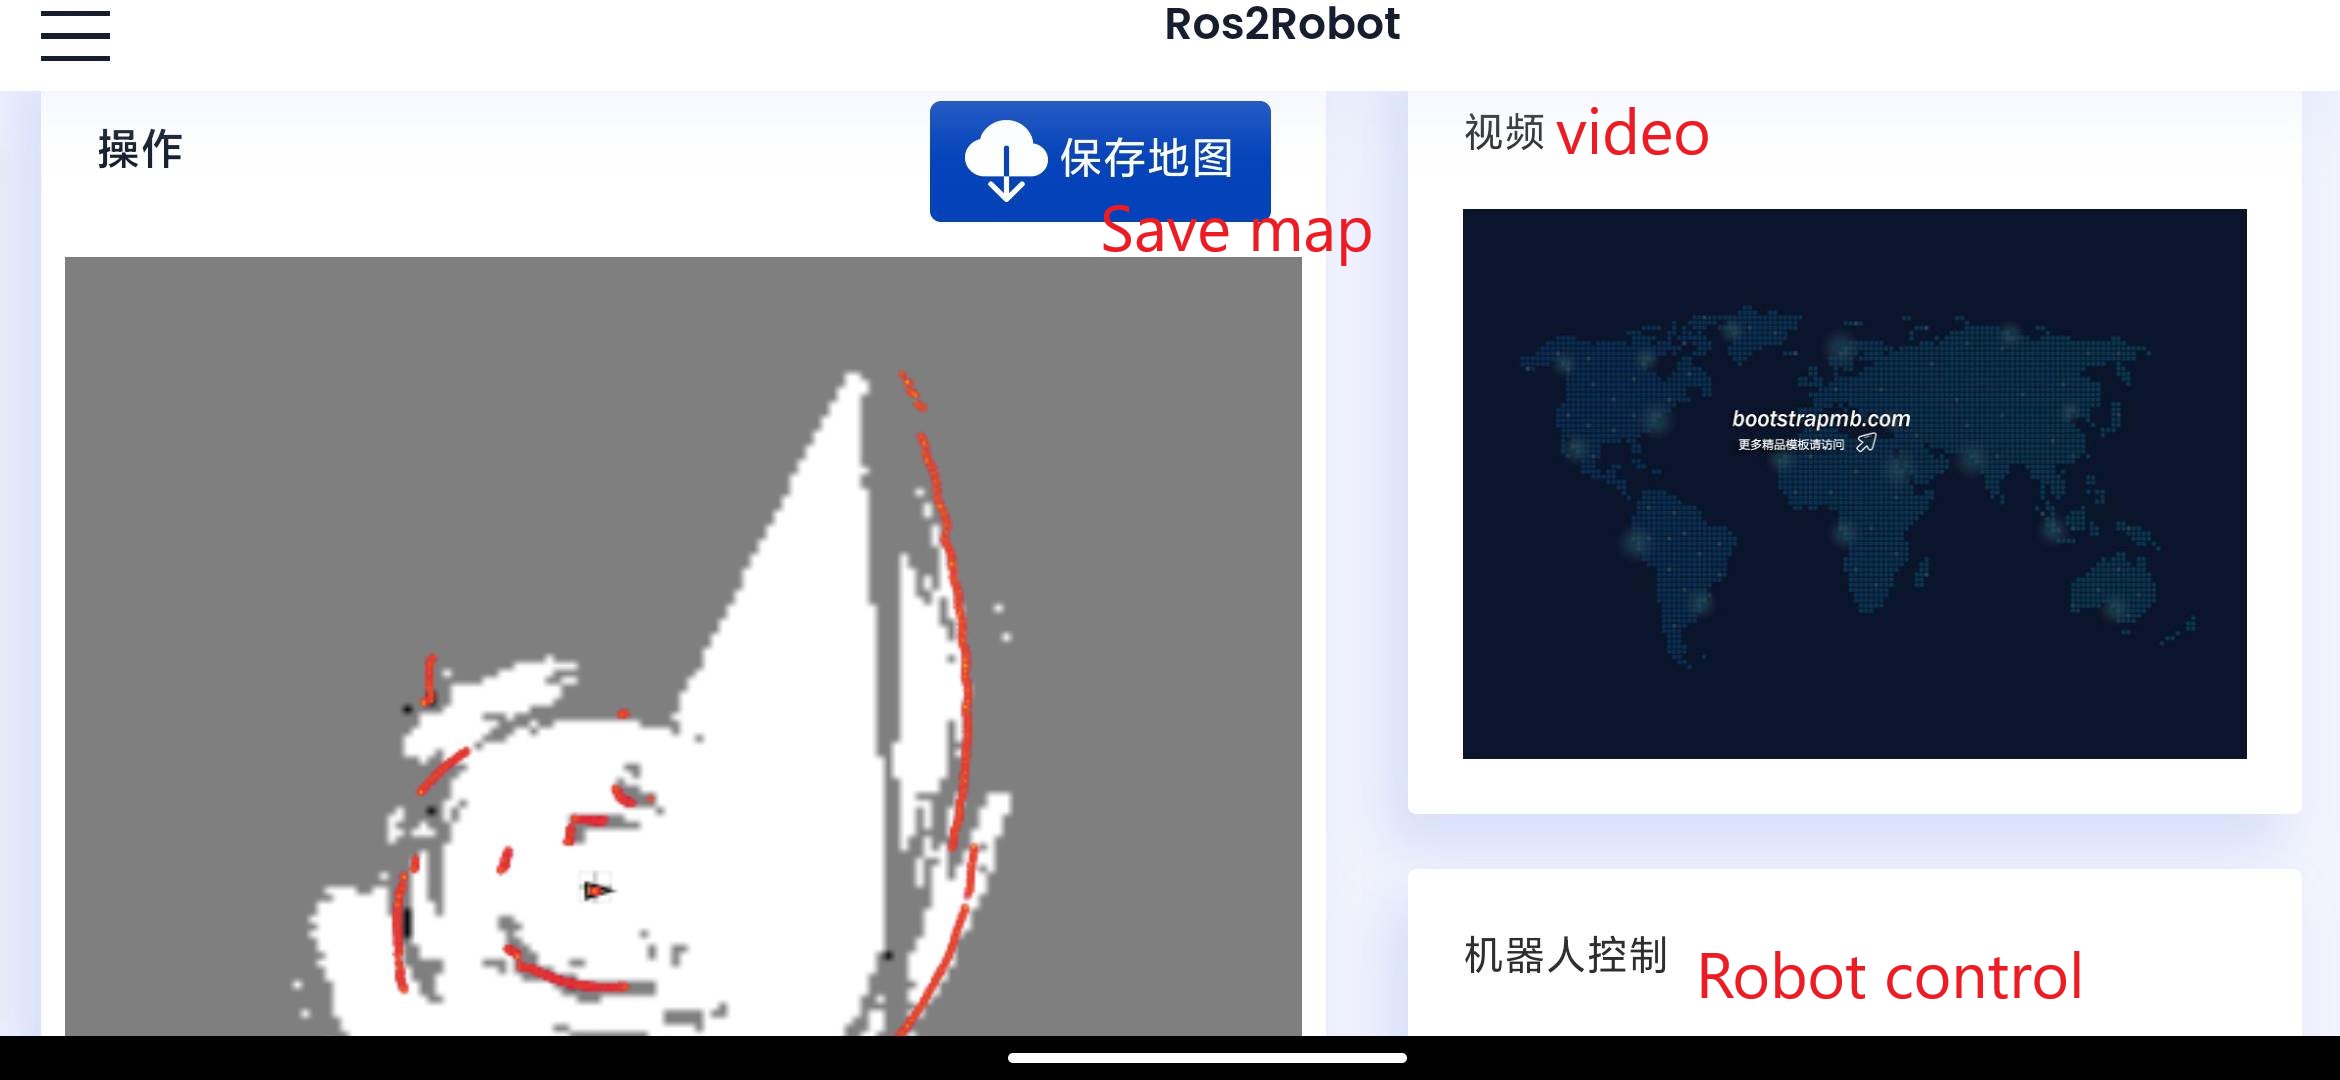
The right robot control area allows you to control the robot to move forward, backward, turn left, and turn right.
 When we are done controlling the robot to build the map, click on the Save Map button.
 Then enter the name of the save in the pop-up box and click Submit.
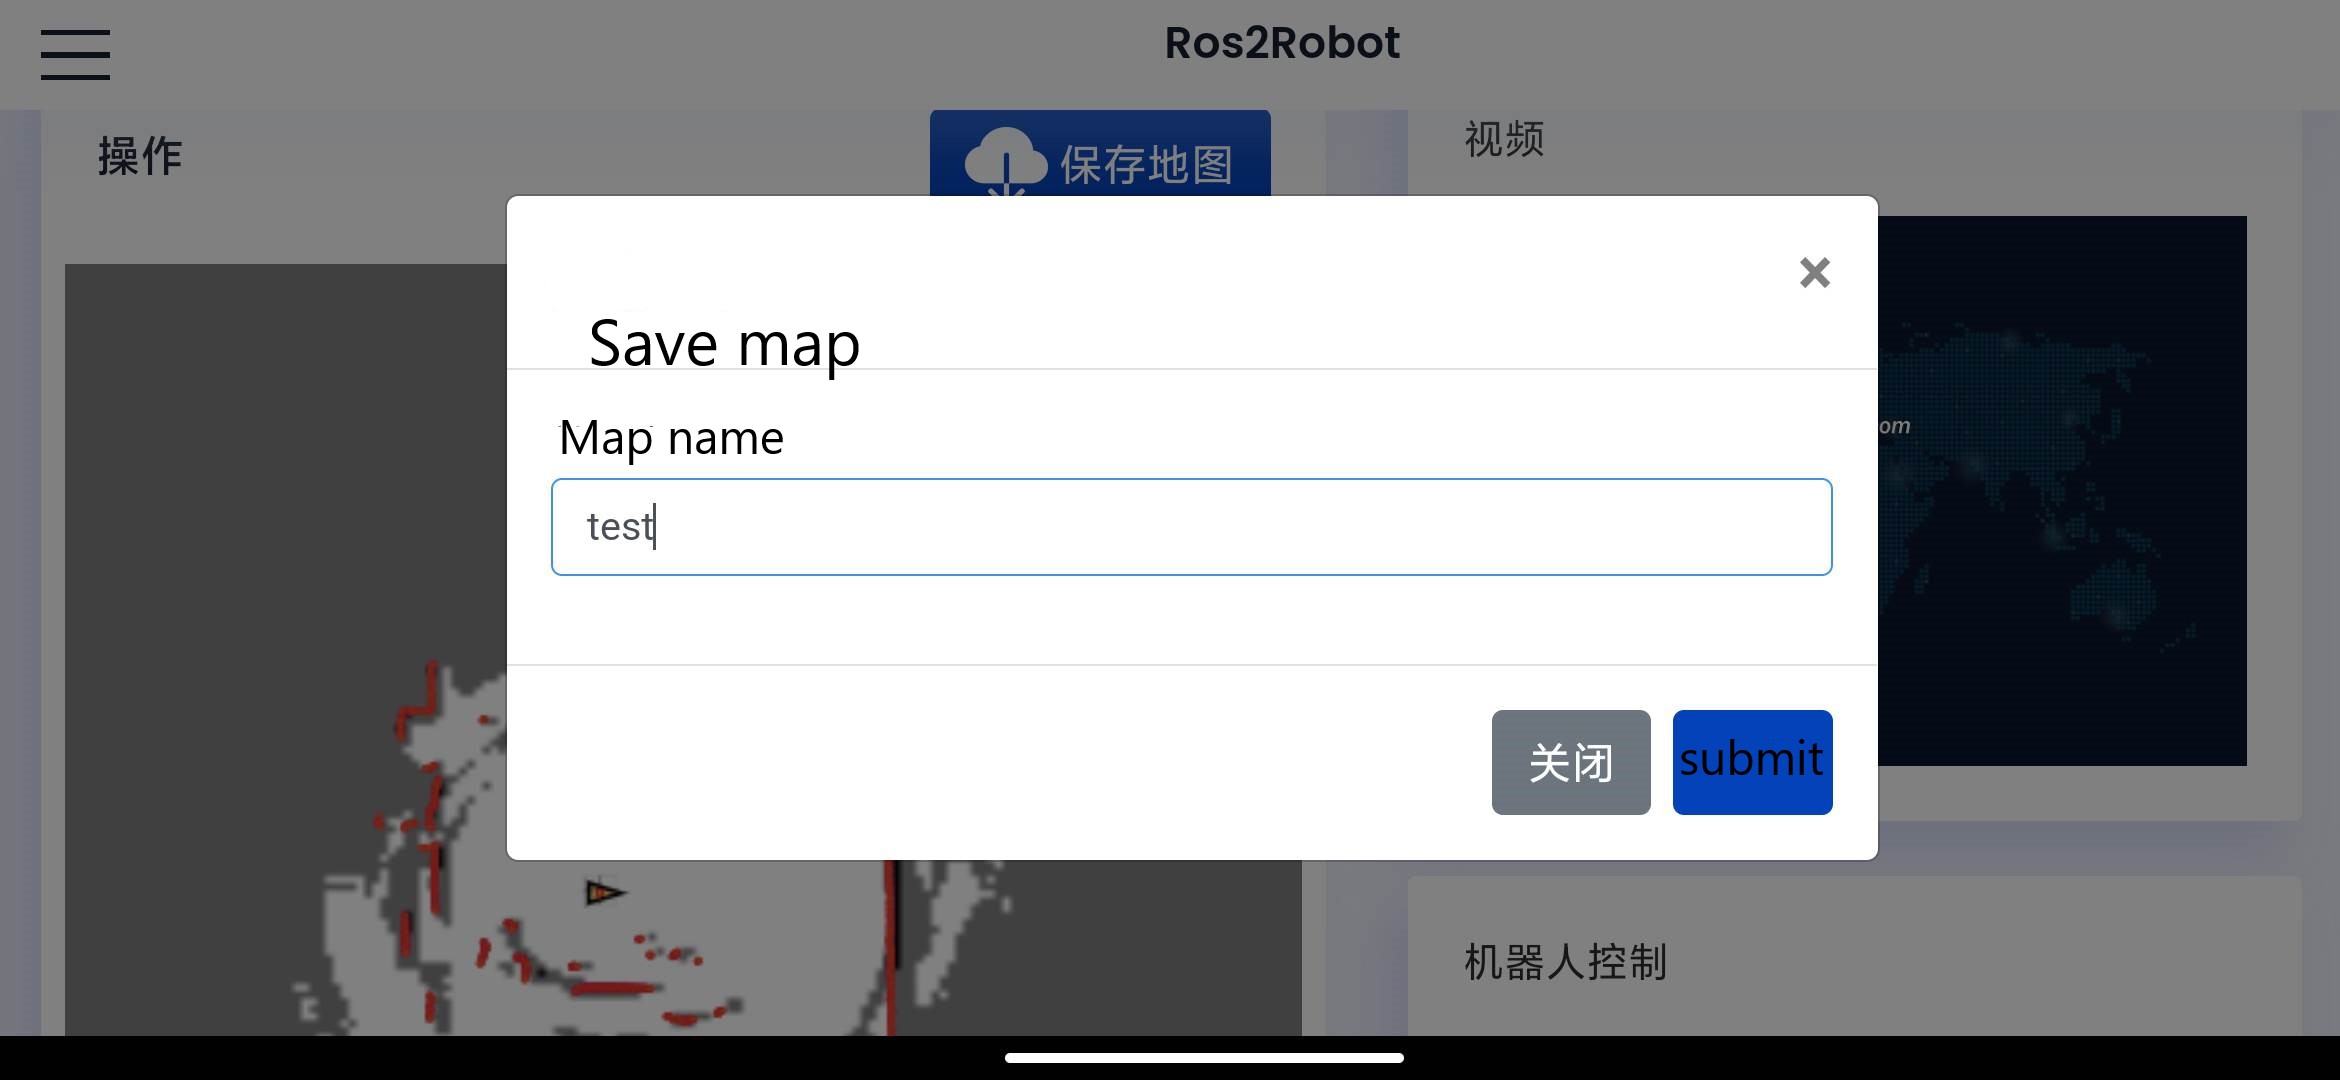
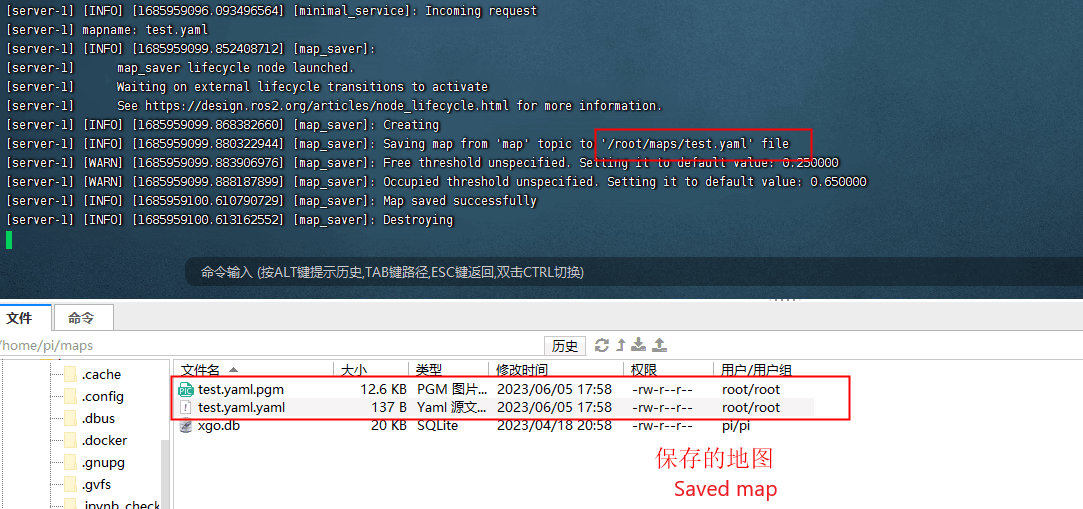
After saving is complete, you can see the path to the map save file printed by the terminal.
If saving the map gives an error, it could be a combination of the map path being incorrect in the code and the xgo.db file being missing from the folder.
xxxxxxxxxxcd /root/yahboomcar_ros2_ws/yahboomcar_ws/src/yahboom_app_save_map/yahboom_app_save_map/
xxxxxxxxxxvim yahboom_app_save_map.py
Move the cursor to line 26 to see the two paths, and then press the key i , the two paths of the frame will be modified according to the path on the diagram.
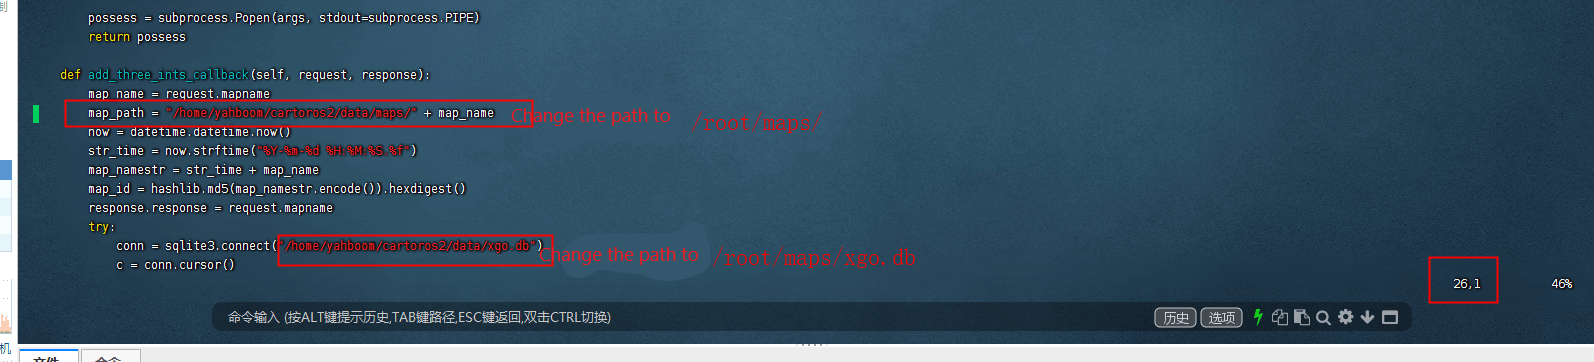
Press the ESC button after the modification is done and then type :wq to save the file.
Then enter the command:
xxxxxxxxxxcd /root/yahboomcar_ros2_ws/yahboomcar_ws/
xxxxxxxxxxcolcon build --packages-select yahboom_app_save_map
xxxxxxxxxxsource install/setup.bash
xxxxxxxxxxros2 launch yahboom_app_save_map yahboom_app_save_map.launch.py
Just resave the map.