Write EMMC boot
一、Jetson Nano B01 Connect Virtual Machine
- Prepare the Jetson Nano B01 motherboard, jumper cap, display screen, mouse and keyboard, etc.
- Put Jetson Nano B01 into the system REC flash mode.
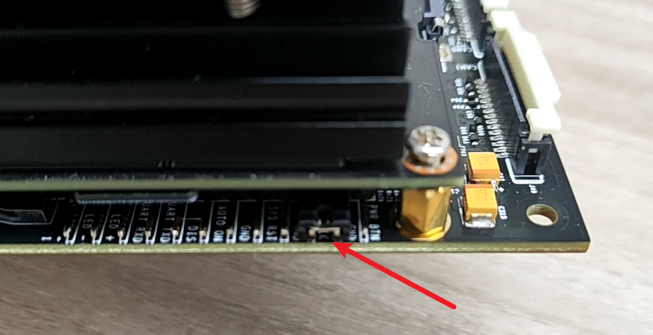
Connect the jumper cap to the FC REC and GND pins, that is, to the second and third pins of the carrier board below the core board, as shown in the following figure:
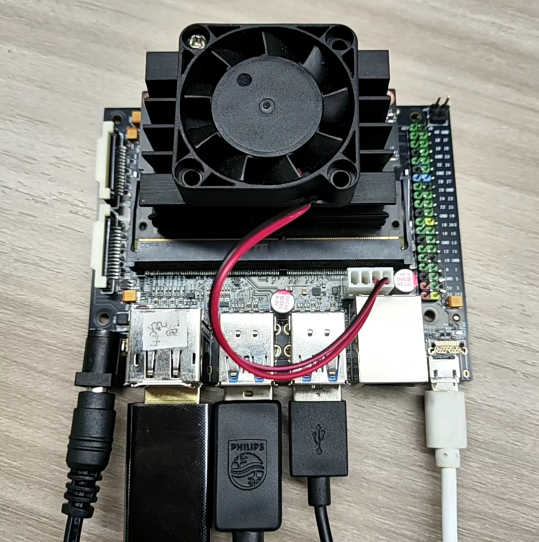
Connect the lines and connect the HDMI display, mouse, and keyboard to the Jetson Nano B01, connect the power supply again, and finally plug in the microUSB data cable. Due to the previous step of connecting the jumper cap to FCREC and GND pins, so after powering on and starting up, it will automatically enter the REC flash mode.
Note: Before flashing, first plug in the DC power cord, then connect the flashing cable. This sequence can increase the success rate of flashing.
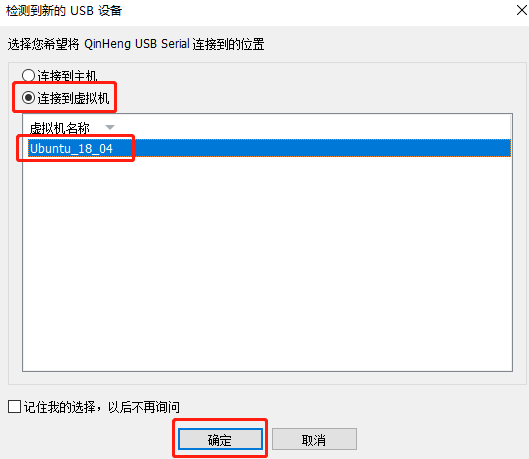
Under normal circumstances, after inserting the microUSB data cable, the following window will pop up. Please note that when using a virtual machine, the device needs to be set to connect to the virtual machine.
二、 Start burning
- Please include Jetson in the information_ Boot_ Transferring the USB.tar.gz file to Ubuntu18.04 system, and open the terminal to run the decompression command.
tar xzvf Jetson_Boot_USB.tar.gz
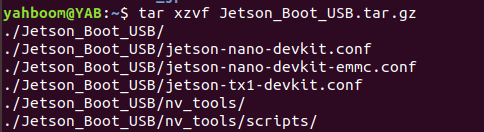
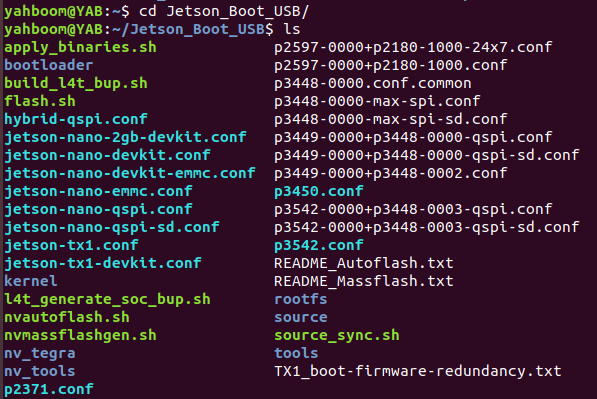
- After decompression, enter Jetson from_ Boot_ USB folder, and then
xcd Jetson_Boot_USB/ls
- Run the command to burn the EMMC boot file.
xxxxxxxxxxsudo ./flash.sh -r jetson-nano-devkit-emmc mmcblk0p1
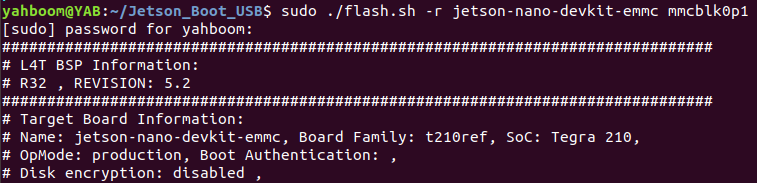
- Finally, wait for the file to be burned and enter the EMMC. If successful, a prompt will appear
"The target t210ref has been flashed successfully. Reset the board to boot from internal eMMC."

If an error message appears, please confirm if the Jetson Nano B01 is connected properly and enter the flash mode. Follow the first step to reconnect.
After the burning is completed, please remove the jumper cap from the JJetson Nano B01, insert the USB flash drive, and then power on and turn on the computer again.
Note: If using the virtual machine provided in the Yahboom Intelligent Materials, it already includes Jetson_ Boot_ USB files do not need to be passed back into the system.
Virtual machine username: yahboom
Password: yahboom