Download the program
Download the programFlyMCUHardware connectionMDK-ARMGenerate .hex fileSTM32CubeIDEGenerate .hex fileDownload the programProgram Running
The tutorial introduces the steps and options for generating and using .hex files in the software!
xxxxxxxxxxThe project files demonstrated in the tutorial do not provide source code, and the operation methods of using the projects in other chapters are the same
FlyMCU
Using the FlyMCU software, you can download the compiled program code (.hex file) to the target MCU chip through the serial port.
Hardware connection
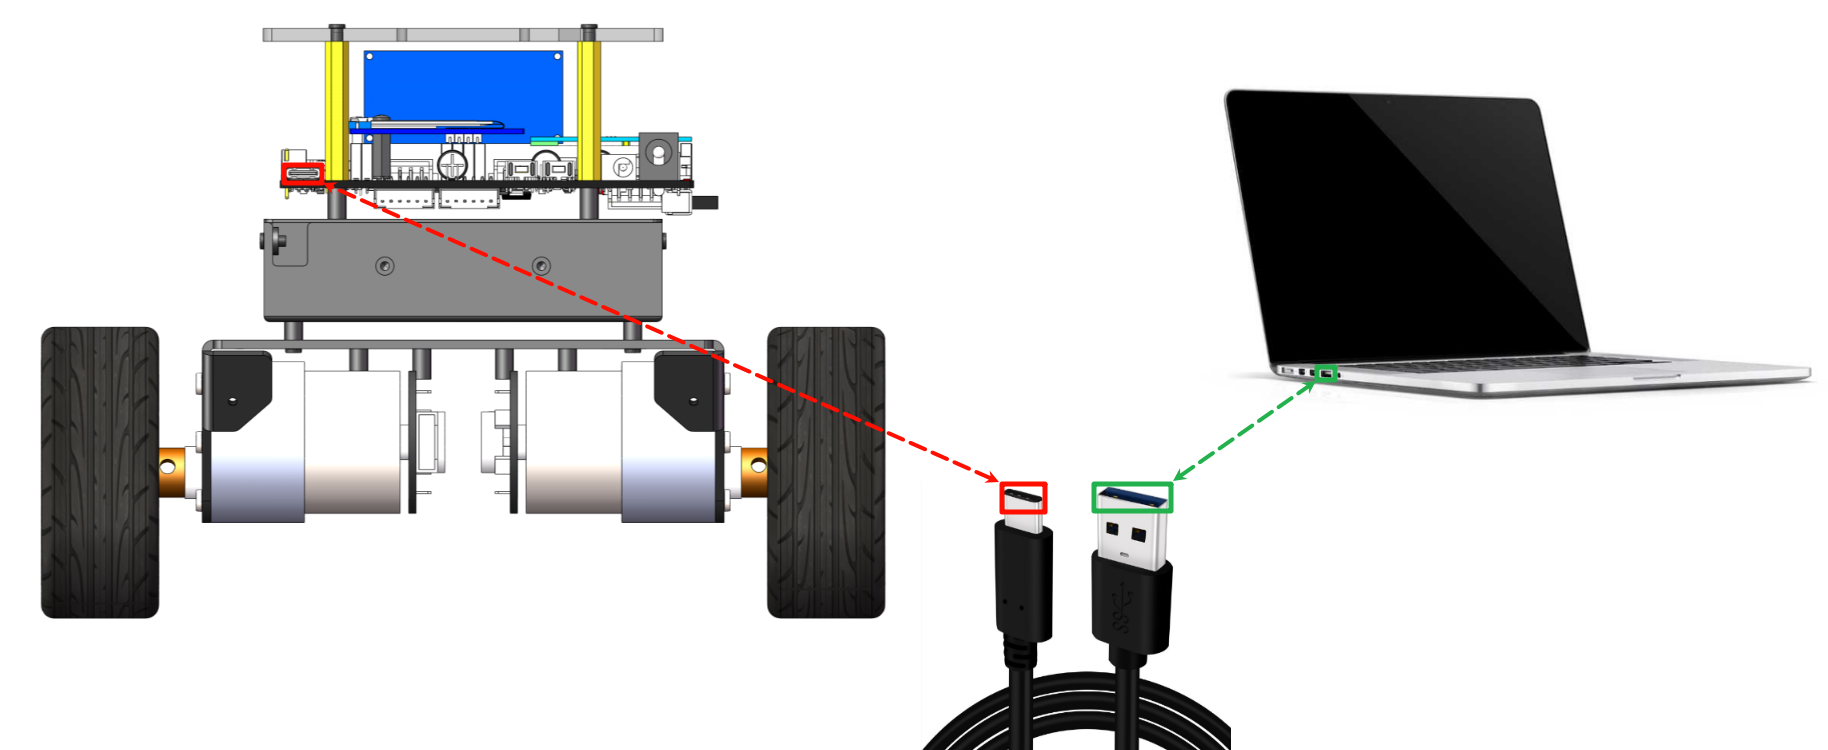
Use the Type-C data cable to connect the computer and the Type-C burning interface of the development board:
MDK-ARM
Generate .hex file
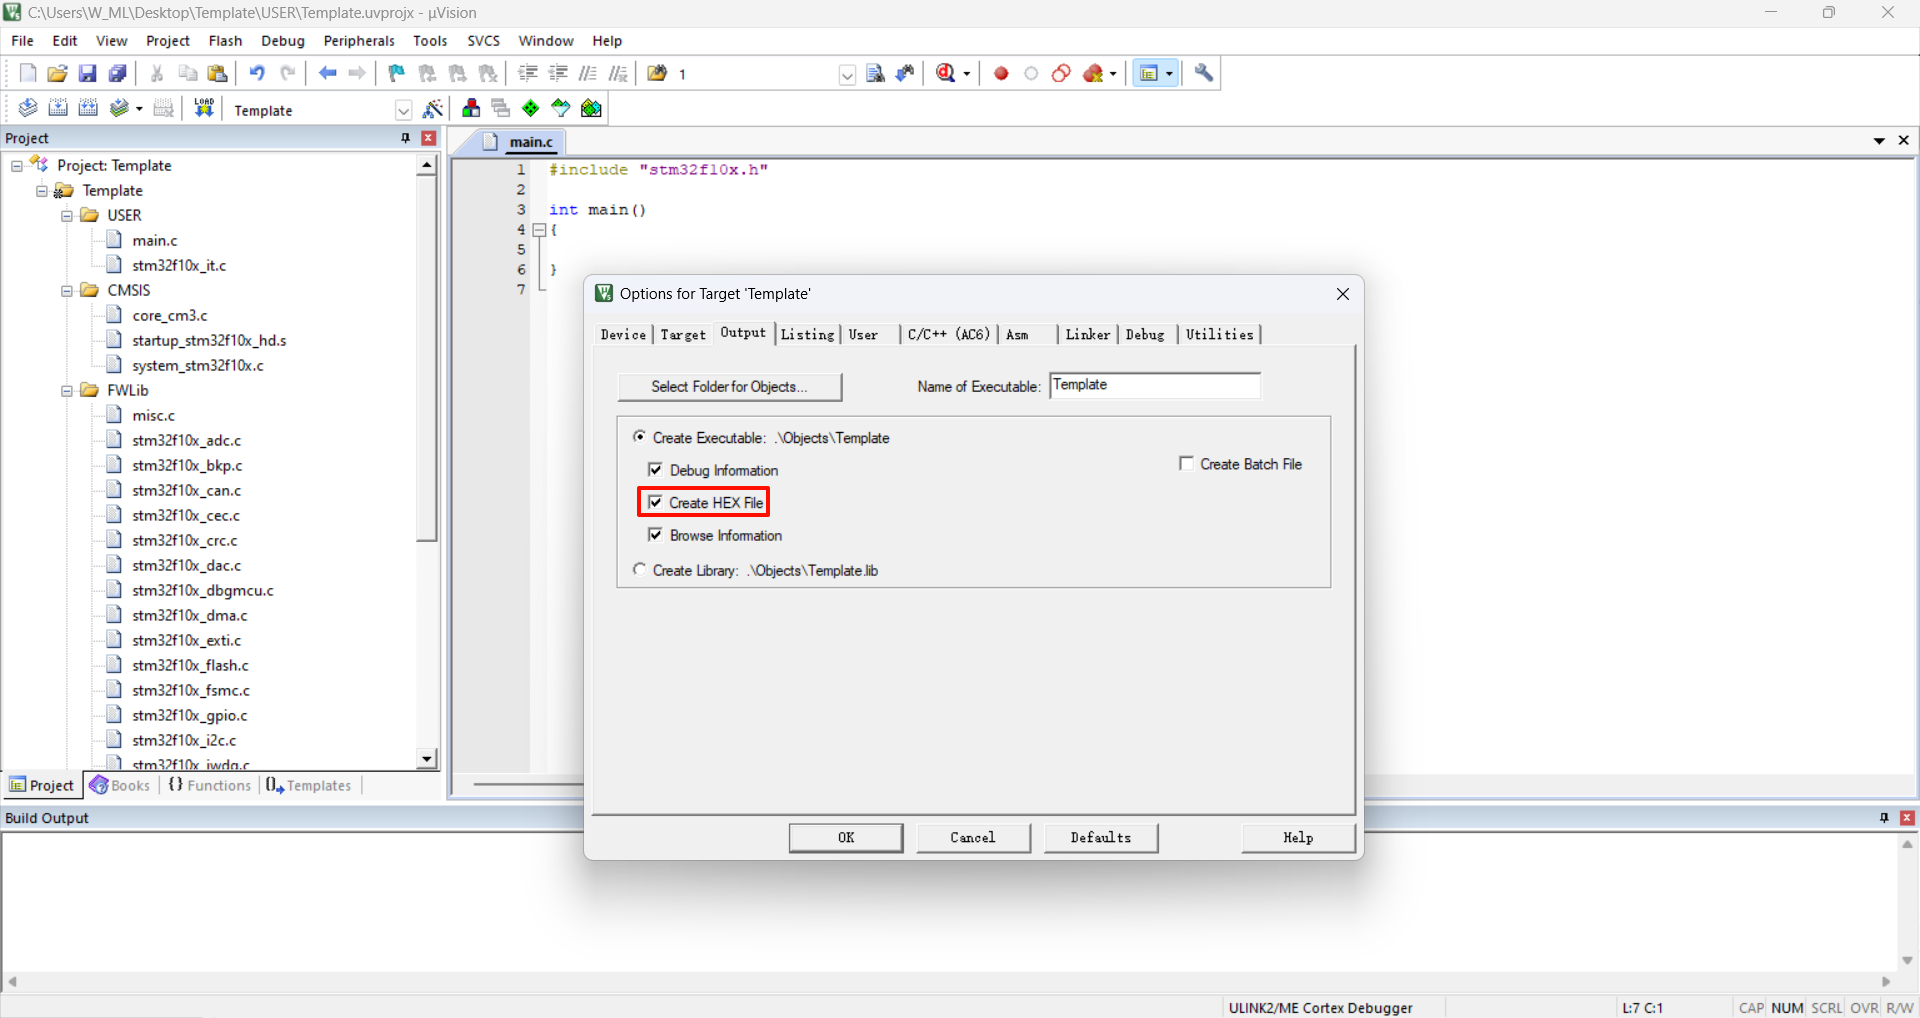
Using MDK-ARM, .hex files will not be generated by default. You need to check the option to generate .hex files to generate them.
xxxxxxxxxxWhen MDK-ARM selects Generate .hex file, it will only be effective for the current project;If you create or add a new project, you need to reselect Generate .hex file. You only need to select it once for each project for the first time!
Project target options
Check Create HEX File in the Output option:
Compile
The .hex file will be generated only after the project is compiled successfully.
xxxxxxxxxx.hex file location: in the OBJ folder of the project file
STM32CubeIDE
Generate .hex file
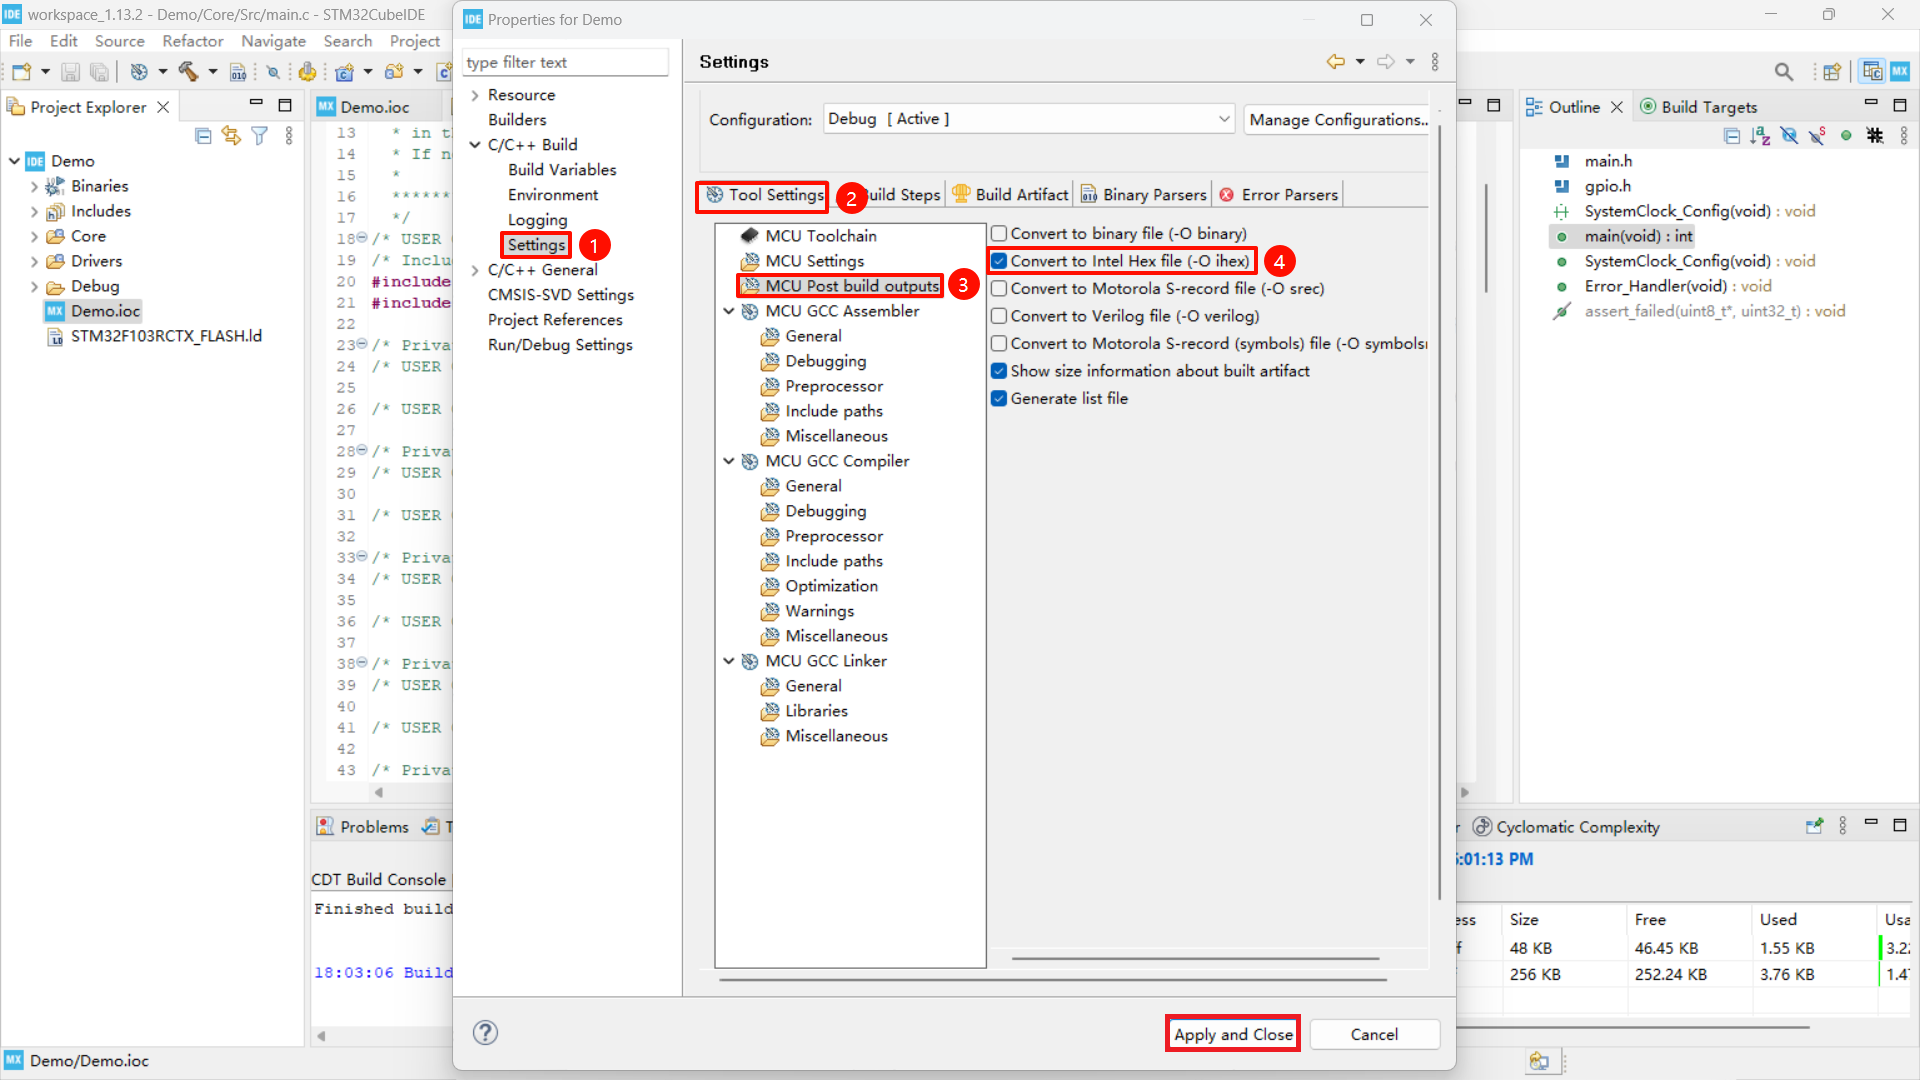
By default, the .hex file will not be generated when using STM32CubeIDE. You need to check the Generate .hex file option to generate it.
xxxxxxxxxxThe STM32CubeIDE option of generating a .hex file will only be valid for the current project;If you create or add a new project, you need to re-check the option of generating a .hex file. You only need to check it once for the first time for each project!
Properties
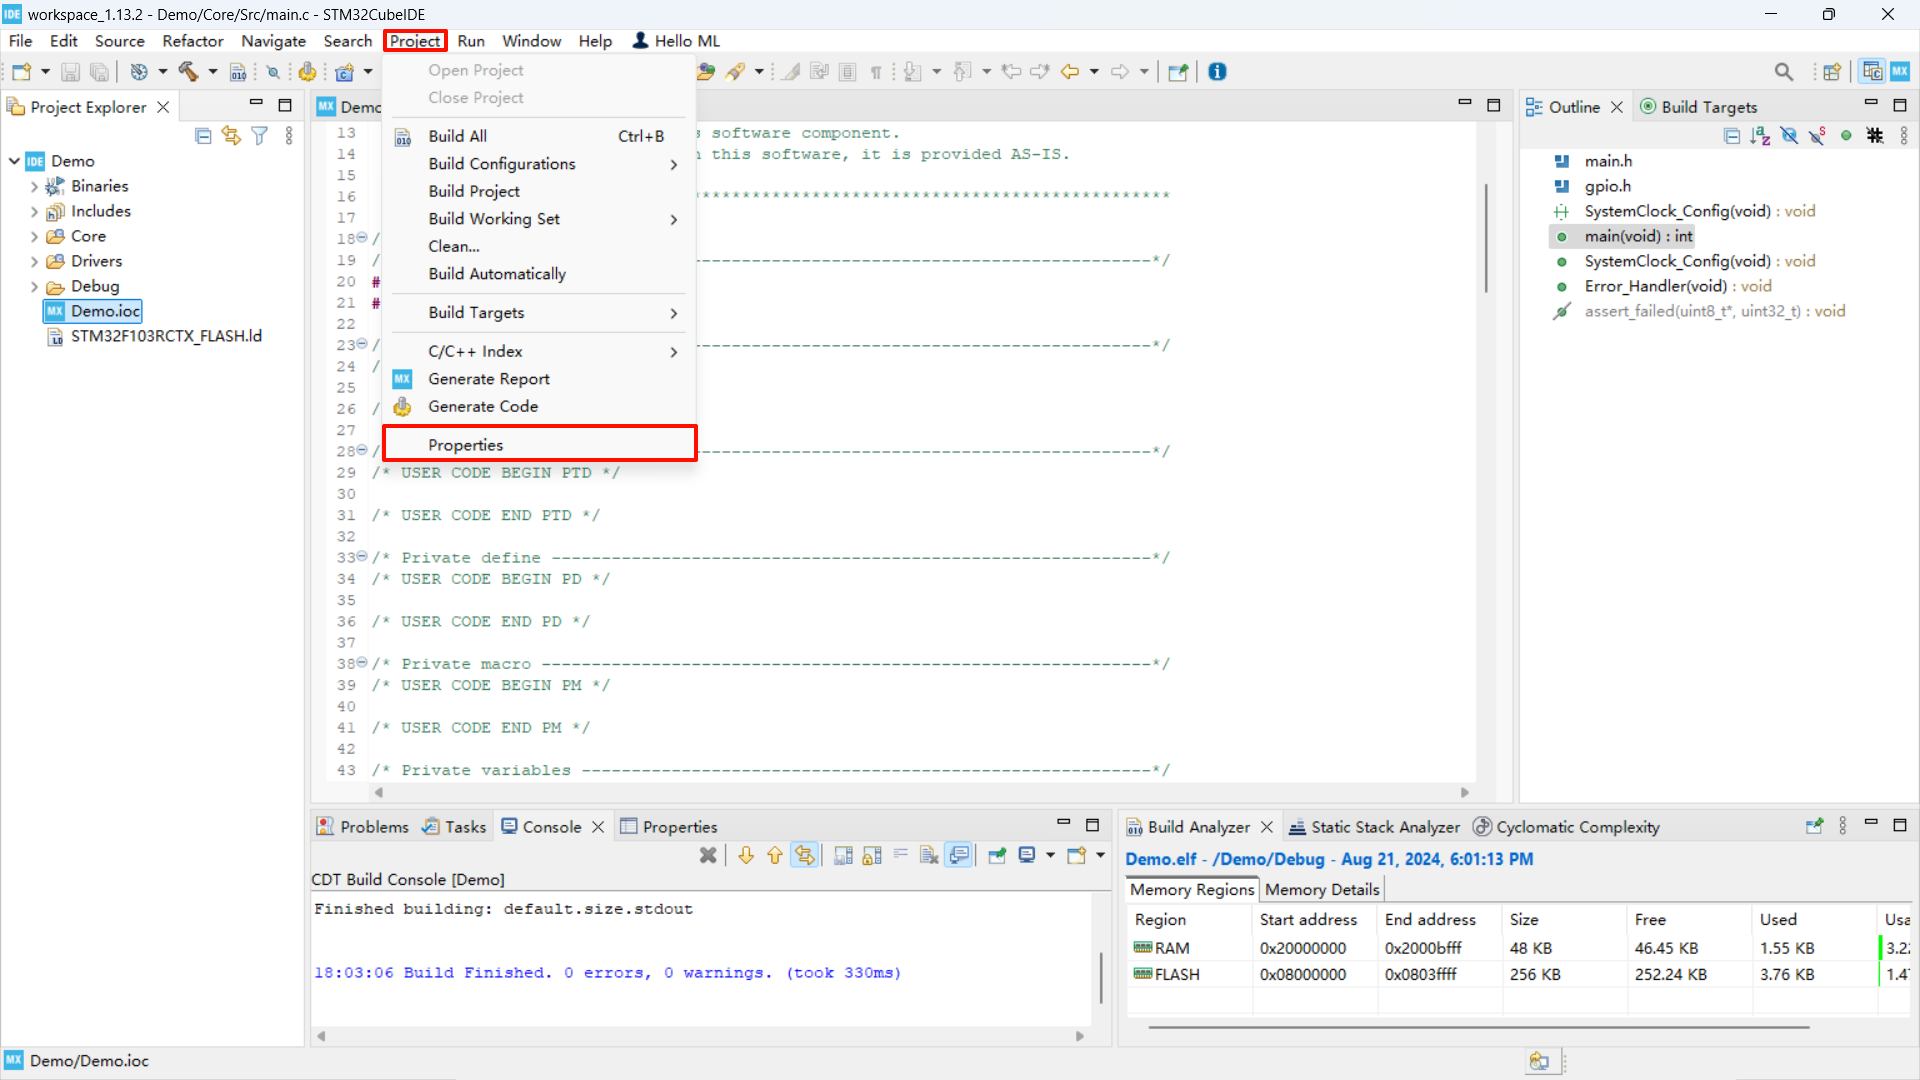
Check the corresponding option
Compile
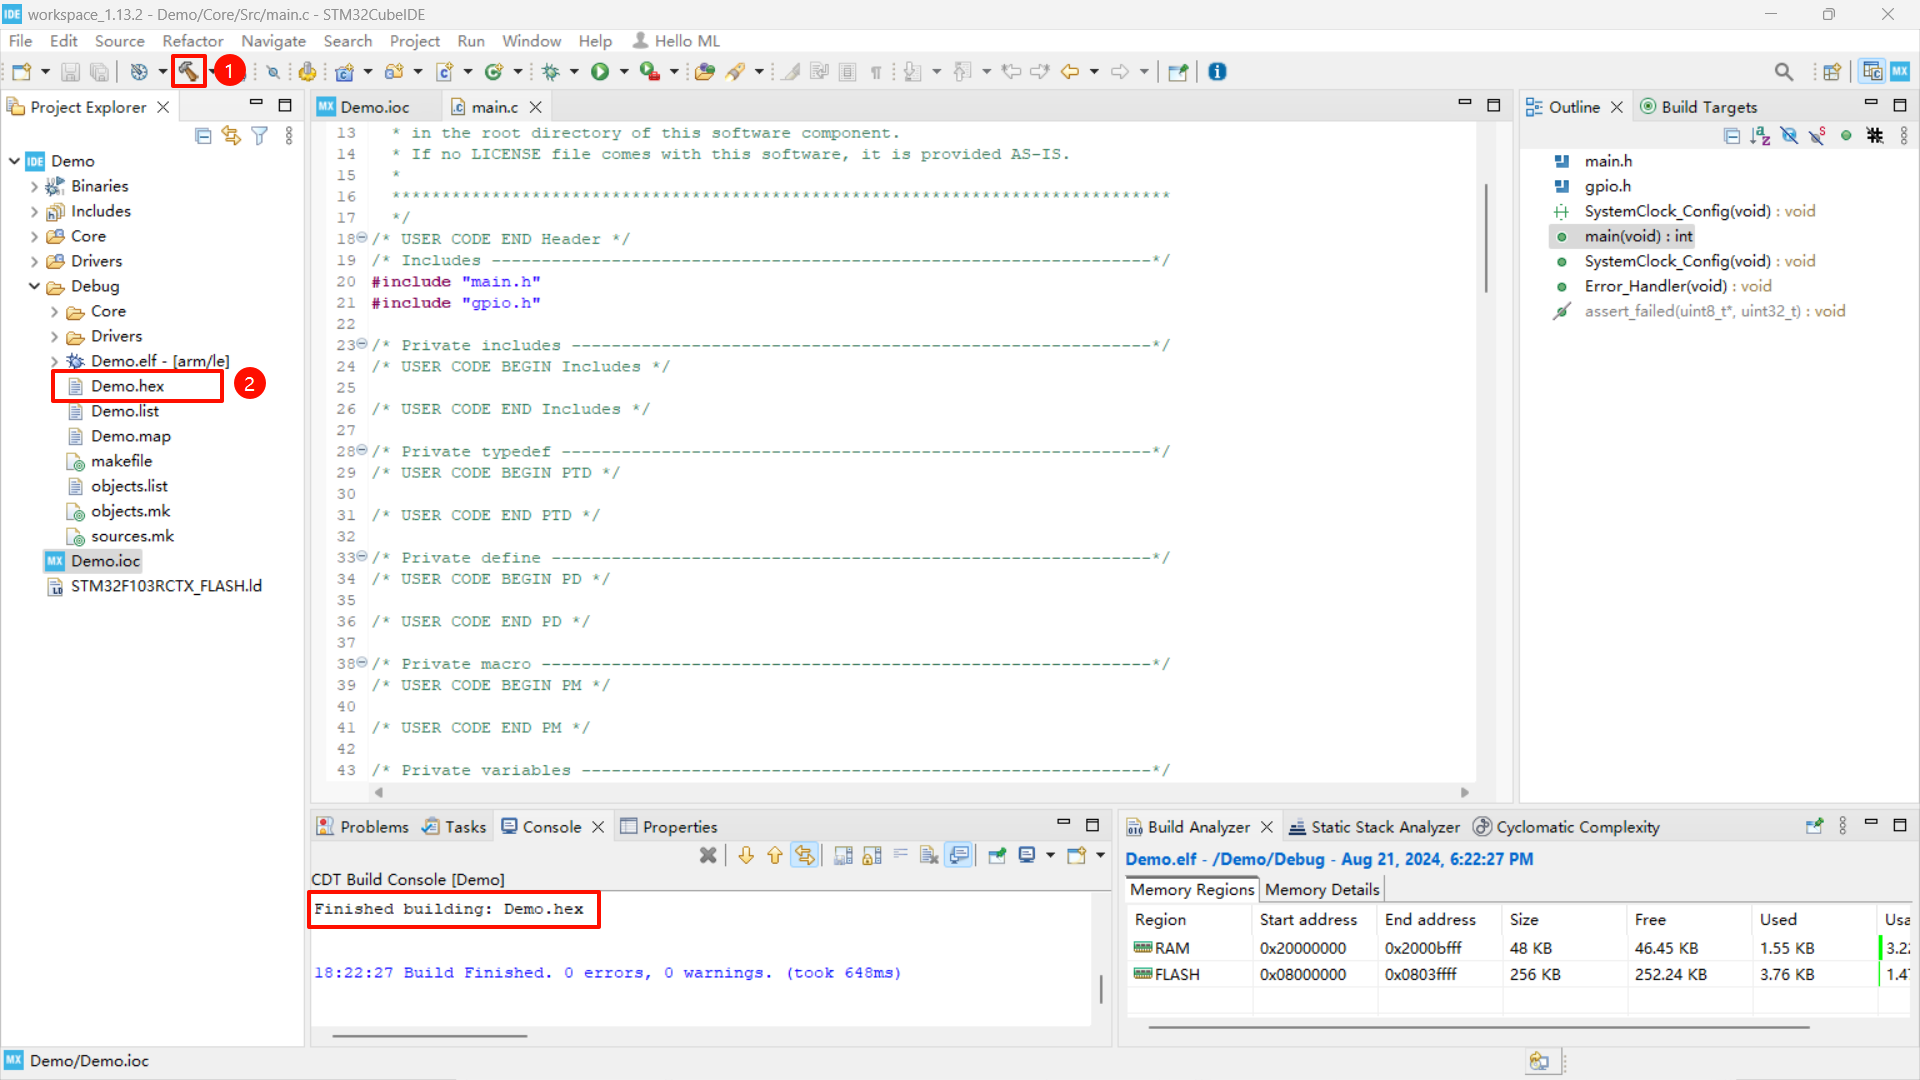
xxxxxxxxxx.hex file location: in the Debug folder of the project file
Download the program
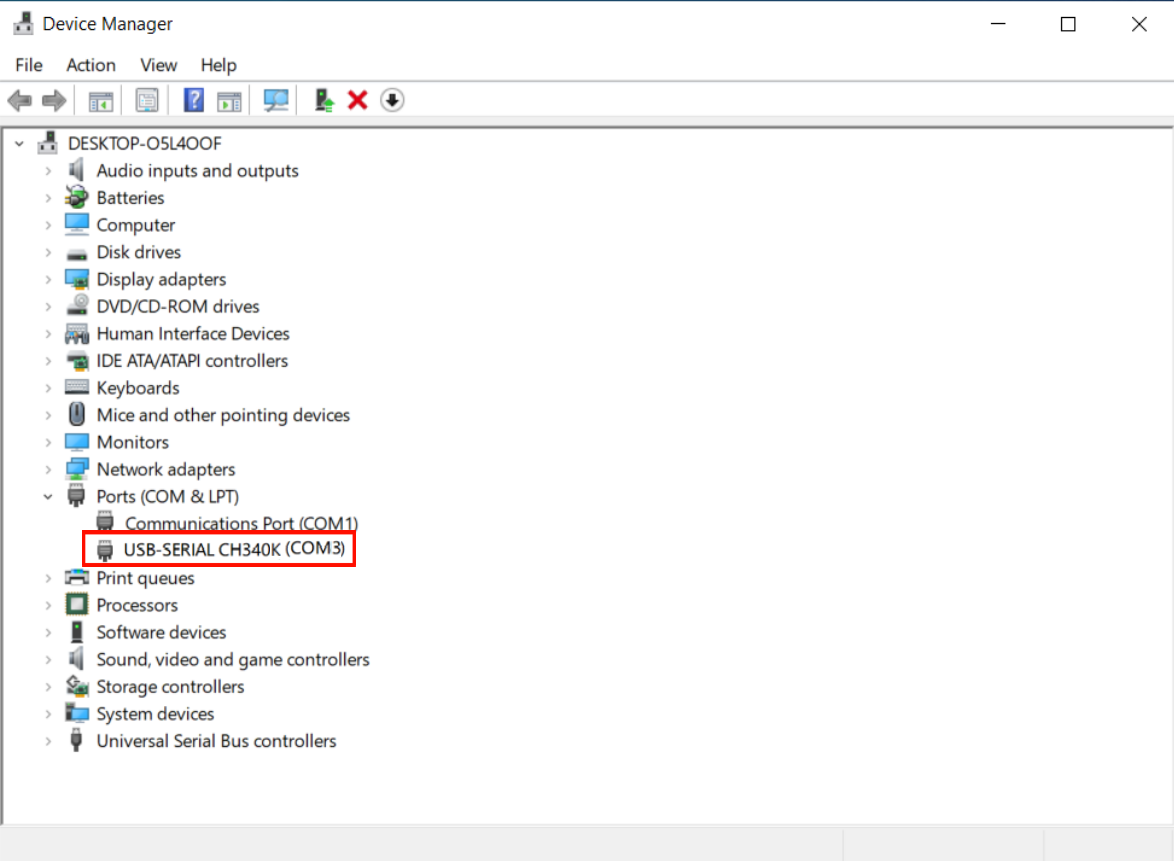
You can use a data cable to burn the program through the Type-C interface of the development board;
After connecting the computer with a Type-C data cable, you can view the serial port number of the corresponding device in the device manager: port.
Device Manager
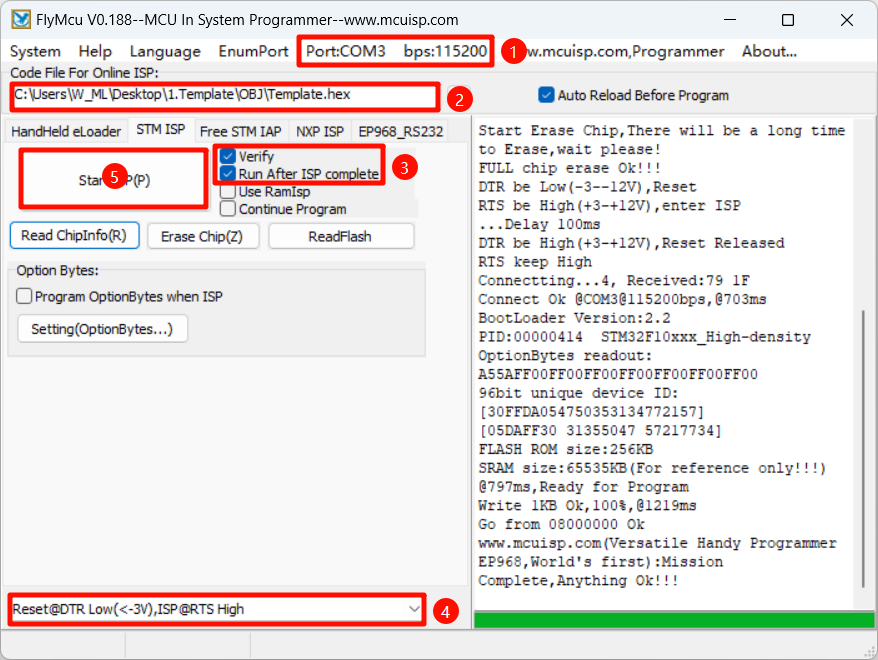
Flymcu
BootLoader Option: DTR low level reset, RTS high level reset into BootLoader
xxxxxxxxxxExcept that the serial port number and program file location may be inconsistent, other options are checked according to the picture
Program Running
After successfully downloading the program, press the RESET button of the development board to observe whether the phenomenon of the development board is normal.
The demonstration project does not drive the development board, so there will be no phenomenon. Other cases in the tutorial will have corresponding phenomena