Installing Jetson environment
Installing Jetson environment1. Hardware connection2. Software connection3. Use SDK Manager3.1. Motherboard selection3.2, STEP13.3, STEP23.4, STEP33.5, STEP44. Environment verification
Some users may need to use NVIDIA's own system component environment. After installing the system and successfully entering the system desktop, you can follow the tutorial below to install the component environment!
Note: The solid-state drive that comes with the product has a factory image, which contains NVIDIA's official system and motherboard environment; if you do not have a requirement for a pure system, do not operate!
The entire process requires the network, and some components may require scientific Internet access. If the user cannot complete the component installation, use our factory image
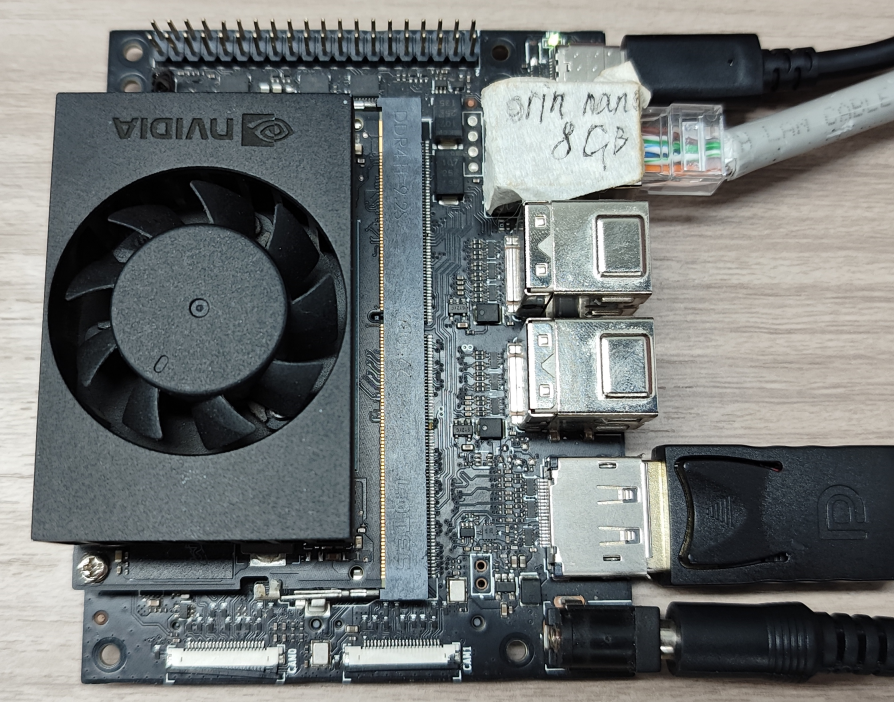
1. Hardware connection
The Jetson Orin motherboard needs to be connected to a DC power adapter, DP data cable, network cable, and Type C data cable: Type C data cable connects to a computer or virtual machine
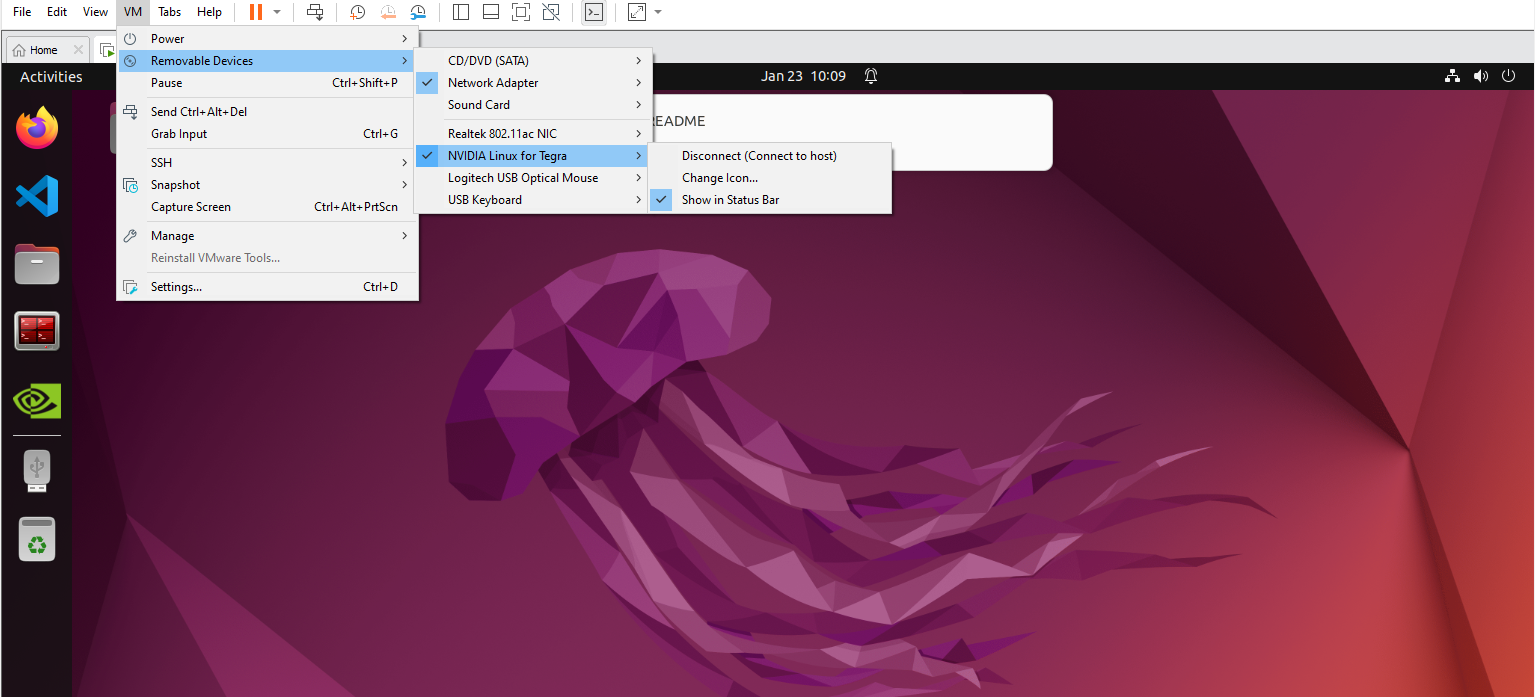
2. Software connection
The tutorial uses VMware Workstation 17 Pro to burn the system!
After starting the virtual machine, select in the menu bar: Virtual Machine → NVIDIA Linux for Tegra → Confirm the status of the connection with the virtual machine
3. Use SDK Manager
The Jetson Orin motherboard is in the normal system startup state, and the Type-C data cable is used to connect to the computer or virtual machine.
3.1. Motherboard selection
After opening SDK Manager, select according to your motherboard model.
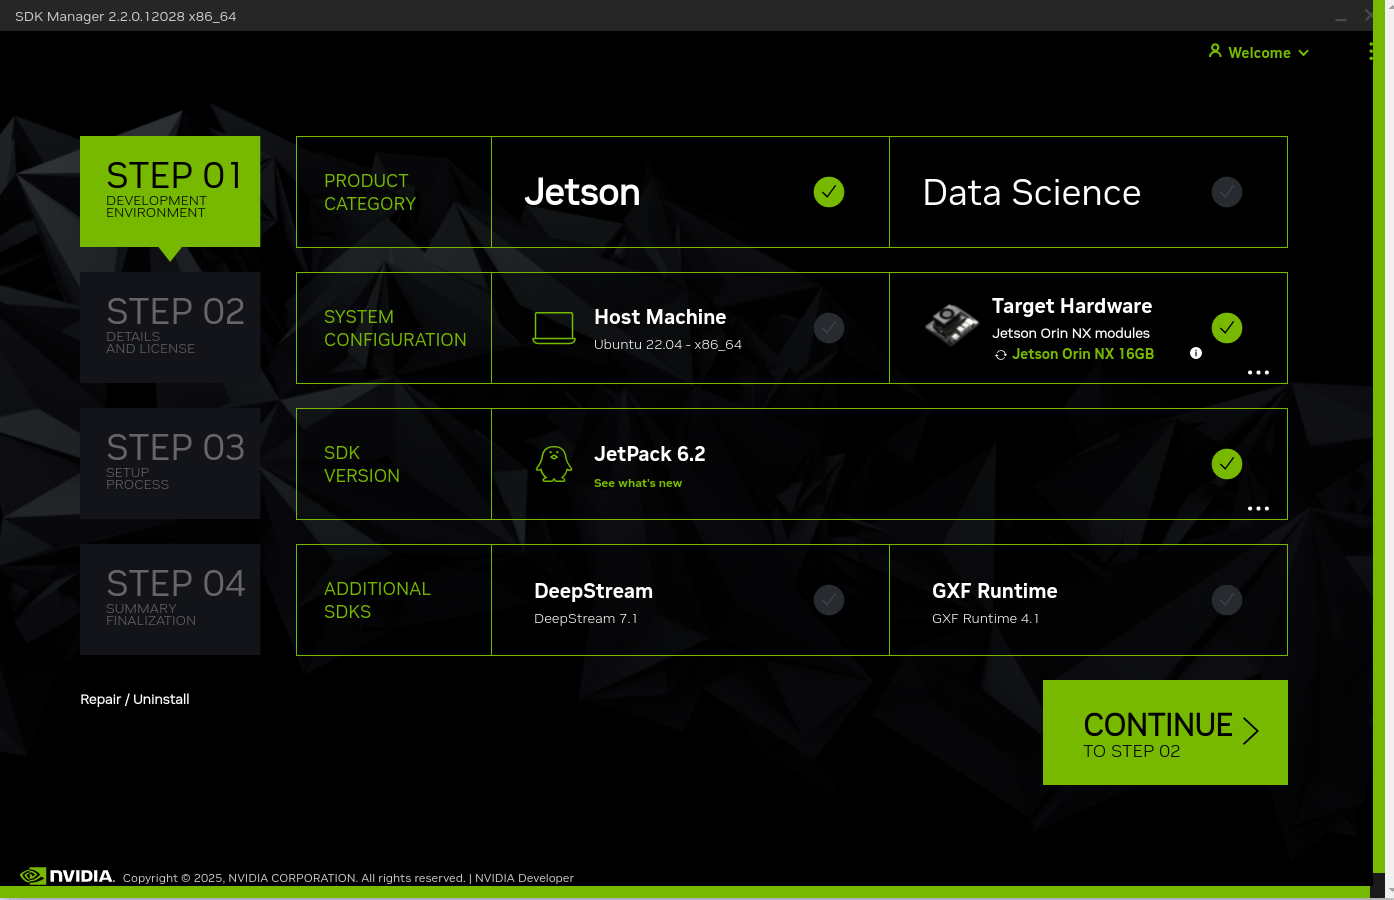
3.2, STEP1
Check the options below, confirm that they are consistent, and click CONTINUE:
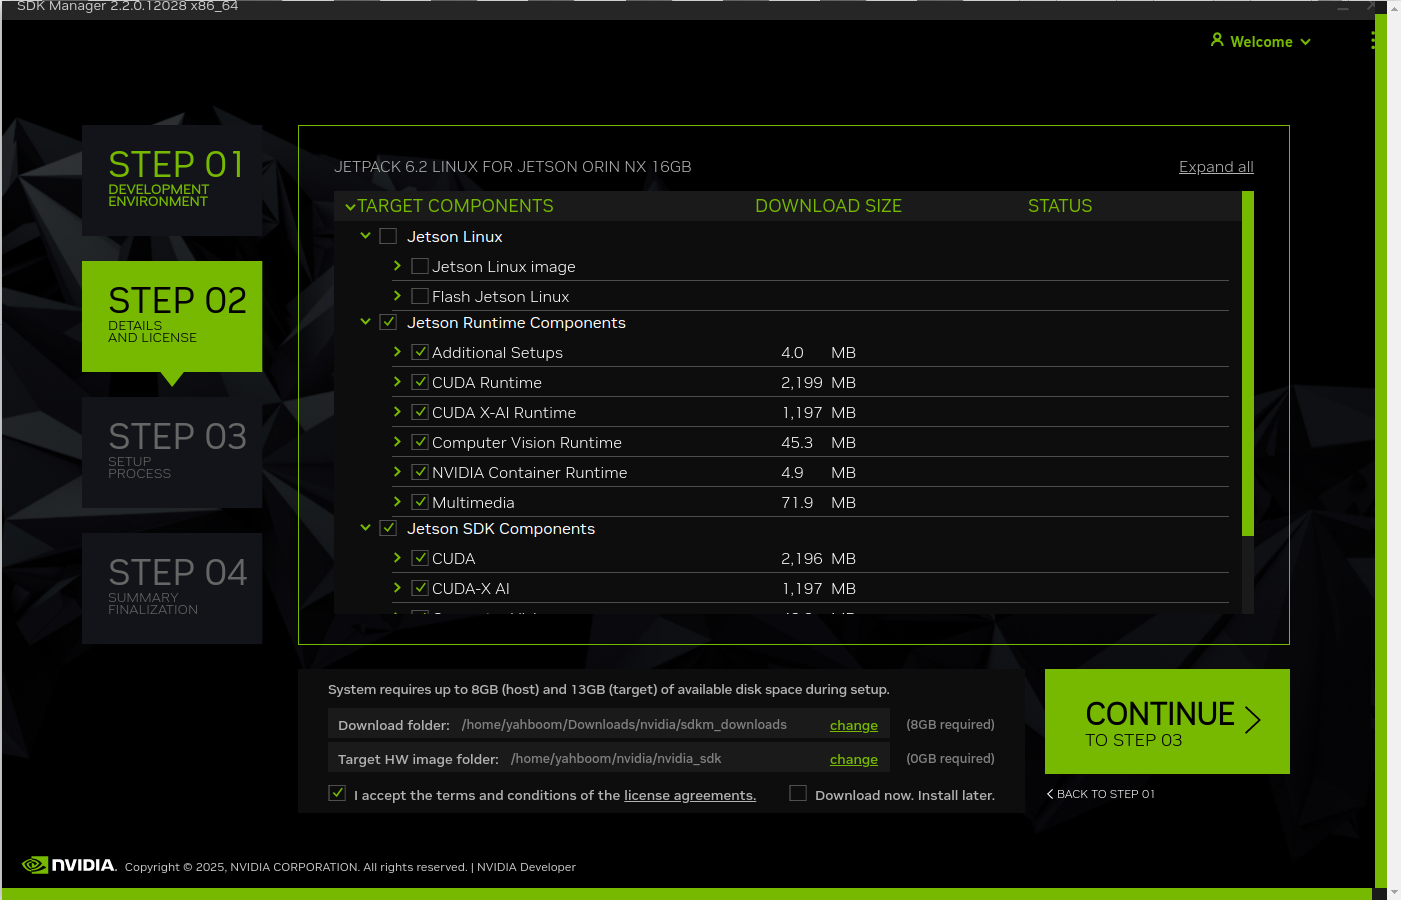
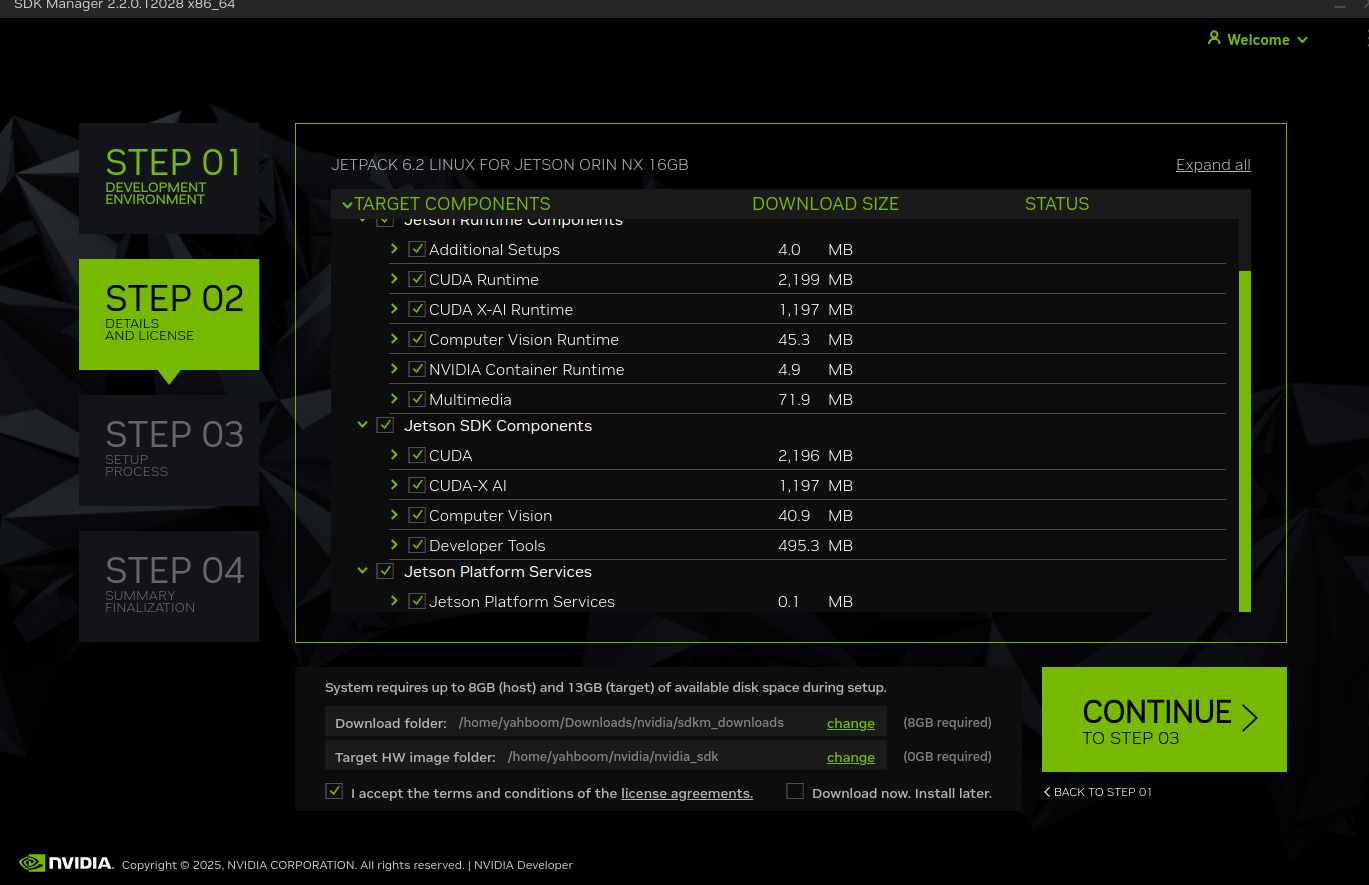
3.3, STEP2
Check all components except the Jetson Linux system:
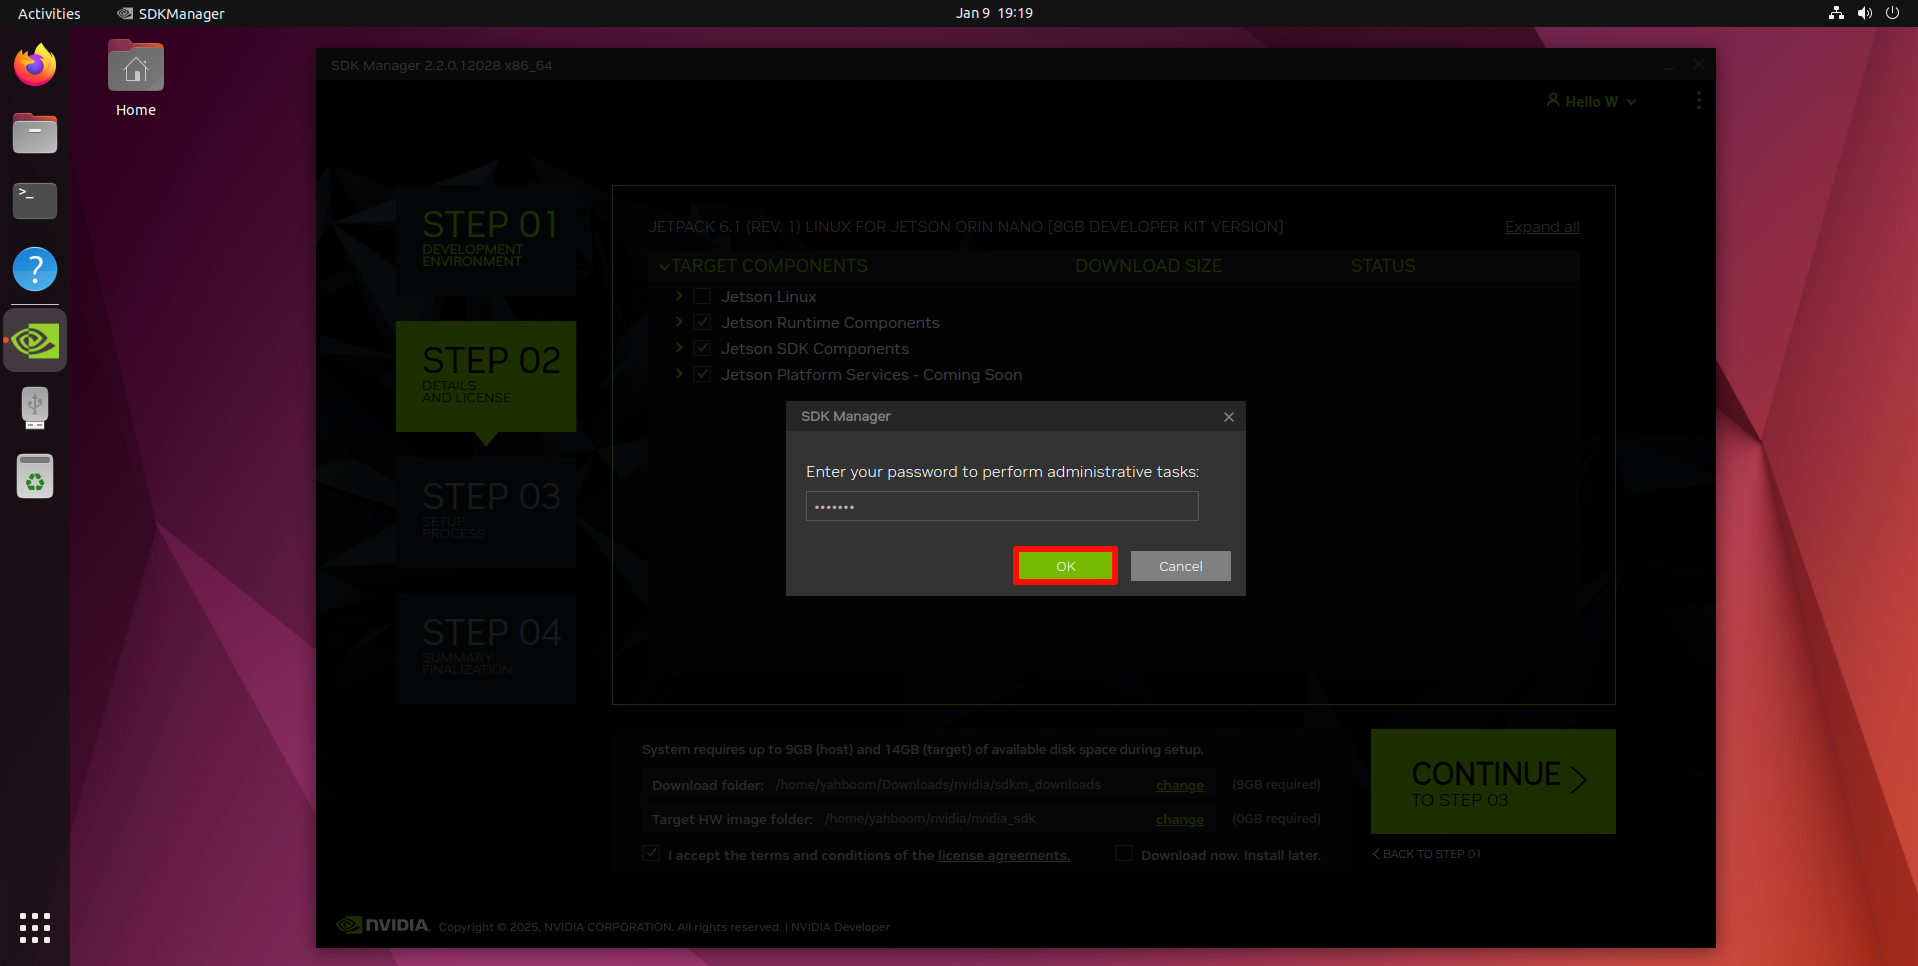
Enter the virtual machine password: yahboom
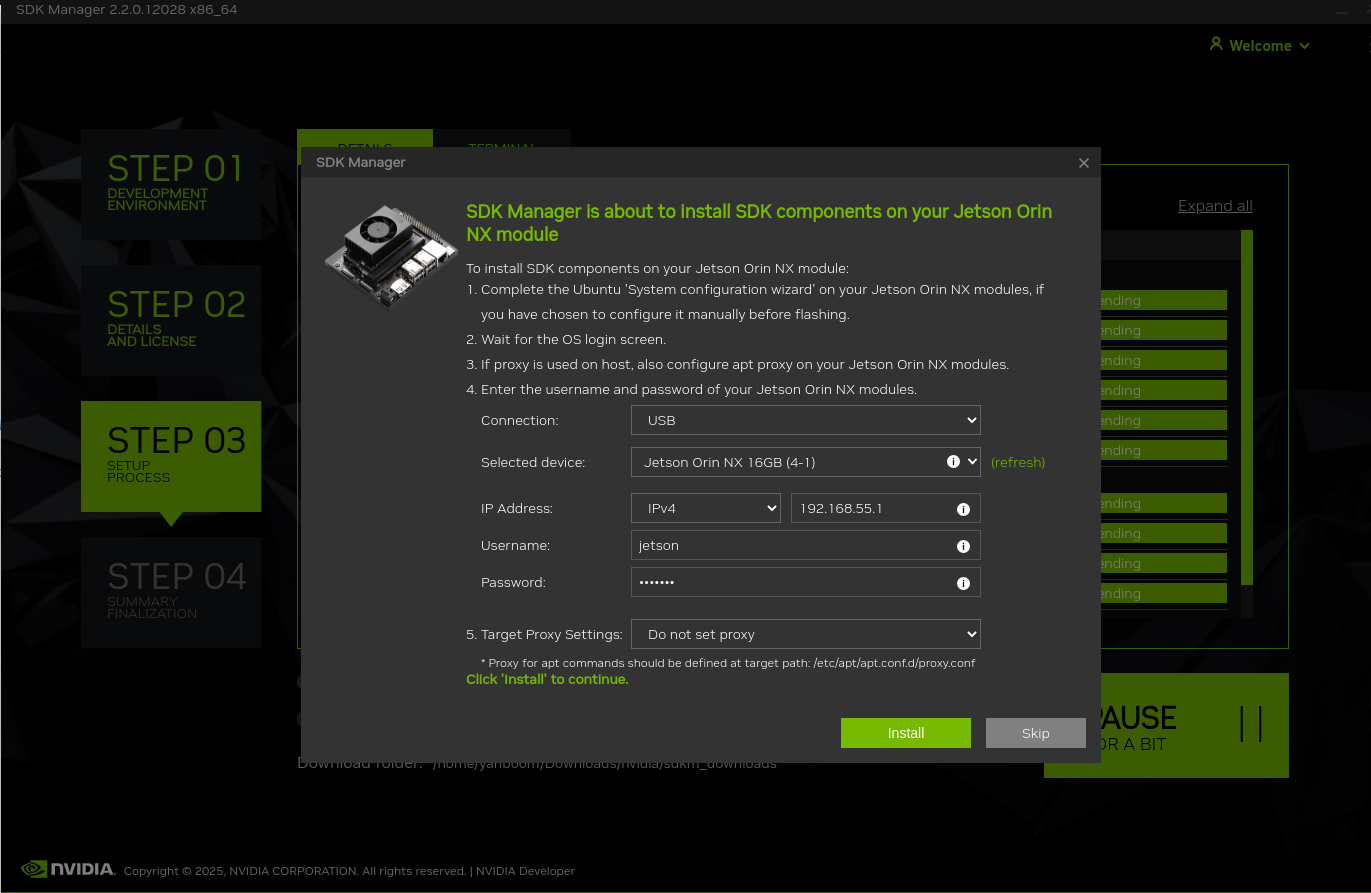
3.4, STEP3
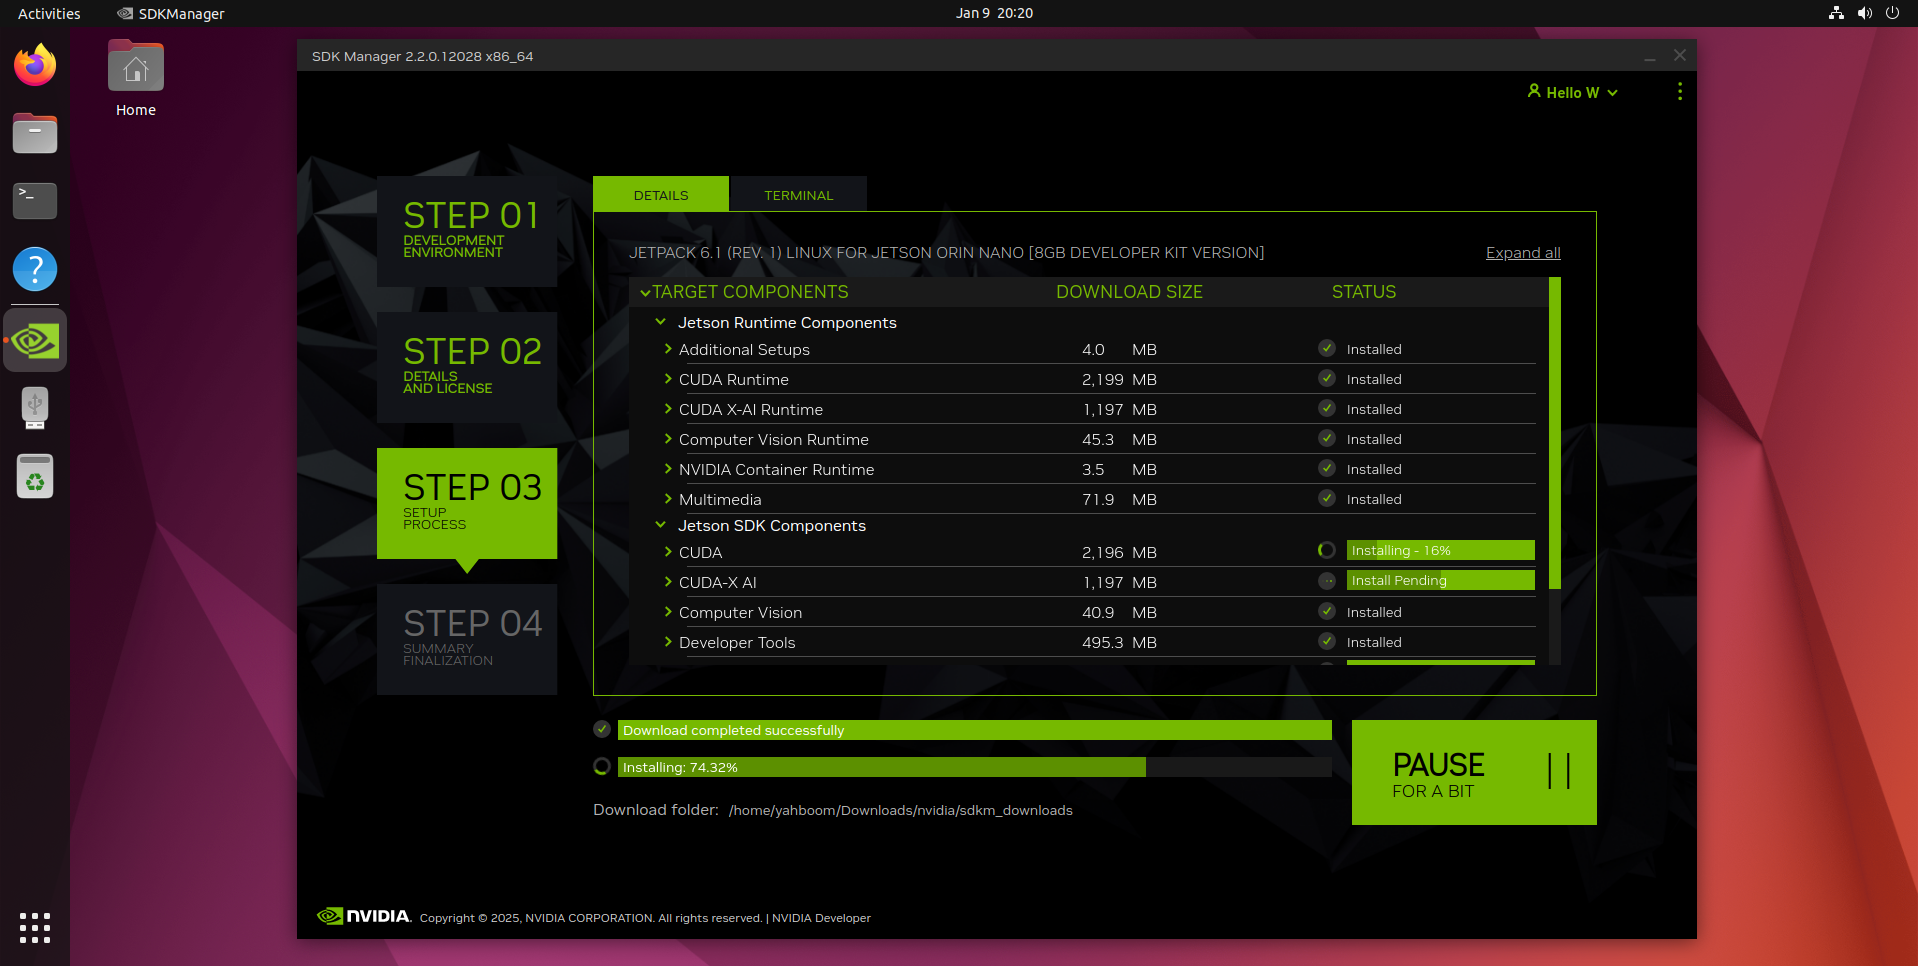
Enter the username and password of the motherboard system, and leave other options unchanged by default. After filling in, click Install:
Wait for the system to download and install: The virtual machine has a network failure during the whole process, which can be ignored. The actual test did not affect the burning of the component environment
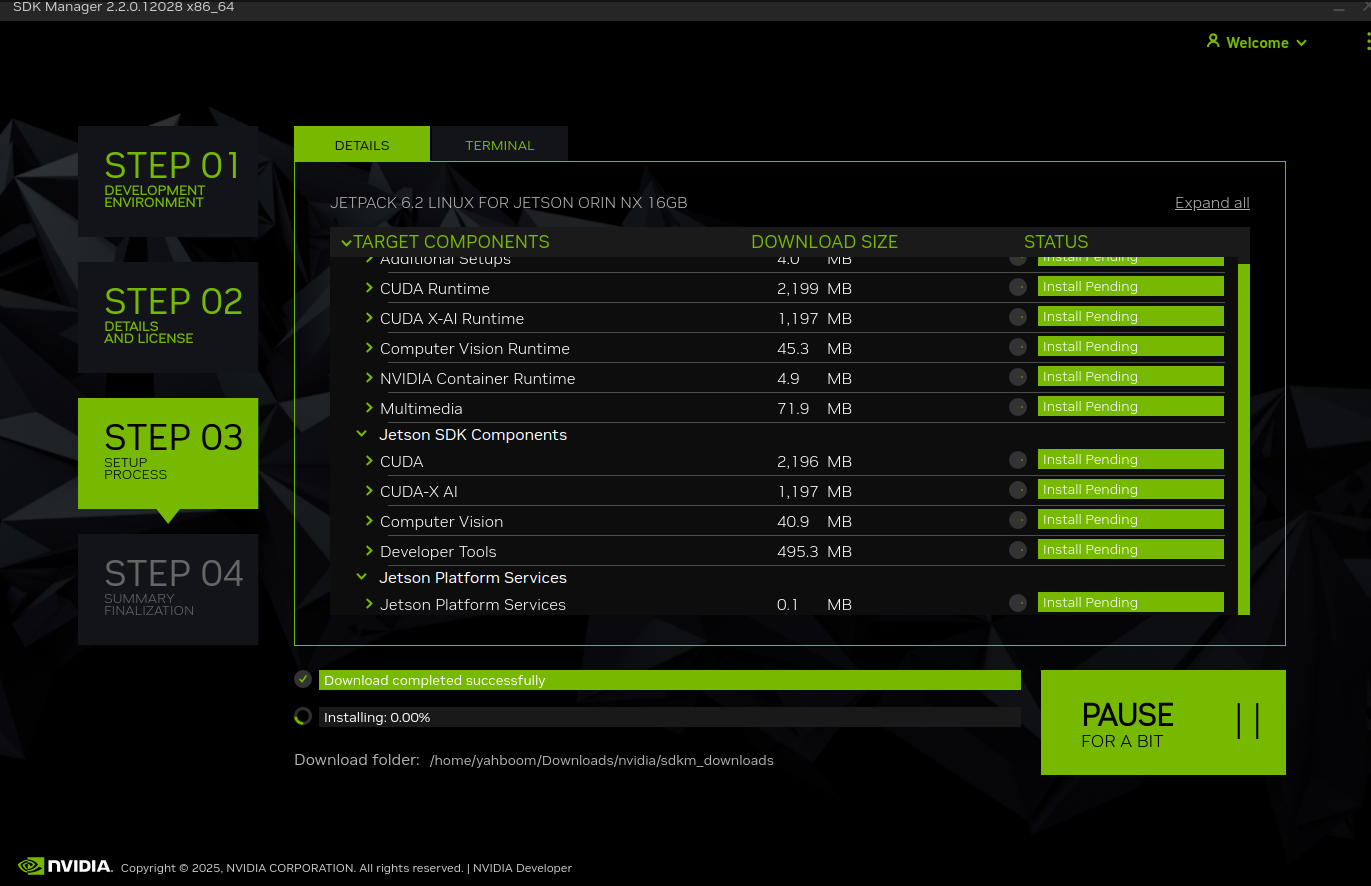
The entire installation process is relatively long, so you need to wait patiently. If the installation fails, you can restart the motherboard system and restart the SDK Manager installation:
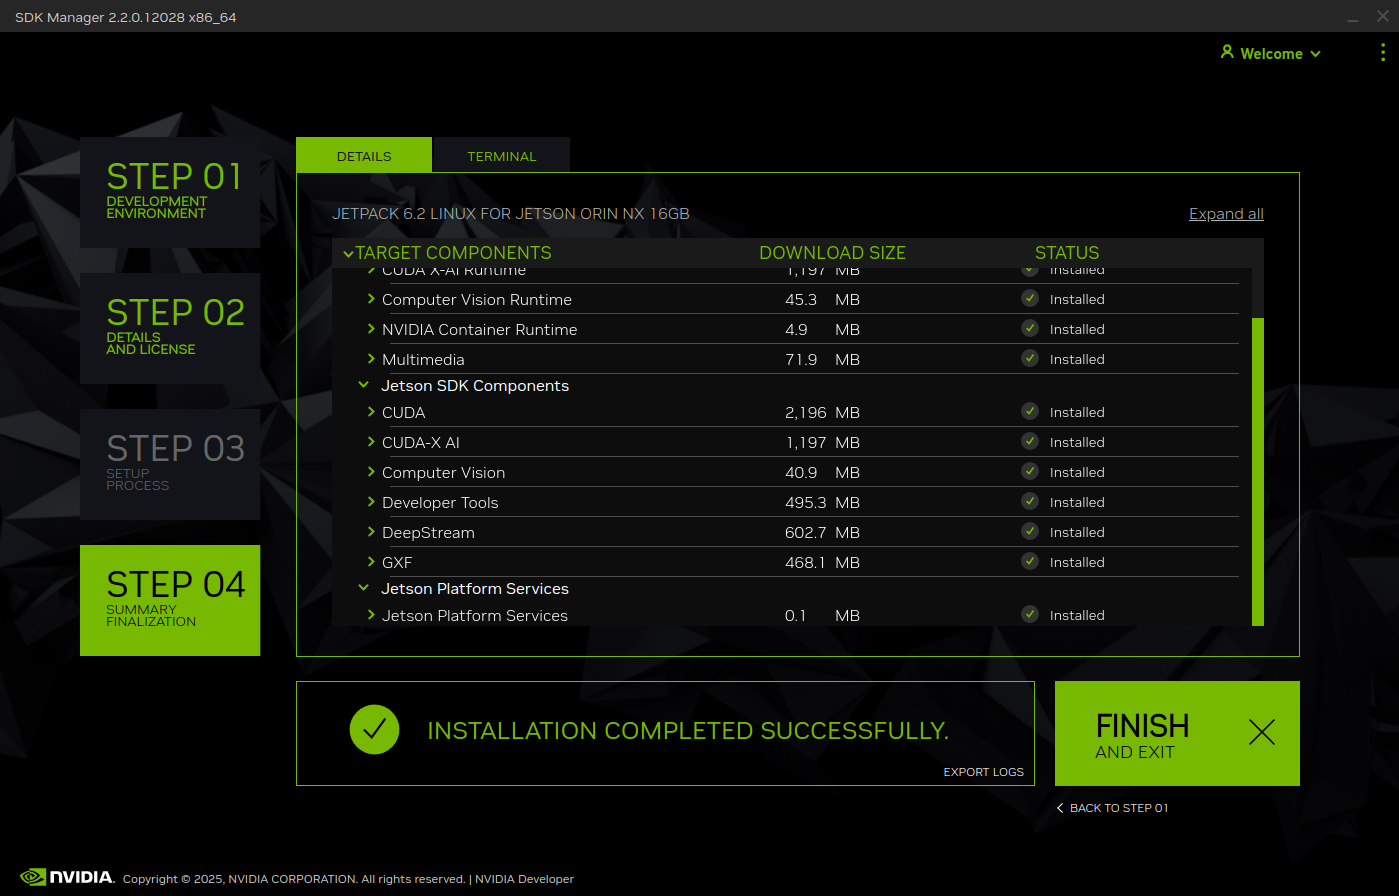
3.5, STEP4
4. Environment verification
Jtop tool
Use the following command to install Jtop:
xxxxxxxxxxsudo apt update && sudo apt upgradesudo apt install python3-pip -ysudo pip3 install -U jetson-stats
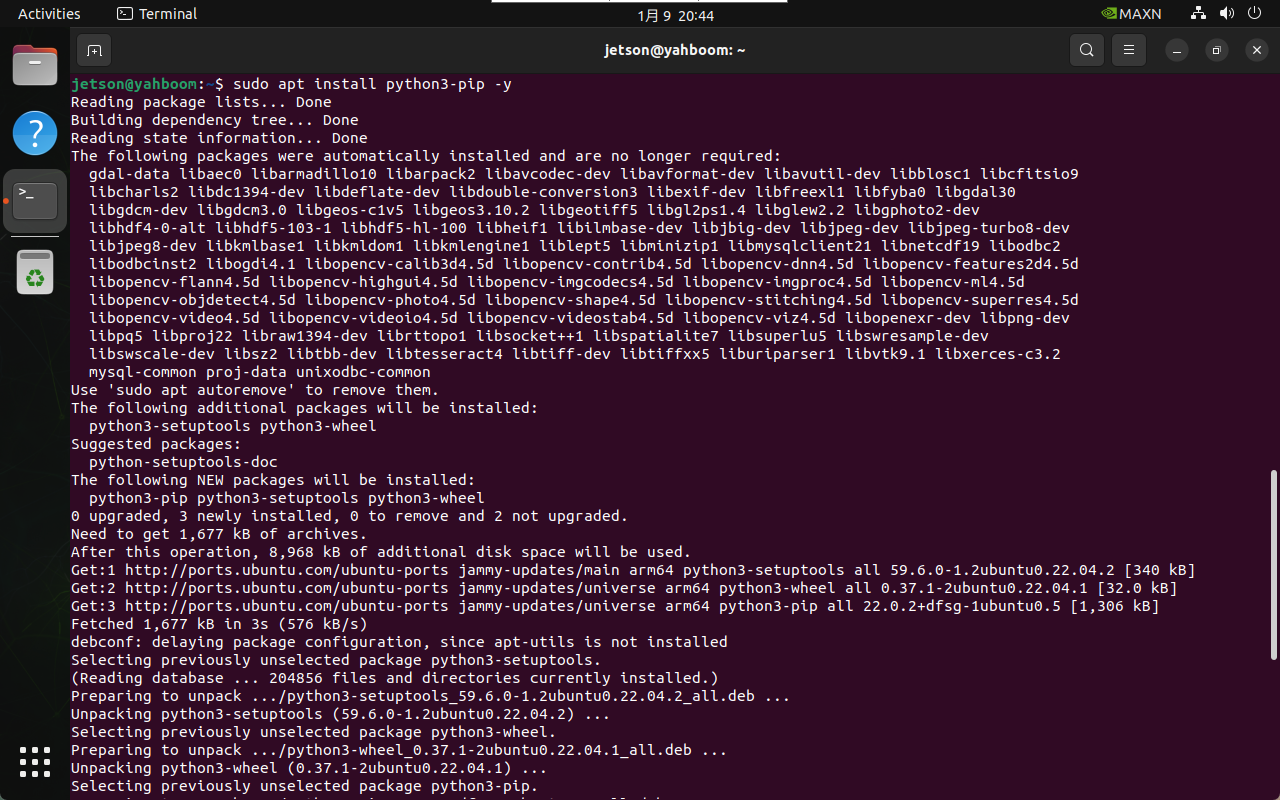

Note: After the installation is complete, you need to restart the system!
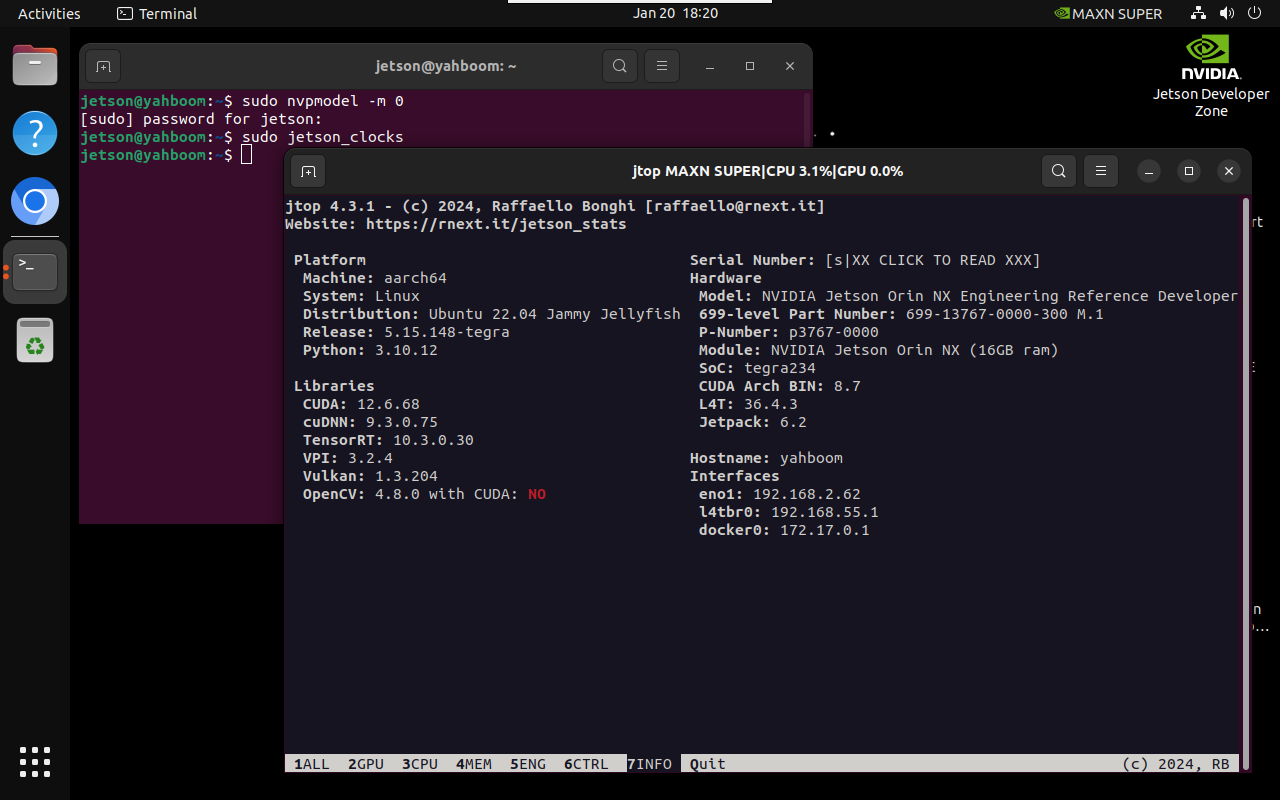
Best performance mode
Enable MAX power mode
xxxxxxxxxxsudo nvpmodel -m 0
Enable Jetson clocks: CPU and GPU cores run at maximum frequency
xxxxxxxxxxsudo jetson_clocks
Use Jtop tool to view system information:
xxxxxxxxxxjtop