OCR character detection
OCR character detectionRoutine Experiment EffectCode ExplanationCode structurePart of the codeBrief description of human detection algorithmWhat is OCR?Common application scenarios
Routine Experiment Effect
In this section, we will learn how to use K230 to implement OCR character detection.
The example code is in [Source code/09.Scene/01.ocr_det.py]
We open the code in this section (or copy the complete code below), click the run button, and then point the camera at the place where the text exists.
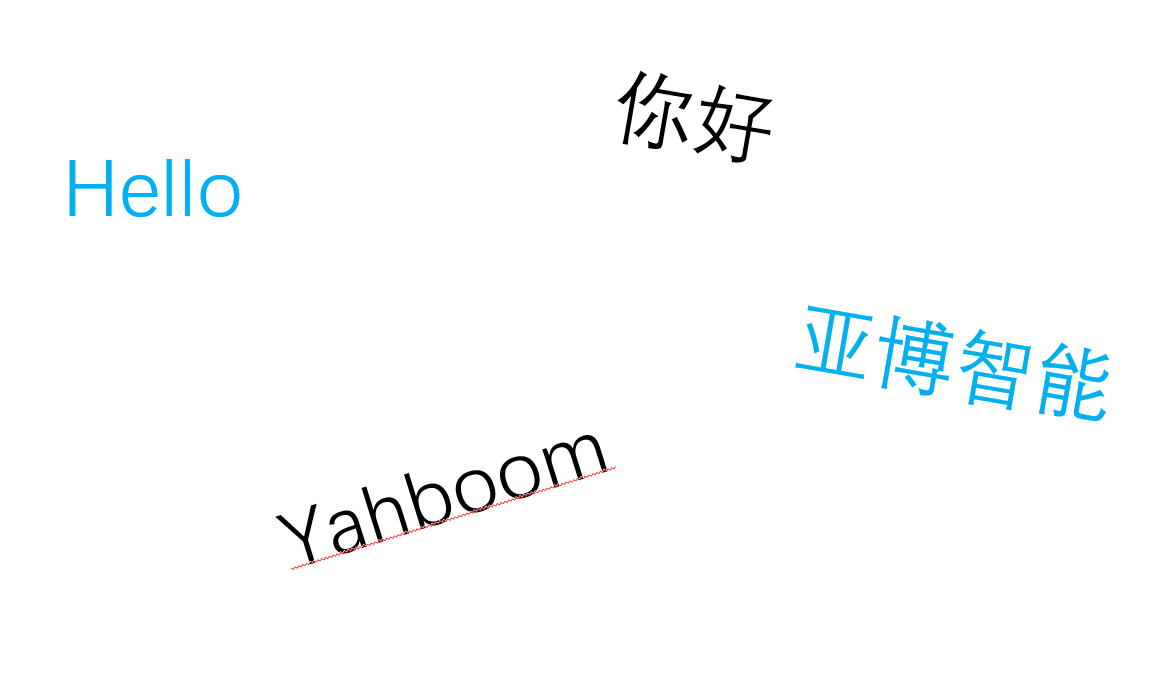
【Original image】
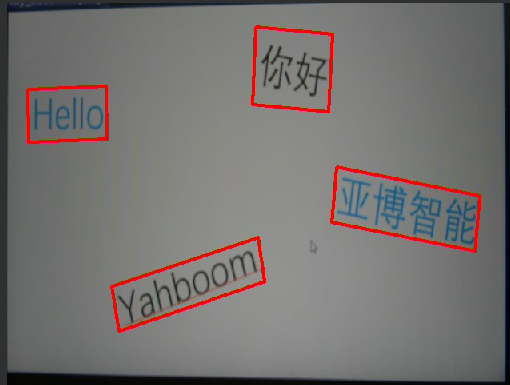
【Detection effect】
Serial port output function has been added
After the OCR string is detected, the following format will be sent to the serial port output
$x1,y1,x2,y2#
The '$' represents the beginning of the data, and the '#' represents the end of the data.
x1, y1, x2, y2 are the positions of an edge line of OCR (resolution is 640*480)
- Each time an OCR string is recognized, four edges are output four times
Code Explanation
Code structure
Initialization Phase:
- Load model
- Set parameters
- Initialize detector
- Initialize AI2D processor
Preprocessing Flow:
- Configure preprocessing
- Image padding
- Image Scaling/Resize
Inference Flow:
- Run detection
- Postprocessing results
- Get detection boxes
Drawing Flow:
- Clear display
- Draw detection boxes
- Update display
Exit Flow:
- Exit demo
- Clean up resources
Part of the code
For the complete code, please refer to the file [Source Code/09.Scene/01.ocr_det.py]
xxxxxxxxxx# 自定义OCR检测类 / Custom OCR detection classclass OCRDetectionApp(AIBase): def __init__(self, kmodel_path, model_input_size, mask_threshold=0.5, box_threshold=0.2, rgb888p_size=[224, 224], display_size=[1920, 1080], debug_mode=0): """ 初始化OCR检测应用 Initialize OCR detection application 参数/Parameters: kmodel_path: 模型文件路径 / Path to the kmodel file model_input_size: 模型输入尺寸 / Input size for the model mask_threshold: 文本分割掩码阈值 / Threshold for text segmentation mask box_threshold: 文本框检测阈值 / Threshold for text box detection rgb888p_size: 摄像头输入尺寸 / Camera input resolution display_size: 显示分辨率 / Display resolution debug_mode: 调试模式级别 / Debug mode level """ super().__init__(kmodel_path, model_input_size, rgb888p_size, debug_mode) self.kmodel_path = kmodel_path # 模型输入分辨率 / Model input resolution self.model_input_size = model_input_size # 分类阈值 / Classification thresholds self.mask_threshold = mask_threshold # 掩码阈值 / Mask threshold self.box_threshold = box_threshold # 边框阈值 / Box threshold # sensor给到AI的图像分辨率 / Image resolution from sensor to AI # ALIGN_UP函数确保宽度是16的倍数 / ALIGN_UP function ensures width is a multiple of 16 self.rgb888p_size = [ALIGN_UP(rgb888p_size[0], 16), rgb888p_size[1]] # 显示分辨率 / Display resolution self.display_size = [ALIGN_UP(display_size[0], 16), display_size[1]] self.debug_mode = debug_mode # Ai2d实例,用于实现模型预处理 / Ai2d instance for model preprocessing self.ai2d = Ai2d(debug_mode) # 设置Ai2d的输入输出格式和类型 / Set input/output format and type for Ai2d # NCHW格式:[batch, channel, height, width] / NCHW format: [batch, channel, height, width] self.ai2d.set_ai2d_dtype(nn.ai2d_format.NCHW_FMT, nn.ai2d_format.NCHW_FMT, np.uint8, np.uint8) def config_preprocess(self, input_image_size=None): """ 配置预处理操作 Configure preprocessing operations 参数/Parameters: input_image_size: 可选的输入图像尺寸,默认使用rgb888p_size / Optional input image size, uses rgb888p_size by default """ with ScopedTiming("set preprocess config", self.debug_mode > 0): # 初始化ai2d预处理配置,默认为sensor给到AI的尺寸,可以通过设置input_image_size自行修改输入尺寸 # Initialize ai2d preprocessing configuration, default is the size from sensor to AI, # you can modify the input size by setting input_image_size ai2d_input_size = input_image_size if input_image_size else self.rgb888p_size # 获取padding参数 / Get padding parameters top, bottom, left, right = self.get_padding_param() # 设置padding / Set padding self.ai2d.pad([0, 0, 0, 0, top, bottom, left, right], 0, [0, 0, 0]) # 设置resize方法 / Set resize method self.ai2d.resize(nn.interp_method.tf_bilinear, nn.interp_mode.half_pixel) # 构建ai2d处理Pipeline / Build ai2d processing pipeline self.ai2d.build([1, 3, ai2d_input_size[1], ai2d_input_size[0]], [1, 3, self.model_input_size[1], self.model_input_size[0]]) def postprocess(self, results): """ 后处理函数,处理模型输出结果 Postprocessing function to handle model output results 参数/Parameters: results: 模型的原始输出 / Raw output from the model 返回/Returns: all_boxes_pos: 检测到的文本框坐标列表 / List of detected text box coordinates """ with ScopedTiming("postprocess", self.debug_mode > 0): # 将CHW格式转换为HWC格式 / Convert CHW format to HWC format hwc_array = self.chw2hwc(self.cur_img) # 使用aicube封装的接口ocr_post_process做后处理,返回文本框位置 # Use aicube's ocr_post_process interface for post-processing, returns text box positions # det_boxes结构为[[crop_array_nhwc, [p1_x, p1_y, p2_x, p2_y, p3_x, p3_y, p4_x, p4_y]], ...] # det_boxes structure: [[crop_array_nhwc, [p1_x, p1_y, p2_x, p2_y, p3_x, p3_y, p4_x, p4_y]], ...] det_boxes = aicube.ocr_post_process( results[0][:, :, :, 0].reshape(-1), # 取模型输出的第一个通道 / Take the first channel of model output hwc_array.reshape(-1), # 原始图像 / Original image self.model_input_size, # 模型输入尺寸 / Model input size self.rgb888p_size, # 原始图像尺寸 / Original image size self.mask_threshold, # 掩码阈值 / Mask threshold self.box_threshold # 边框阈值 / Box threshold ) # 提取所有文本框位置 / Extract all text box positions all_boxes_pos = [] for det_box in det_boxes: all_boxes_pos.append(det_box[1]) return all_boxes_pos def draw_result(self, pl, all_boxes_pos): """ 绘制检测结果 Draw detection results 参数/Parameters: pl: PipeLine实例 / PipeLine instance all_boxes_pos: 所有检测到的文本框位置 / All detected text box positions """ with ScopedTiming("display_draw", self.debug_mode > 0): # 清除OSD图像 / Clear OSD image pl.osd_img.clear() # 遍历所有检测到的文本框 / Iterate through all detected text boxes for i in range(len(all_boxes_pos)): # 一次绘制四条边,得到文本检测的四边形 / Draw four edges to get the quadrilateral of text detection for j in range(4): # 计算缩放后的坐标 / Calculate scaled coordinates # 当前点坐标 / Current point coordinates x1 = all_boxes_pos[i][2 * j] * self.display_size[0] // self.rgb888p_size[0] y1 = all_boxes_pos[i][2 * j + 1] * self.display_size[1] // self.rgb888p_size[1] # 下一个点坐标(循环到第一个点) / Next point coordinates (cycle back to the first point) x2 = all_boxes_pos[i][(2 * j + 2) % 8] * self.display_size[0] // self.rgb888p_size[0] y2 = all_boxes_pos[i][(2 * j + 3) % 8] * self.display_size[1] // self.rgb888p_size[1] # 绘制线段 / Draw line segment pl.osd_img.draw_line(int(x1), int(y1), int(x2), int(y2), color=(255, 255, 0, 0), thickness=4) def get_padding_param(self): """ 计算padding参数以保持图像比例 Calculate padding parameters to maintain image aspect ratio 返回/Returns: top, bottom, left, right: padding参数 / padding parameters """ # 目标尺寸 / Target dimensions dst_w = self.model_input_size[0] dst_h = self.model_input_size[1] # 输入尺寸 / Input dimensions input_width = self.rgb888p_size[0] input_high = self.rgb888p_size[1] # 计算宽高缩放比例 / Calculate width and height scaling ratios ratio_w = dst_w / input_width ratio_h = dst_h / input_high # 选择较小的比例以保证完整图像可见 / Choose the smaller ratio to ensure the entire image is visible if ratio_w < ratio_h: ratio = ratio_w else: ratio = ratio_h # 计算缩放后的新尺寸 / Calculate new dimensions after scaling new_w = (int)(ratio * input_width) new_h = (int)(ratio * input_high) # 计算需要填充的像素数 / Calculate the number of pixels to pad dw = (dst_w - new_w) / 2 dh = (dst_h - new_h) / 2 # 计算padding参数 / Calculate padding parameters # 这里设置top和left为0,只在bottom和right进行padding # Here, set top and left to 0, only pad at bottom and right top = (int)(round(0)) bottom = (int)(round(dh * 2 + 0.1)) left = (int)(round(0)) right = (int)(round(dw * 2 - 0.1)) return top, bottom, left, right def chw2hwc(self, features): """ 将CHW格式的数据转换为HWC格式 Convert data from CHW format to HWC format 参数/Parameters: features: CHW格式的数据 / Data in CHW format 返回/Returns: hwc_array: HWC格式的数据 / Data in HWC format """ # 获取原始形状 / Get original shape ori_shape = (features.shape[0], features.shape[1], features.shape[2]) # 将CHW reshape为C x (H*W) / Reshape CHW to C x (H*W) c_hw_ = features.reshape((ori_shape[0], ori_shape[1] * ori_shape[2])) # 转置为(H*W) x C / Transpose to (H*W) x C hw_c_ = c_hw_.transpose() # 创建新数组 / Create new array new_array = hw_c_.copy() # 重塑为HWC格式 / Reshape to HWC format hwc_array = new_array.reshape((ori_shape[1], ori_shape[2], ori_shape[0])) # 释放临时变量以节省内存 / Release temporary variables to save memory del c_hw_ del hw_c_ del new_array return hwc_array
Brief description of human detection algorithm
What is OCR?
OCR (Optical Character Recognition) is an AI technology used to convert text in images into editable digital text.
Key features include:
- Recognize printed text
- Recognize handwritten text
- Processing multiple languages
- Identify table and document structure
Common application scenarios
- Document digitization
- ID card, driver's license and other documents recognition
- Invoice and bill processing
- Business card information extraction
- License Plate Recognition