Model Conversion
Note: Using the Docker container in the factory image does not require re-setting up the environment. The environment is already set up. Simply enter Docker and run the corresponding function commands according to the previous tutorial.
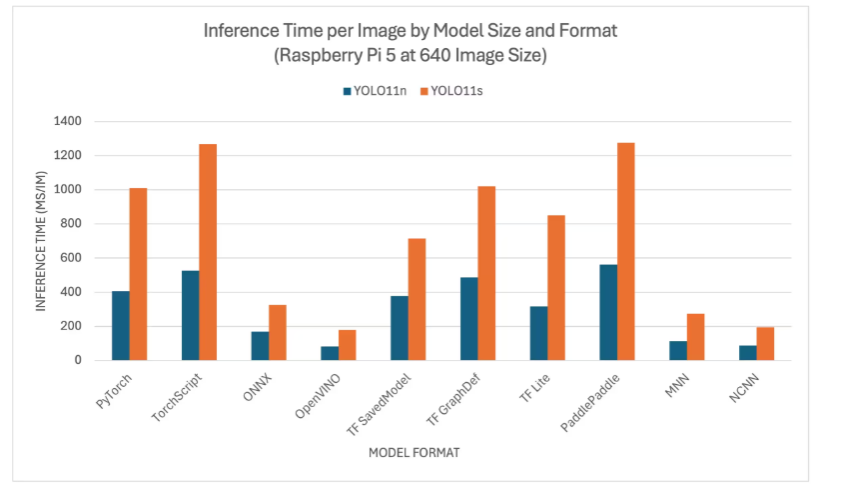
1. Raspberry Pi 5 YOLO11 (Benchmark)
YOLO11 benchmark data comes from the Ultralytics team, and is tested on models in various formats (data for reference only).
Officially, only YOLO11n and YOLO11s models were benchmarked. Other models are too large to run on Raspberry Pis and may not provide good performance.
2. Model Conversion
**Conversion cannot be performed on the Jetson Nano board in Docker because the PyTorch/Ultralytics dependencies are too new and the CPU/GPU instruction sets are incompatible. You can first export to TensorRT/ONNX on a Raspberry Pi or PC, then run it on the Jetson Nano:
Based on the test parameters for different model formats provided by the Ultralytics team, we found that using TensorRT for inference performance is the best!
xxxxxxxxxxThe first time you use the export mode for YOLO11, some dependencies will automatically be installed. Wait for it to complete!
2.1. CLI: pt → onnx, pt → ncnn
Convert the PyTorch model to onnx and ncnn
xxxxxxxxxxcd ~/ultralytics/ultralytics/
Run the following command in the terminal:
xxxxxxxxxxyolo export model=yolo11n.pt format=onnx# yolo export model=yolo11n-seg.pt format=onnx# yolo export model=yolo11n-pose.pt format=onnx# yolo export model=yolo11n-cls.pt format=onnx# yolo export model=yolo11n-obb.pt format=onnxyolo export model=yolo11n.pt format=ncnn# yolo export model=yolo11n-seg.pt format=ncnn# yolo export model=yolo11n-pose.pt format=ncnn# yolo export model=yolo11n-cls.pt format=ncnn# yolo export model=yolo11n-obb.pt format=ncnn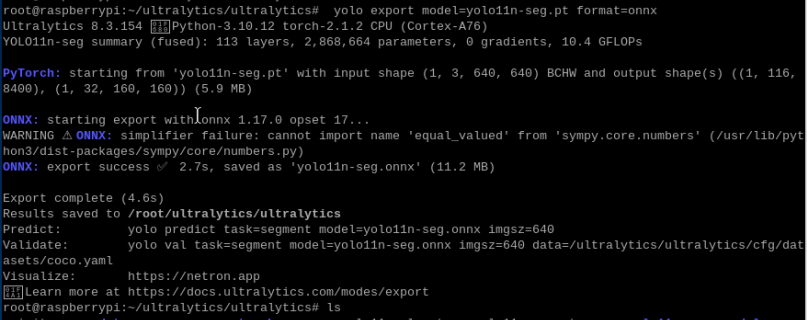

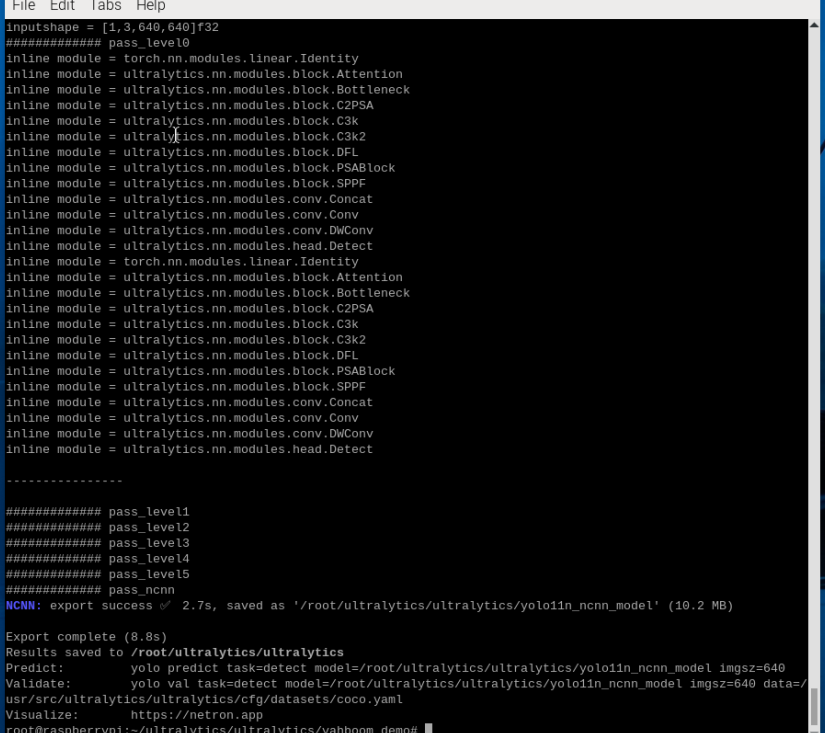
2.2. Python: pt → onnx → ncnn
Converting a PyTorch model to TensorRT: The conversion process automatically generates an ONNX model.
xxxxxxxxxxcd ~/ultralytics/ultralytics/yahboom_demo
xxxxxxxxxxpython3 model_pt_onnx_ncnn.py
Sample code:
xxxxxxxxxxfrom ultralytics import YOLO# Load a YOLO11n PyTorch modelmodel = YOLO("/root/ultralytics/ultralytics/yolo11n.pt")# model = YOLO("/root/ultralytics/ultralytics/yolo11n-seg.pt")# model = YOLO("/root/ultralytics/ultralytics/yolo11n-pose.pt")# model = YOLO("/root/ultralytics/ultralytics/yolo11n-cls.pt")# model = YOLO("/root/ultralytics/ultralytics/yolo11n-obb.pt")# Export the model to ONNX formatmodel.export(format="onnx") # This will create 'yolo11n.onnx' in the same directory# Export the model to NCNN formatmodel.export(format="ncnn") # Creates 'yolo11n_ncnn_model'3. Model Prediction
CLI Usage
Currently, the CLI only supports USB camera calls!
xxxxxxxxxxcd ~/ultralytics/ultralytics/
xxxxxxxxxxyolo predict model=yolo11n.onnx source=0 save=False show
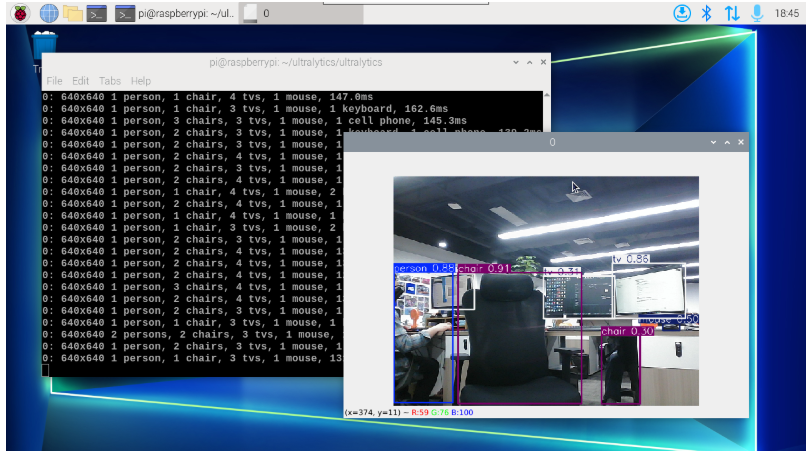
xxxxxxxxxxyolo predict model=yolo11n_ncnn_model source=0 save=False show