1. OpenClaw Deployment
1. OpenClaw Deployment1.1 OpenClaw Installation1.1.1 Reference Website for Installing OpenClaw1.1.2 Installing Using QuickStart1.1.3 Accessing the OpenClaw Control UI on a PC (Windows)1.2 Configuring Models (Must Read)1.2.1 Why Configure Models?1.2.2 How to Configure Models1. OpenRouter (OpenClaw's Built-in Service Provider)2. Bailian (Example: Third-Party Service Provider API)2.1. Applying for an API Key2.2. Modifying the Configuration File
This chapter will cover two parts:
- OpenClaw Installation
- Configuring the Model (OpenRouter / Bailian / Ollama)
1.1 OpenClaw Installation
1.1.1 Reference Website for Installing OpenClaw
OpenClaw Official Website: https://openclaw.ai/
Open Source Project Address: https://github.com/openclaw/openclaw
1.1.2 Installing Using QuickStart
We use the installation script provided by the official OpenClaw website:
xsudo apt install curl -ycurl -fsSL https://openclaw.ai/install.sh | bash#Currently, the one-click download script installs the latest OpenClaw version by default. This version may not be reliable or stable. If the installation fails or prompts a permission error after installation, you can use the following command to specify the version (refer to version 2026.3.28):curl -fsSL https://openclaw.ai/install.sh | bash -s -- --version 2026.3.28
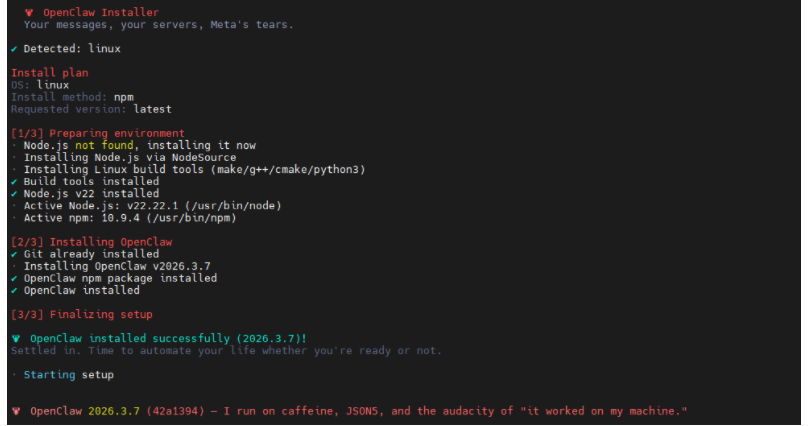
During this process, the installation script will automatically detect missing environments and assist us in installing them with one click.
During the installation process, use the arrow keys to select options, the spacebar to select/deselect, and the Enter key to confirm and configure.
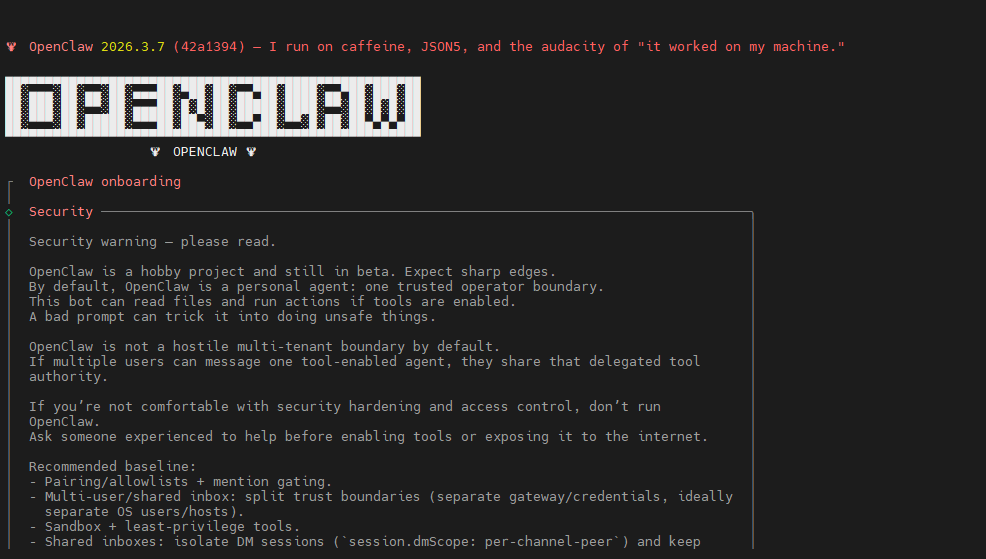
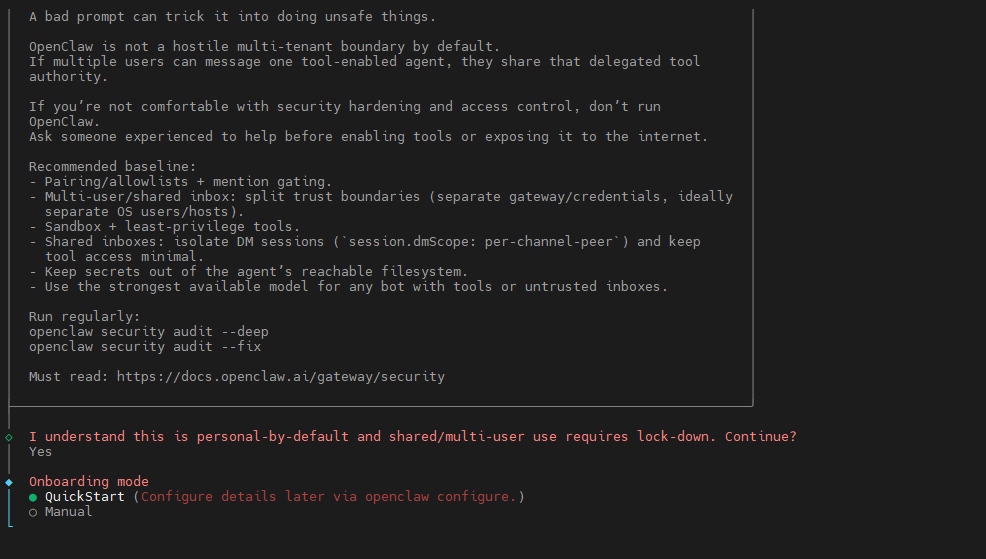
Here we'll use the QuickStart option to quickly complete the OpenClaw installation; we'll handle the detailed configuration later.
If you haven't applied for any API... For the Key section, simply select "Skip" for now; we will configure this later.
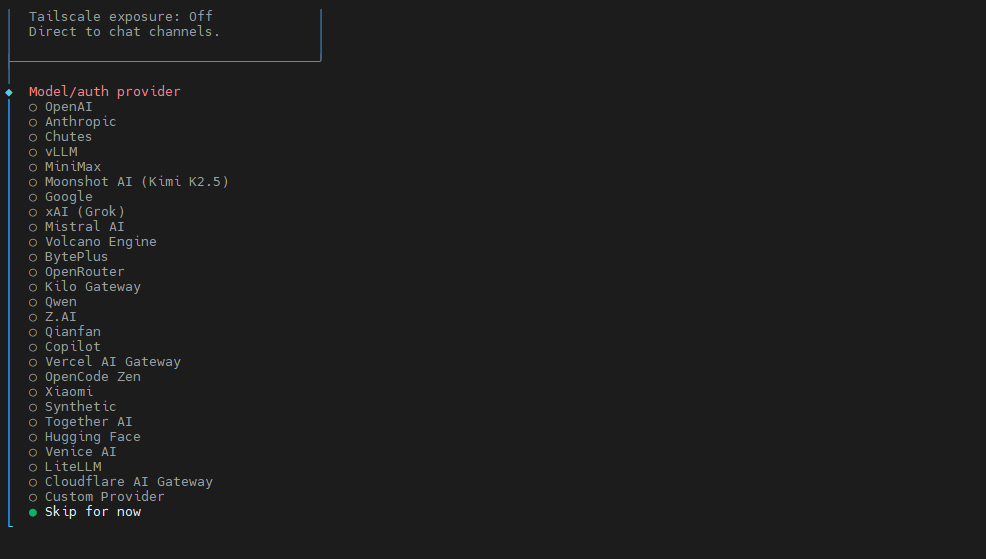
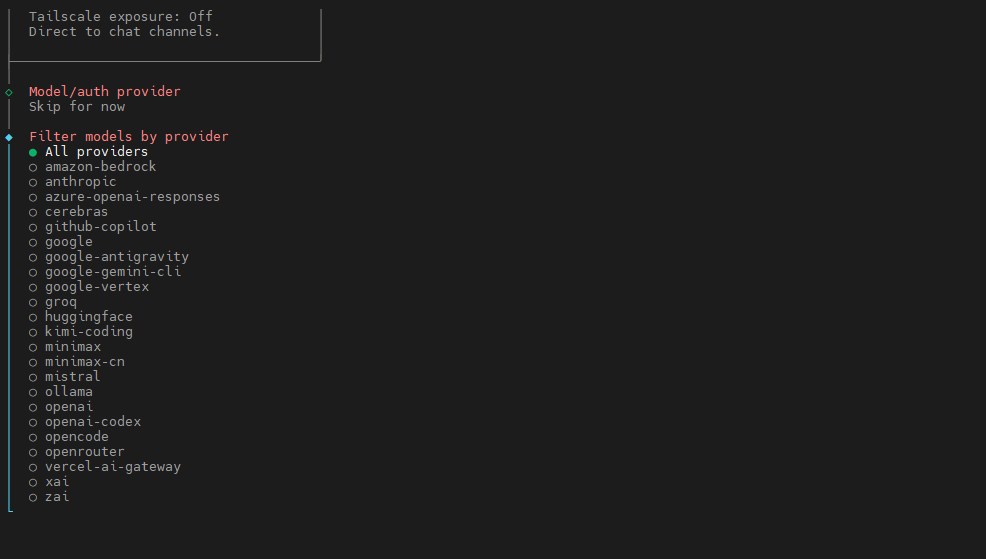
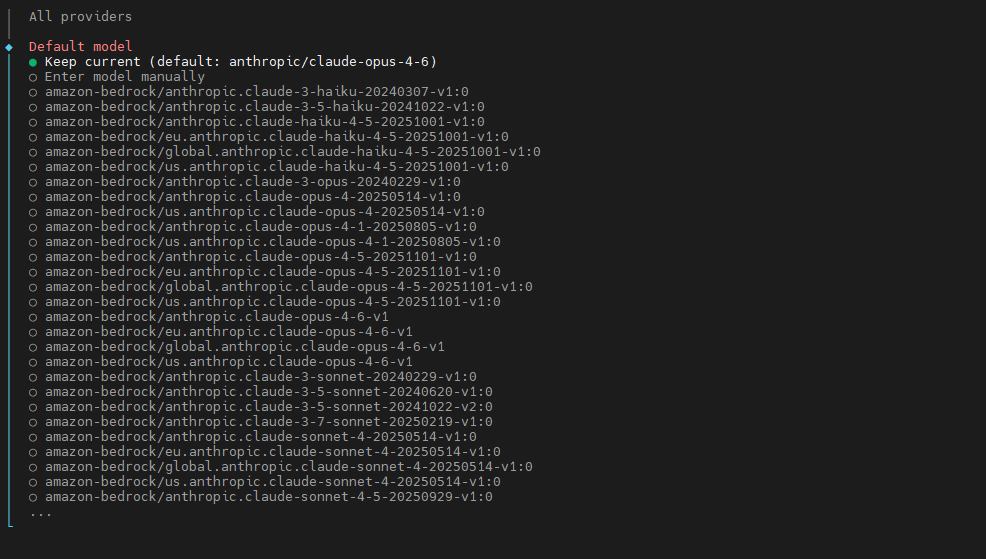
For the Model selection, we will keep the default settings (to be configured later).
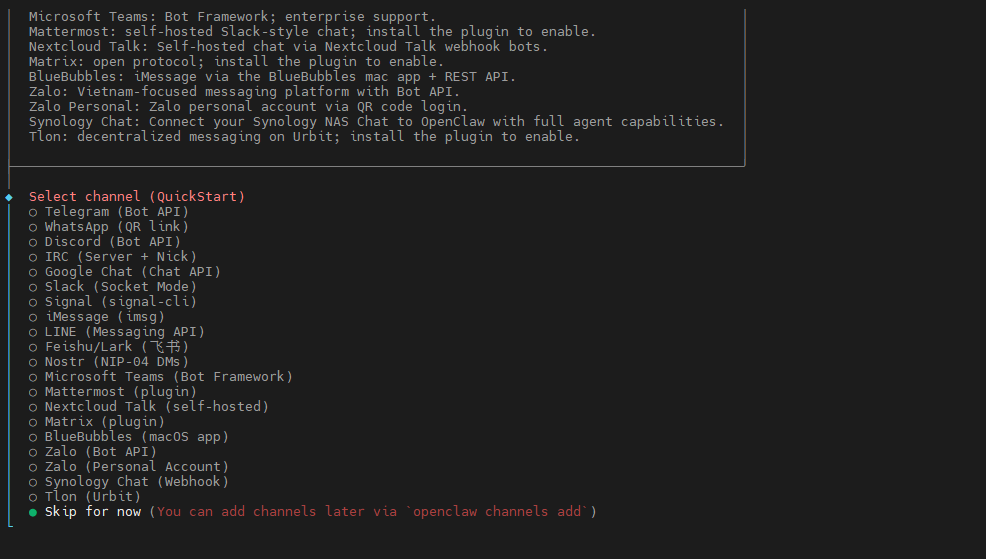
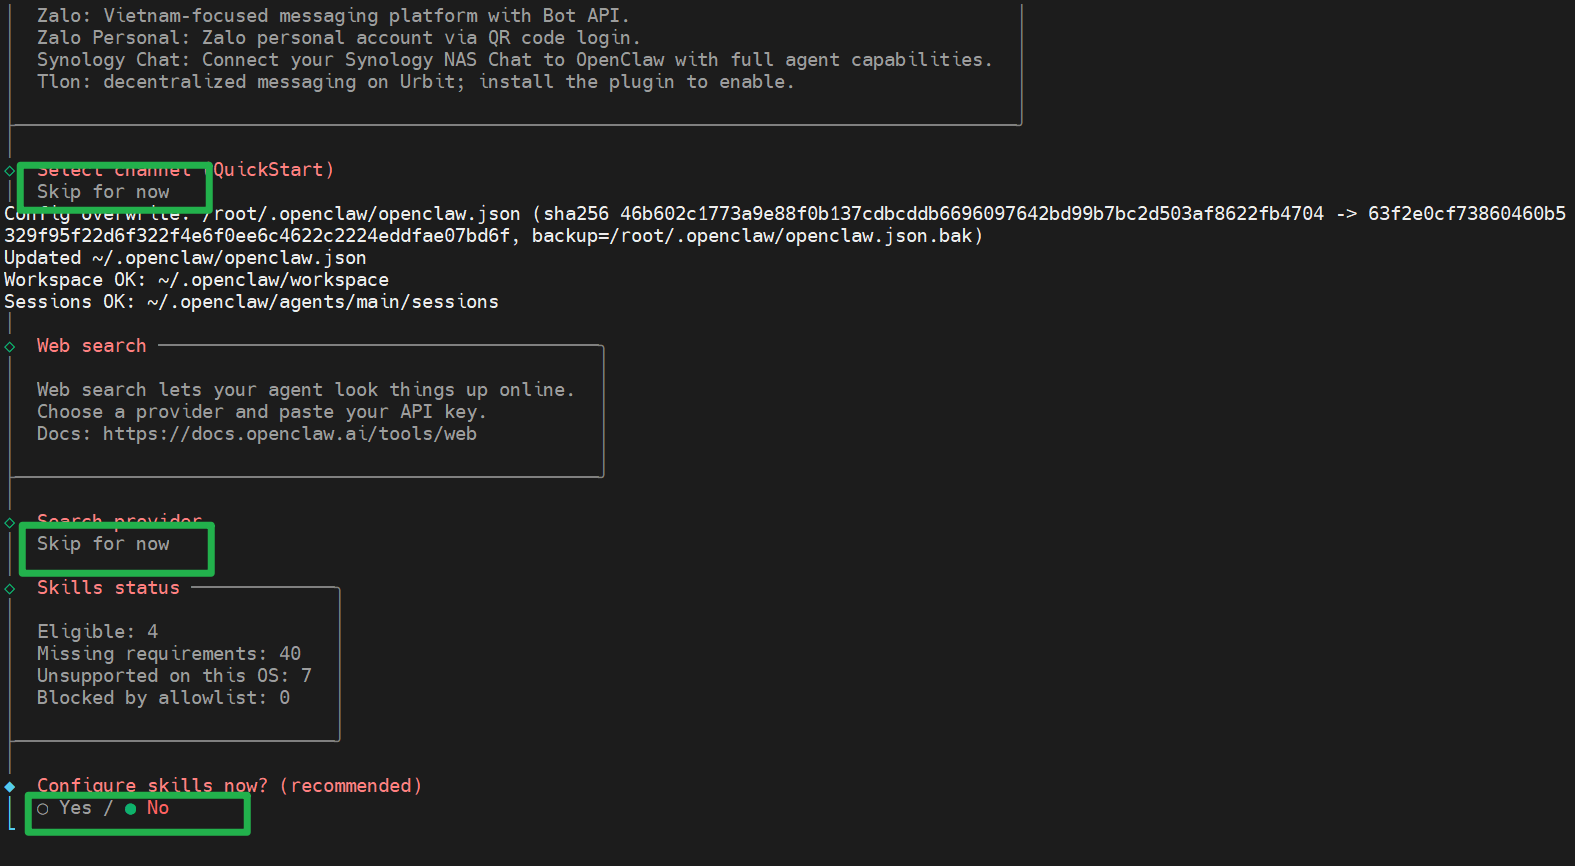
Regarding Channels—primarily used for communication with third-party applications—we will also skip this step for the time being.
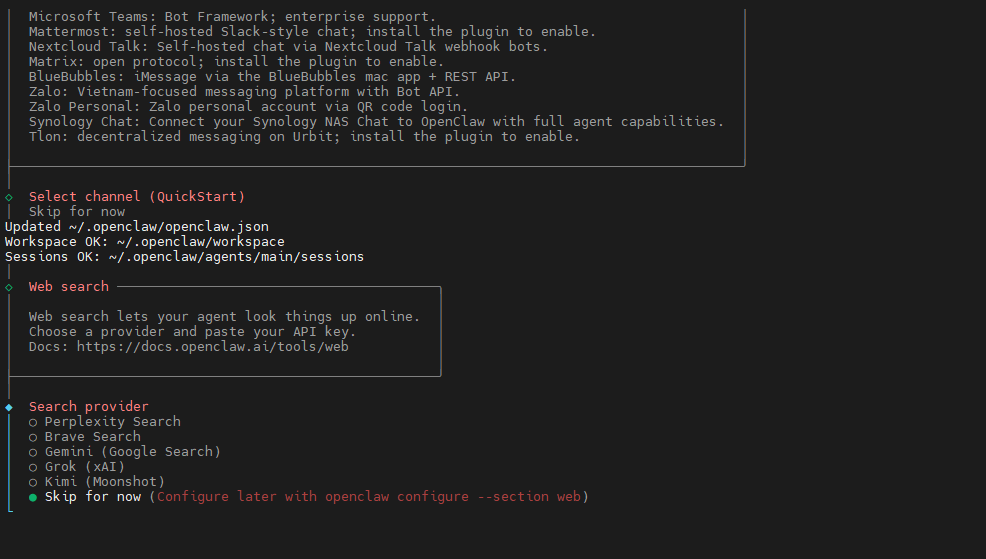
The "Search provider" refers to the API provider for search services; we will choose to skip this as well.
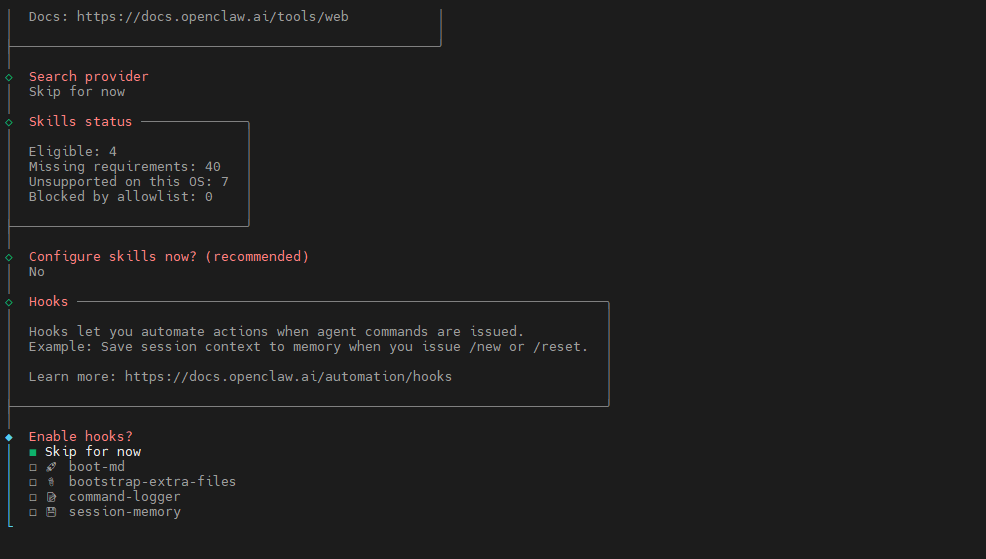
For "Skills" configuration, we choose not to set this up at this time (select "no").
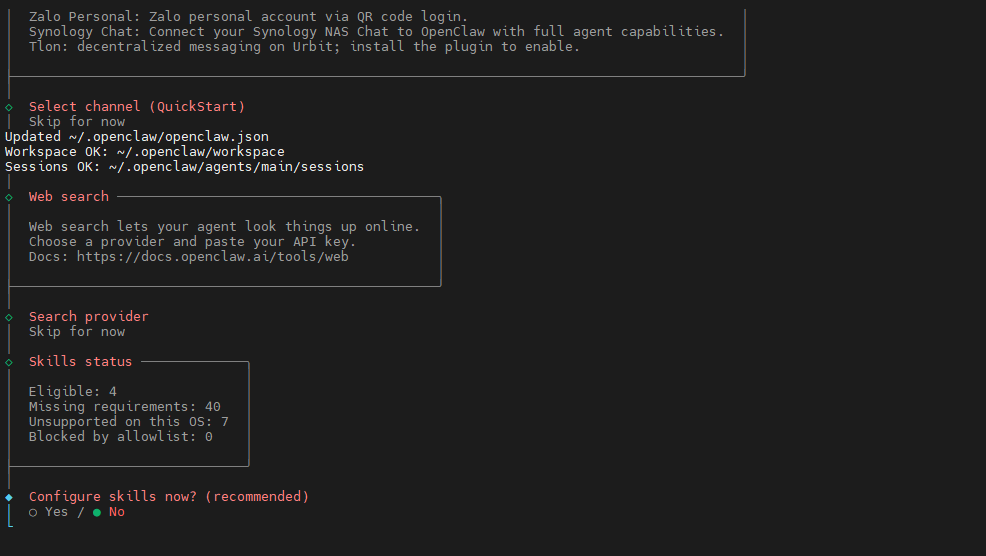
To configure "Hooks," press the Spacebar to select "Skip for now," then press Enter to confirm.
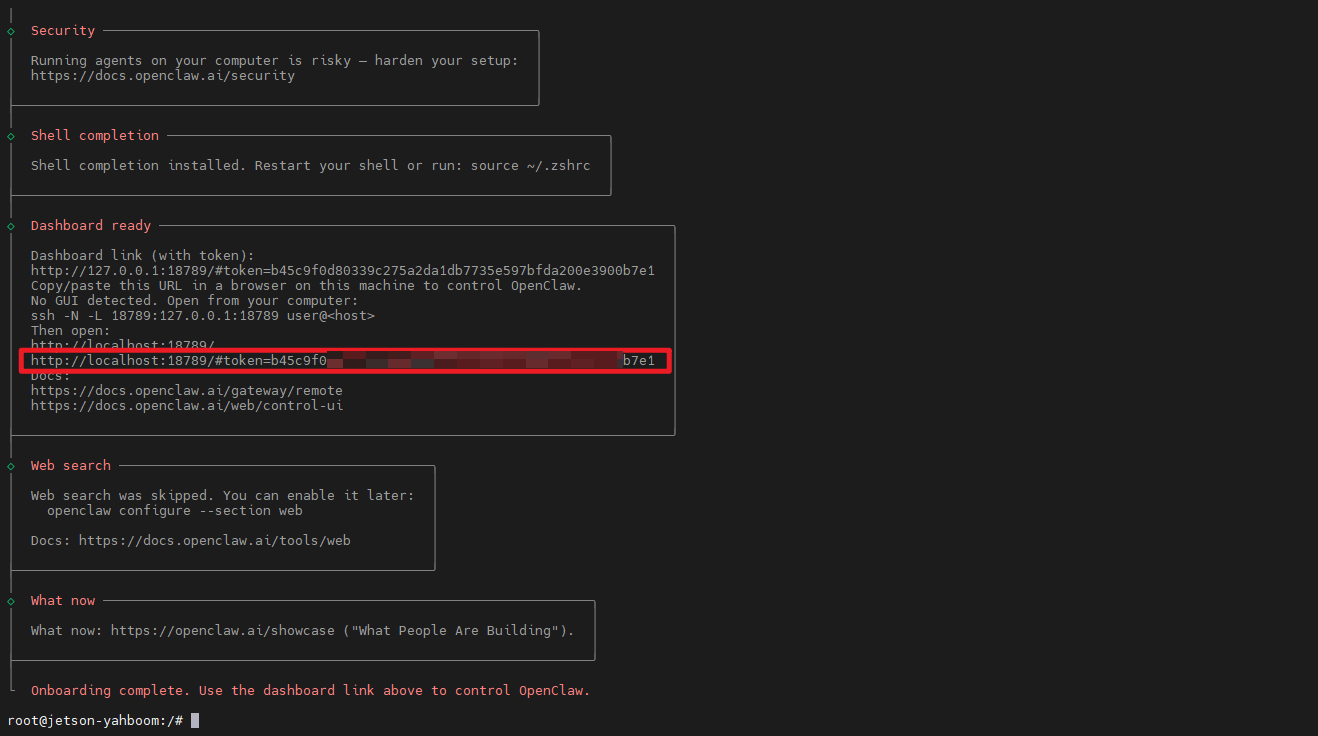
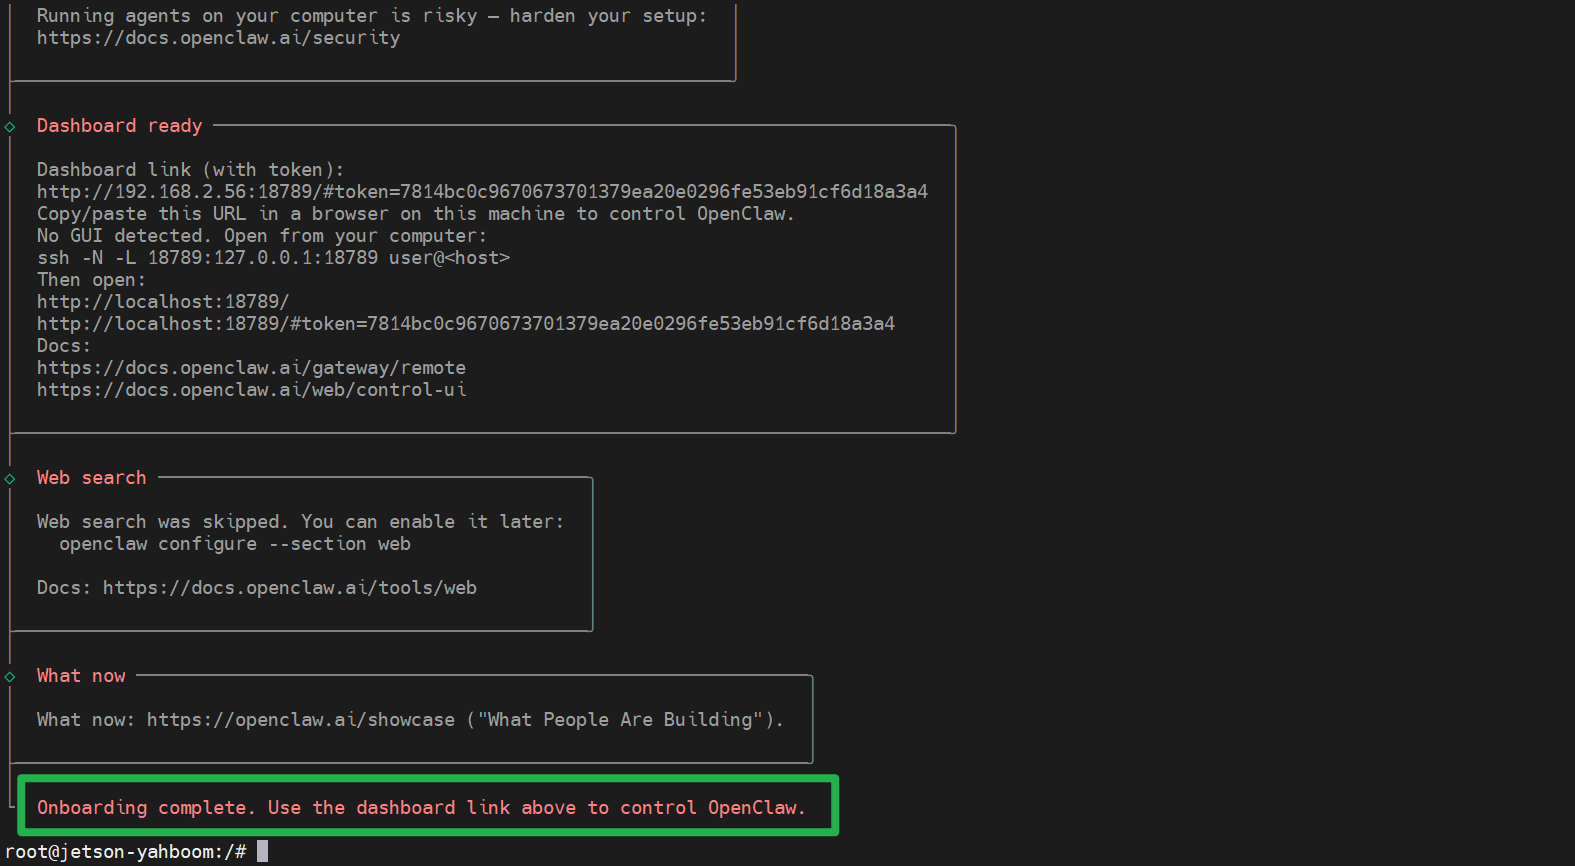
Wait for the installation to complete.
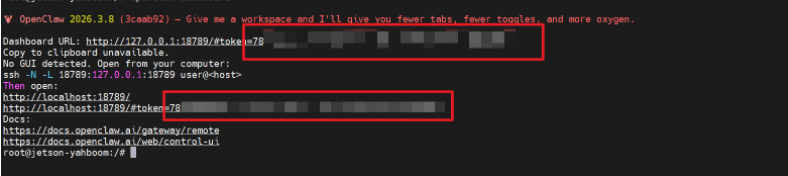
Once the installation is complete, copy this address for future reference. (Note: If the token appears to change in subsequent sections of this tutorial, it is because we later manually configured the Gateway; therefore, strictly speaking, you do not need to record this specific address here, as it will change later anyway.)
You must add the OpenClaw installation directory to your system's environment variables; otherwise, the openclaw command may not be recognized in your terminal.
xxxxxxxxxxecho 'export PATH="$(npm prefix -g)/bin:$PATH"' >> ~/.bashrcsource ~/.bashrc
1.1.3 Accessing the OpenClaw Control UI on a PC (Windows)
- Modify the OpenClaw configuration file to allow other devices within your local network to access OpenClaw.
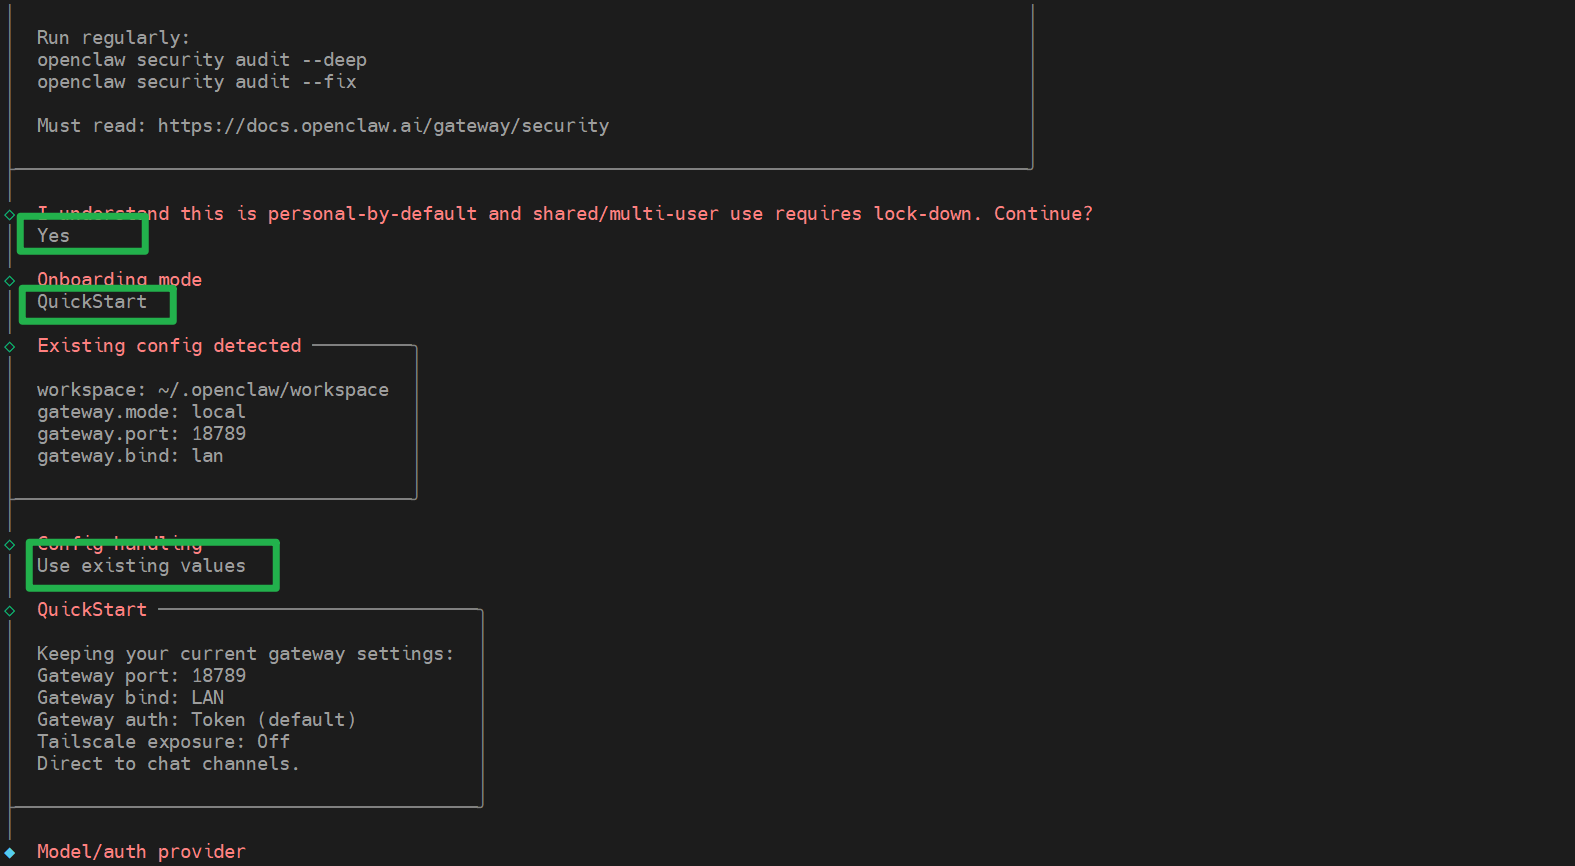
xxxxxxxxxxopenclaw configHere, follow the selections shown in the image below (use the Up/Down arrow keys to navigate, and press Enter to confirm).
With the exception of the "Token" field—which may differ from what is shown in our image—all other settings should match exactly. The critical setting here is the "Gateway bind mode" option, which must be set to "LAN" to enable other devices within your local area network to access your OpenClaw instance.
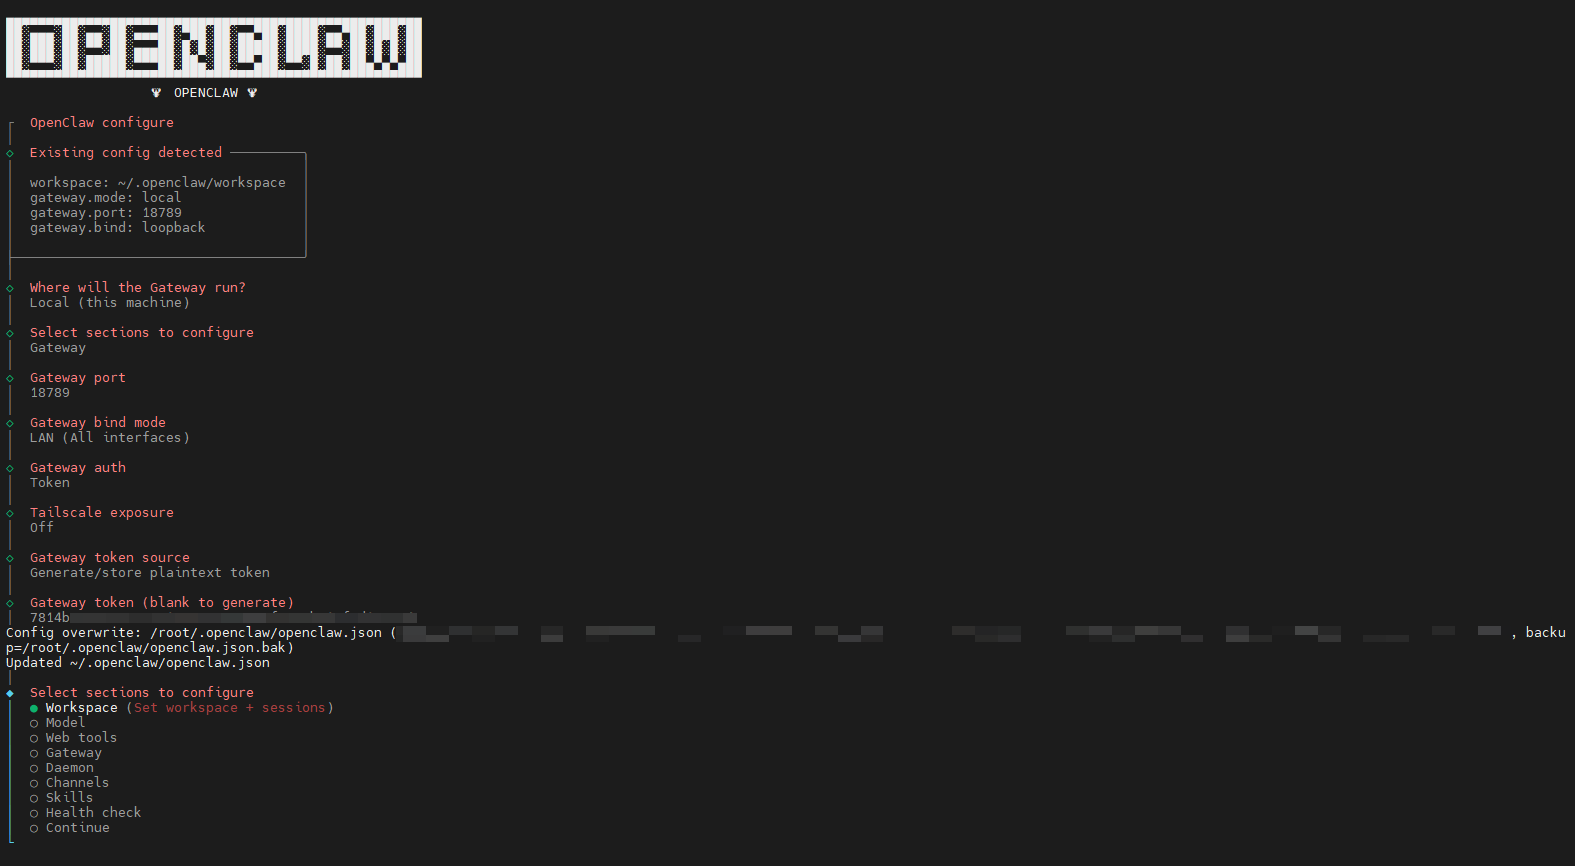
Finally, select "Continue" to confirm your choices, press Enter, and the configuration process is complete! 
Once the configuration is complete, let's first start the OpenClaw Gateway. Open a new terminal window and enter the following command:
xxxxxxxxxxopenclaw gateway
- Obtain the Access Token
The Token referred to here is the one generated during the configuration process we just completed. If you did not write it down, you can use the following command:
xxxxxxxxxxopenclaw dashboard
This command will display the token for you. Alternatively, you can locate the ~/.openclaw/openclaw.json file; your token will be stored within this configuration file.
- Configure the Connection Environment to the Jetson on a PC within the Same Local Network
Open a Command Prompt (Cmd) terminal on your PC. (Using Windows as an example: press Win + R to launch the Run utility, type cmd, and then press Enter.)

Enter the following command in the console:
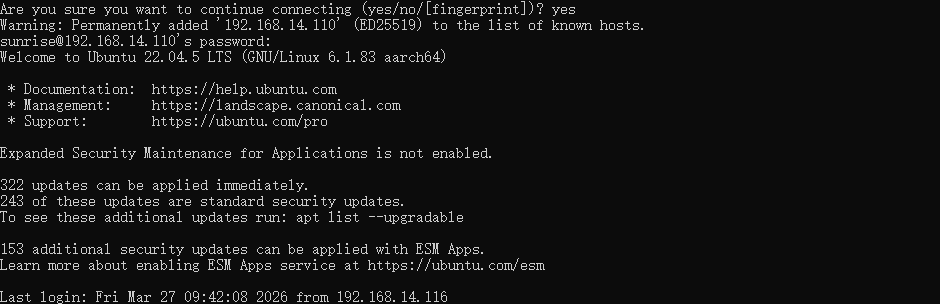
xxxxxxxxxxssh -L 18789:127.0.0.1:18789 sunrise@<sunrise-ip-address>Note: Replace <sunrise-ip-address> with the actual IP address of your RDK board.
After pressing Enter, you will be prompted to enter a password (the default is sunrise).
- Accessing via a Browser
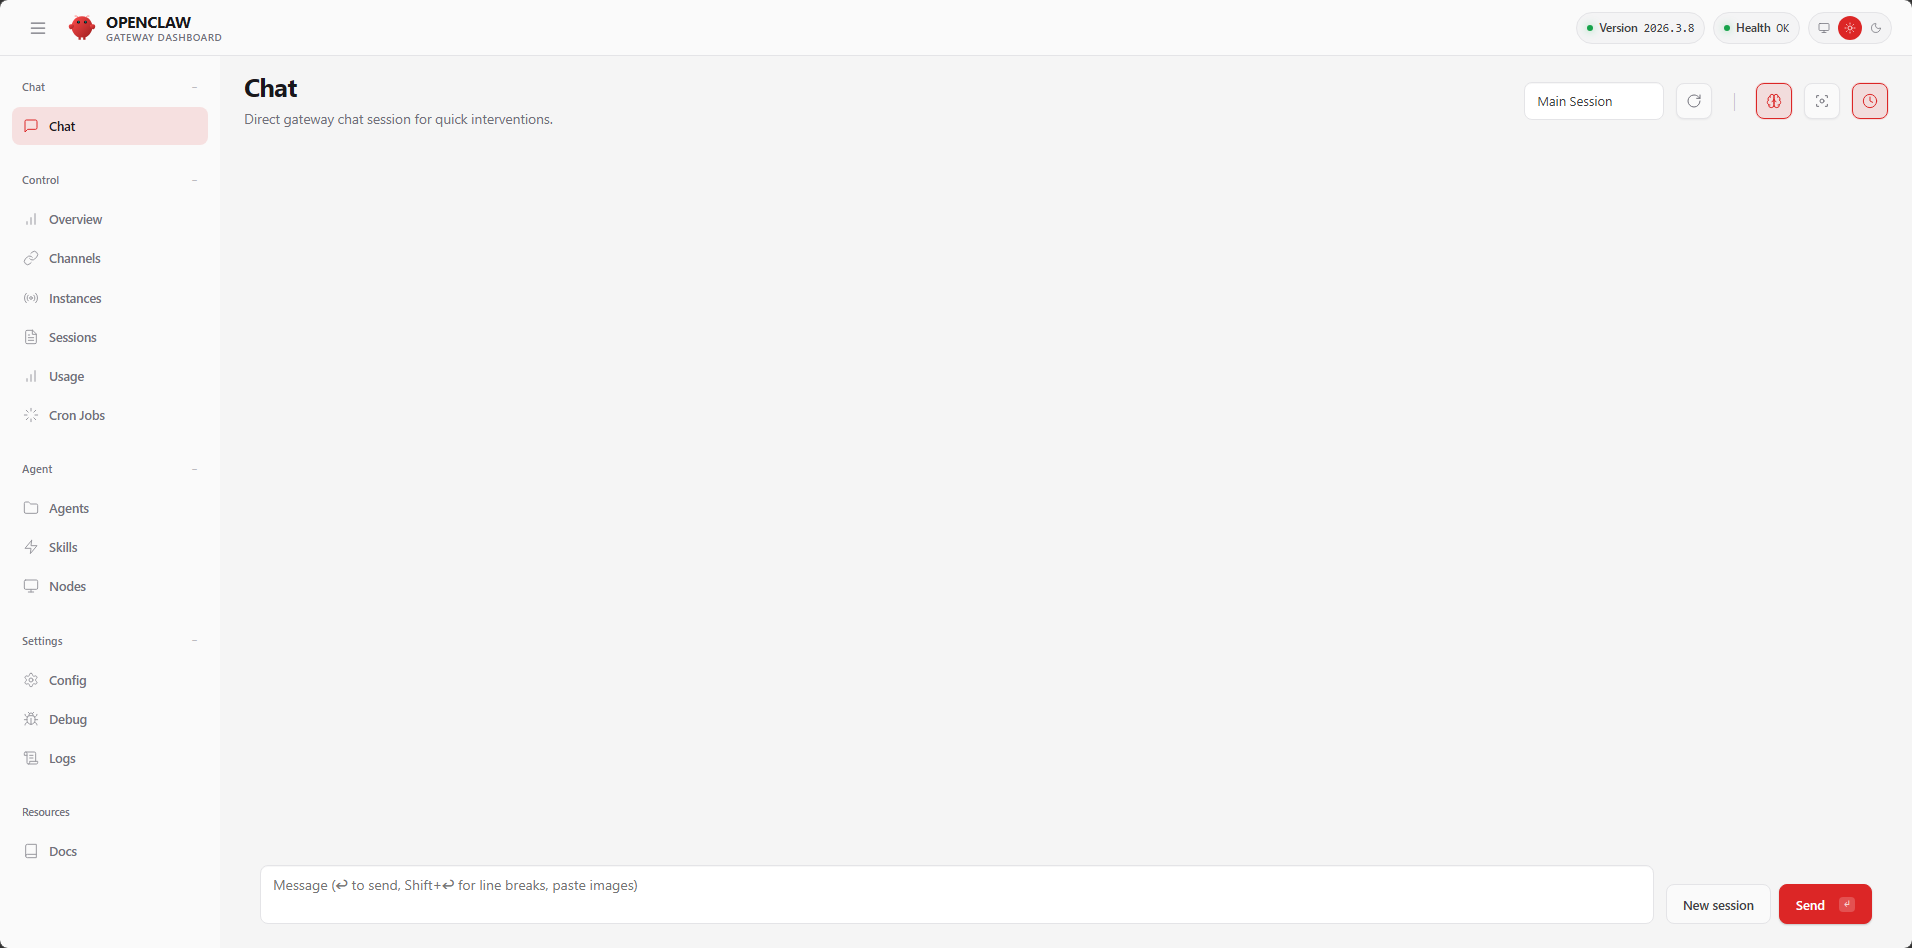
We open the browser on the PC, enter the IP+token address in the address bar (the address we just output from openclaw dashboard, https://127.0.0.1:18789/#token=xxxxxxxxxxxxx). When this interface appears, it means the deployment is successful!
1.2 Configuring Models (Must Read)
1.2.1 Why Configure Models?
OpenClaw acts as an AI Agent Gateway; by itself, it does not possess the "intelligent" capabilities of a large language model (LLM). We must configure an LLM to endow OpenClaw with the ability to think and comprehend.
1.2.2 How to Configure Models
Here, we will use three representative models as examples:
- OpenRouter (An OpenClaw built-in provider, accessible both domestically and internationally)
- Alibaba Cloud Bailian (An external LLM platform; requires manual configuration)
- Ollama (A local LLM)
Before beginning the configuration process, we must first start the OpenClaw Gateway. > If you did not exit the Gateway terminal after completing the deployment in the previous chapter, you may skip this step.
Enter the following command in your terminal:
xxxxxxxxxxopenclaw gateway

1. OpenRouter (OpenClaw's Built-in Service Provider)
For this section, you must have already applied for an OpenRouter API Key by following the instructions in the previous tutorial (please refer to the earlier guide: [Online Large Models / 4. OpenRouter Large Model API Aggregation Platform]).
The format of an OpenRouter API Key typically looks like this: sk-or-v1-b3exxxxxx4xxxxxxxxxxxxxxxxxxxxxxxxxxxxxxxxcddf81d9.
We will once again use the initial "onboard" wizard to configure the settings:
xxxxxxxxxxopenclaw onboard
Please select the options exactly as shown in my screenshots below:
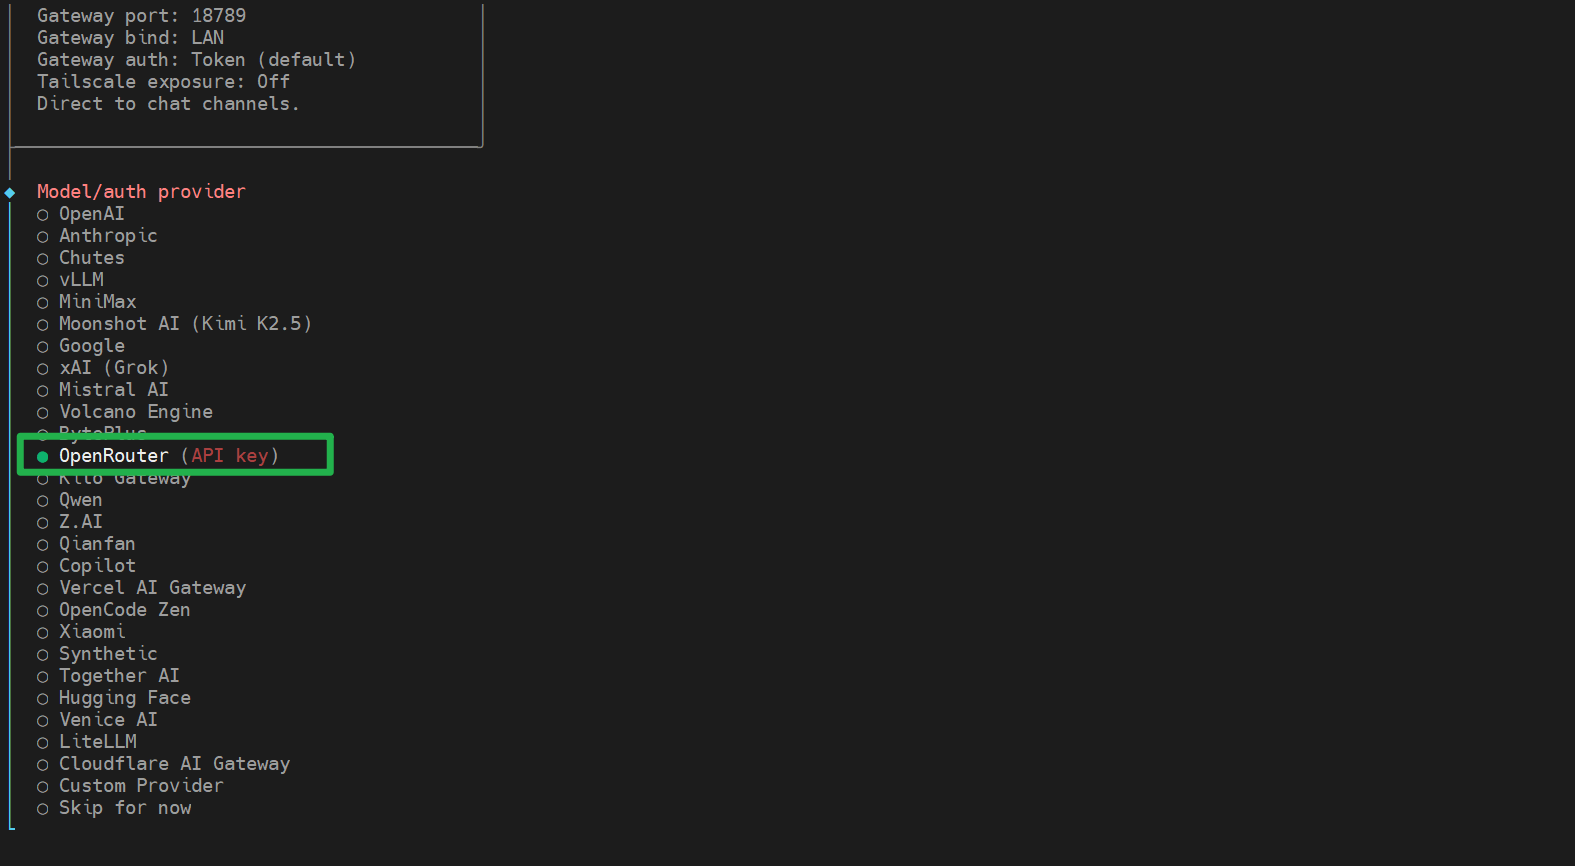
Next, enter the API Key you obtained and press Enter to confirm.

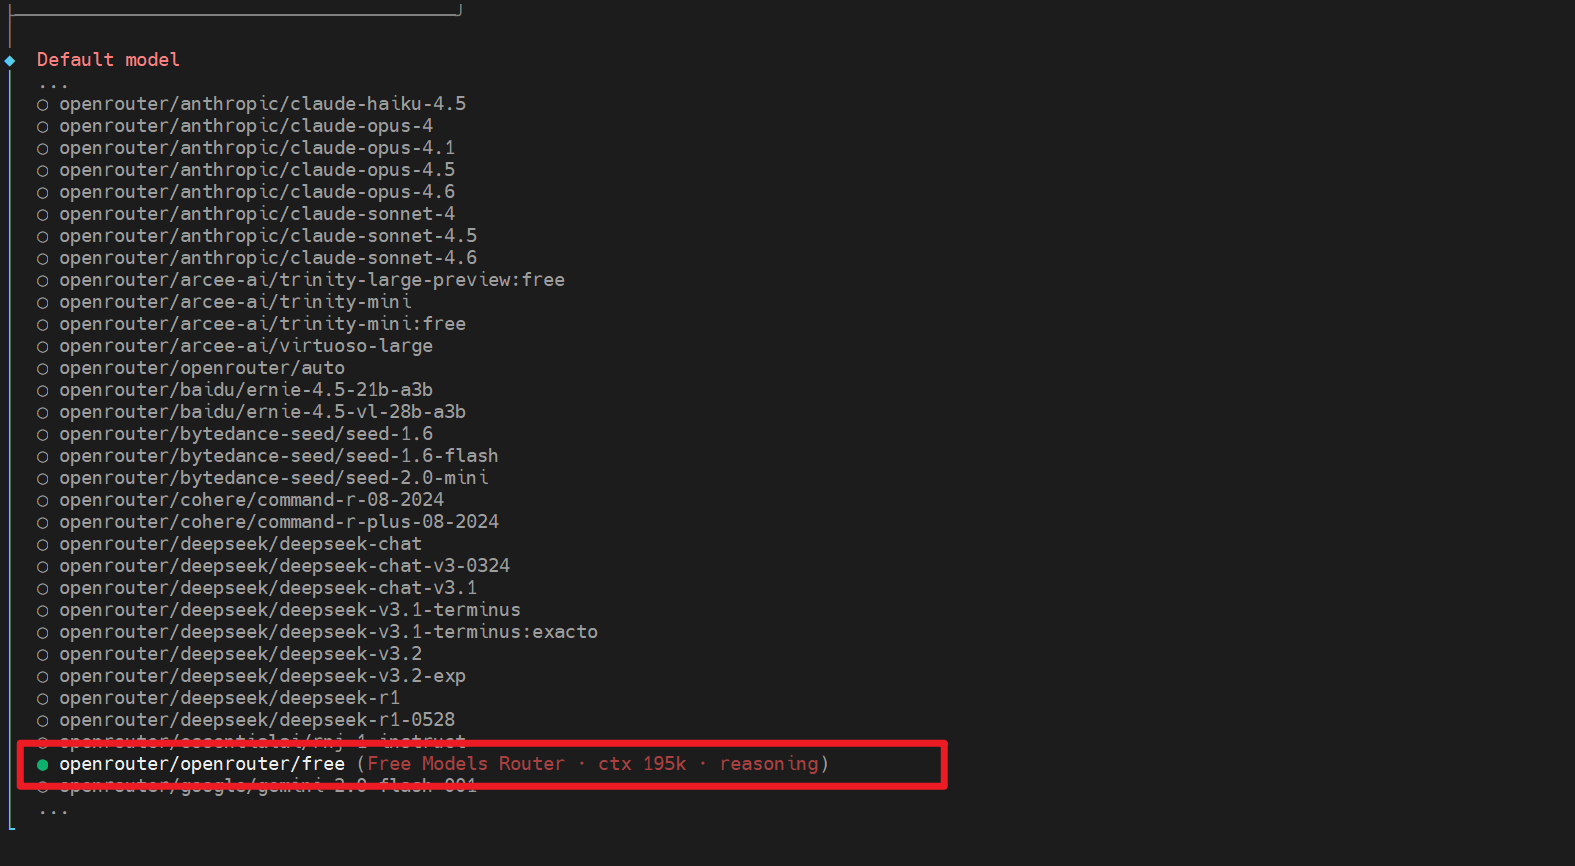
In the following step, we need to select a model. Due to OpenRouter's traffic control policies, we recommend maintaining an account balance of at least $11. If your balance falls below this threshold, OpenRouter may throttle your connection speed (please note that this policy is subject to change; always refer to the latest actual conditions). Here, we have the option to select a free model (identified by model names ending in "free"), or to choose a dedicated free model provided by OpenRouter: openrouter/free. (This acts as a router that randomly selects a free model from those currently available on OpenRouter. The router intelligently filters for models that support the specific capabilities required by your request.)
At this stage, you may be prompted to enter an API Key. Simply paste your API Key into the field and press Enter to proceed to the next step.
Next, you will encounter various additional configuration options. For now, we will skip these and select "Skip" for all of them.
At this point, the configuration process is complete.
We can now use the TUI feature to perform a quick test.
Enter the following command:
xxxxxxxxxxopenclaw tui
Once the command is entered, simply type a greeting to OpenClaw. (In the image below, the "Input" section displays the text we entered, while the green box highlights the model we selected.)

2. Bailian (Example: Third-Party Service Provider API)
2.1. Applying for an API Key
Before proceeding with the configuration, you must first apply for an API Key for Tongyi Qianwen. The application URL is as follows:
https://modelstudio.console.alibabacloud.com/ap-southeast-1/?tab=doc#/doc/?type=model&url=2840914
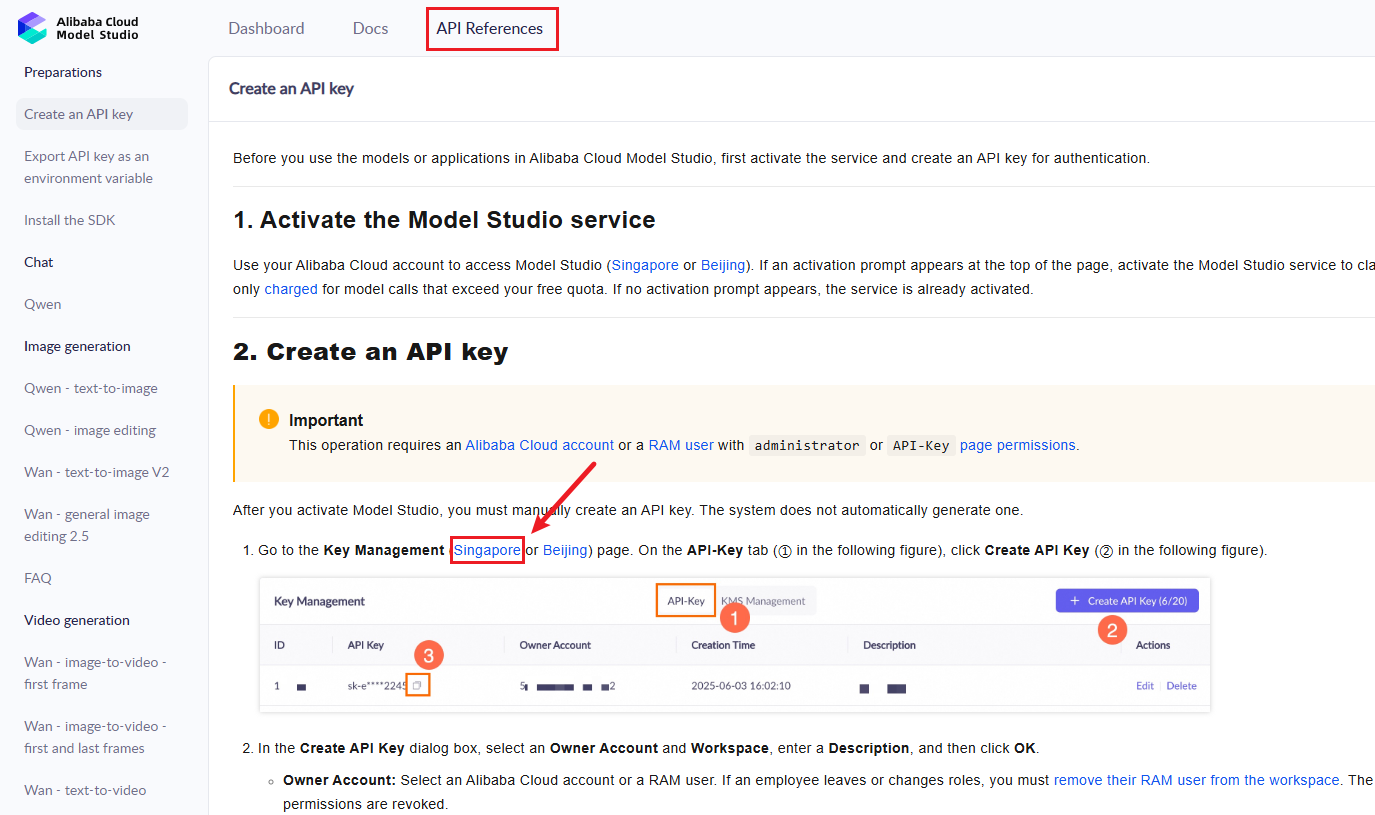
In API References, click Singapore on the page to jump to the create API-key page
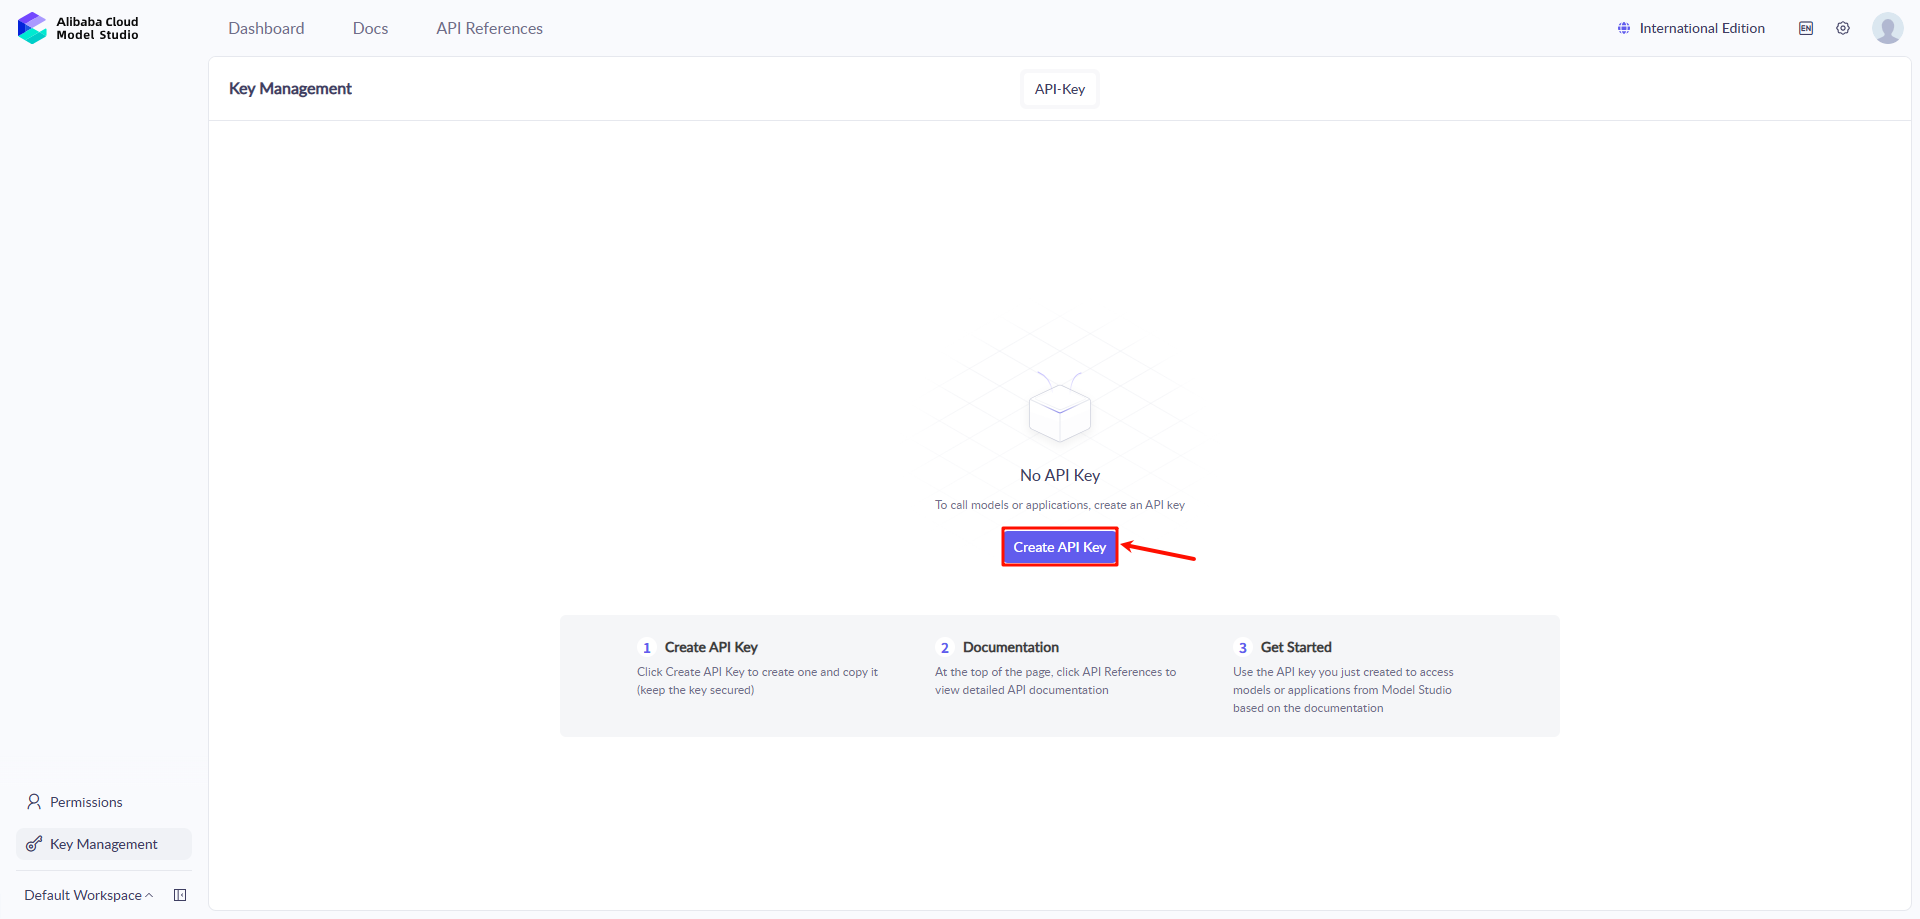
Next, click "Create API Key":
Click "OK":
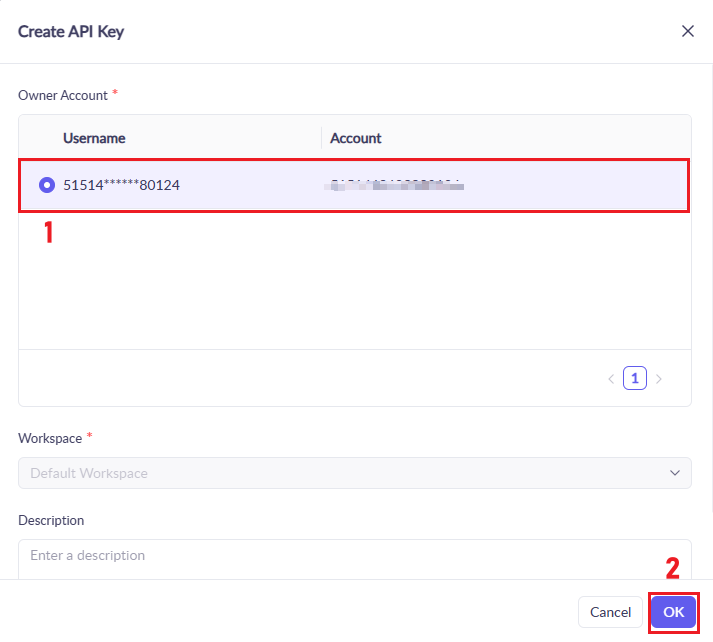
At this point, the account registration and API-KEY creation for Alibaba Cloud Model Studio Platform are completed

Make sure to keep this API Key handy, as you will need it later.
2.2. Modifying the Configuration File
To configure a third-party API, you need to edit Openclaw's configuration file (located at ~/.openclaw/openclaw.json). Enter the following command in your terminal to edit the ~/.openclaw/openclaw.json file:
xxxxxxxxxxvim ~/.openclaw/openclaw.json
The current contents of the file are displayed below; our primary focus will be on the agents section.
xxxxxxxxxx{ "meta": { "lastTouchedVersion": "2026.3.8", "lastTouchedAt": "2026-03-10T07:56:18.292Z" }, "wizard": { "lastRunAt": "2026-03-10T07:56:18.270Z", "lastRunVersion": "2026.3.8", "lastRunCommand": "onboard", "lastRunMode": "local" }, "auth": { "profiles": { "openrouter:default": { "provider": "openrouter", "mode": "api_key" } } }, "agents": { "defaults": { "model": { "primary": "openrouter/openrouter/free" }, "models": { "openrouter/auto": { "alias": "OpenRouter" }, "openrouter/openrouter/free": {} }, "workspace": "/sunrise/.openclaw/workspace", "compaction": { "mode": "safeguard" }, "maxConcurrent": 4, "subagents": { "maxConcurrent": 8 } } }, "tools": { "profile": "coding" }, "messages": { "ackReactionScope": "group-mentions" }, "commands": { "native": "auto", "nativeSkills": "auto", "restart": true, "ownerDisplay": "raw" }, "session": { "dmScope": "per-channel-peer" }, "gateway": { "port": 18789, "mode": "local", "bind": "lan", "controlUi": { "allowedOrigins": [ "http://localhost:18789", "http://127.0.0.1:18789" ] }, "auth": { "mode": "token", "token": "__OPENCLAW_REDACTED__" }, "tailscale": { "mode": "off", "resetOnExit": false }, "nodes": { "denyCommands": [ "camera.snap", "camera.clip", "screen.record", "contacts.add", "calendar.add", "reminders.add", "sms.send" ] } }}We need to add some "Models" content (within the first-level JSON, meaning this newly added "models" is at the same level as "agents").
Here, we'll use qwen3.5-plus and qwen3-coder-next as examples of models. For support of other models, please refer to this model list: https://help.aliyun.com/zh/model-studio/models

Press 'i' to enter Vim's edit mode, then copy the following content after the "agents" content. Change DASHSCOPE_API_KEY to your own API key.
xxxxxxxxxx "models": { "mode": "merge", "providers": { "bailian": { "baseUrl": "https://dashscope.aliyuncs.com/compatible-mode/v1", "apiKey": "DASHSCOPE_API_KEY", "api": "openai-completions", "models": [ { "id": "qwen3.5-plus", "name": "qwen3.5-plus", "reasoning": false, "input": ["text", "image"], "contextWindow": 1000000, "maxTokens": 65536 }, { "id": "qwen3-coder-next", "name": "qwen3-coder-next", "reasoning": false, "input": ["text"], "contextWindow": 262144, "maxTokens": 65536 } ] } } },After adding the "models," we also need to modify the "agents" section to set the BaiLian large language model as the default.
The "agents" configuration before modification is shown below (by default, it uses the OpenRouter service we configured in the previous step).
xxxxxxxxxx "agents": { "defaults": { "model": { "primary": "openrouter/openrouter/free" }, "models": { "openrouter/auto": { "alias": "OpenRouter" }, "openrouter/openrouter/free": {} }, "workspace": "/home/sunrise/.openclaw/workspace", "compaction": { "mode": "safeguard" }, "maxConcurrent": 4, "subagents": { "maxConcurrent": 8 } } },The modified agents are as follows:
xxxxxxxxxx"agents": { "defaults": { "model": { "primary": 'bailian/qwen3.5-plus' }, "models": { "openrouter/auto": { "alias": "OpenRouter" }, "openrouter/openrouter/free": {} }, "workspace": "/home/sunrise/.openclaw/workspace", "compaction": { "mode": "safeguard" }, "maxConcurrent": 4, "subagents": { "maxConcurrent": 8 } } },Once you have finished making modifications, press the Esc key to exit model editing mode. Then, press : to enter command mode, type wq, and press Enter to save and exit. Next, enter the following command in the terminal to restart the gateway:
xxxxxxxxxxopenclaw gateway restart
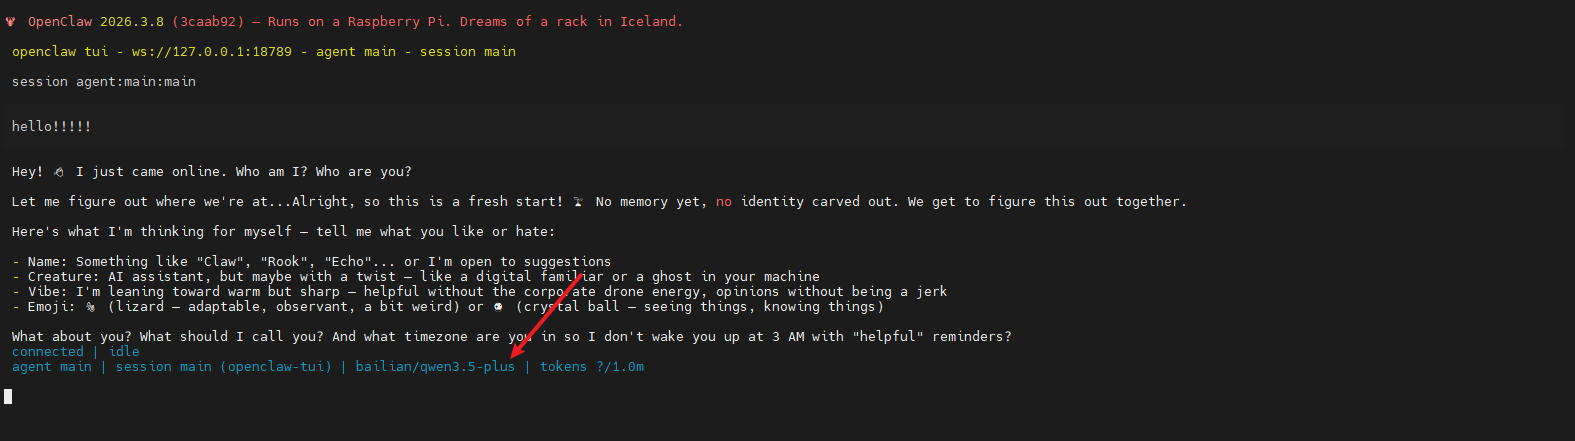
Initially, the status may display as "unknown"; however, after waiting a short while, the current model will be correctly recognized.

Similarly, in addition to the TUI interface, you can also engage in chats and conversations within OpenClaw's Control UI (the web-based interface).
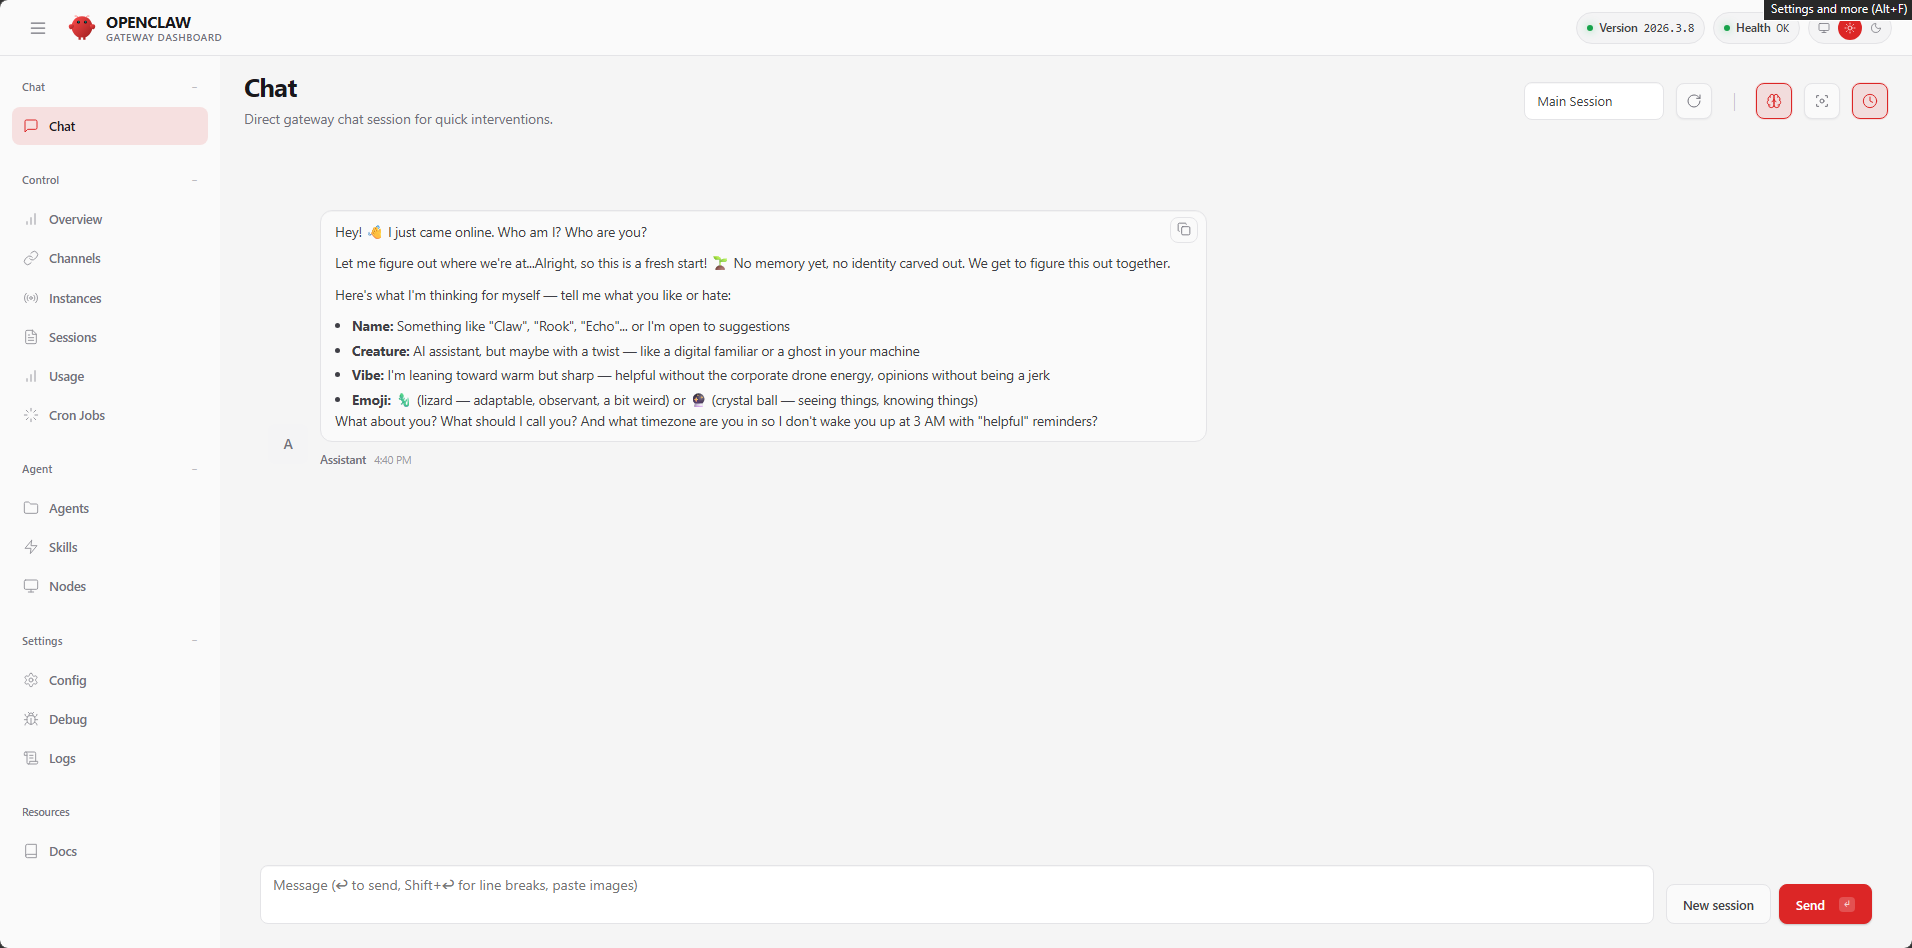
You may observe that the conversation content displayed in the TUI is identical to the content shown in the Control UI. This is because OpenClaw's conversation system utilizes a "Session" mechanism to isolate different conversation threads; in this instance, both the TUI and the Control UI are operating within the same session. You can try clicking the "New session" button located in the bottom-right corner to initiate a fresh conversation thread.