Flashing a Pure Jetson System via SDK
Flashing a Pure Jetson System via SDK1. Hardware Connections1.1. Installing the SSD1.2. Motherboard Connections1.3. Entering Flash Mode2. Software Connection3. Using SDK Manager3.1. SDK Manager Download3.2. SDK Manager Installation3.3. Launching and Logging In3.4. Board Selection3.5. STEP 13.6. STEP 23.7. STEP 33.8. STEP 44. Booting the System4.1. Normal Mode4.2. Starting the System4.3. System SetupFrequently Asked Questions (FAQ)Device Not Recognized
Note: This tutorial will erase all data on the NVMe SSD and reallocate the disk space. The optional 2TB SSD available for purchase comes pre-installed with a factory image; this image contains the official NVIDIA operating system and the motherboard environment. Unless you specifically require a pure system installation, please do not proceed with this operation!
1. Hardware Connections
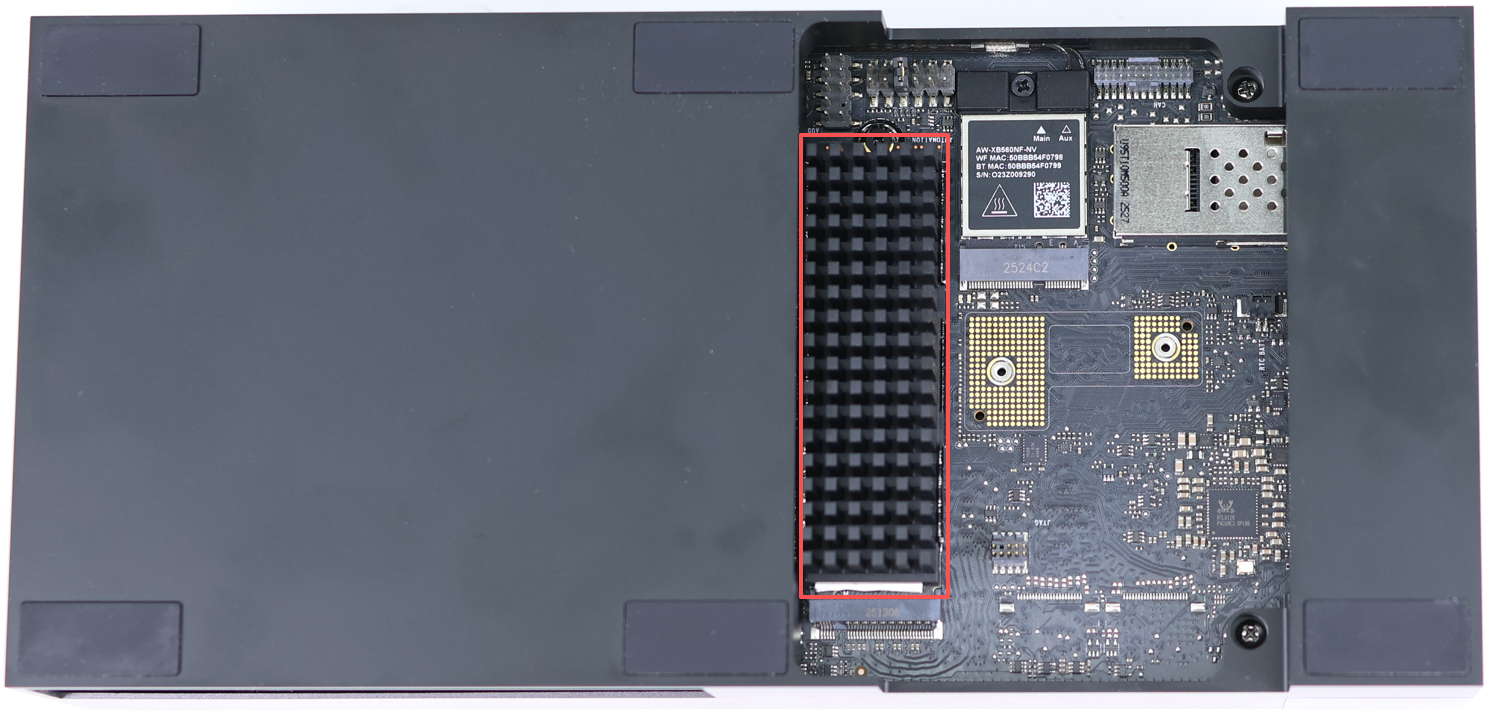
1.1. Installing the SSD
The M.2 NVMe SSD interface is located on the underside of the Jetson AGX Thor. By default, one SSD is already installed on the motherboard, as shown in the figure below.
1.2. Motherboard Connections
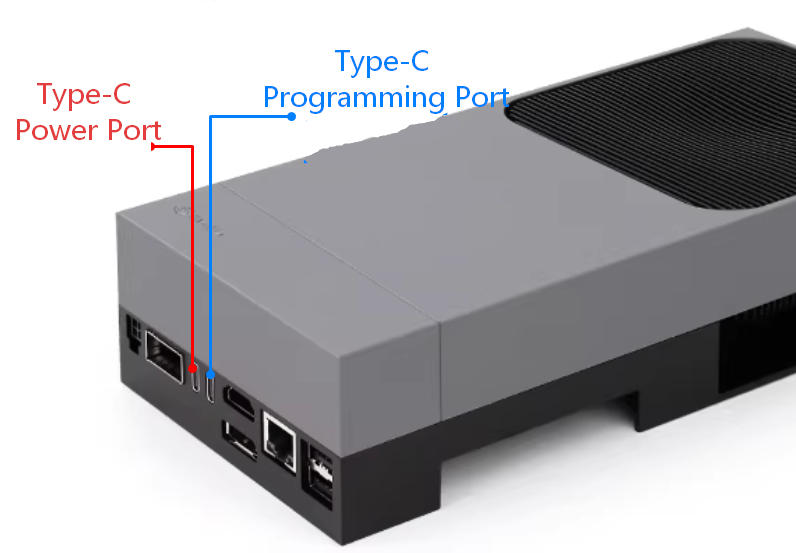
The Jetson AGX Thor motherboard requires connection to both a power adapter and a Type-C data cable. The Type-C cable serves as the data transmission link; one end should be connected to a USB port on your computer, while the other end must be connected to the specific Type-C port located right next to the HDMI port on the Jetson AGX Thor motherboard.
1.3. Entering Flash Mode
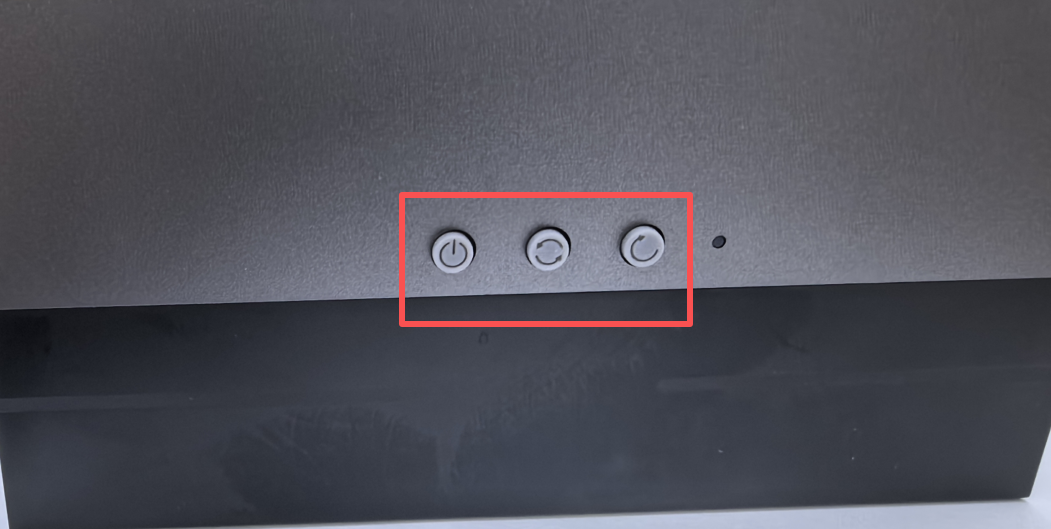
Connect the power adapter to the Jetson AGX Thor motherboard. Locate the three buttons at the rear of the board: press and hold the "Flash" button, then briefly press the "Reset" button. Wait for 3 seconds before releasing the "Flash" button to enter Flash Mode.
As shown in the figure below, the three buttons—from left to right—are the Power button, the Flash button, and the Reset button.
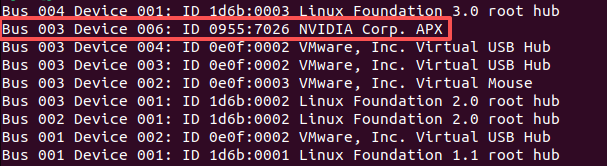
Open a terminal window to check for connected USB devices. If the entry [ID 0955:7026 NVIDIA Corp. APX] appears, the connection has been successfully established.
lsusb
2. Software Connection
This tutorial utilizes VMware Workstation 17 Pro for the system flashing process.
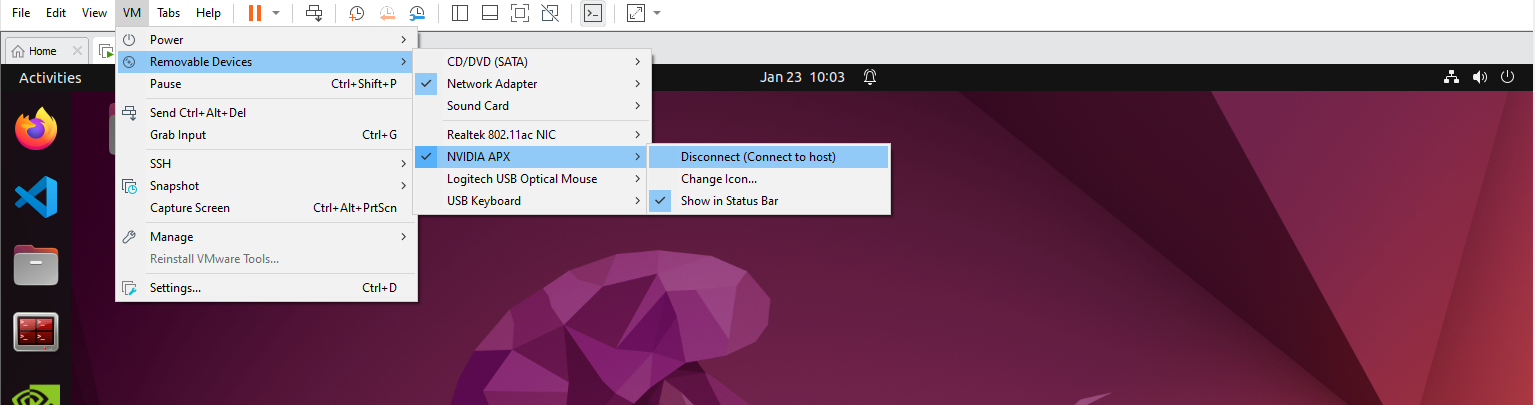
After launching the virtual machine, navigate to the menu bar and select: Virtual Machine → NVIDIA APX → Verify Connection Status.
3. Using SDK Manager
To use SDK Manager, you must register an account and log in beforehand. Please complete the account registration and login steps independently.
xxxxxxxxxxWhen using our virtual machine images, installing the SDK Manager is not required; however, if you encounter issues updating the SDK Manager, you can follow the tutorial below to reinstall it.
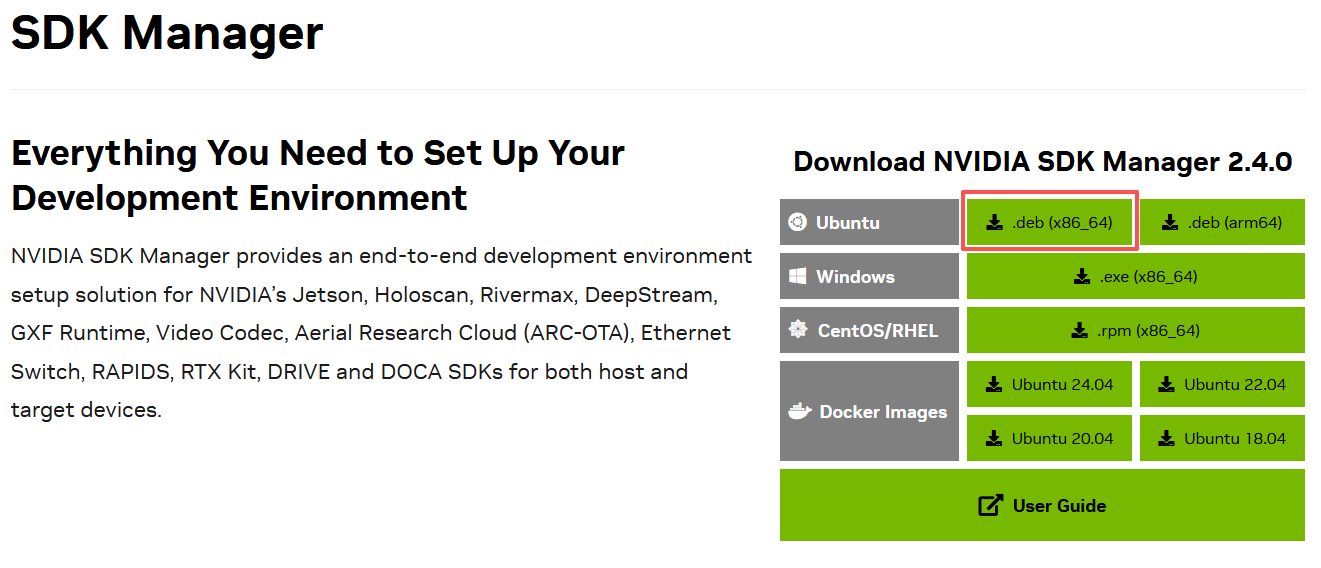
3.1. SDK Manager Download
Official Website: https://developer.nvidia.com/sdk-manager
3.2. SDK Manager Installation
Navigate to the folder containing the installation package and execute the following installation command:
xxxxxxxxxxsudo dpkg -i sdkmanager_xxxxx_amd64.deb
Fixing Dependencies: On a pure system installation, you may encounter error messages when installing the SDK Manager. You can resolve this by running the command below, and then re-executing the installation command:
xxxxxxxxxxsudo apt --fix-broken install -y
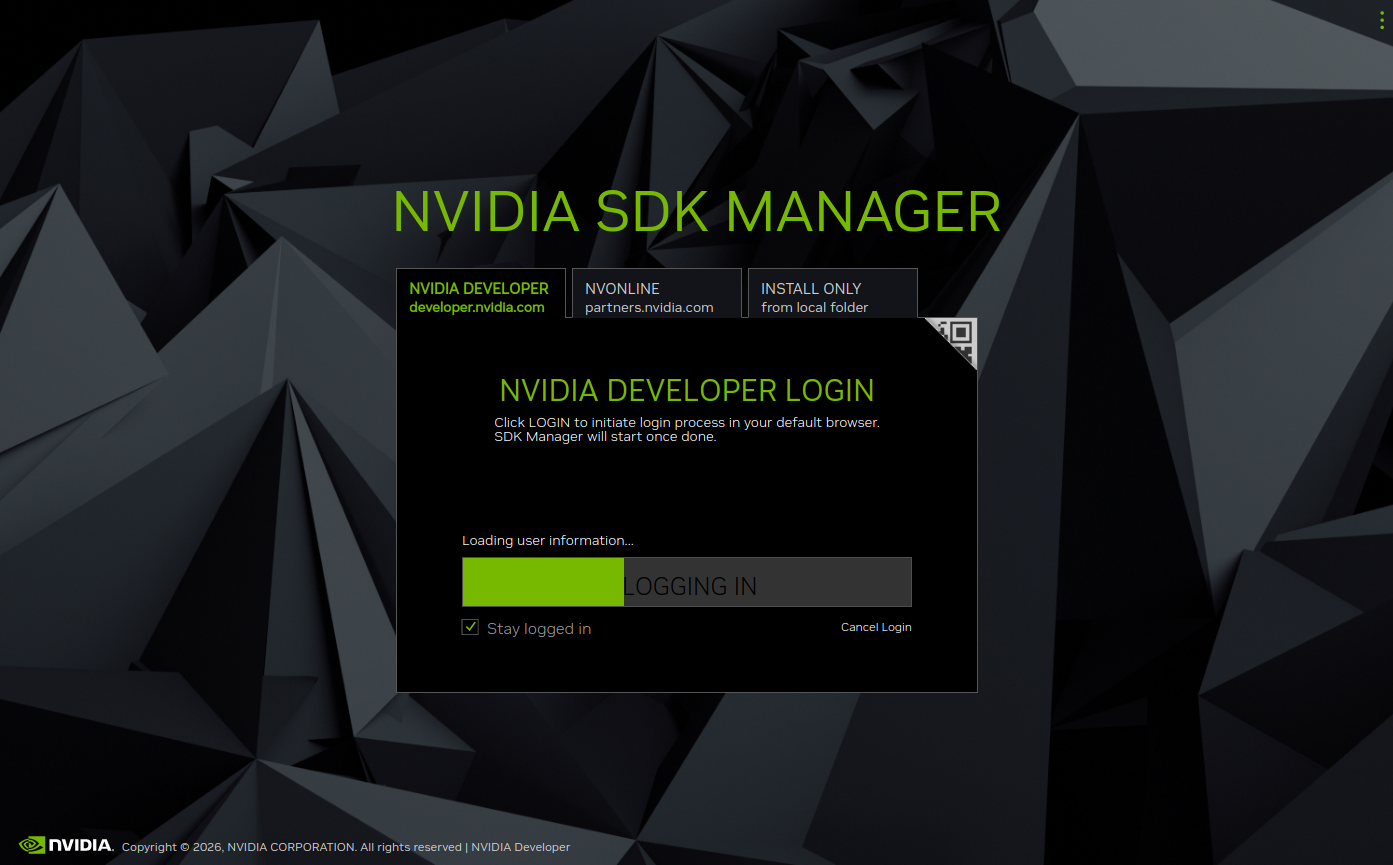
3.3. Launching and Logging In
Locate the SDK Manager application icon in the system's application menu, or launch the application by entering the following command in the terminal:
xxxxxxxxxxsdkmanager# To flash older versions of JetPack, use the command: sdkmanager --archived-versions
Clicking the "Log In" button will automatically open a login page in your web browser:
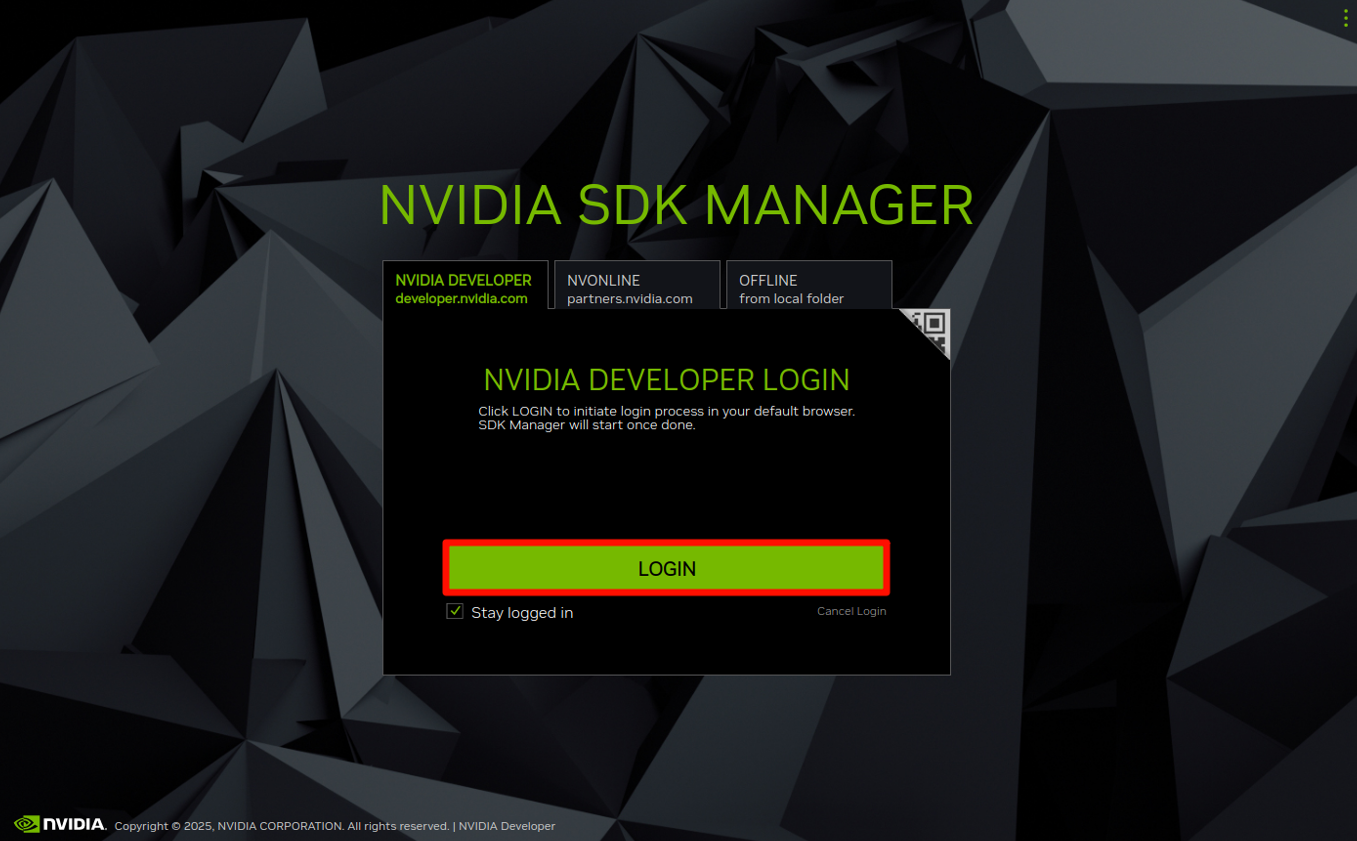
Enter the email address and password you previously registered to access the software:
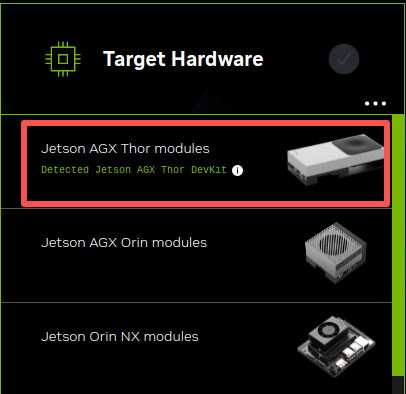
3.4. Board Selection
Select the option corresponding to your specific board model. For official developer kits, select Jetson AGX Thor modules:
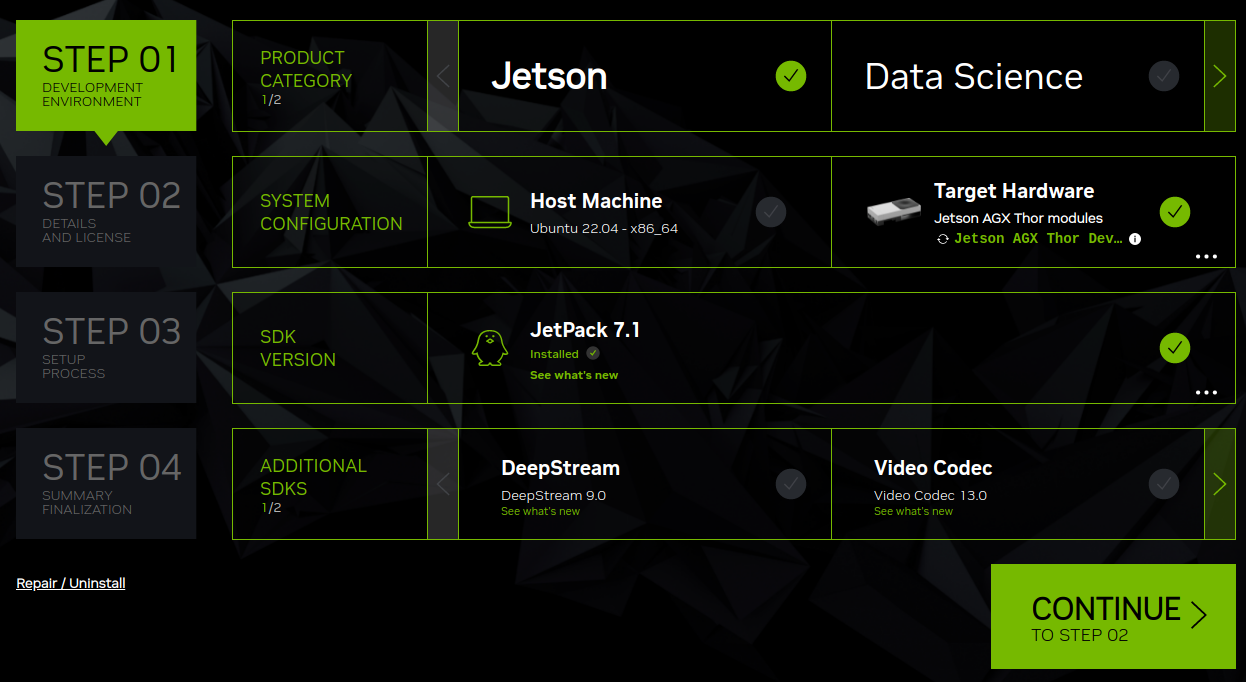
3.5. STEP 1
Select the options as shown below; once you have confirmed that your selections match, click CONTINUE:
3.6. STEP 2
Select the options as shown below; once you have confirmed that your selections match, click CONTINUE:

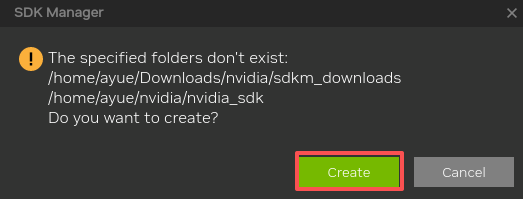
If this is your first time flashing the device, you will need to click [Create] to create a folder. Then, click [Continue] again to proceed to the next step.
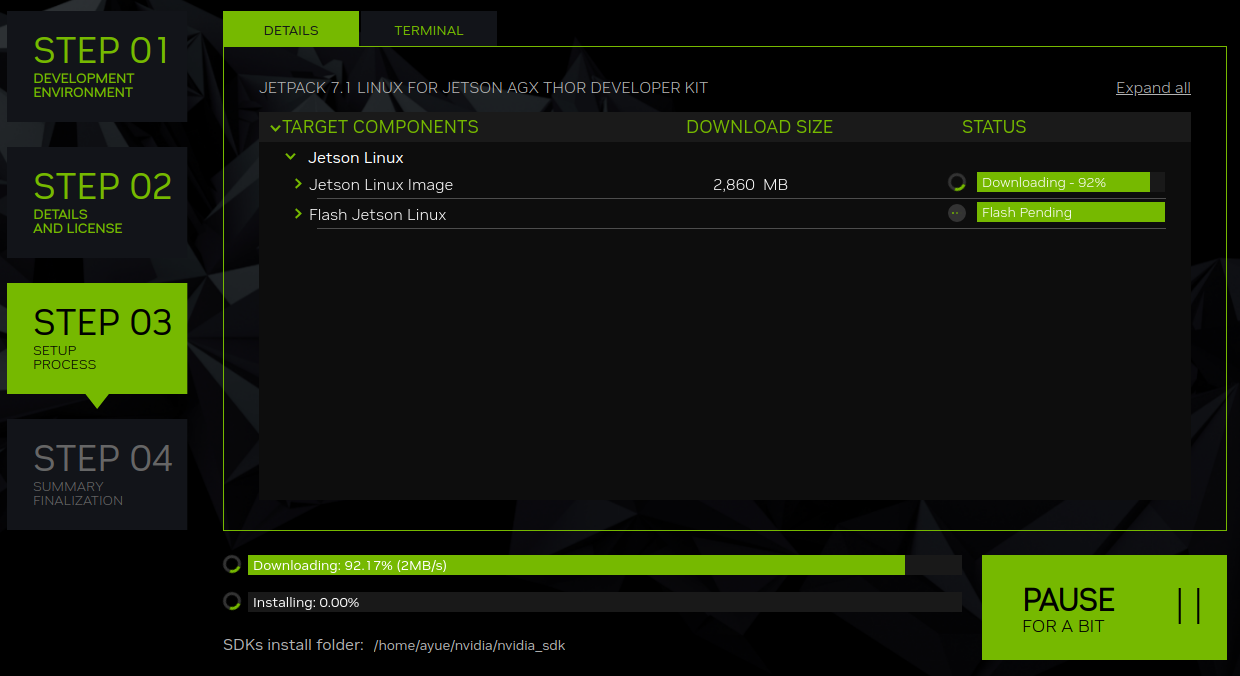
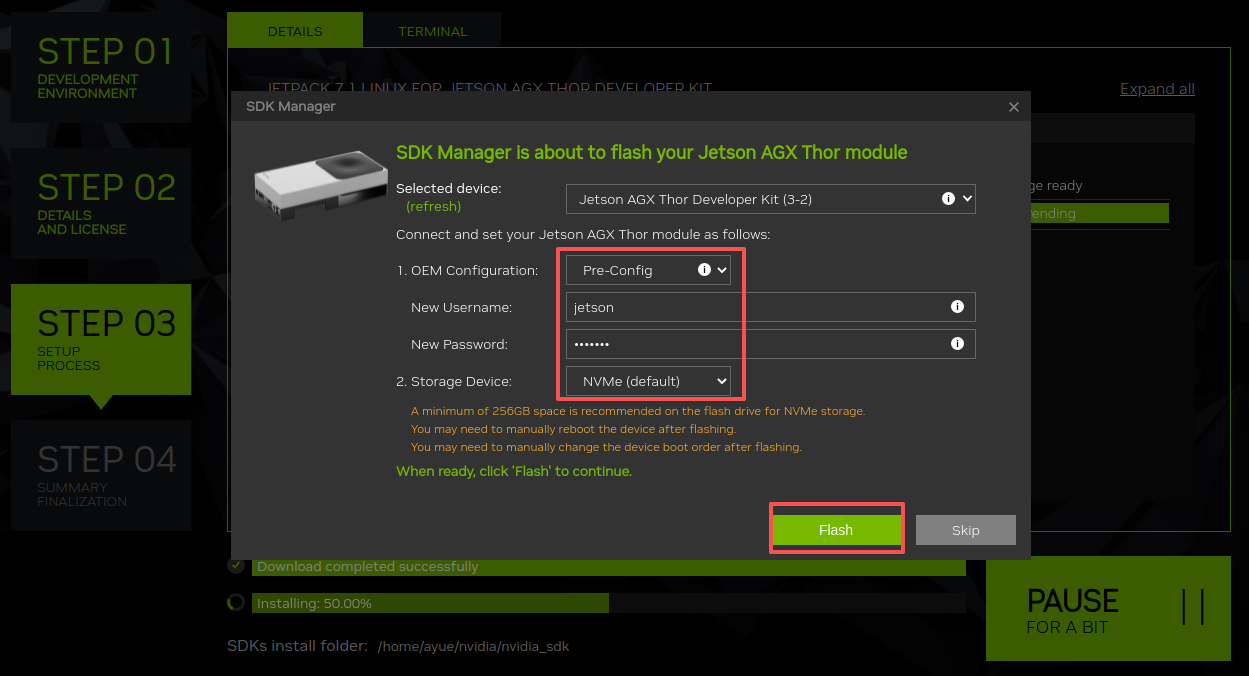
3.7. STEP 3
Download the necessary flashing files.
Here, configure the username and password, select NVMe as the target storage for flashing, and then click [Flash] to begin the flashing process.
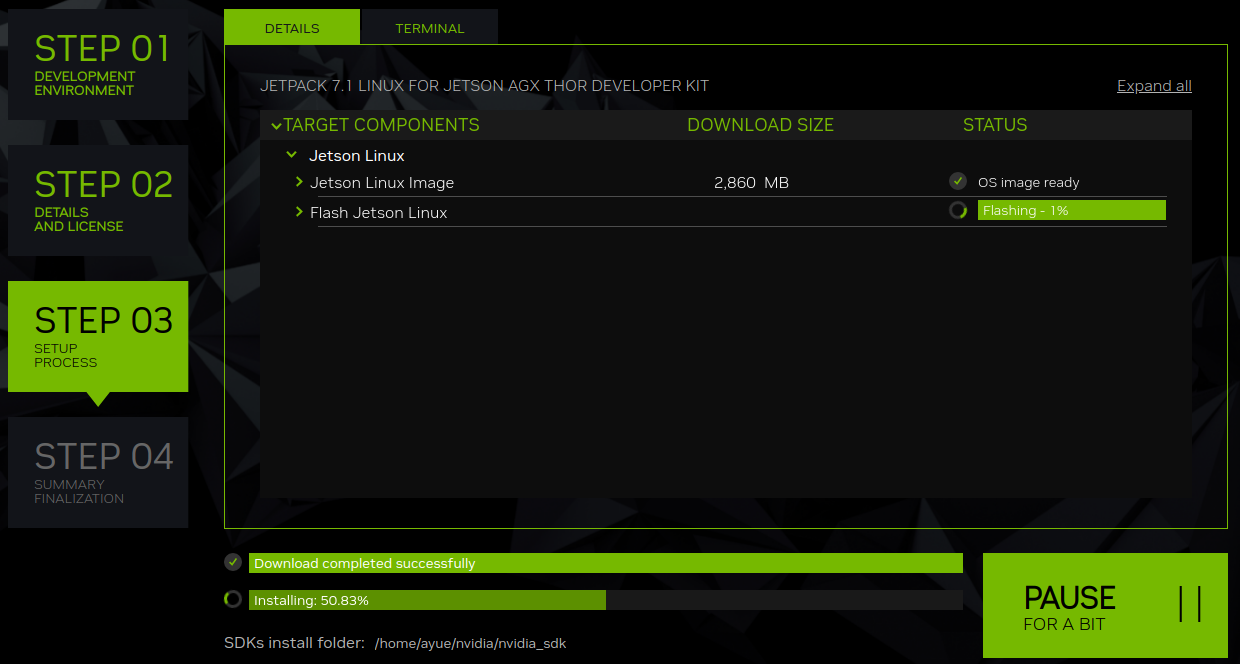
Wait for the system compilation and flashing to complete. Throughout this entire process, the virtual machine automatically manages the connection and disconnection of the device; however, once the progress exceeds 95%, you should closely monitor the system flashing progress displayed in the SDK Manager. If the device disconnects and the virtual machine does not automatically re-establish the connection, you must manually reconnect the mainboard to the virtual machine immediately.
Once the flashing is complete, click [OK]. 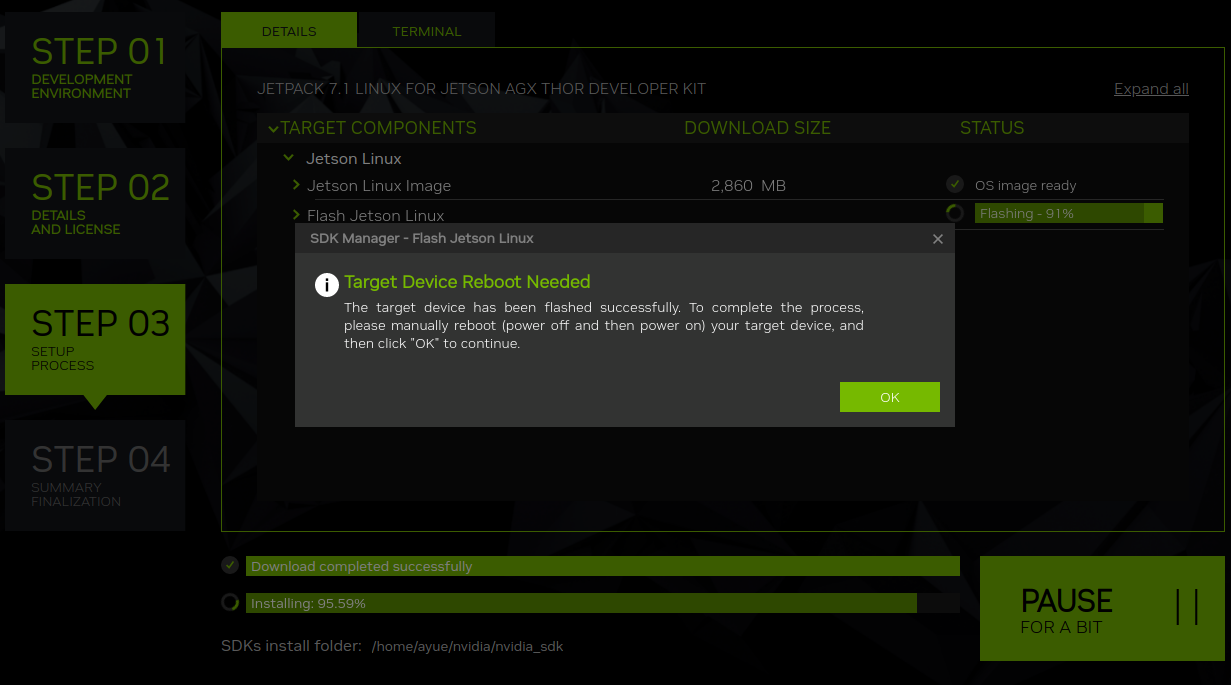
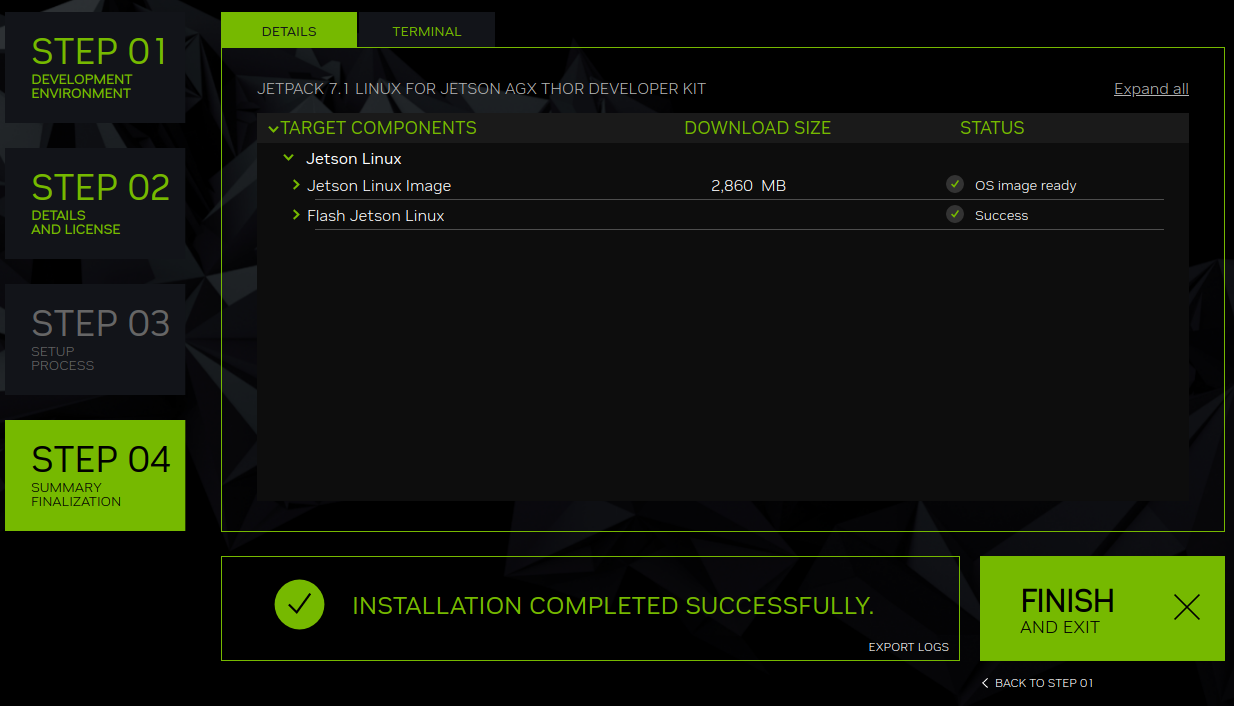
3.8. STEP 4
Once the flashing process is complete, click [FINISH] to exit the SDK Manager software.
4. Booting the System
After successfully flashing the system using SDK Manager, the system will boot up automatically. First, power off the device; then, connect a monitor, keyboard, and mouse to the mainboard before powering it back on.
4.1. Normal Mode
The Jetson AGX Thor mainboard operates in Normal Mode when powered on.
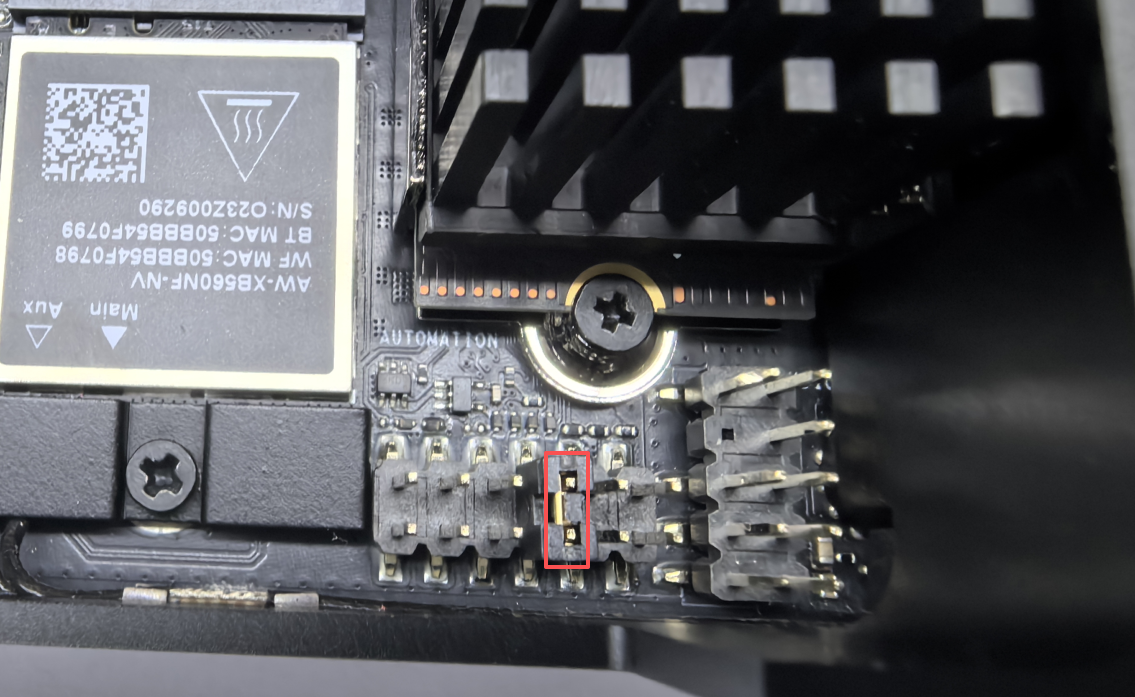
Note: Please keep the "AUTOMATION" pin header located at the bottom of the board in its default state, as shown in the figure below.
4.2. Starting the System
Connect the DP cable, Ethernet cable, and Type-C cable to the Jetson mainboard; finally, use the power adapter to supply power to the board.
xxxxxxxxxxThe Jetson AGX Thor series mainboard requires a connected monitor to properly display video output and to enable VNC remote access.
4.3. System Setup
After the system boots up, users can configure the system options by following the on-screen prompts. This process is quite straightforward, so a detailed demonstration will not be provided here.
Frequently Asked Questions (FAQ)
Device Not Recognized
Check the virtual machine software's device settings to ensure that the USB device has been successfully connected to the virtual machine. 2. You may disconnect the motherboard's power adapter and Type-C data cable, then re-apply power. Press and hold the Flash button, briefly press the Reset button, and then release the Flash button to re-enter Flash Mode. Finally, reconnect the virtual machine using the Type-C data cable.