Welcome to PCle to M.2 Adapter repository
02.System mounting
Raspberry mounted PCIE
Hardware connection PCIE
- Connect the Raspberry Pi's ribbon cable interface using ribbon cables, as shown in the following figure
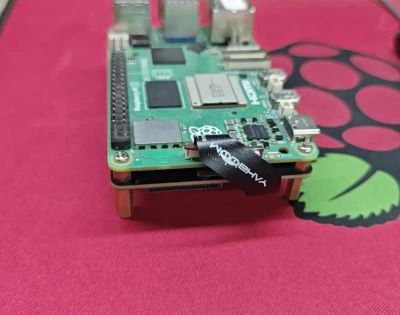
- Connect the solid state to PCIE and secure it onto the board. After confirming its accuracy, power supply Raspberry Pi 5 as shown in the figure
Reminder: Remember to connect the Raspberry Pi to an SD card that can boot into the system.
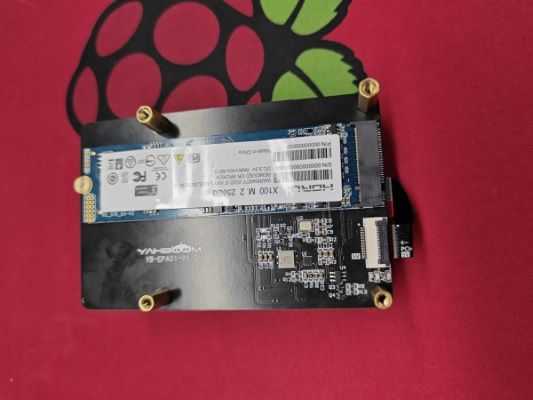
System mounting (used as expansion space)
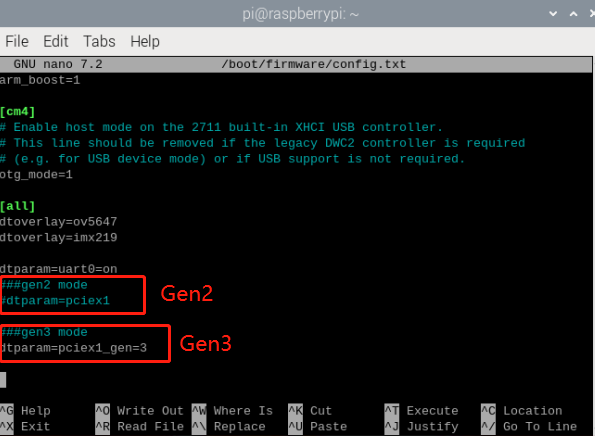
- Raspberry Pi 5 does not have the PCIE interface enabled by default,Select one of the statements in /boot/firmware/config.txt and add it under the last file:
xsudo nano /boot/firmware/config.txt#Gen2 slow mode dtparam=pciex1#Gen3 High speed modedtparam=pciex1_gen=3As shown in the figure:
- reboot pi5
xxxxxxxxxxsudo reboot
- Enter the following command to detect PCIE
xxxxxxxxxxlspci
As shown in the figure below, it is recognized that SM2263 is my SSD solid-state, and the other PI5 is an RPI chip

- Start mounting
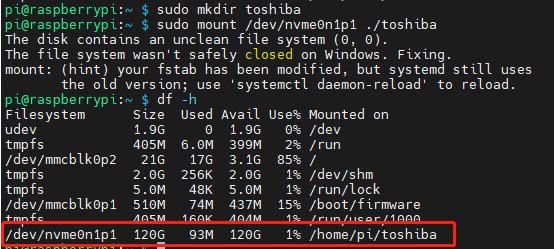
xxxxxxxxxx#Create mounting directorysudo mkdir yahboomba#Mount devicesudo mount /dev/nvme0n1p1 ./yahboomba#Check disk statusdf -hBefore mounting
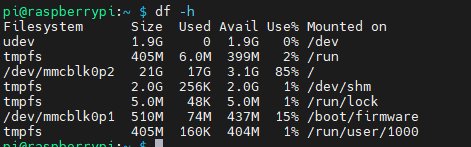
After mounting
The difference between Gen2 and Gen3 modes
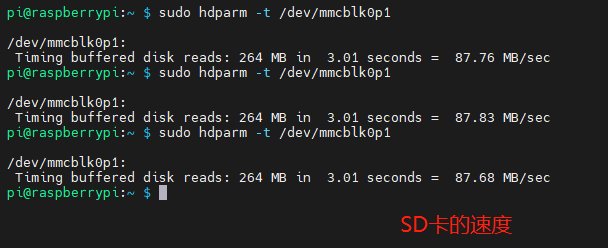
Gen2 mode:
TF:
nvme:
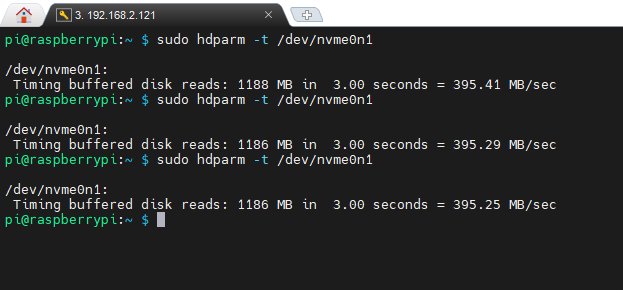
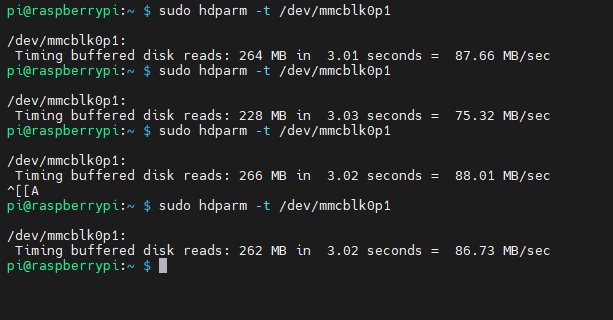
- Gen3 mode:
SD:
nvme:
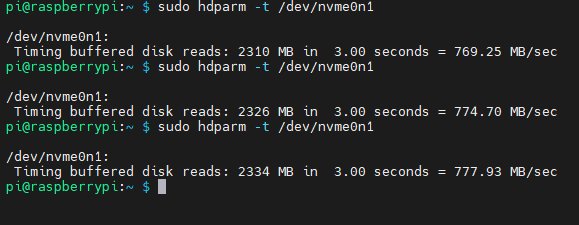
Conclusion: The SD card slot is not affected by the mode, The PCIE board is influenced by the mode, Gen3 mode is much faster than Gen2 mode.
Using NVME solid-state as the system boot disk
- Modify the boot information by entering the following command
xxxxxxxxxxsudo rpi-eeprom-config --edit
Modify BOOT-ORDER to:BOOT_ORDER=0xf416
Enable PCIE_PROBE: PCIE_PROBE=1
Then save, exit, and restart.
As shown in the figure:
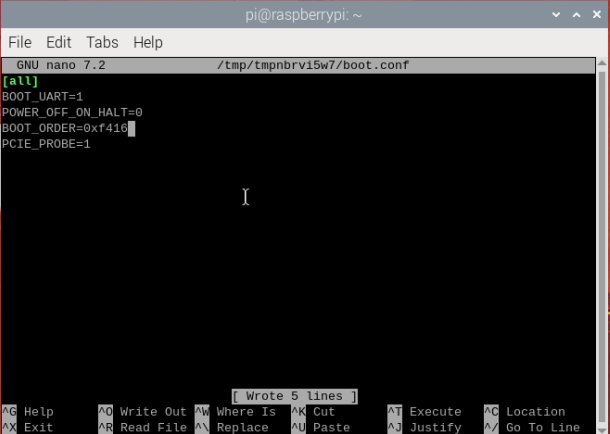
Attention: If multiple modifications are found to be unable to be made, please connect to the network before making the changes (wait for network self calibration), or set the correct time before making the changes to the file.
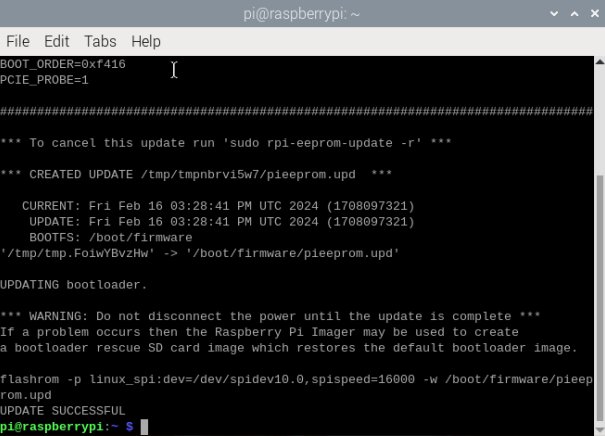
The following is a screenshot of the successful modification:
- The method of NVME downloading system way 1:
xxxxxxxxxxsudo apt updatesudo apt install rpi-imagerThen, by clicking on the image installation on the desktop, the system can be downloaded into NVME
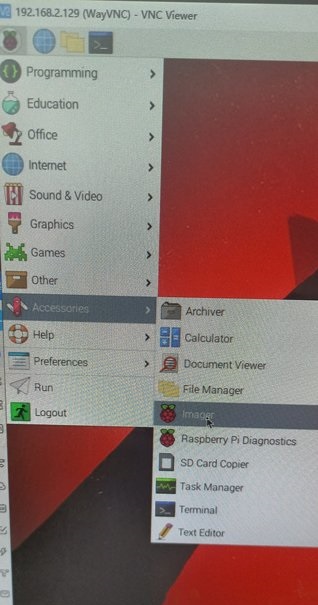 Specific operating methods:
way 2: Alternatively, use a solid-state box to create a Raspberry Pi system for NVME.
- Remove the SD card from the Raspberry Pi Card slot, Install PCIE on Raspberry Pi 5 and then turn it on.
As shown in the figure:
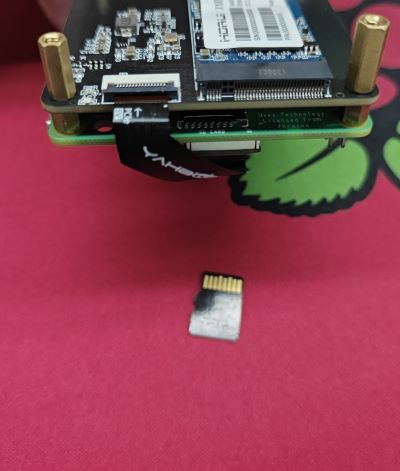
You can see that the startup disk of Raspberry Pi 5 is nvme.
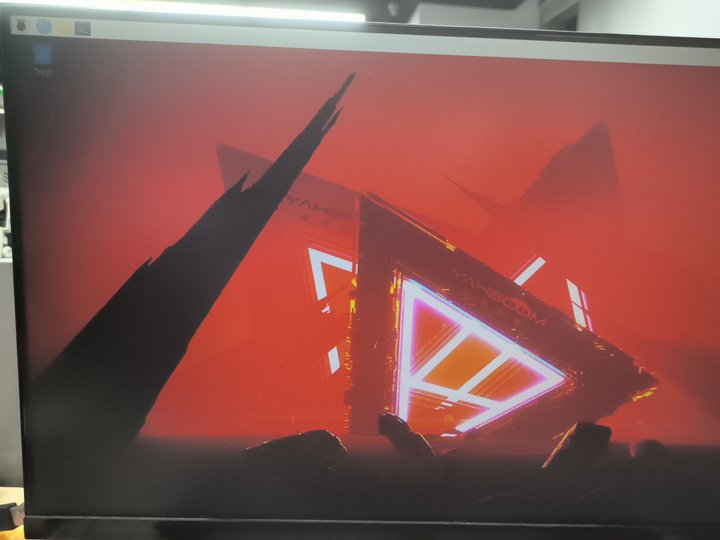
- If you want to switch back to SD card startup, you can simply unplug the PCIE and it will return to SD card startup.