Welcome to LCD1602 repository
1602 display module use instructions
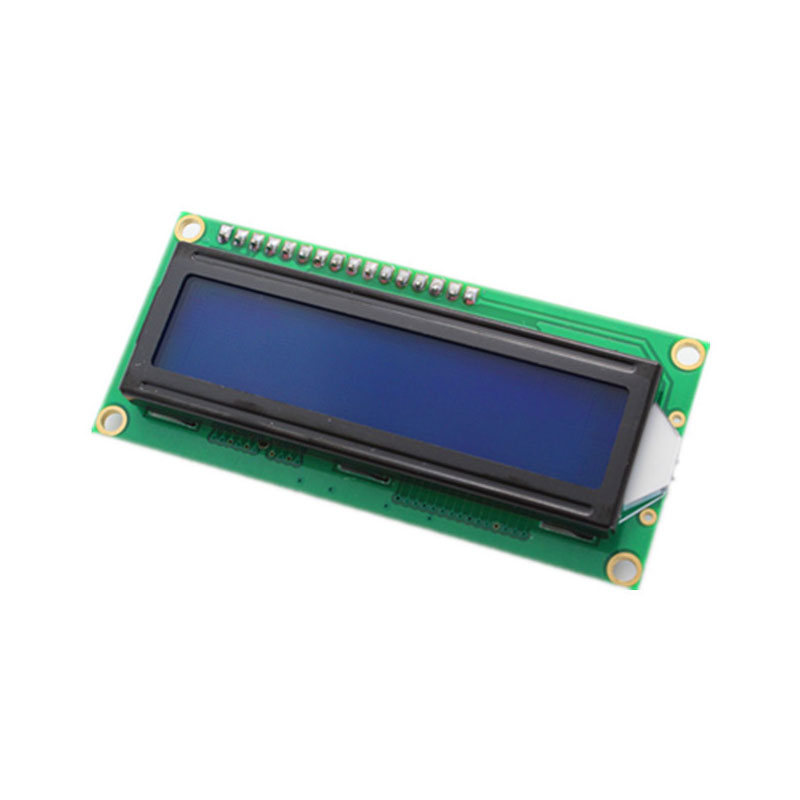
1.Introduction of 1602:
The actual object is shown below.

2.Main specification of 1602LCD:
Display capacity: 16 x 2 characters;
Working current: 2.0mA
Operating voltage: 5.0v
Size of character: 2.95 * 4.35 (W * H) mm.
3.1602 possess 16 pins:
Pin 1: VSS is ground power
Pin 2: VDD is connected to 5V positive power supply
Pin 3: V0 is the LCD contrast adjustment pin, which can be adjusted by a 10K adjustable resistor.
Pin 4: RS is the register selection pin, data register is selected at high voltage and instruction register is selected at low voltage.
Pin 5: R/W is the signal line for reading and writing. Reading operation is carried out at high level and writing operation is carried out at low level.
Pin 6: E pin is the enable pin. When this pin changes from high level to low level, the LCD module executes the command.
Pin 7 ~ Pin 14: D0 ~ D7 is 8-bit two-way data line.
Pin 15: power positive pole of backlight.
Pin 16: power negative pole of backlight.
4.Actual object connection diagram:
We need to connect the circuit as shown in the figure below.

5.Experimental code analysis:
#include
//Declaring the Arduino digital port connected to the 1602 LCD pin,
//8-wire or 4-wire data mode, either one
LiquidCrystal lcd(12,11,10,9,8,7,6,5,4,3,2);
//LiquidCrystal lcd(12,11,10,5,4,3,2);
int i;
void setup()
{
lcd.begin(16,2); //Initialization of 1602
//The 1602 LCD display range is defined as 2 lines and 16 columns characters
while(1)
{
lcd.home(); //Moving the cursor back to the upper left corner,output from the beginning
lcd.print("Hello World");
lcd.setCursor(0,1); //The cursor is positioned on line 1, column 0
lcd.print("Welcome to Yahboom-Arduino");
delay(500);
for(i=0;i<3;i++)
{
lcd.noDisplay();
delay(500);
lcd.display();
delay(500);
}
for(i=0;i<24;i++)
{
lcd.scrollDisplayLeft();
delay(500);
}
lcd.clear();
lcd.setCursor(0,0); //Moving the cursor back to the upper left corner,output from the beginning
lcd.print("Hi,");
lcd.setCursor(0,1); //The cursor is positioned on line 1, column 0
lcd.print("Arduino is fun");
delay(2000);
}
}
void loop()
{}//Initialization is complete and the main loop is not need to do anythings
6.Experimental steps:
1).We need to open the code for this experiment: code-1602_display.ino, click “√”under the menu bar,compile the code, and wait for the words of Done compiling in the lower left corner, as shown in the following figure.

2).In the menu bar of Arduino IDE,you need to select the 【Tools】---【Port】--- select the port that the serial number displayed by the device manager just now.for example:COM6,as shown in the following figure.


3).After the selection is completed, you need to click “→”under the menu bar,and upload the program to the Arduino UNO board, when appears to Done uploading on the lower left corner , that means that the code has been successfully uploaded to the Arduino UNO board, as shown in the following figure.

4).After the code is uploaded. First, the 1602 screen will display “Hello World, Welcome to yahboom-arduino” and flash three times. Then,“Hello World,Welcome to yahboom-arduino,” is displayed from the right to the left. Next, “Hi,Arduino is fun.” is displayed on the 1602. Finally, it clear the screen, and continue the endless cycle.
As shown in the figure below.