Welcome to 16-channel Servo Debugging Board repository
Raspberry Pi 5 serial port control
Serial port control servo
Serial port control servo1.learning target2.Preparation before class3. Run the program4.Experimental phenomena
1.learning target
In this course, we mainly learn to use the Raspberry Pi 5 and the 16-channel servo drive module to realize serial port control of the servo.
2.Preparation before class
In this example, the 16-channel servo drive module uses serial communication. Connect the TXD and RXD of the module to the IO15 and IO14 pins of the Raspberry Pi 5 board respectively. VCC and GND are connected to the 3.3V and GND of the Raspberry Pi respectively.
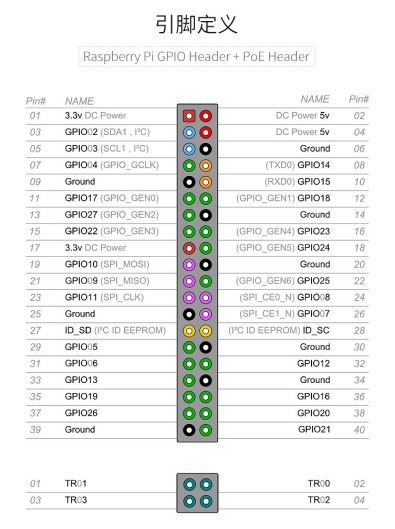
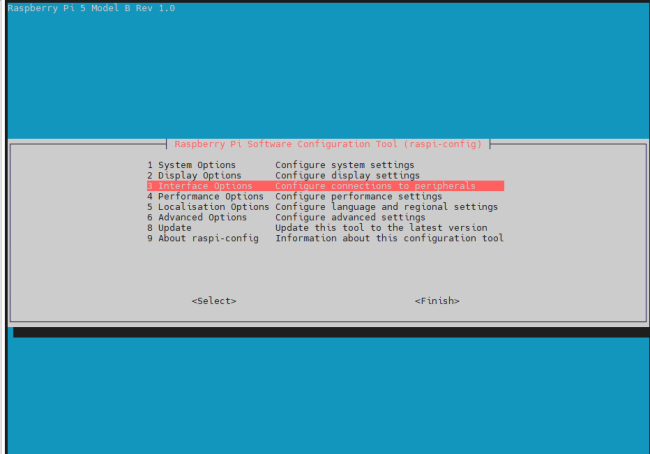
The Raspberry Pi needs to assign the ttyAMA0 port to the GPIO serial ports TXD0 and RXD0. The specific method is as follows. Enter sudo raspi-config to enter the Raspberry Pi system configuration interface and select the third Interfacing Options:
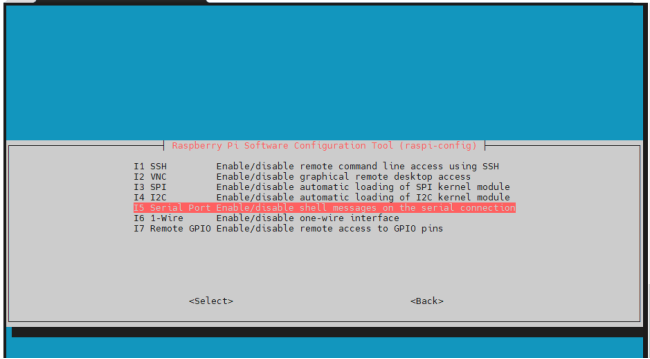
Enter the I5 Serial Port option
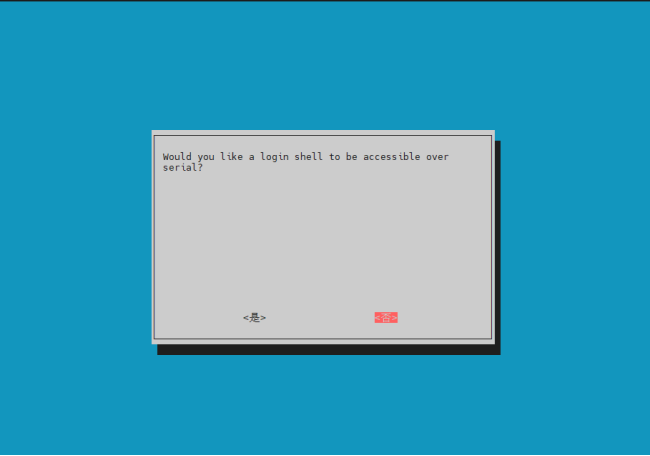
Select to turn off the serial port login function and turn on the hardware serial port debugging function.
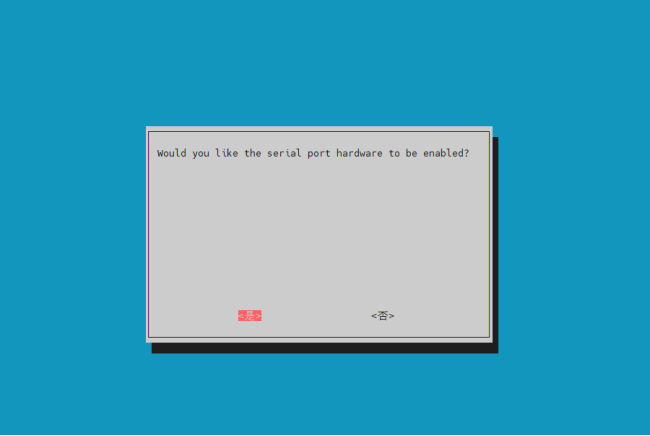
After completion, the following interface will appear, press OK
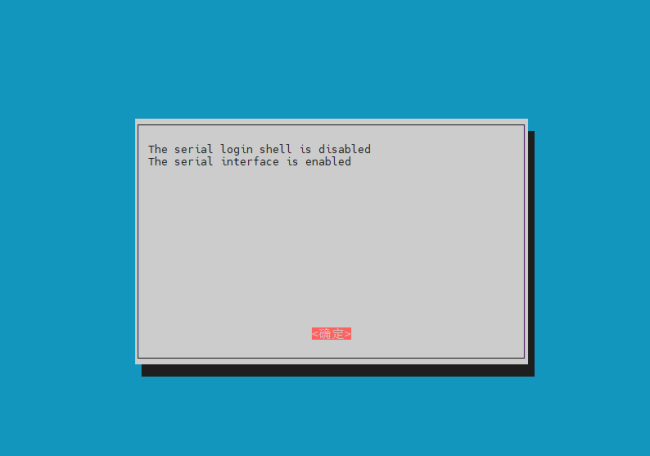
Exit the raspi-config settings and restart the Raspberry Pi according to the prompts.
3. Run the program
Please refer to the source code file for the program of this course. (16CServo-uart.py)
Configure serial port

The serial port controls the servo function. According to the protocol, 36 and 35 are the header and tail of the data packet respectively.
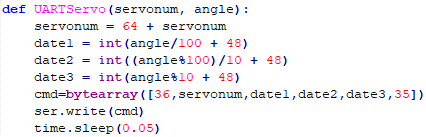
Set servo S1 to 0 degrees

Enter python 16CServo-uart.py in the Raspberry Pi 5 terminal to run the program.
4.Experimental phenomena
After the program is run, the servo S1 first turns to 0 degrees, and then turns to 180 degrees after 2 seconds.