Welcome to 24-channel Servo Drive Board repository
2.1 RPi_Jetson
RPi_Jetson control servo board
1.RPi control servo board
According to the schematic diagram of the servo control board, serial port 3 is specially used for communication with controller. In this lesson, we will explain how to realize the Raspberry Pi to control the servo to rotate through the drive board.
Environment Configuration
- Because the Raspberry Pi hard serial port is used for Bluetooth, and the mini serial port is unstable, we need to configure the Raspberry Pi serial port so that we can use the hard serial port normally.
- Input following command: sudo raspi-config
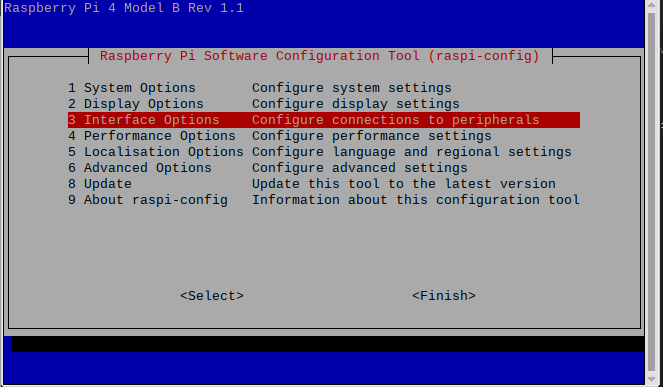
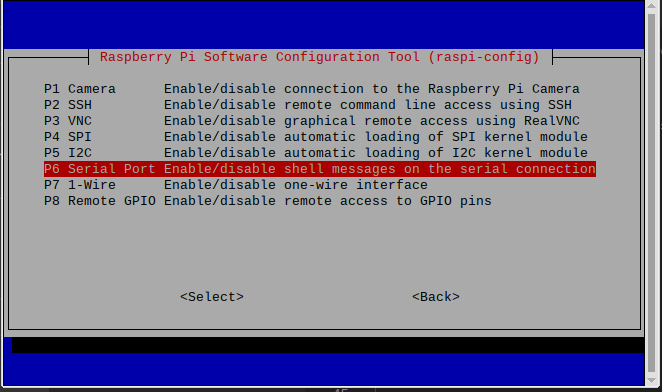
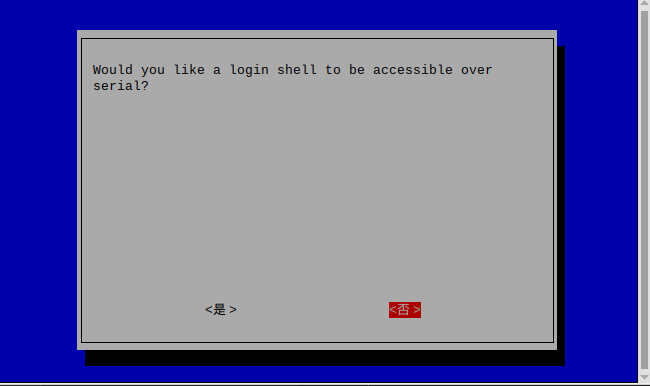
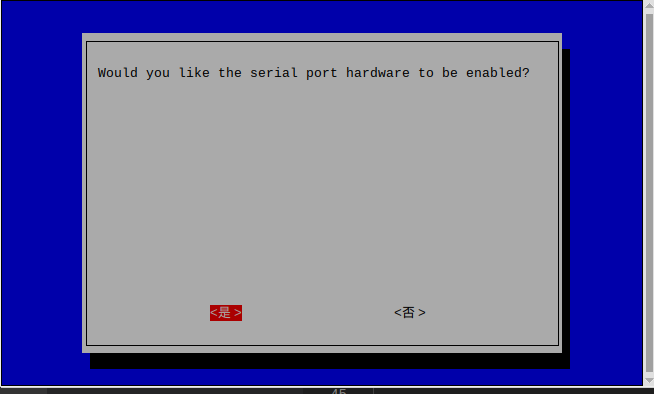
- Set the hardware serial port to GPIO serial port, and edit with root permission /boot/config.txt file. Input following command:
sudo nano /boot/config.txtAfter opening the file, add two lines at the end
dtoverlay=miniuart-bt
force_turbo=1
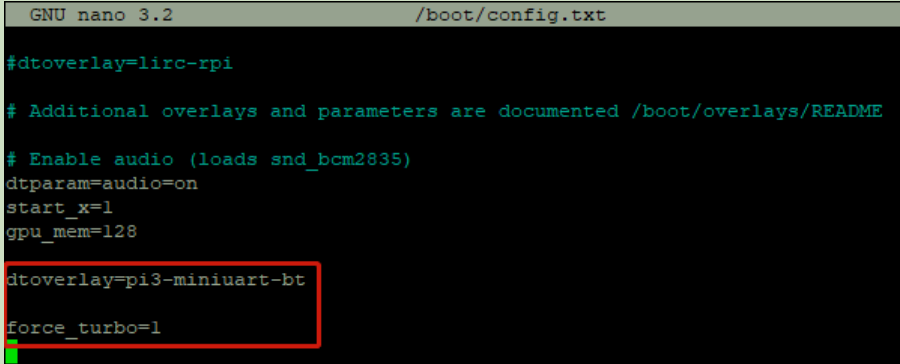
Save: Ctrl+O, exit Ctrl+X.
- After saving and exiting, restart the Raspberry Pi. You can see that the serial ports are switched.
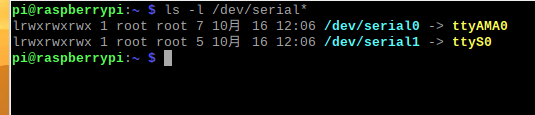
* Start up *
- The pin diagram of Raspberry Pi,as shown below.

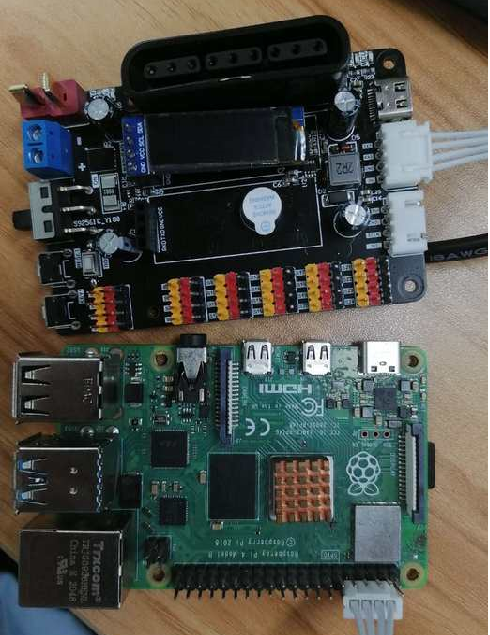
- The connection between Raspberry Pi and servo board, as is shown in the figure.
- Use winScp software to transfer the source code of raspberry pie (serial_pi_cor. py) of this routine to the raspberry pie system
- Run code
x
python3 serial_pi_cor.py#If the system prompts that some modules do not exist, you can use the following command to install themsudo pip install serialsudo pip install pyserialAccording to the communication protocol
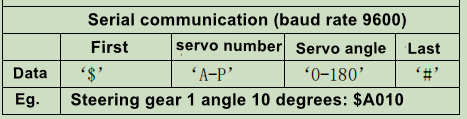 For example, if you want the fourth channel servo rotate to 100°.
Enter D at the terminal. Then, pressing "Enter" key. Next, input 100°.
You can see that servo to rotate to 100°.
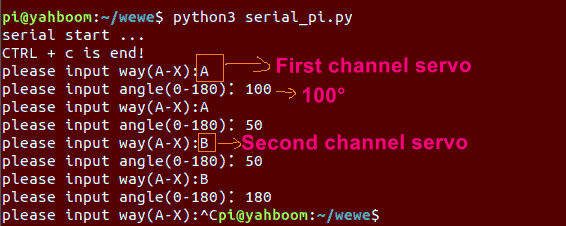
Press ctrl+c to ending program.
2.jetson control servo board
According to the schematic diagram of the servo control board, serial port 3 is specially used for communication with controller. In this lesson, we will explain how to realize the Jetson NANO to control the servo to rotate through the drive board.
- The pin diagram of Jetson NANO,as shown below.
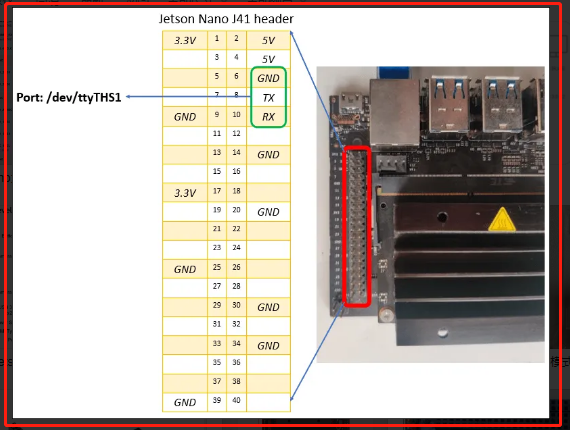
- The connection between jetson NANO and servo board, as is shown in the figure.
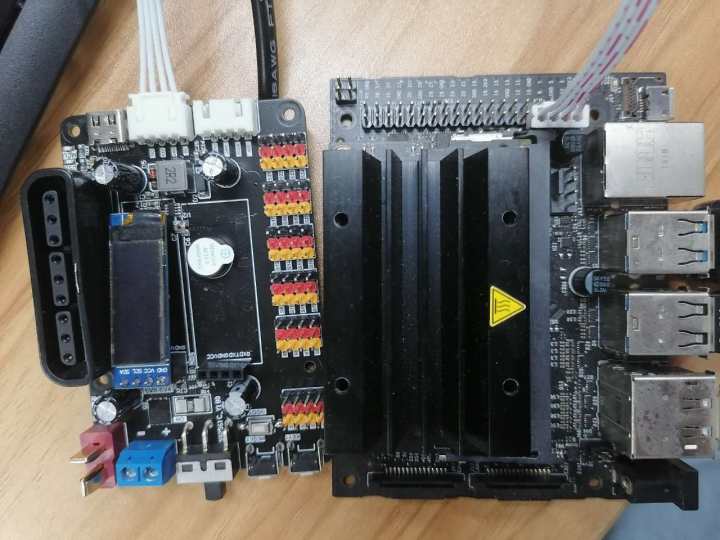
- Use winScp software to transfer the source code of raspberry pie (serial_jetson_cor. py) of this routine to the raspberry pie system
- Run code
xsudo python3 serial_jetson_cor.py #Then, input password#If the system prompts that some modules do not exist, you can use the following command to install themsudo pip install serialsudo pip install pyserialAccording to the communication protocol
For example, if you want the fourth channel servo rotate to 100°.
Enter D at the terminal. Then, pressing "Enter" key. Next, input 100°.
You can see that servo to rotate to 100°.
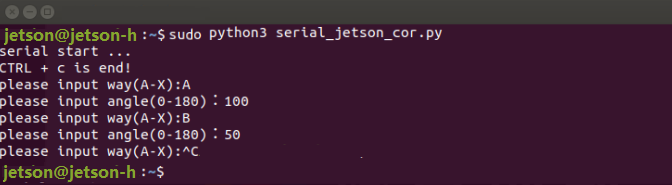 Press ctrl+c to ending program.