yahboom
HomeLearn
Solution
Blog
Online Store
About Us
EN/中文
YDLIDAR 4ROS LiDAR📖
01.Linux basic course
  • 1.Introduction to Linux system
  • 2.Ubuntu file system
  • 3.Ubuntu common commands
  • 4.Ubuntu common editors
  • 5.Ubuntu software operation commands
  • 6.Virtual machine installation
  • 7.SSH remote control
  • 8.VNC remote control
  • 9.Transfer files remotely
  • 10.Driver library and communication
  • 11.Static IP and hotspot mode
  • 12.Bind device ID
  • 13.Capacity expansion and resource allocation
  • 14.Update system software sources
  • 15.Set root user password
  • 16.sudo free password
  • 17.Connect to WiFi network
  • 18.View system version
  • 19.Customized service management
  • 20.Back up system image
02.ROS1 basic course
  • 1.ROS introduction
  • 2.ROS installation
  • 3.ROS common command tools
  • 4.ROS workspace
  • 5.ROS function package
  • 6.ROS node
  • 7.ROS topic publisher
  • 8.ROS topic subscribers
  • 9.ROS service client
  • 10.ROS service server
  • 11.ROS action client
  • 12.ROS action server
  • 13.ROS custom message reception
  • 14.ROS-launch file
  • 15.ROS-TF transformation
  • 16.ROS parameter service
  • 17.ROS-rviz use
  • 18.ROS-rqt tool usage
  • 19.Topic message recording and playback
  • 20.urdf model introduction
  • 21.gazebo introduction
  • 22.ROS distributed communication
03.ROS1 lidar course
  • 0.Instructions before use
  • 1.Preparation
  • 2.Handheld lidar mapping
  • 3.Lidar avoiding
  • 4.Lidar guard
  • 5.Lidar follow
  • 6.Lidar mapping
  • 7.rrt_exploration mapping algorithm
  • 8.Navigation
  • 9.APP Mapping and Navigation
  • 10.RTAB 3D mapping and navigation
04.ROS2 basic course
  • 1. Introduction to ROS2
  • 2.ROS2 install Humble
  • 3.ROS2 development environment
  • 4.ROS2 workspace
  • 5.ROS2 function package
  • 6.ROS2 node
  • 7.ROS2 topic communication
  • 8.ROS2 service communication
  • 9.ROS2 action communication
  • 10.ROS2 custom interface message
  • 11.ROS2 parameter service case
  • 12.ROS2 meta-function package
  • 13.ROS2 distributed communication
  • 14.ROS2 DDS
  • 15.ROS2 time related API
  • 16.ROS2 common command tools
  • 17.ROS2 rviz2 use
  • 18.ROS2 rqt toolbox
  • 19.ROS2 Launch startup file configuration
  • 20.ROS2 recording and playback tool
  • 21.ROS2 URDF model
  • 22.ROS2 Gazebo simulation platform
  • 23.ROS2 TF2 coordinate transformation
05.ROS2 lidar course
  • 0.ReadMe
  • 1.Preparation
  • 2.Handheld lidar mapping
  • 3.Lidar avoiding
  • 4.Lidar follow
  • 5.Lidar guard
  • 6.Lidar patrol
  • 7.gmapping mapping
  • 8.cartographer mapping
  • 9.Navigation and avoiding
  • 10.APP Mapping and Navigation
  • 11.RTAB 3D mapping and navigation
06.RPi 5 Docker course
  • 1.Overview and installation
  • 2.Common commands
  • 3.Understand and publish images
  • 4.Hardware interaction data processing
  • 5.Enter docker container
  • 6.Update docker images
  • 7.Docker container to install ROS using accessories
Download
  • ROS1-Code
  • ROS1-VMFile
  • ROS2-Code
  • ROS2-VMFile
  • Other File
  • ROS2_Basic_VM
Download ZIP

Welcome to YDLIDAR 4ROS LiDAR repository

22.ROS distributed communication

22.ROS distributed communication

A running ROS system can contain multiple nodes distributed across multiple computers. Depending on the system configuration, any node may need to communicate with any other node at any time. However, a necessary condition for implementing this distributed communication is that each machine must be on the same local area network. In this lesson, we will use Raspberry Pi and Virtual Machine as an example to illustrate how to configure and implement distributed communication.

22.1 Preparation work

22.1.1 Configuration

Require:

  • The virtual machine and Raspberry Pi are connected to the same LAN;

  • Select one as the host. The host needs to start roscore. Here, select Raspberry Pi as the host and the virtual machine as the slave. The Raspberry Pi here needs to have ros-noetic installed;

  • Install the ssh and chrony packages on each device for synchronization. You can enter the following instructions to install.

    sudo apt-get install chrony openssh-server -y

22.1.2 Check ip address

Both are connected to the same LAN, query the network IP address through the following command,

xxxxxxxxxx
ifconfig

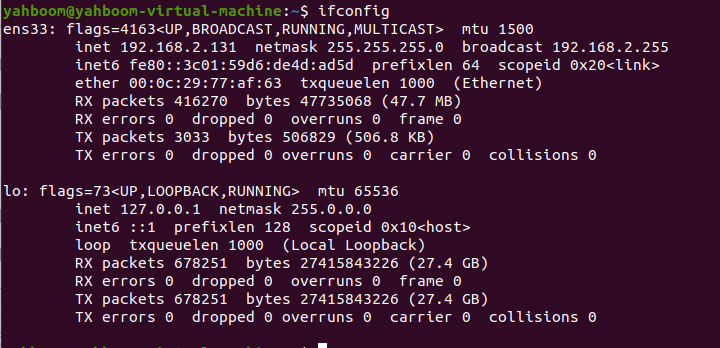
Virtual machine side,

image-20231025115453254

The address found is 192.168.2.131

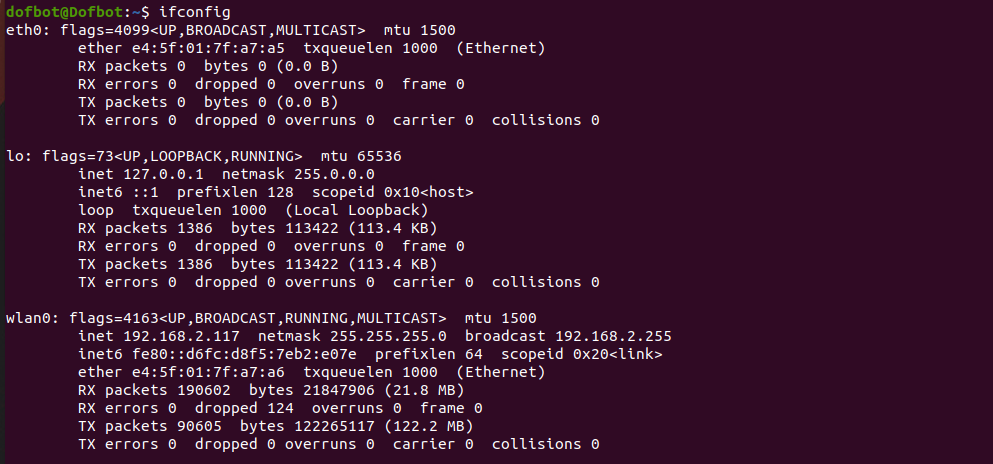
Raspberry Pi side,

xxxxxxxxxx
ifconfig

image-20231025120113573

The found address is 192.168.2.117

22.2 Modify configuration file

22.2.1 Virtual machine side

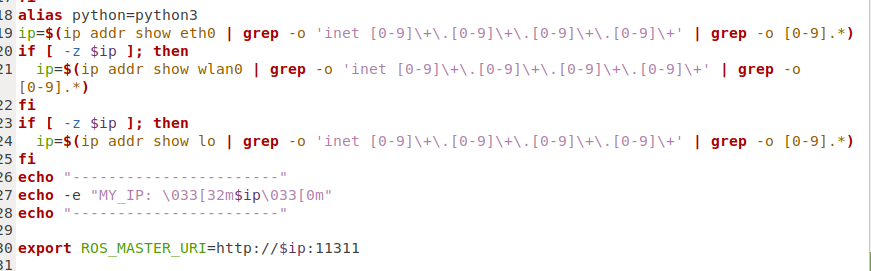
Taking the virtual machine as a slave machine as an example, you need to modify the ROS_MASTER_URI of the virtual machine to the Raspberry Pi IP. Here is the 192.168.2.117 you just queried, enter it in the terminal,

xxxxxxxxxx
sudo gedit ~/.bashrc

After entering the password, add it at the bottom of the file,

xxxxxxxxxx
export ROS_MASTER_URI=http://192.168.2.117:11311
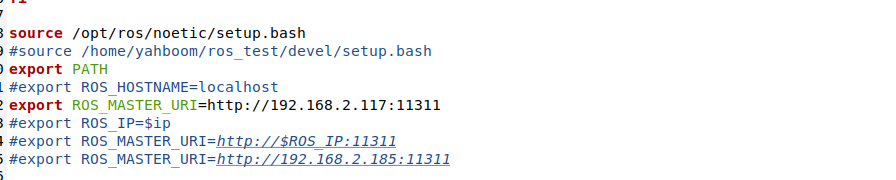
image-20231025151710358

Exit after saving and reopen the terminal to refresh the environment variables to take effect.

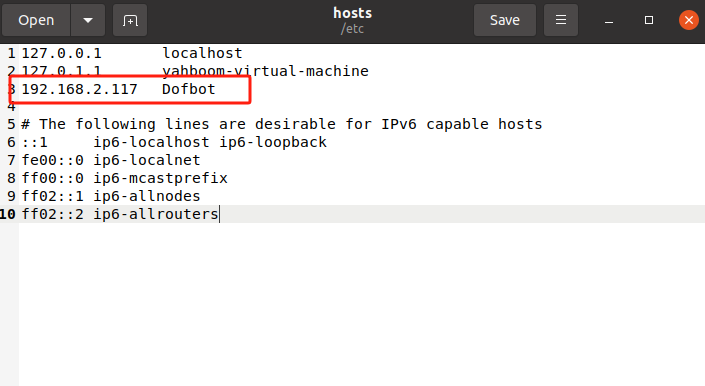
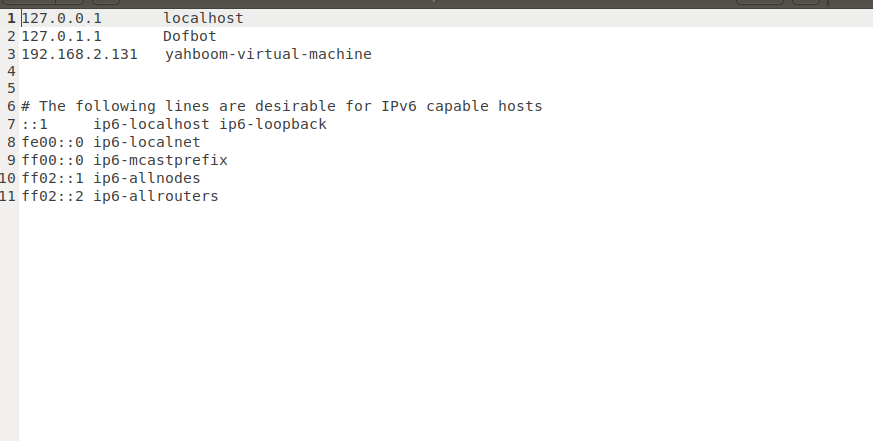
Then, modify the/etc/hosts file,

xxxxxxxxxx
sudo gedit /etc/hosts

image-20231025121908941

As shown in the picture above, add the Raspberry Pi's IP and machine name, save and exit.

22.2.2 Raspberry Pi terminal

The modified files and steps are almost the same as above. The only difference is that the ROS_MASTER_URI of the Raspberry Pi needs to be replaced with the local IP, which is 192.168.2.131. Just add the ip and machine name of the virtual machine at the end of the /etc/hosts file. The two files are as follows:

~/.bashrc

xxxxxxxxxx
sudo vim ~/.bashrc

image-20231025151625167

/etc/hosts

xxxxxxxxxx
sudo vim /etc/hosts

image-20231025151544904

Similarly, exit after saving, reopen the terminal or source the terminal to refresh the environment variables.

22.3 Enable distributed communication

Let's verify whether the configuration is successful. First, on the host (here is the Raspberry Pi), start roscore and enter in the host terminal,

xxxxxxxxxx
roscore

Then, run the little turtle node on the slave machine (virtual machine) and enter from the slave machine terminal,

xxxxxxxxxx
rosrun turtlesim turtlesim_node

A little turtle appears from the machine,
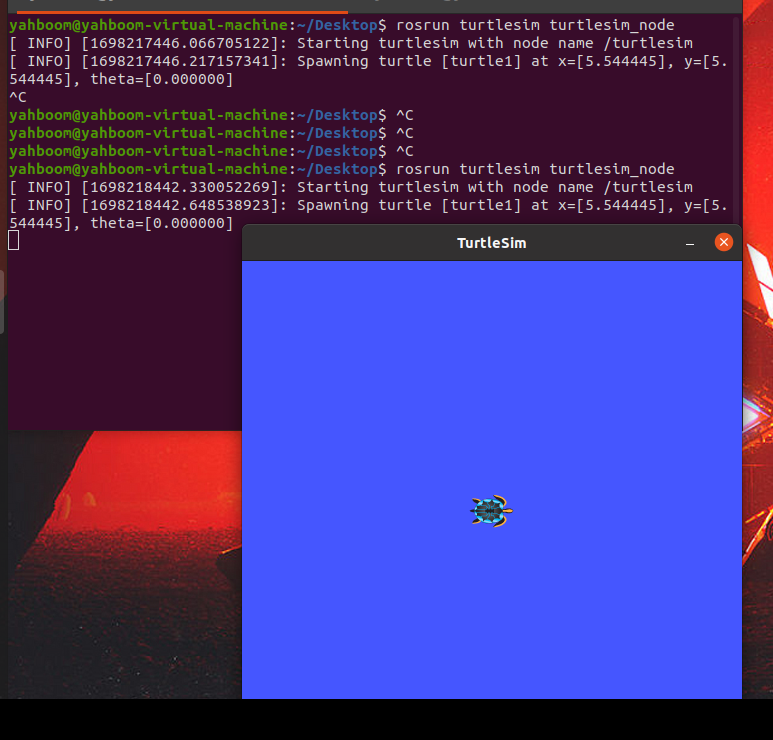
image-20231025152103076

Then, we start the little turtle keyboard control node on the host (Raspberry Pi), and input at the host terminal,

xxxxxxxxxx
rosrun turtlesim turtle_teleop_key 

Click the keyboard to control the terminal, and then use the up, down, left and right buttons to control the movement of the little turtle on the virtual machine.
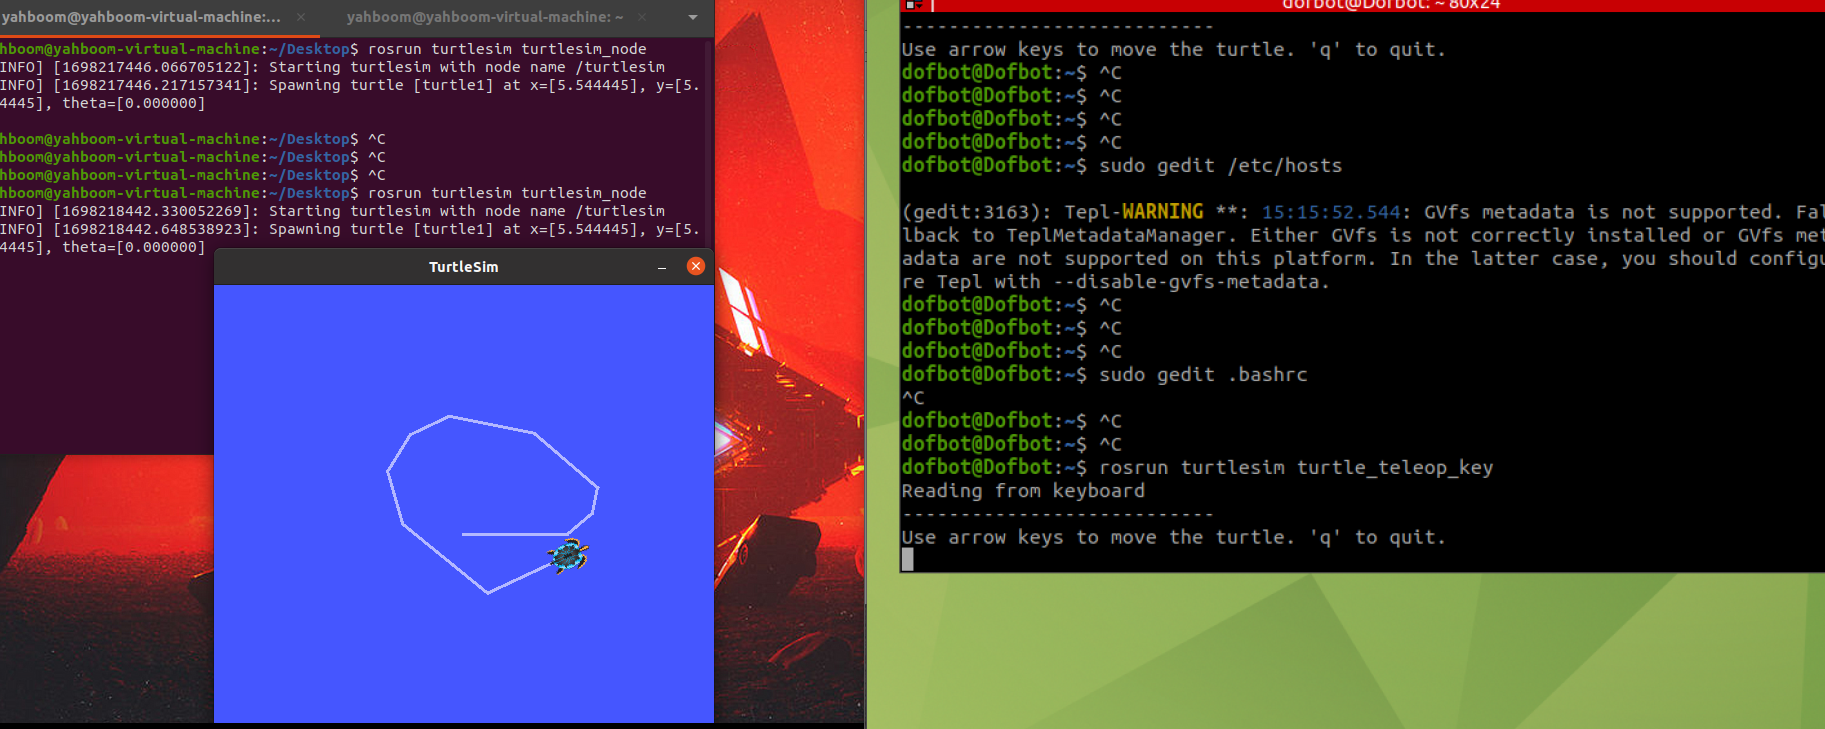
image-20231025152147175

gazebo introduction
Instructions before use

COMPANY

  • About us
  • Team Style
  • Blog

LEARNING & EXPLORATION

  • Tutorials
  • Edge AI hardware
  • Educational robots
  • Embedded intelligent hardware

WHERE TO BUY

  • Yahboom Online Store
  • Amazon
  • Alibaba
  • AliExpress
  • Mercado

TECHNOLOGY SUPPORT

  • Email: support@yahboom.com

BE A DISTRIBUTOR

  • Email: sales@yahboom.com
QR Code

Copyright © 2017-2026 Yahboom. All Rights Reserved.

EN/中文