Welcome to 2.4G 10-channel Controller repository
SBUS receiver usage process
SBUS receiver usage process
SBUS receiver usage processHardware PreparationHT-10A Remote ControllerSBUS ReceiverButton DescriptionPairing Steps
Hardware Preparation
- HT-10A Remote Controller
- SBUS Receiver
- ROS Control Board
HT-10A Remote Controller
Install 4 AA batteries in advance to power the HT-10A remote controller:
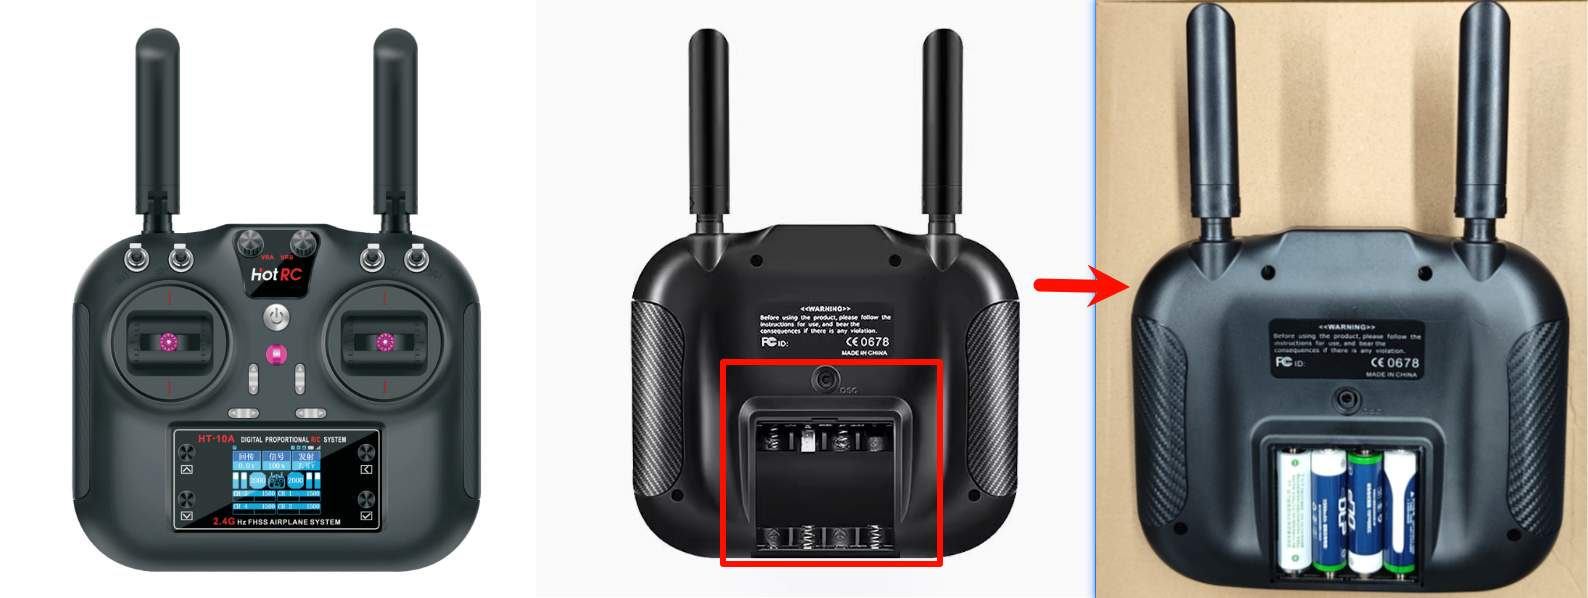
| HT-10A Remote Controller | Default Channels: No channel mapping on the remote |
|---|---|
| CH1 | Right Joystick: Left/Right |
| CH2 | Right Joystick: Up/Down |
| CH3 | Left Joystick: Up/Down |
| CH4 | Left Joystick: Left/Right |
| CH5 | SWA Channel |
| CH6 | SWB Channel |
| CH7 | SWC Channel |
| CH8 | SWD Channel |
| CH9 | VRA Channel |
| CH10 | VRB Channel |
SBUS Receiver
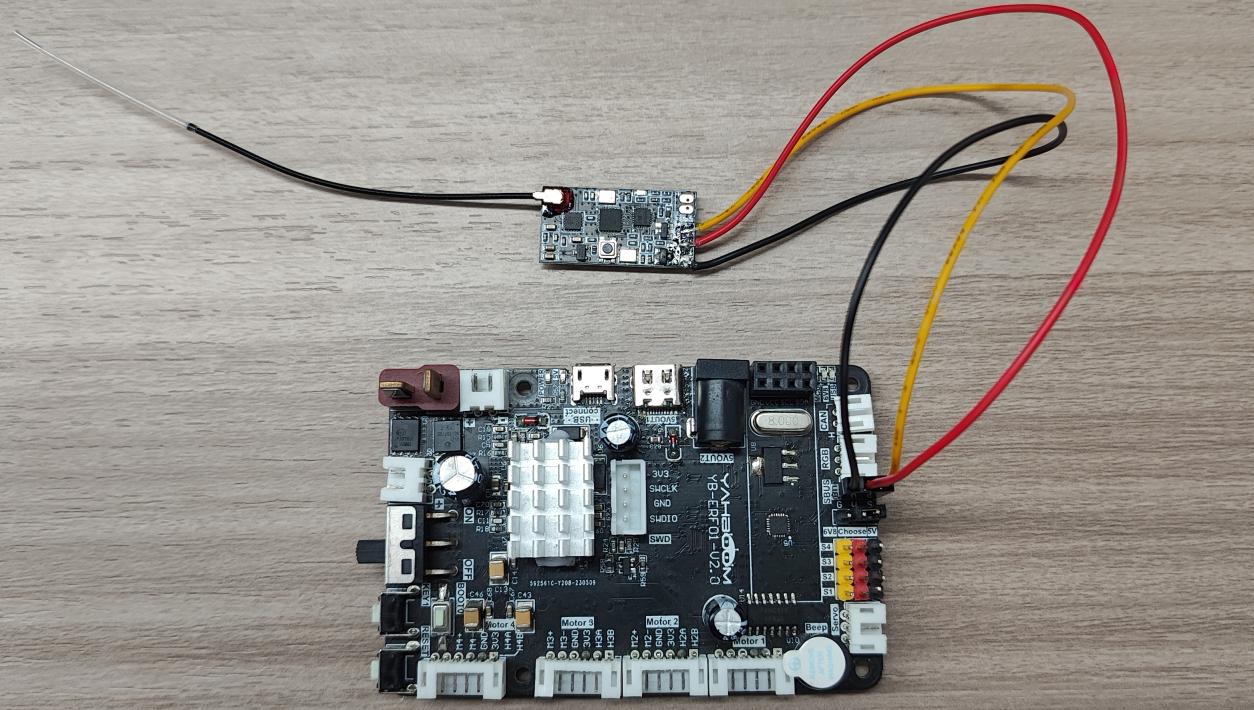
Diagram showing the hardware connection between the SBUS receiver and the ROS control board:
| SBUS Receiver | ROS Control Board |
|---|---|
| S | S |
| + | V |
| - | G |
Button Description
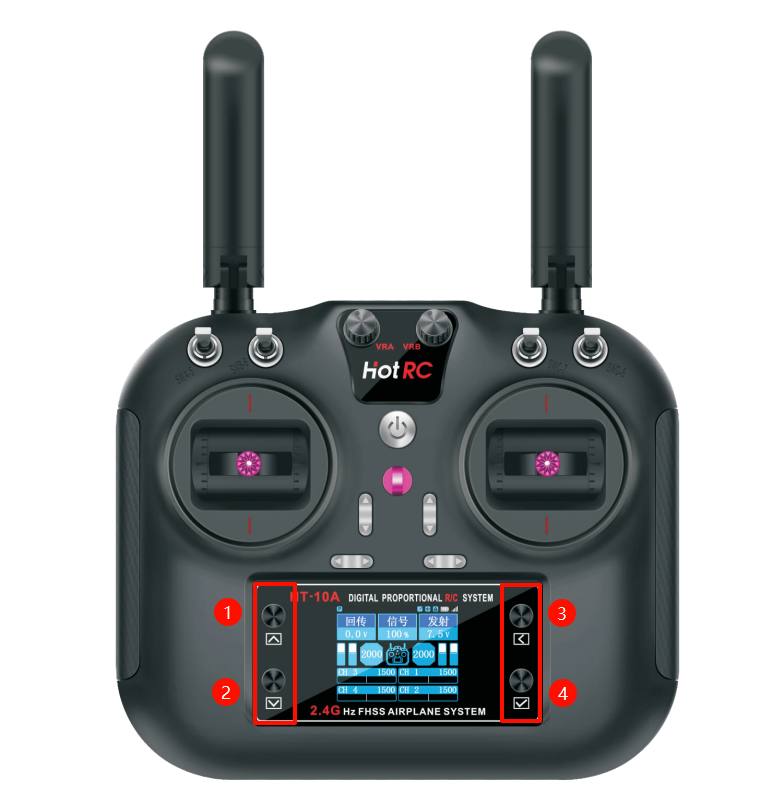
| HT-10A Remote Controller | Function |
|---|---|
| ① | Up Button |
| ② | Down Button |
| ③ | Back Button |
| ④ | OK Button |
Pairing Steps
Use a 12V T-type battery pack or MicroUSB cable to power the ROS control board. The ROS control board powers the SBUS receiver through the SBUS interface.
| SBUS Receiver LED Status | Meaning |
|---|---|
| LED Slow Flash | Device not connected |
| LED Fast Flash | Pairing mode |
| LED Solid On | Device connected |
- Power on the SBUS receiver. The LED on the SBUS receiver will be in slow flash mode;
- Press and hold the button on the SBUS receiver for 1 second. The LED will fast flash, indicating the SBUS receiver has entered pairing mode;
- Turn on the HT-10A remote controller's power switch. On the main interface, press the "OK button" to enter settings, then use the "Up button", "Down button", "Back button", and "OK button" to navigate different options:
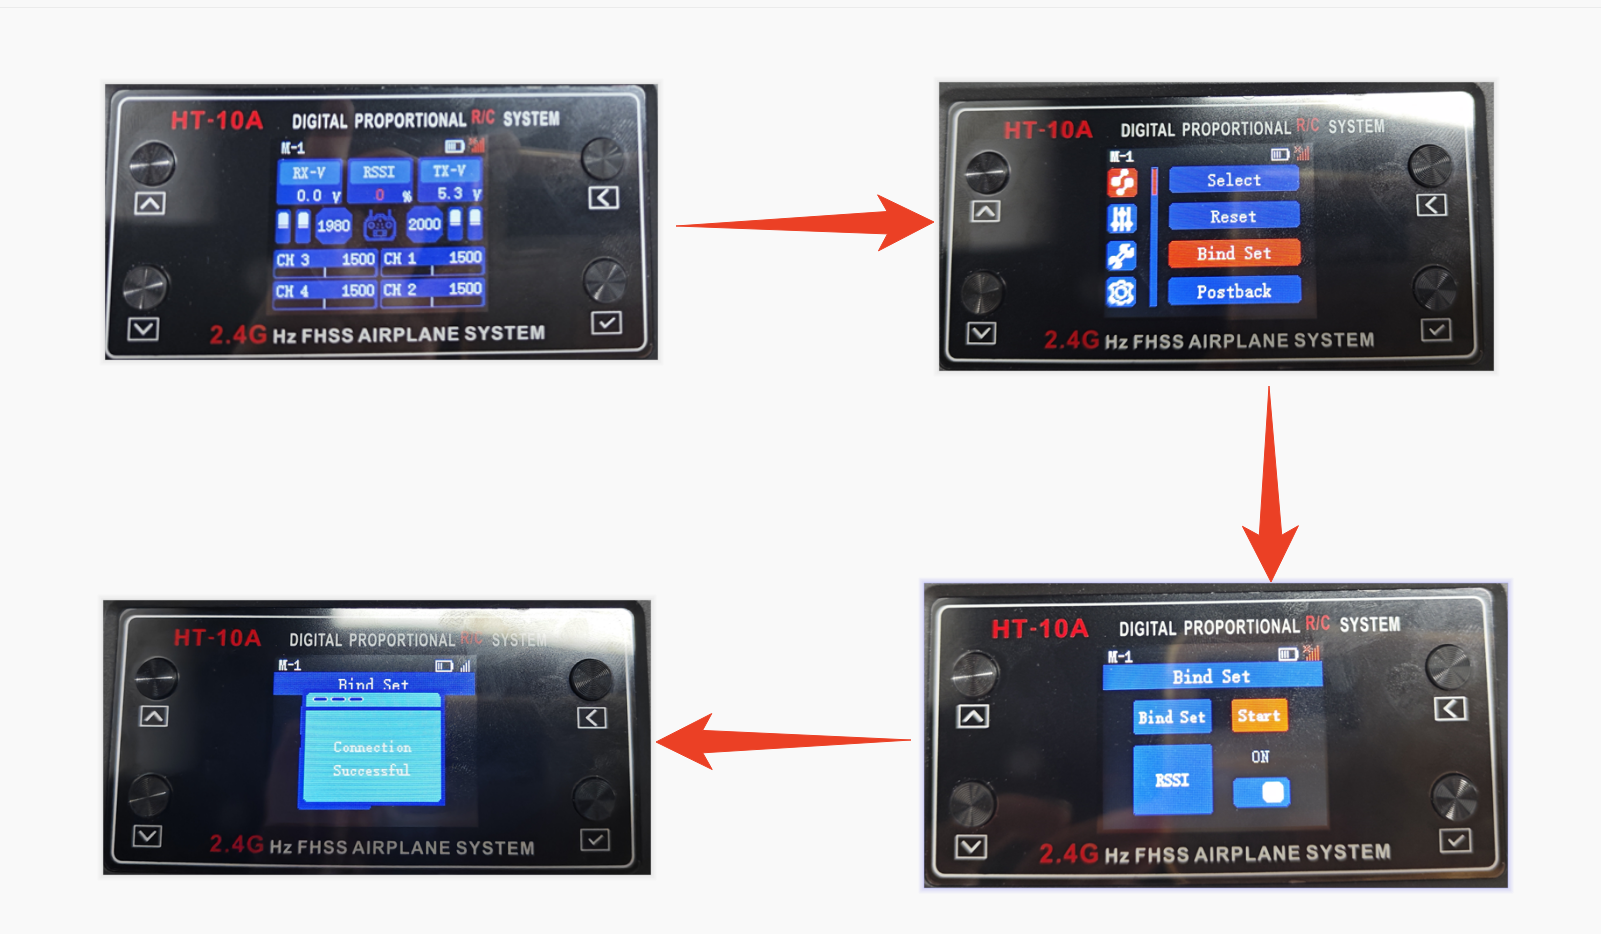
- After successful connection, the LED on the SBUS receiver will be solid on: When connected, it cannot enter pairing mode.
Note: The HT-10A remote controller and SBUS receiver only need to be paired once. They will automatically connect on next power-on. No need to pair again!